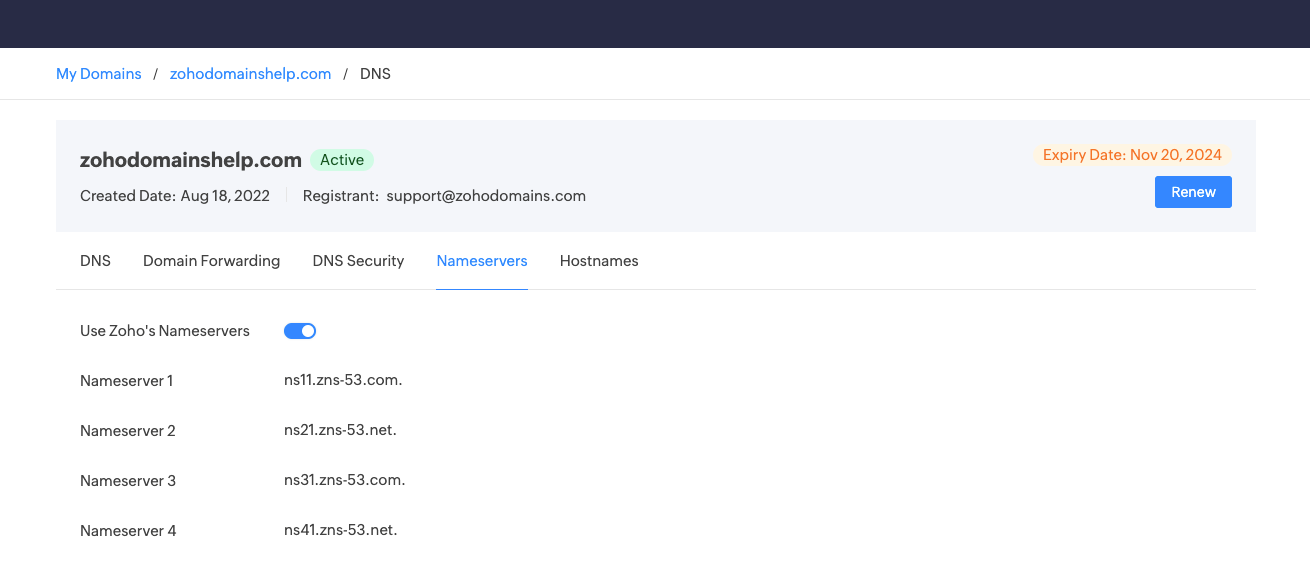
Manage Nameservers in Zoho Domains
Nameservers are servers that direct your domain's DNS queries to the correct location, determining how your domain's DNS is managed. Managing nameservers in Zoho Domains allows you to either use Zoho's default nameservers or switch to a third-party DNS provider based on your needs. Learn more.
Follow the given steps to manage nameservers in Zoho Domains:
1. Log in to your Zoho Domains account and navigate to My Domains.
2. Click Manage next to the domain you wish to configure.
3. Click Manage DNS, and then click the Nameservers link to access the nameserver settings.