Button Group
Buttons on landing pages help visitors take important actions such as signing up or making a purchase. These buttons guide users seamlessly through the landing page and help boost overall conversions. Well-crafted, effective buttons can also make your landing page goals clear and encourage users to take action. Using Button Groups, you can stack two buttons side by side on a landing page and use them for your primary and secondary goals.
Inserting a Button Group
- Click on the Insert button on the top bar of your landing page builder to view the menu.
- In the menu, click on the Elements tab and choose the Button Group that you want to have inserted in your landing page.
- Once inserted, your buttons will appear side-by-side as shown in the image below.
Button Group Settings
Under button group settings, you can align the buttons to left, right, or center using the alignment icons. You can also choose to modify the background, boder, shadow, and spacing under the settings. Once you've added the button element, you can choose to modify the styles and properties of the primary and secondary buttons separately.
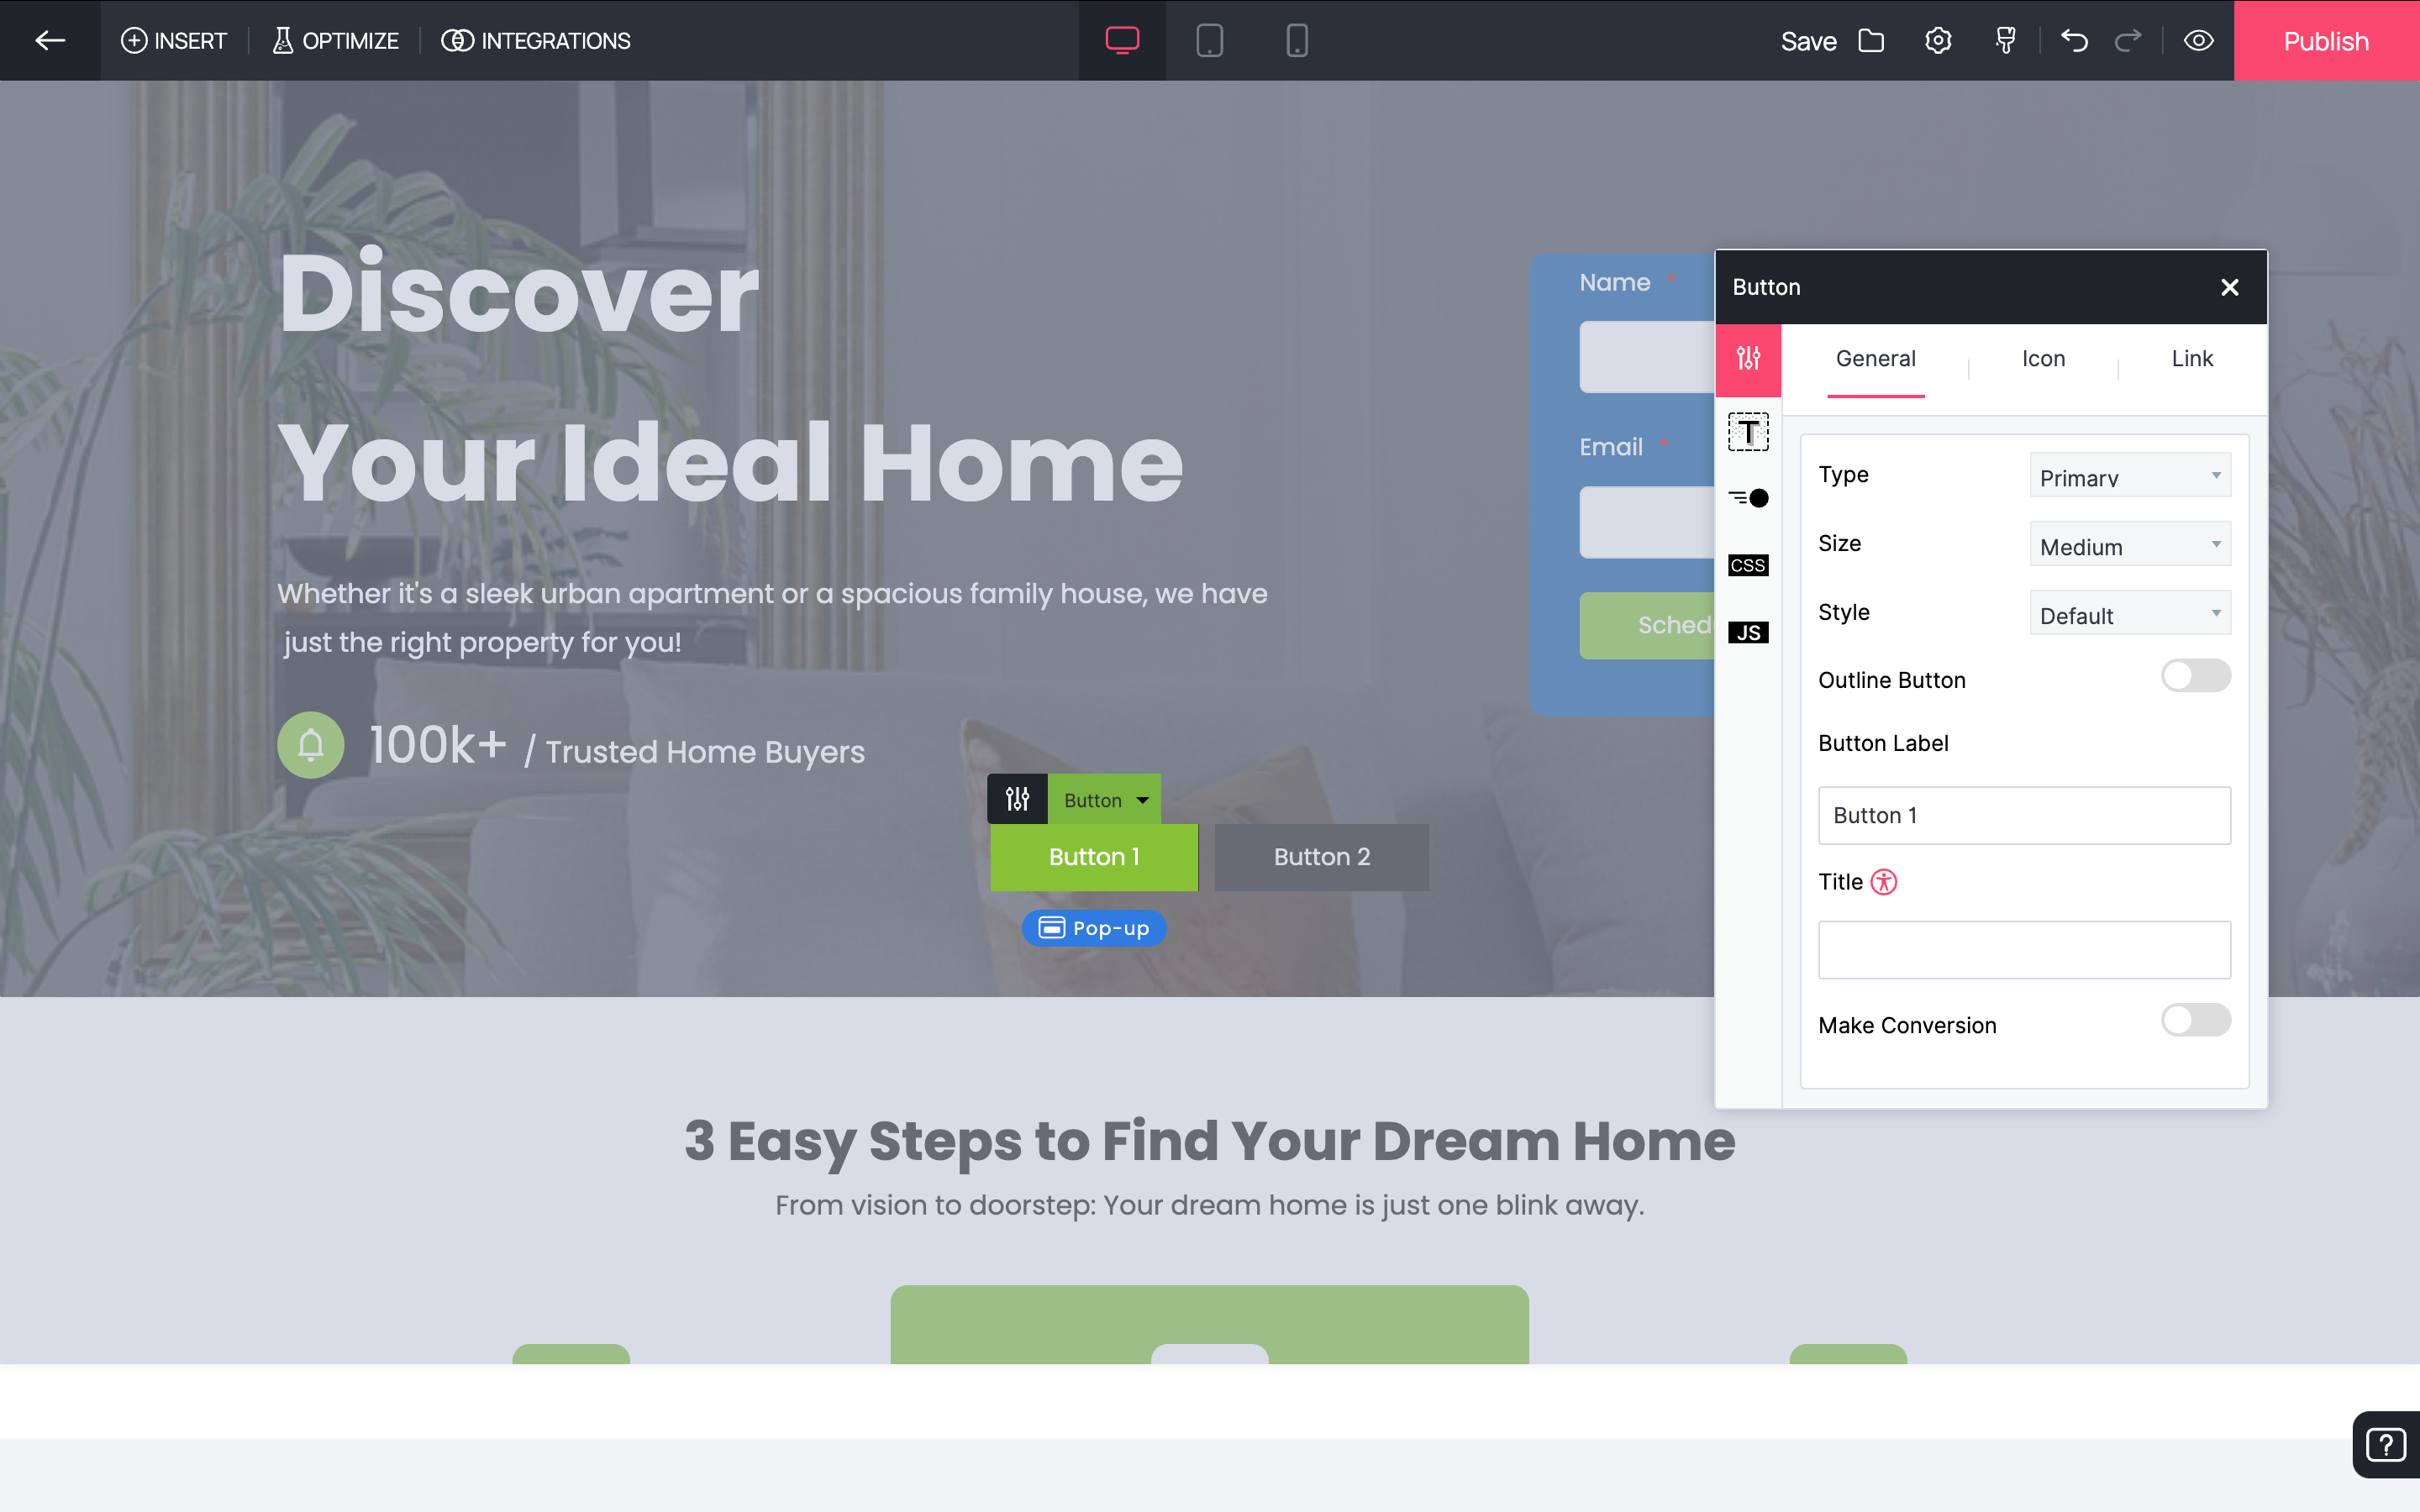
Button Settings
Well-designed landing page buttons enhance user engagement and drive higher conversion rates. By customizing buttons to be clear and visually appealing, you can significantly impact user actions. Adjusting the button size, color, and links to align with your goals ensures they effectively guide users toward desired actions, helping you achieve your landing page objectives.
General Settings
You can access the button settings by clicking on the settings icon next to the element name in case it is not visible already. In the General tab, you can change the alignment, button type, size, style, and choose whether button should be full width or an outline button. Additionally you can enable the Make Conversion feature to ensure each unique click on this button is marked as a conversion.
Button Icon
Under the button icon settings, you can enable an icon to complement your call-to-action and prompt your page visitors to engage with the button element.
Button Link
- In the Link Properties tab, you can add a link to your button. Visitors who click on this button will be redirected to the provided link.
- You can add a link to any landing page in your portal. Choose from the list of landing pages displayed to select the desired destination. You can also add an anchor and tool tip to help make the link more relevant. Visitors will now be redirected to the landing page when they click on the button in your landing page.
- You can add a link to any webpage. Users will be redirected to your webpage when they click on the button in your landing page.
- Using the anchor option, you can redirect users to any section in your landing page where you have added an anchor. The anchors created in your landing page will be displayed in the drop-down list next to Select Anchor.
- To link an email address to your button, you can type in an email address here. You can also add extra details such as Cc, Bcc, Subject, and the message in the fields below. When users click on the button on your landing page, a new email composition window will open with all the details already filled in.
- If you want to link a phone number to your button, you can choose any phone number you like. When users click on the button on your landing page, their phone will open the dialer with the phone number already entered, ready to call.
- If you want to link a file download to your button, you can upload the file of your choice here. When users click on the button on your landing page, the file will be downloaded automatically.
Whether it's prompting sign-ups, purchases, or downloads, tailored buttons ensure clarity and ease of use. Thus, creating and customizing landing page buttons is essential for maximizing user engagement and achieving desired business outcomes.