Wix Platform Integration
Wix is another platform integration that comes with Zoho Thrive built in. Follow the steps below to integrate your Wix site with Thrive:
Create a new app
- On the My Apps page, click Start Building if you’re creating an app for the first time. Otherwise, click Create New App.
- Under Set Up Your App, complete Read the App Guidelines and Read Terms of Use.
- Click Add Webhooks -> + Add Webhook under Set Up Your App.
 The webhook helps notify whenever an order is created on your site.
- Select Wix Stores as the API Category and choose Webhook Event as Order Approved.
This URL here is just a temporary entry; once the connection is complete, you will modify it.
- Under Permissions, choose Manage eCommerce - all permissions
Click Subscribe and return to Dashboard. Click Set Up OAuth under Set Up Your App.
By setting up OAuth, you can allow addition of webhooks and use of APIs, which are a must for the integration.
- In the OAuth page, go to Advanced OAuth section and enter a below Redirect URL based on the Data Center where you run Zoho Thrive.
Data Center | Thrive Domain (for reference) | Redirect URL |
US | ||
EU | ||
SA | ||
IN | ||
AU | ||
CA |
- In the App URL field, enter your respective domain - refer to the above table.
Avoid leaving spaces before and after filling the URL.
- Make note of the App Key and App Secret Key displayed and click Save.
- Return to Dashboard and click Add Permissions under Set Up Your App. By adding permissions, you will grant Thrive access to your site’s data that are required to run the programs.
- Allow all the below permissions by choosing the respective permission category and permission scope after clicking + Add Permissions.
You need to save each permission after configuring it.
For the sake of transparency, we have added an explanation alongside each permission.
Permission Category | Permission Scopes | Need |
Wix Developers | Manage Embedded Scripts, Read Site Owner Email | These scopes allow us to push the tracking scripts for the program and read the site owner's email address. |
Wix Stores | Read Orders; Manage Orders | These scopes are used to view and manage the orders that are placed on your site. They help manage all purchase related tasks and their management. |
Wix Payments | Manage Transactions | This scope is used to manage the purchase transactions that take place on your site. It helps verify the legitimacy of the purchase. |
Contacts & Members | Read Members and Contacts - all read permissions | This scope is used to view all your member and contact details. It helps manage and verify the customers participating in the loyalty program and the ones referred by another customer of the same site. |
Coupons | Manage Coupons | This scope is used to manage all the coupons on your site. It allows configuration and creation of coupons for your programs. |
Complete integration with Thrive
2. Go to the top-right corner and click the Settings icon.
3. Then navigate to Integrations -> Store Integrations -> Wix.
4. In the pop-up, enter the noted App Key, App Secret Key, and the Public key.
5. Click Connect.
The action will open a page with a list of sites available on your Wix account.
6. In the displayed page, Select the site that you want to integrate with Thrive. If you’re signed in to your Wix account, the above action will trigger a permissions acceptance page that looks like the one below. If not, the Wix sign up page will appear in a new window where you need to complete signing in to get to this page.
7. Click Agree & Add. This will create a brand for your Wix site within Thrive, and you’ll be directed to the Scripts page in Thrive’s UI.
8. Copy the Purchase Webhook URL displayed.
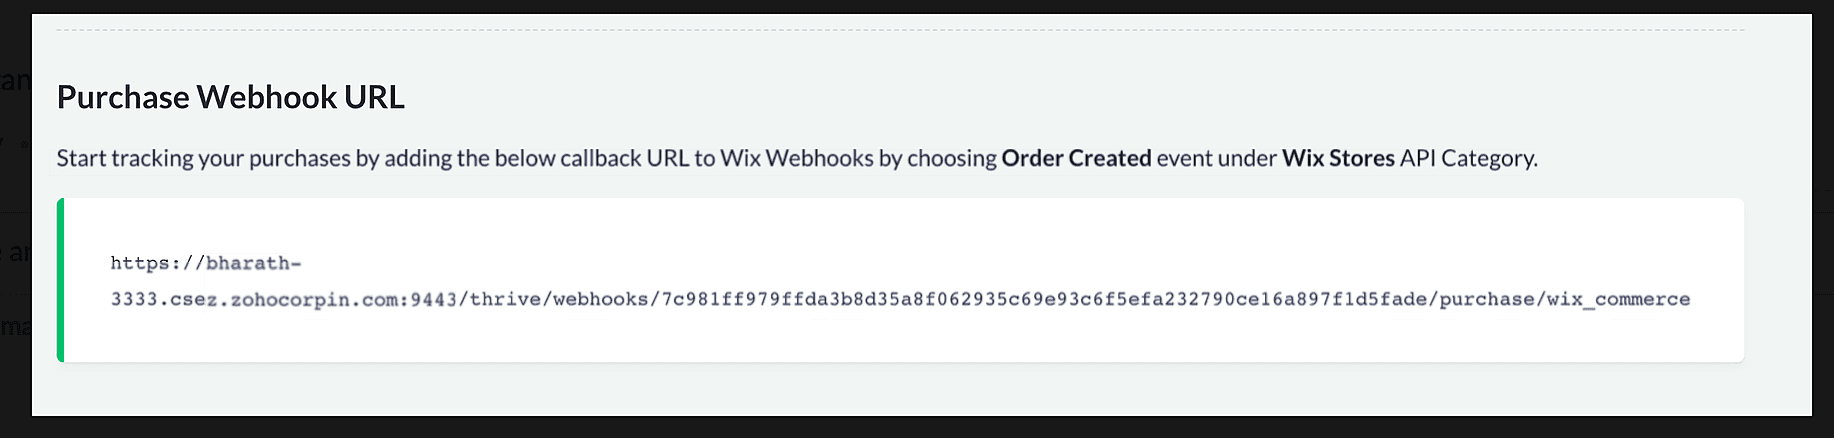
10. Go to Webhooks and Edit the previously-added webhook (shown in the picture.)
11. Paste the copied URL in the Callback URL field.
12. Click Save.
Add Thrive Scripts to Your Wix Site
- Open your Wix site in a new tab.
- Click on Select Site for the site where you want to add the scripts.
- Go to Settings > Custom Code.
- Click Add Code in the Head section of the Custom Code tab.
- Head back to the Thrive admin UI.
- Go to the top-right corner and click the Settings icon. Then navigate to Integrations -> Store Integrations -> Wix -> View Details.
- Paste the Tracking Script into the code area of the Wix Custom Code tab.
- Provide a name for the script, such as 'Thrive Script.'
- Under Add Code to Pages > All Pages, select Load Code Once.
- Select Essential under Code Type.
- In the Wix Site Editor, go to Add Elements -> Embed Code -> Velo Dev Mode.
- Under Main Pages, open masterPage.js and paste the code below.
 import wixUsers from 'wix-users';import wixWindow from 'wix-window';$w.onReady(function () {wixUsers.onLogin((user) => {wixWindow.postMessage("thriveLoginEvent");});});
 - Save your changes and publish the site.
You are now all set to build loyalty program using Thrive for your Wix site.
For any questions, please contact support@zohothrive.com.