Windows App actions
Window App Automation is a powerful feature in Zoho RPA that allows you to automate interactions with Windows-based applications. This functionality streamlines and accelerates repetitive processes by enabling the RPA software to mimic human actions within these applications. Whether you're dealing with financial software, customer databases, healthcare systems, or any other Windows application, this feature opens up a world of possibilities. In this short guide, we'll explore the core features of Window App Automation and delve into real-world use cases that demonstrate its practical applications for each of the actions.
Supported Frameworks : Win32, WinForms, WPF, UWP
Supported RPA Agent Platforms : Windows
Available Actions
1. Open application
This action allows you to automate the process of launching Windows applications.
Example: Automatically open an Invoice Generator application for sales representatives to input customer data.
Configuration
Application Name: The name of the application to open.
Application path: The path to the application's executable file.
Arguments: Provide any arguments or parameters that need to be passed to the application. For example, to open a specific text file in Notepad, you would enter the path to the text file in the arguments field.
Example: To open a text file named "myfile.txt" in Notepad, you would have the following configuration
Application Name: Notepad.exe
Application path: C:\Windows\notepad.exe
Arguments: myfile.txt
2. Click
Allows the RPA bot to click on buttons, links, menus, or any other clickable elements within an application's user interface.
Example: Click the Submit button in an order management application to complete a purchase order.
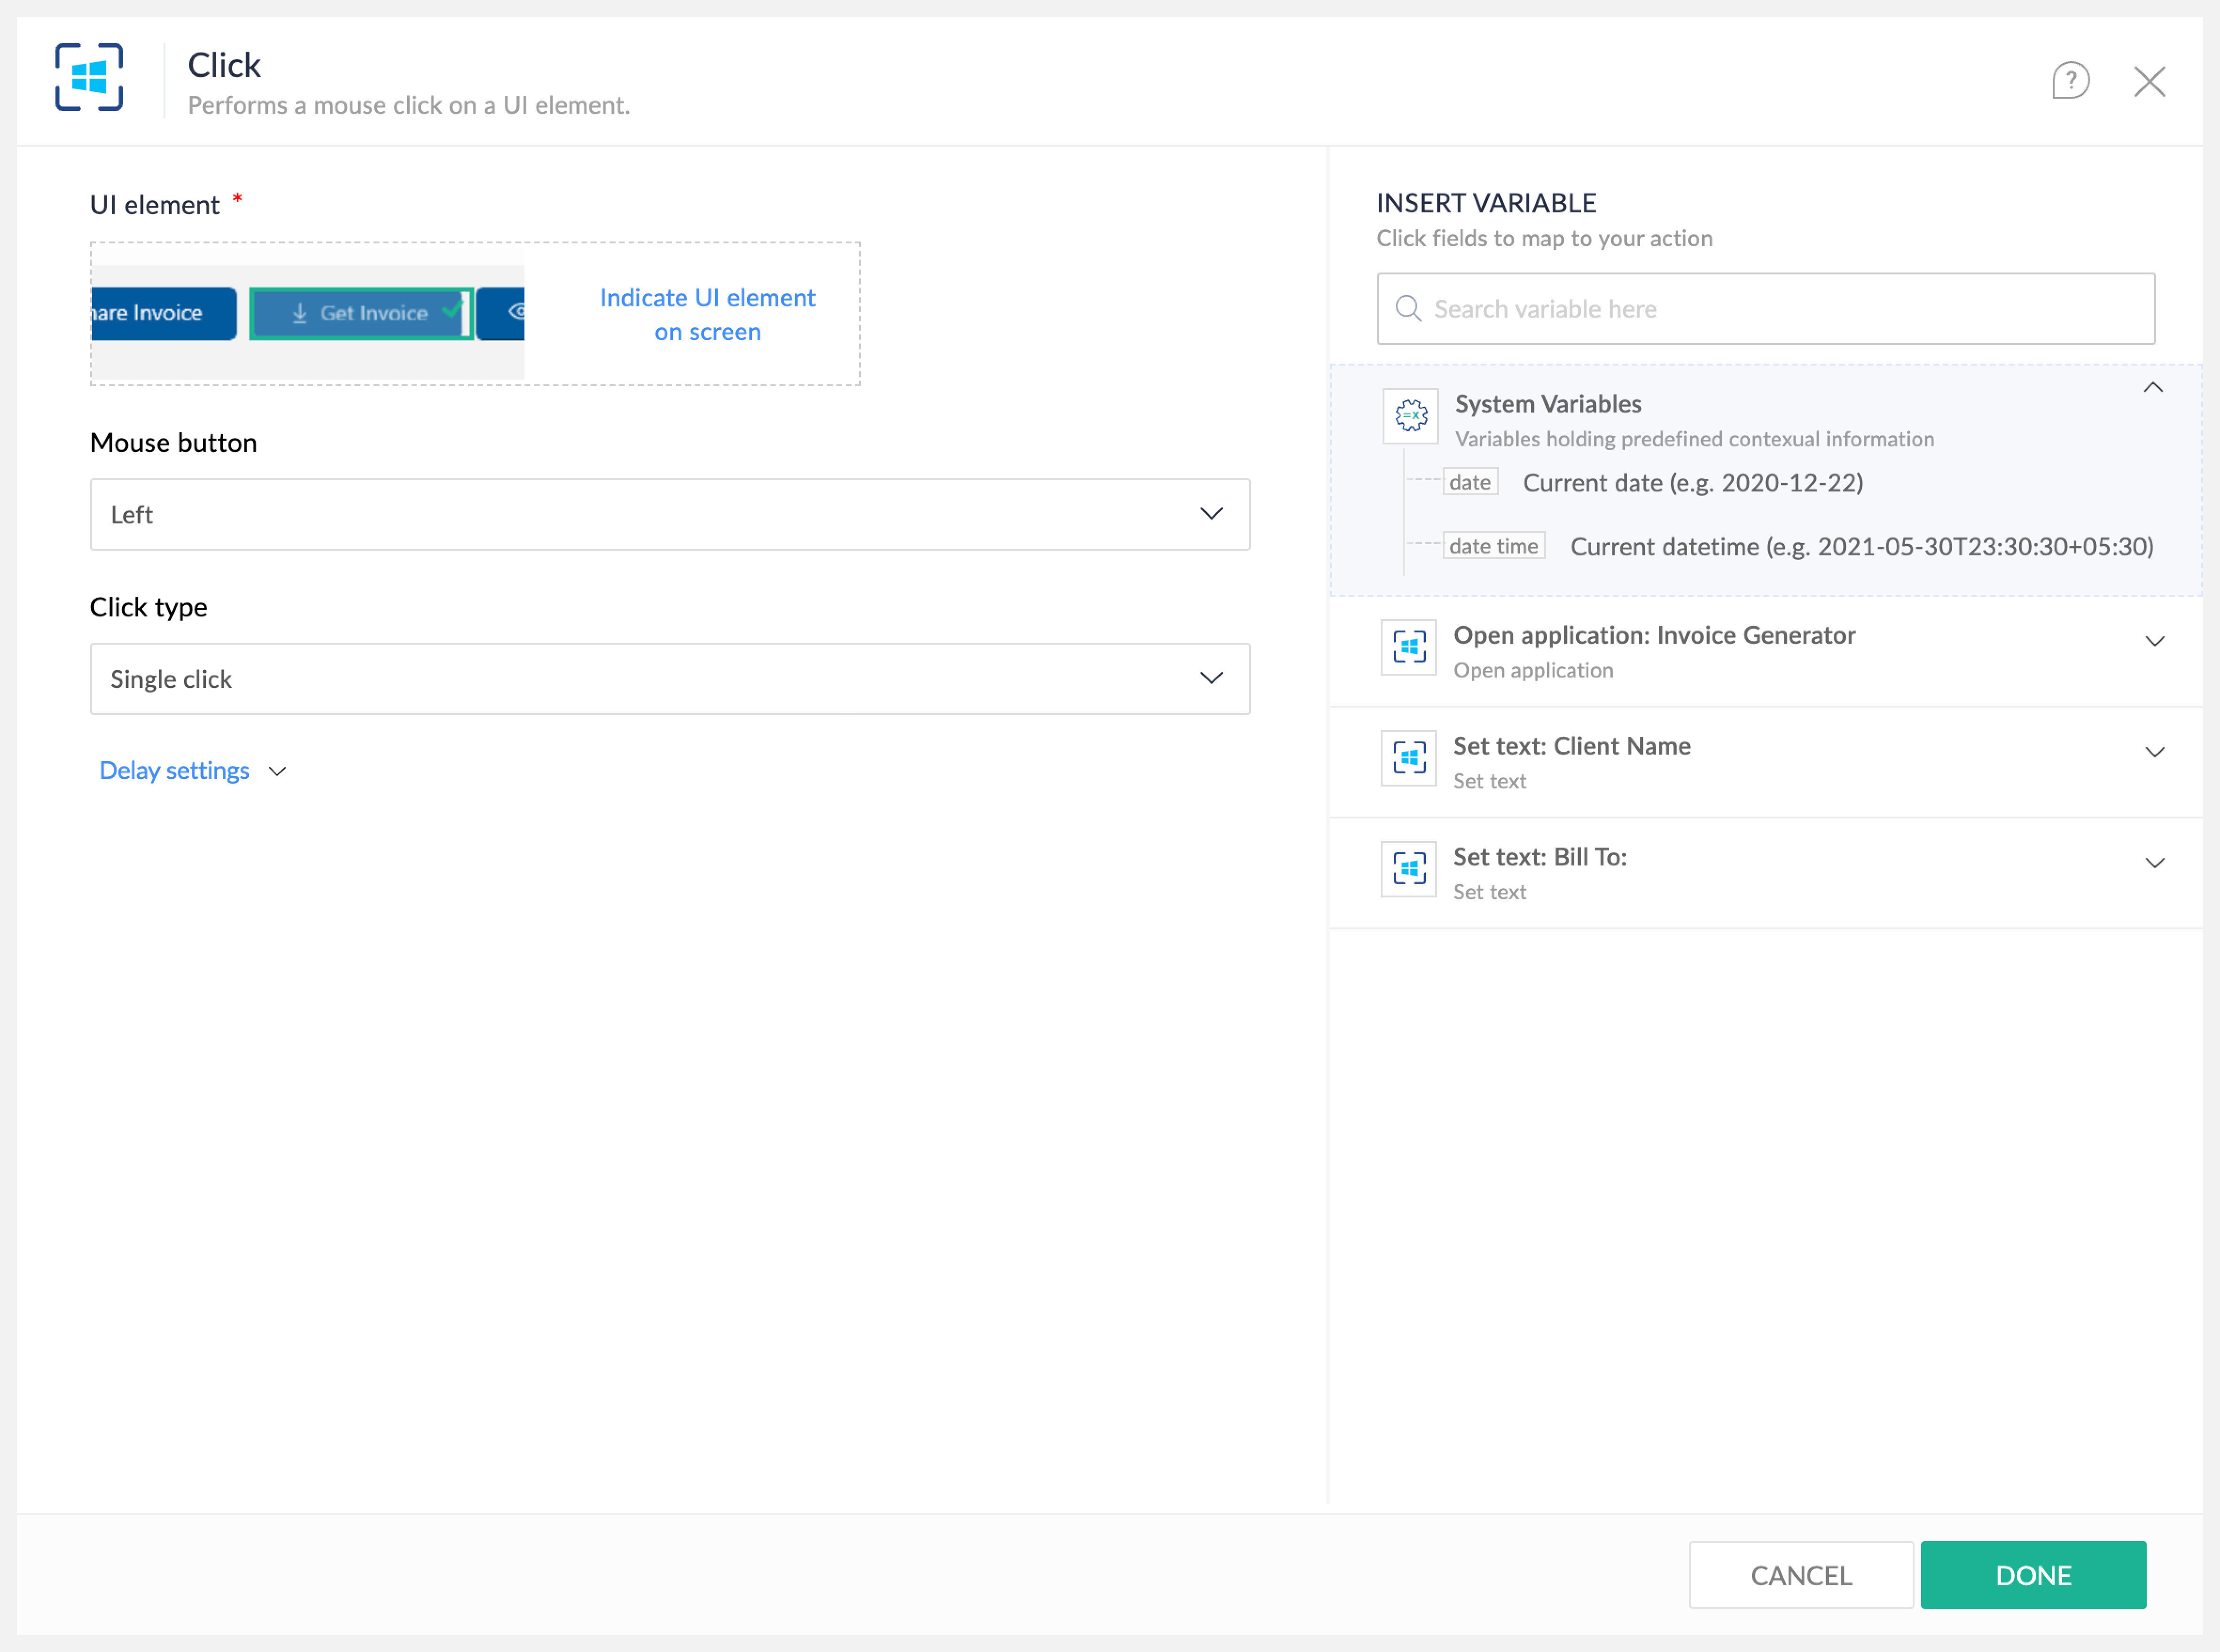
Configuration
UI element: The UI element to click on.
Mouse button: Specify the mouse button to use, either left or right.
Click Type: Specify the number of times to click, whether it is a single click, double click or right-click.
3. Hover
Hovers the mouse over an element of a an application to view tooltips or reveal hidden or dropdown menus.
Example: Hovering over navigational menu items in an application usually displays tooltips that explain what the menu options do.
Configuration
UI element: The UI element to hover on.
4. Set text
Allows to set a string value to the text attribute of a specified UI element.
Example: Set a text value to a Name field in an invoicing application.
Configuration
UI element: The UI element that you want to set text for.
Set text: The text to be entered into the input field.
When the input field already has text: If there is existing text in the input field, determine how to handle it. If we need to replace or add to the existing text.
Replace text - Replace the existing text with the new text.
Append text - Add the given text to the existing text.
5. Get text
Extracts text from various parts of an application's interface, such as labels, text boxes, or tables.
Example: Retrieve order details from an order confirmation window, including order numbers, customer names, and shipping addresses.
Configuration
UI element: The UI element that you want to extract text from.
6. Set checkbox
Selects or clears checkboxes or toggle switches within a Windows application's user interface.
Example: Order management apps often have a checkbox that lets customers indicate if the shipping address is the same as the billing address.
Configuration
UI element: The UI Element for which you want to set a checkbox value.
Checkbox value: The value that should be assigned for the checkbox field, that is check, uncheck or toggle
7. Get checkbox state
Retrieves the state of the checkbox or toggle switch, whether on or off.
Example: In many CRM applications, there is typically a checkbox that indicates whether a contact has chosen to receive email communications. With the Get Checkbox State action, you can easily retrieve the status of this Email Opt-In option for each contact in the system.
Configuration
Configuration
UI element: The UI element that you want to get the checkbox state for.
8. Select item
Selects an item from a combo box, list box, or dropdown menu.
Example : When creating a purchase order in a procurement application, you can automate the process of selecting a specific supplier from a list box or dropdown menu using the Select Item action.
Configuration
UI element: The UI element that you want to select
List item value: The specific value of the list item you want to select.
9. Select radio button
Selects a radio button in a Windows application.
Example : To automate selecting the employee's job status (full-time or part-time) in an employee database app, you can use the Select Radio Button action.
Configuration
UI element: The specific radio button you want to select.
10. Get radio button state
Retrieves the state of a specific radio button.
Example : In the same example as given above, we can check if the full-time radio button is selected. If so, we can automate additional steps like adding insurance perks and benefits for the employee.
Configuration
Configuration
UI element: Retrieves the state of a specific radio button
11. Get selected radio button from group
Retrieves the selected radio button from a radio button group.
Example : In a booking system, we can use the Select Radio Button action to identify the selected seat type from the group of radio buttons for the Select Seat Preference option (window, aisle, exit, or middle).
Configuration
UI element: Retrieve the currently selected radio button from the radio button group.
Configuration
UI element: Retrieve the currently selected radio button from the radio button group.
12. Send hotkeys
Sends keyboard shortcuts to a UI element.
Example: When try to save changes to an Excel or any document, you can use CTRL + S shortcut to automate this step.
Configuration
UI element: The specific UI element or window to which the hotkey will be sent.
Key modifiers: Choose the key modifiers for your hotkey. Available modifiers include Ctrl, Alt, Shift, and Win.
Key: Select the key to be used along with the key modifiers to form the hotkey..
Generated hotkey: The resulting hotkey combination will be displayed in this field for reference.
13. Type into
Sends keystrokes or simulates typing keyboard input into a UI element.
Example: Some login fields require you to type into them, and you cannot set a text to the input field. This action can be used in these scenarios.
Configuration
UI element: Specify the UI element, such as an input field or text area, where you want to enter the text.
Input text: Enter the text you want to type into the field
Insert keys: Use this option to include special keys like Enter, Tab, and Esc within the input text.
When the input field has text: Lets you choose how to handle existing text in the input field.
Replace text: Replace the existing text with the new text.
Append text: Add the new text to the end of the existing text.
Click before typing: Use this option to ensure the UI element is active before attempting to type.
Delay between keystrokes (in ms): Set the desired time delay (in milliseconds) between each keystroke to simulate a more natural typing pace.
14. Check if element exists
Verifies if a specific piece of text or a UI element exists.
Example: In a CRM application, when you want to update customer contact information, it's required that you first locate the Update Contact Details button in the window before initiating the update.
Configuration
UI element: Specify the UI element you want to check.
Check if application: Check if the application contains the element or a text.
Text: Enter the text you want to search for.
15. Close application
Automate the closure of applications to free up system resources.
Example: Ensure that a financial analysis application is closed properly at the end of a work session.
Configuration
Application: Select the application you want to close from the list of open applications.
Delay Settings
Delay settings allow you to introduce strategic pauses when interacting with UI elements.This option allows you to configure delays so that the actions do not fail due to loading or UI elements not present on the screen.
Delay before action (Time in ms): This setting allows you to configure a fixed pause, specified in milliseconds, that the bot will wait before attempting the subsequent action, regardless of the readiness of the target UI element.
Delay after action (Time in ms): This setting introduces a fixed pause, specified in milliseconds, that the automation will execute immediately after completing the current action. This can be useful in scenarios where a brief pause is required to allow for post-action processing, such as data saving, transitions between screens or downloading files before the next step in the automation flow.
Wait for element (Time in ms): This setting defines the maximum duration, in milliseconds, that the automation will wait for a specific UI element to become visible on the screen before proceeding with the associated action. Unlike the fixed delay, this is a dynamic wait. If the designated element appears within the specified timeout period, the automation will proceed immediately. For example, if a timeout of 15000 milliseconds (15 seconds) is configured and the element appears in 10 seconds, the automation will continue after 10 seconds. If the element does not appear within the timeout period, the action will likely result in an error.
Note : Utilize Delay Before Action for consistent, predictable pauses when a general waiting period is necessary. Use Wait for Element to optimize execution time by waiting only as long as required for specific UI elements to load, making your automation more efficient.