Tip #21- Enhance your support sessions with the "Show remote cursor" feature- 'Insider Insights'
Hello Zoho Assist community! This week in Insider Insights, we’ll be learning how the “Show remote cursor” feature under Preferences enhances remote support sessions. While it’s a small feature, it plays a significant role in improving remote support and enabling more effective communication throughout the session. Let's jump right into the feature.
Imagine you're a technician providing remote support to a user struggling with a complex issue on their computer. The customer is confused and anxious, unsure of the exact issue and struggling to explain it to the technician. This is where this feature comes in handy. With the visible cursor, the customer can quickly move the mouse and show the application or screen that has an issue.
With the "Show remote cursor" feature enabled, this scenario changes dramatically. As the customer moves the cursor, the technician can easily follow the screen and diagnose the issue more effectively.
Enabling the remote cursor
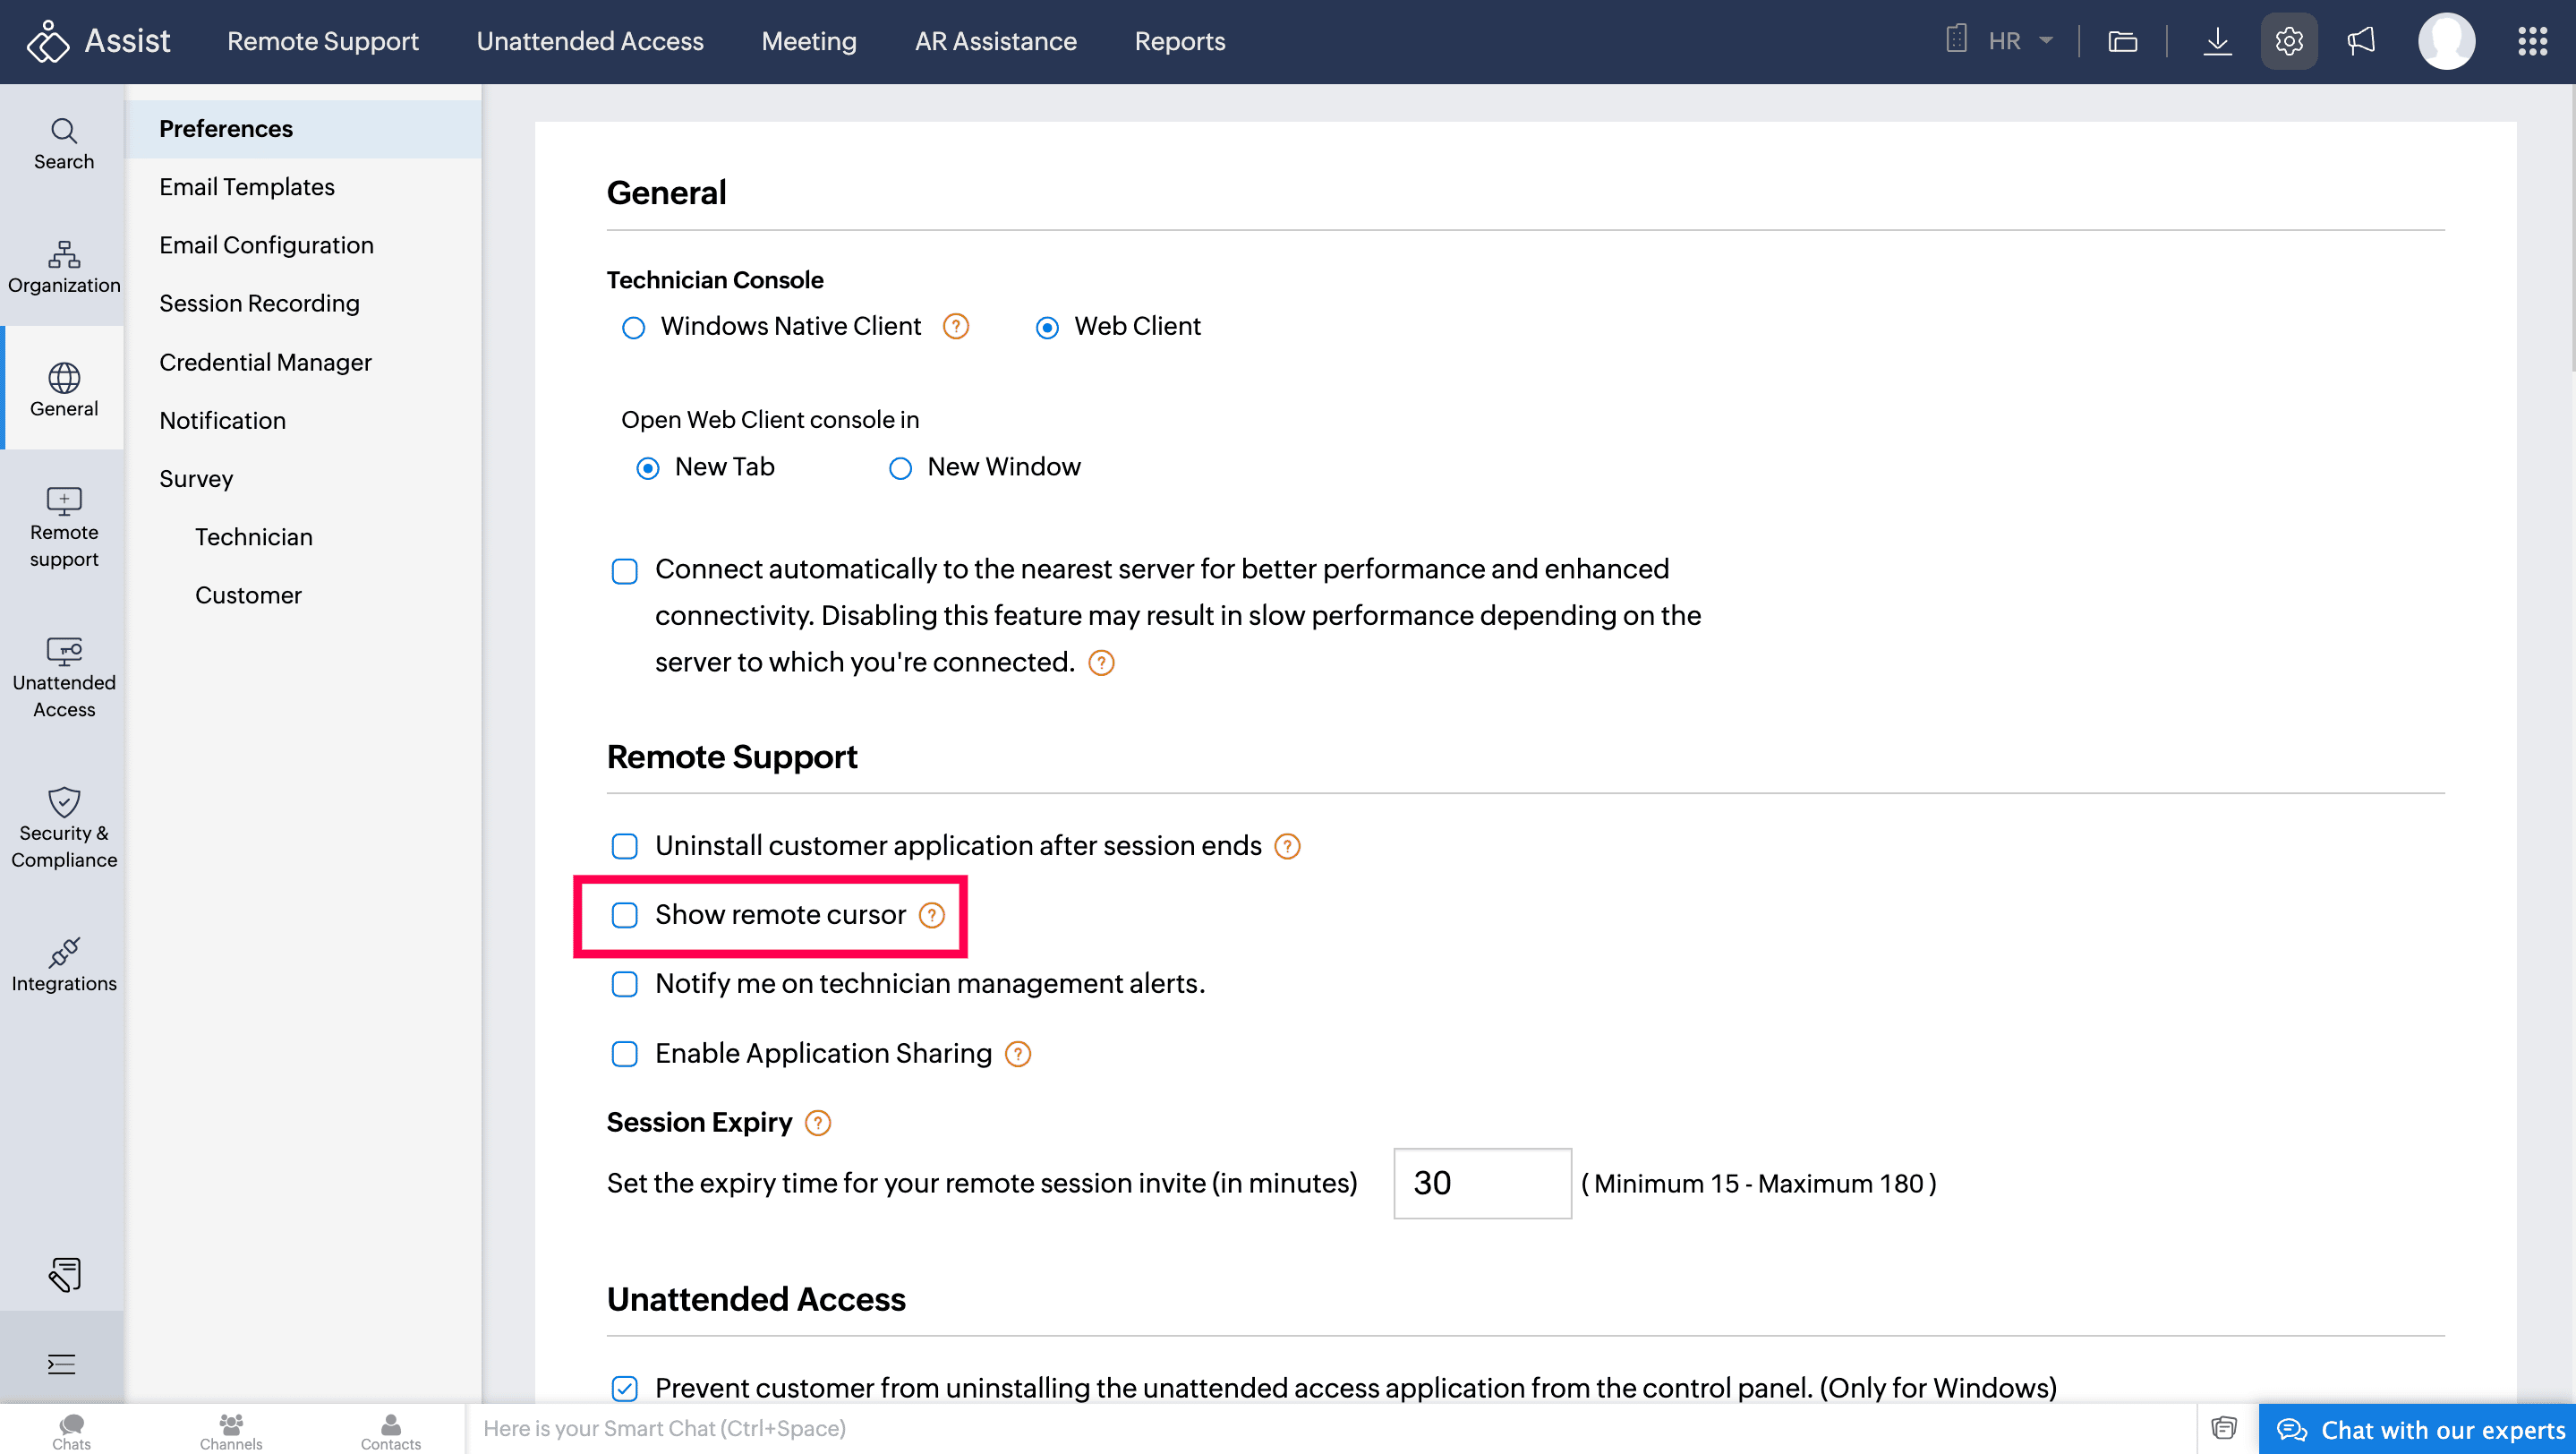
To show the remote cursor during a remote support session, follow these steps:
Once you have logged into Zoho Assist, go to the Settings icon on the right.
Under General, choose Preferences.
Scroll down to Remote Support and enable the checkbox for Show remote cursor.

Key benefits
Enhanced communication: By making the remote cursor visible, both the technician and the customer can see exactly where the other is pointing, reducing misunderstandings and making instructions clearer.
Increased efficiency: The technician can quickly identify and address issues because the customer can easily highlight problem areas, leading to faster resolution times.
Improved user experience: Customers feel more involved and informed during the support session, which helps reduce anxiety and build trust in the support process.
Incorporating the "Show remote cursor" feature into your support sessions can significantly enhance communication, efficiency, and user experience. Try it out today and see how it transforms your remote support interactions!
Topic Participants
Amali Steffi Raj J