Extension pointers #13: Handle cases with personalized solutions using custom actions
In our last post, we detailed the steps involved in creating a custom action and the workflow from the developer and end user's side. Now let's look at a working example of how we can create a custom action and implement it in a Zoho CRM account to make the end user's work simpler.
You are a sales representative (the end user/extension user) handling cases and their solutions in a Zoho CRM account. While cases may arrive by phone, web, or email, you must log them with basic information, such as the subject, description, and priority.
Issues are typically recorded in cases modules using the Subject field, which contains a brief description of the problem. You may discover an immediate solution to the issue while manually logging the cases. In those cases, you must still manually feed the solution into the Solution field. How convenient would it be if the solution for a case could be auto-populated when a case with a common issue arises? We can streamline this process by creating a custom action.
Note: Throughout the following example explanation, the terms "sales representative", "end user", and "extension user" can be used interchangeably, but refer to the same person. The sales representative is the end user who installs and makes use of the extension features in their Zoho CRM account.
Create a custom action as part of extension development that includes a custom UI for obtaining personalized solution inputs and an action that will update the solution in the Solution field of a case. After installing the extension, the end user can simply create workflows and associate the custom action with them.
Because the sales representative who installs the extension will be dealing with the cases in their Zoho CRM account, they can easily create different workflows. Each of these workflows can be assigned criteria so that when the Subject field contains specific keywords typically used by the sales representative while logging, the custom action updates the personalized solution provided as part of that workflow custom action.
Let's go over the steps in order to achieve this.
- Create a custom user interface (widget-connected app) that allows the user to enter their personalized solution inputs.
- In the Zoho Developer console, create a custom action.
- Associate the custom UI to the custom action.
- Define an action that performs the function of updating a case's Solution field.
- Create workflows (as an end-user perspective that meets specific subject criteria (e.g., if the subject contains keywords like "widget," "not," and ''loading," then set a personalized solution in the case) and associate a custom action to them.
Creating a custom UI to obtain an end user's personalized solution inputs
- Create a custom UI to retrieve the end user's personalized input for the solution field and later be updated in a case based on the workflow the user creates.
Case handling.html code snippet
|
Case handling.js code snippet
|
- The above javascript code snippet will fetch the current case's ID and set it to a variable "Caseid". The end user's inputted solution through the UI is also set to a variable "Solution".
- These values will be passed as parameters to the custom function that will be associated with the custom action in the coming section.
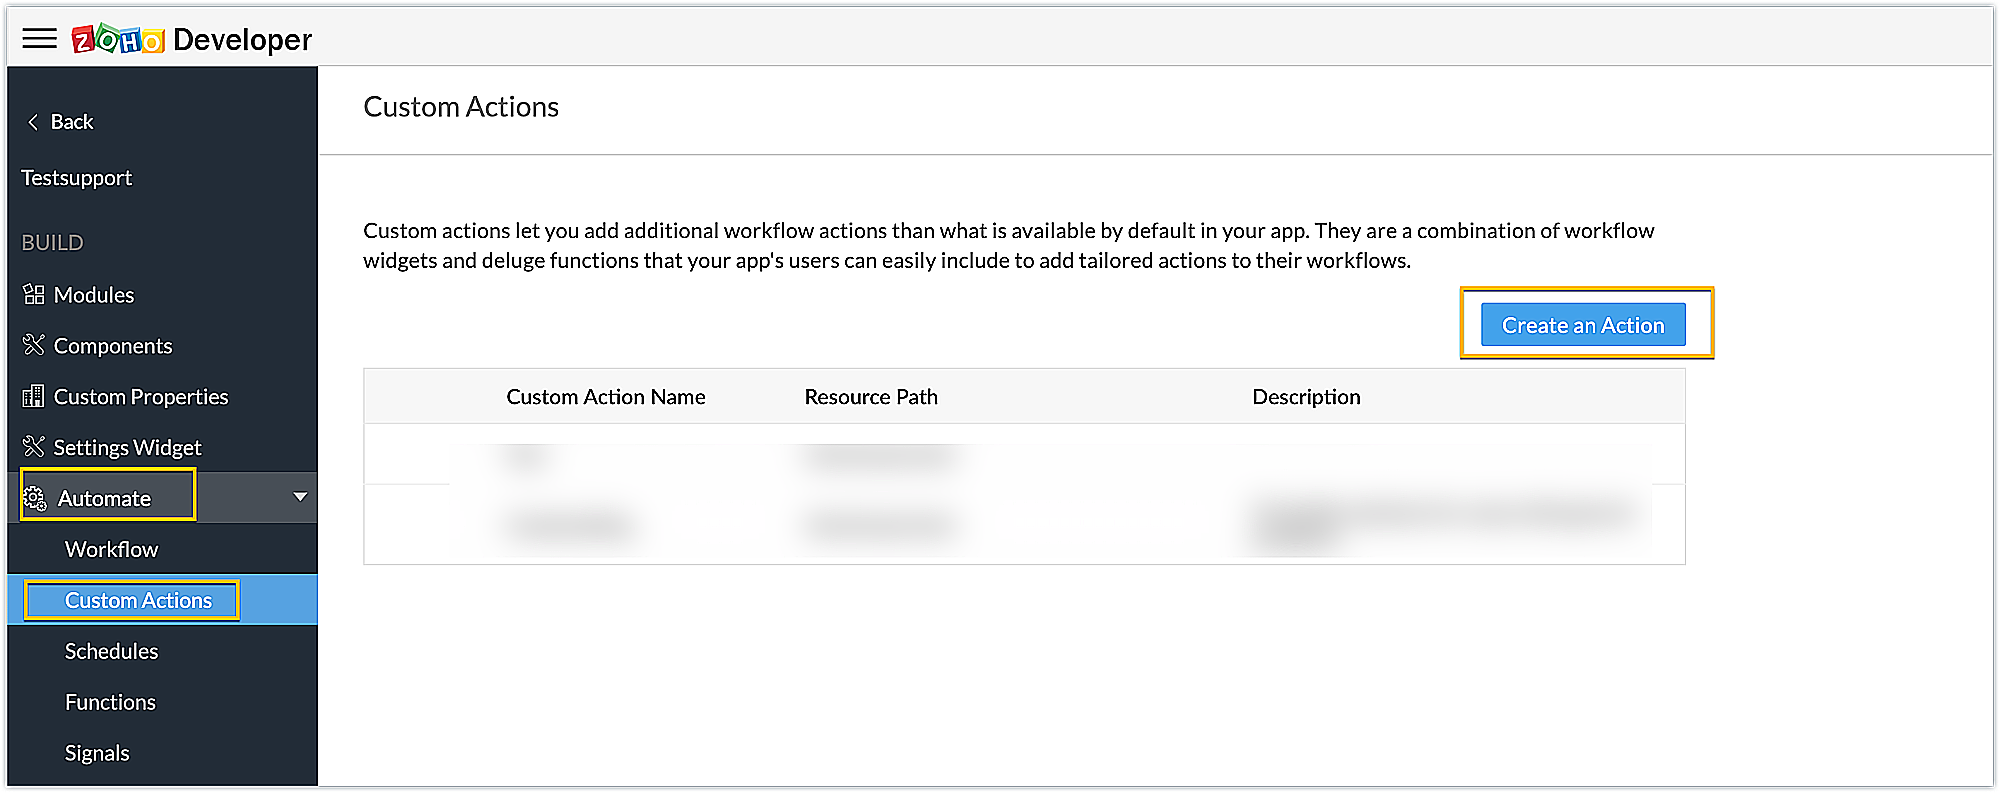
Creating a custom action
1. Create a custom action called "Casehandling" using the Create an Action button under the Custom Actions option, available in the Components section of the Zoho Developer console.
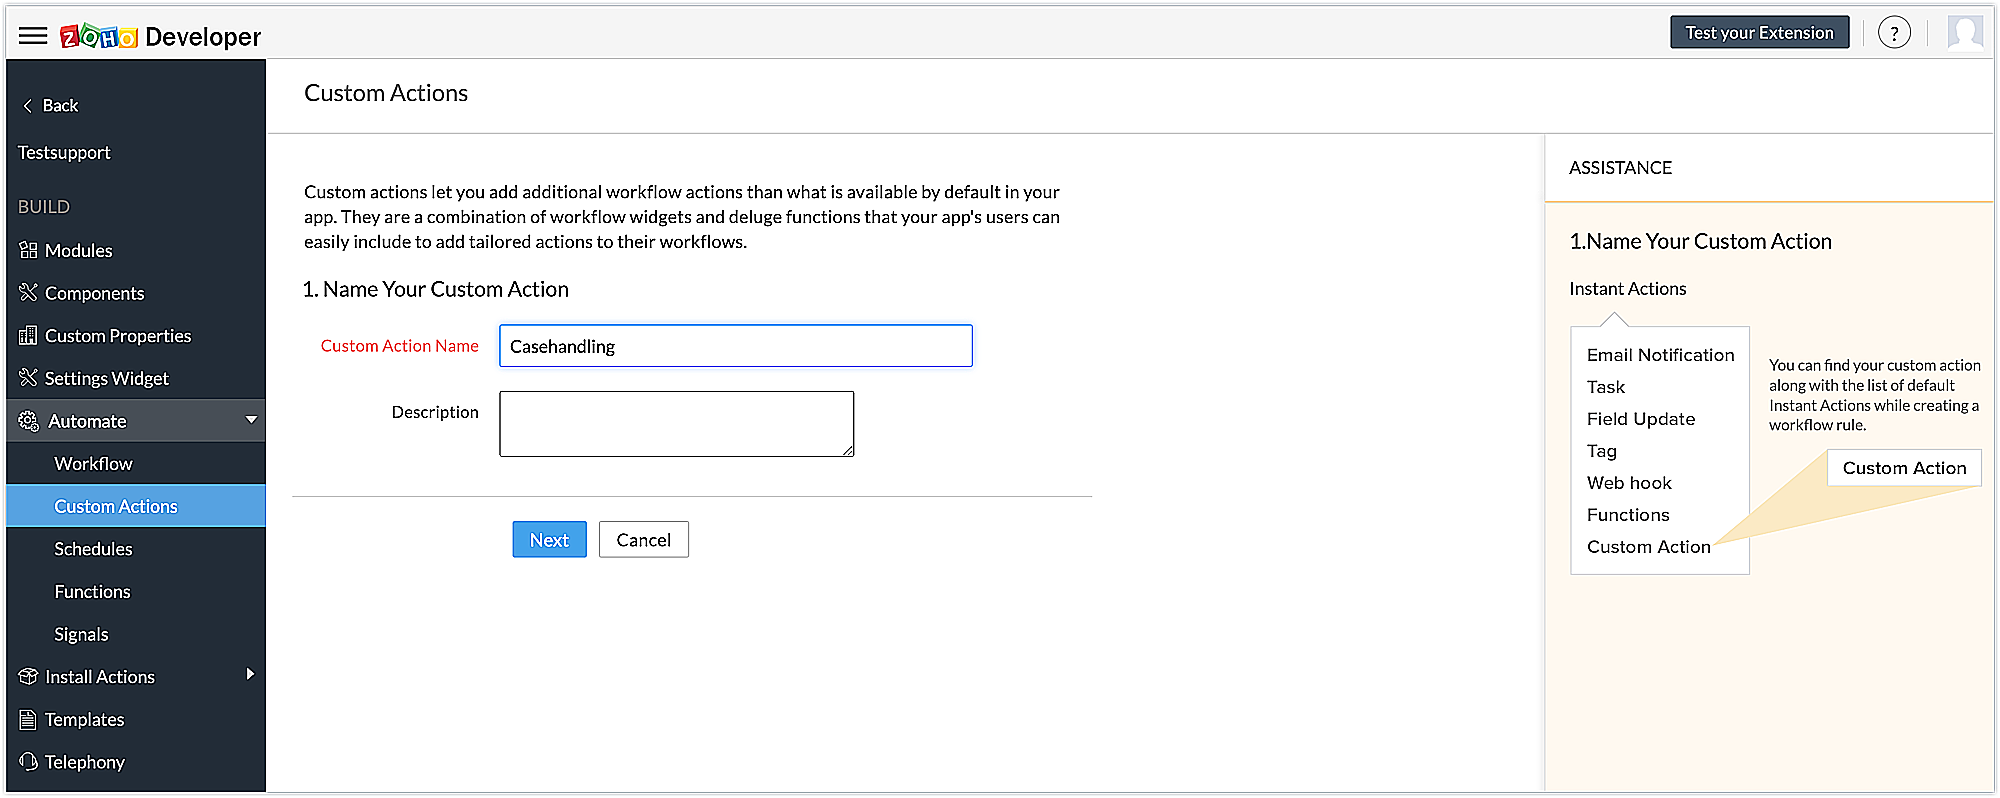
2. Provide a name for the custom action and a description if necessary. Click Next.
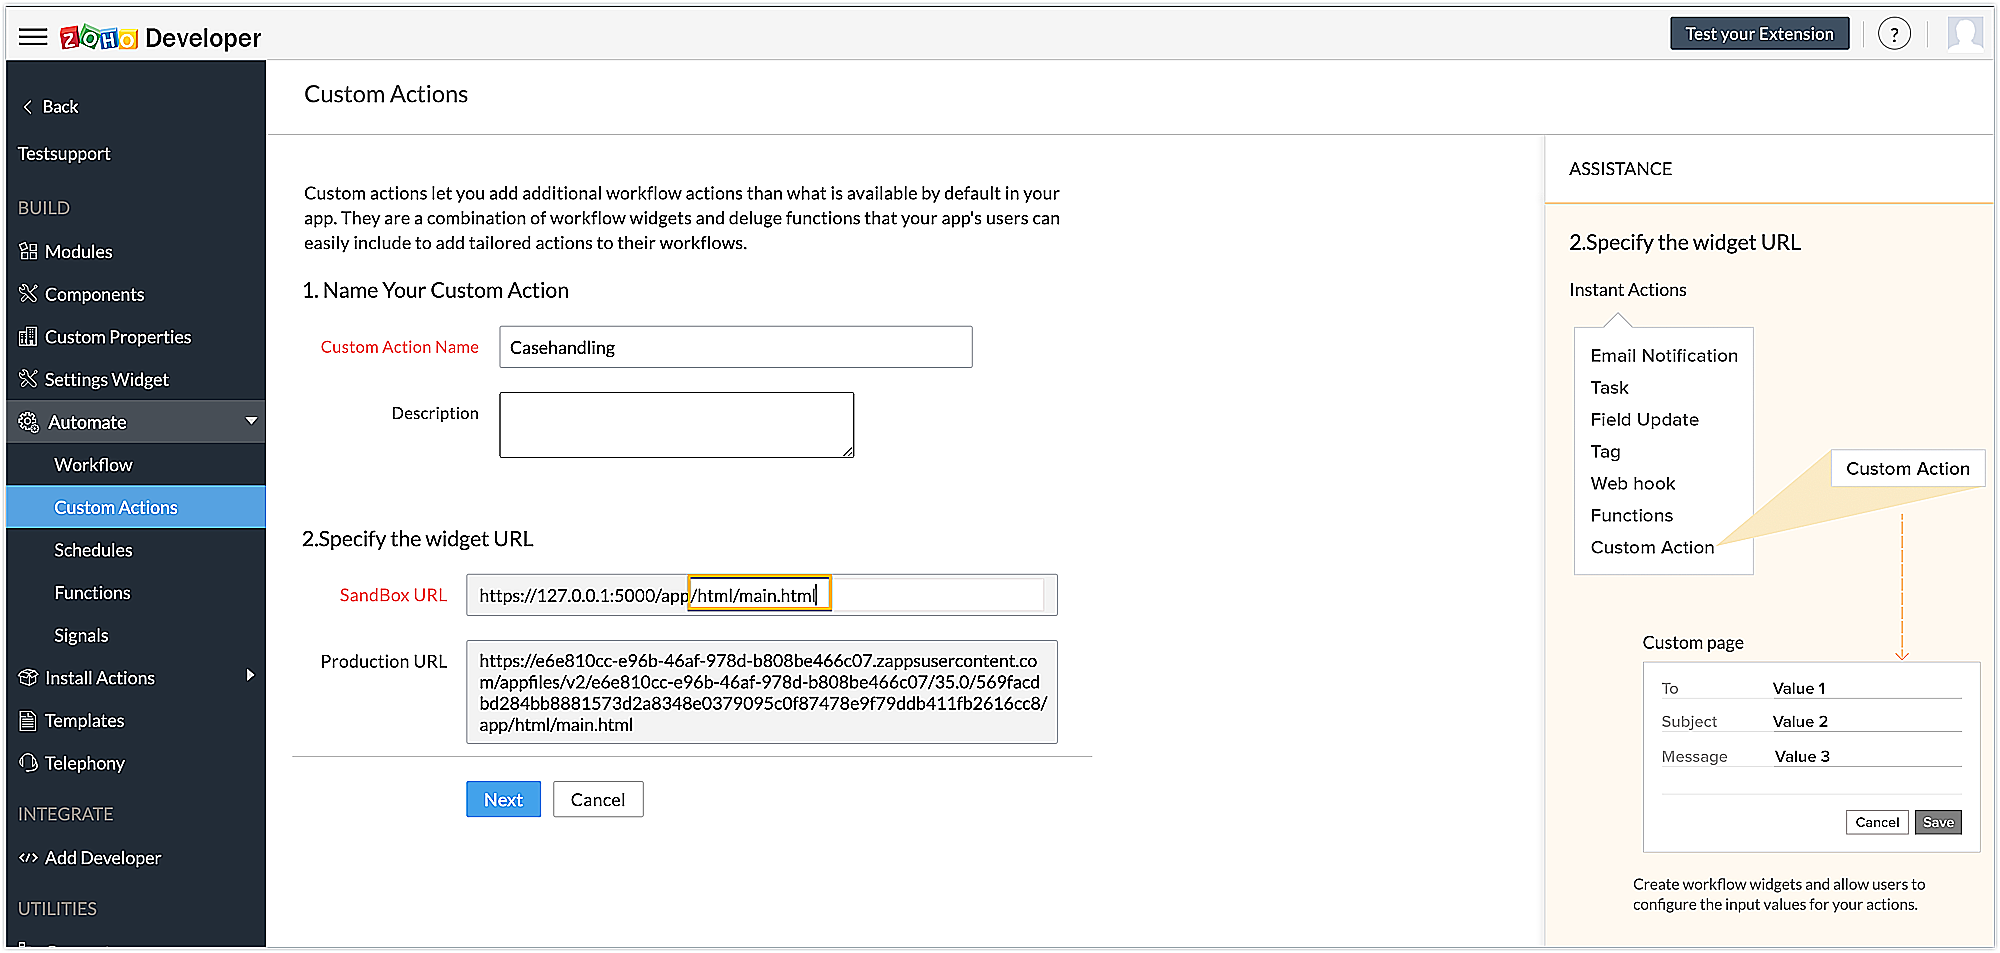
3. Associate the custom UI created earlier with the custom action by specifying the html page of the widget's connected app. Click Next.
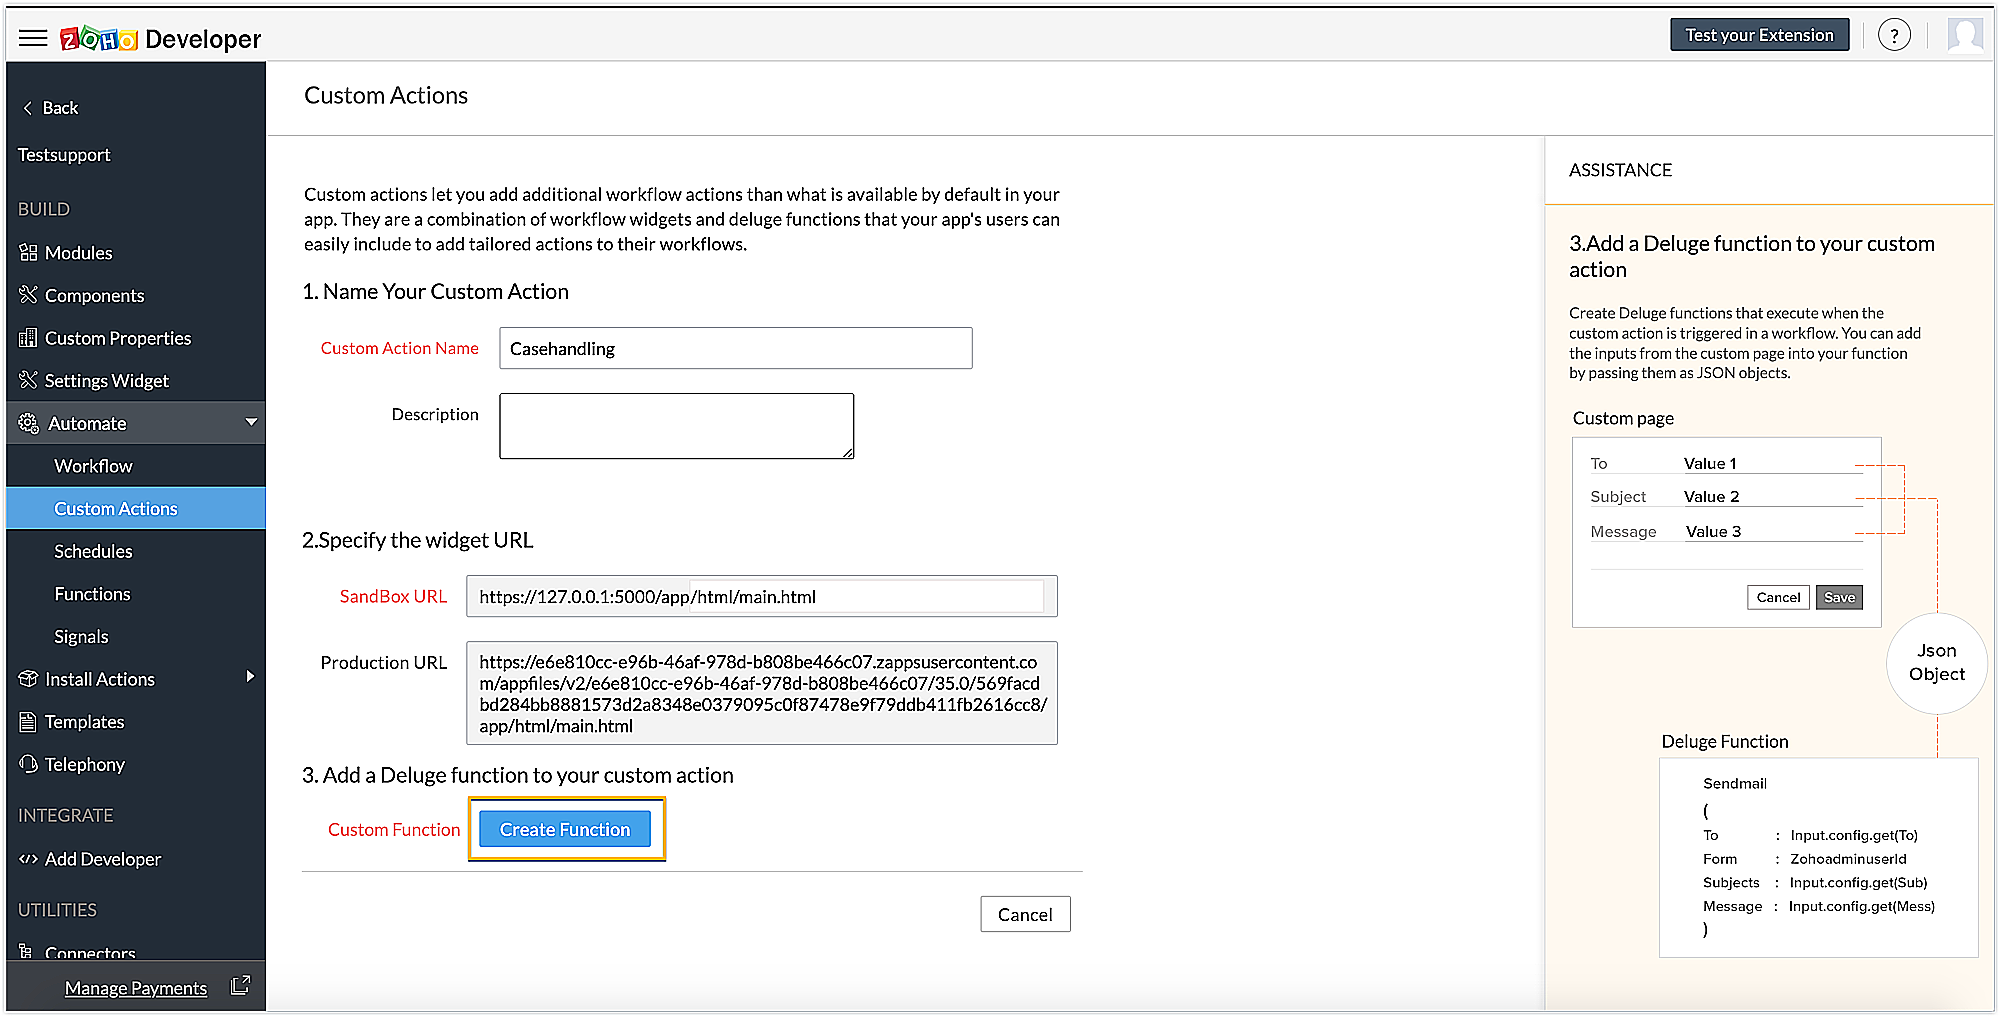
4. Then write a Deluge function to perform the desired action by clicking the Create Function button. As shown on the right hand side of the page, the values obtained in the custom UI earlier will be passed as a JSON object parameter to this Deluge function, and then the functionalities can be performed based on these inputs from the custom page.
Case handling Deluge function code snippet
caseinfo = {"ID":config.get("Caseid"),"Solution":config.get("Solution")}; response = zoho.crm.updateRecord("Cases",config.get("Caseid"),caseinfo); |
- The above Deluge code snippet uses the current case ID and the solution input by the end user through the UI to update the personalized solution to the Solution field of the case using the updateRecord deluge task.
- Click Save to save the custom action.
Now that the functionality is defined, the extension can be published and installed.
Creating workflows in Zoho CRM as an end user
1. As an end user, install the extension.
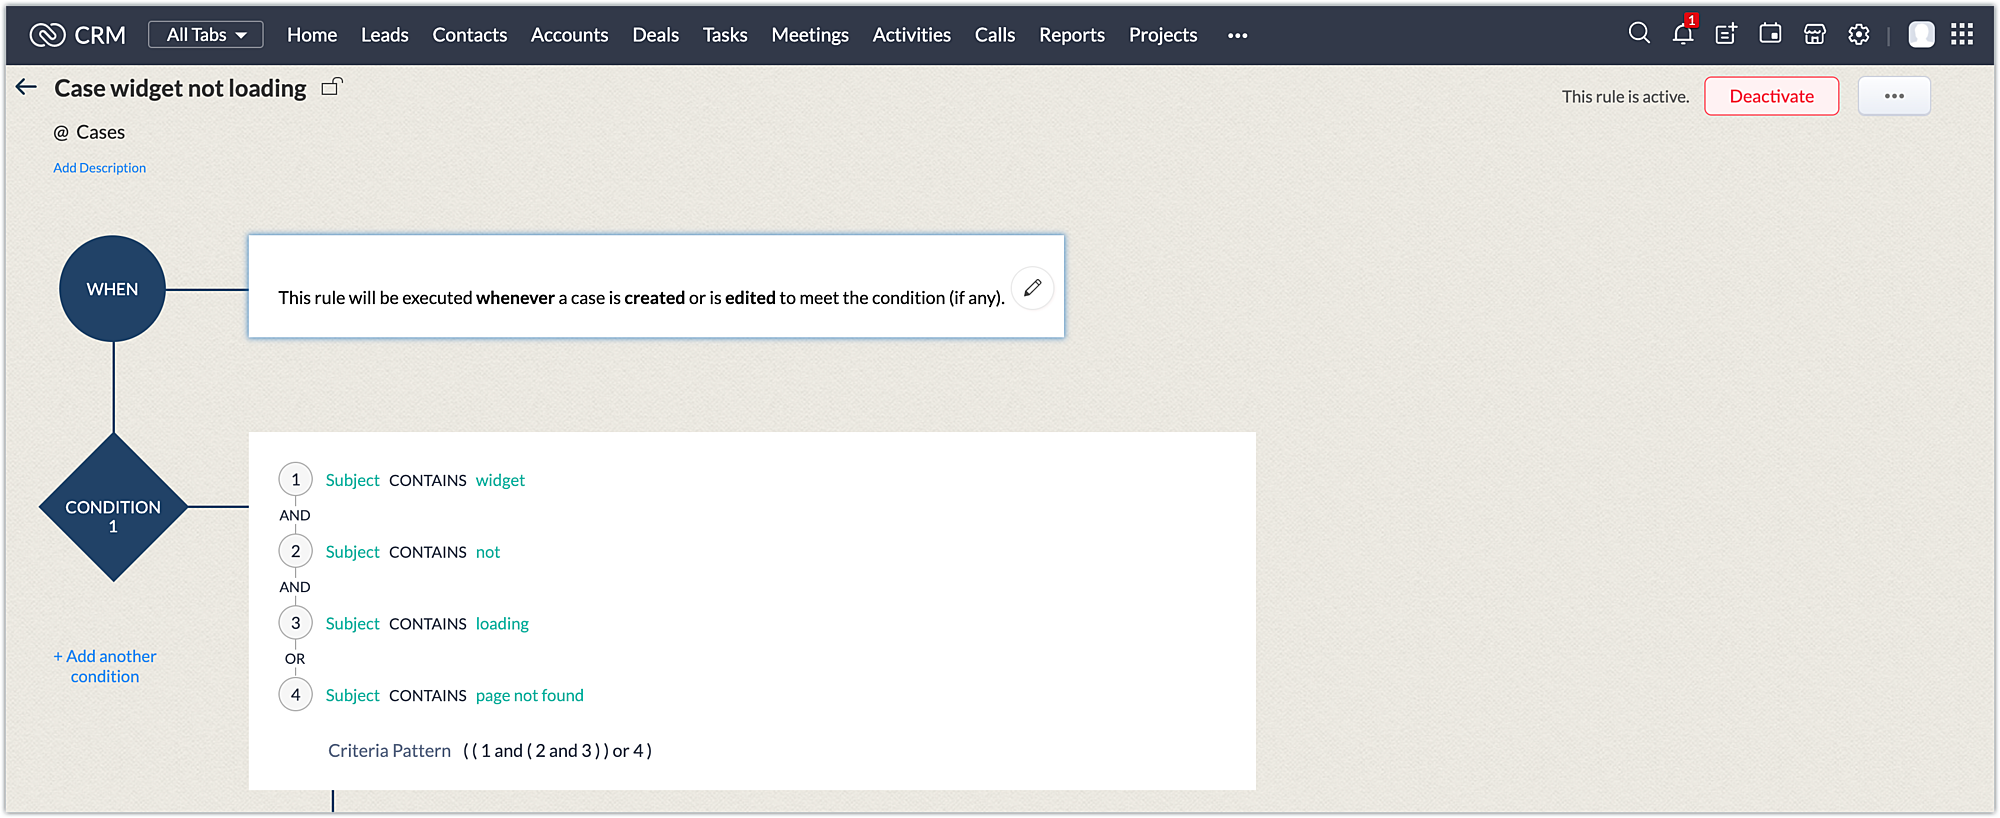
2. Now create a workflow using Setup->Automation->Workflow rules. Create workflows for two commonly arising cases so that, as an end user, you can predefine some personalized solution inputs for these common cases. This will thereby update the solution to the case when the workflow criteria is satisfied. The two sample workflows handled for this example are:
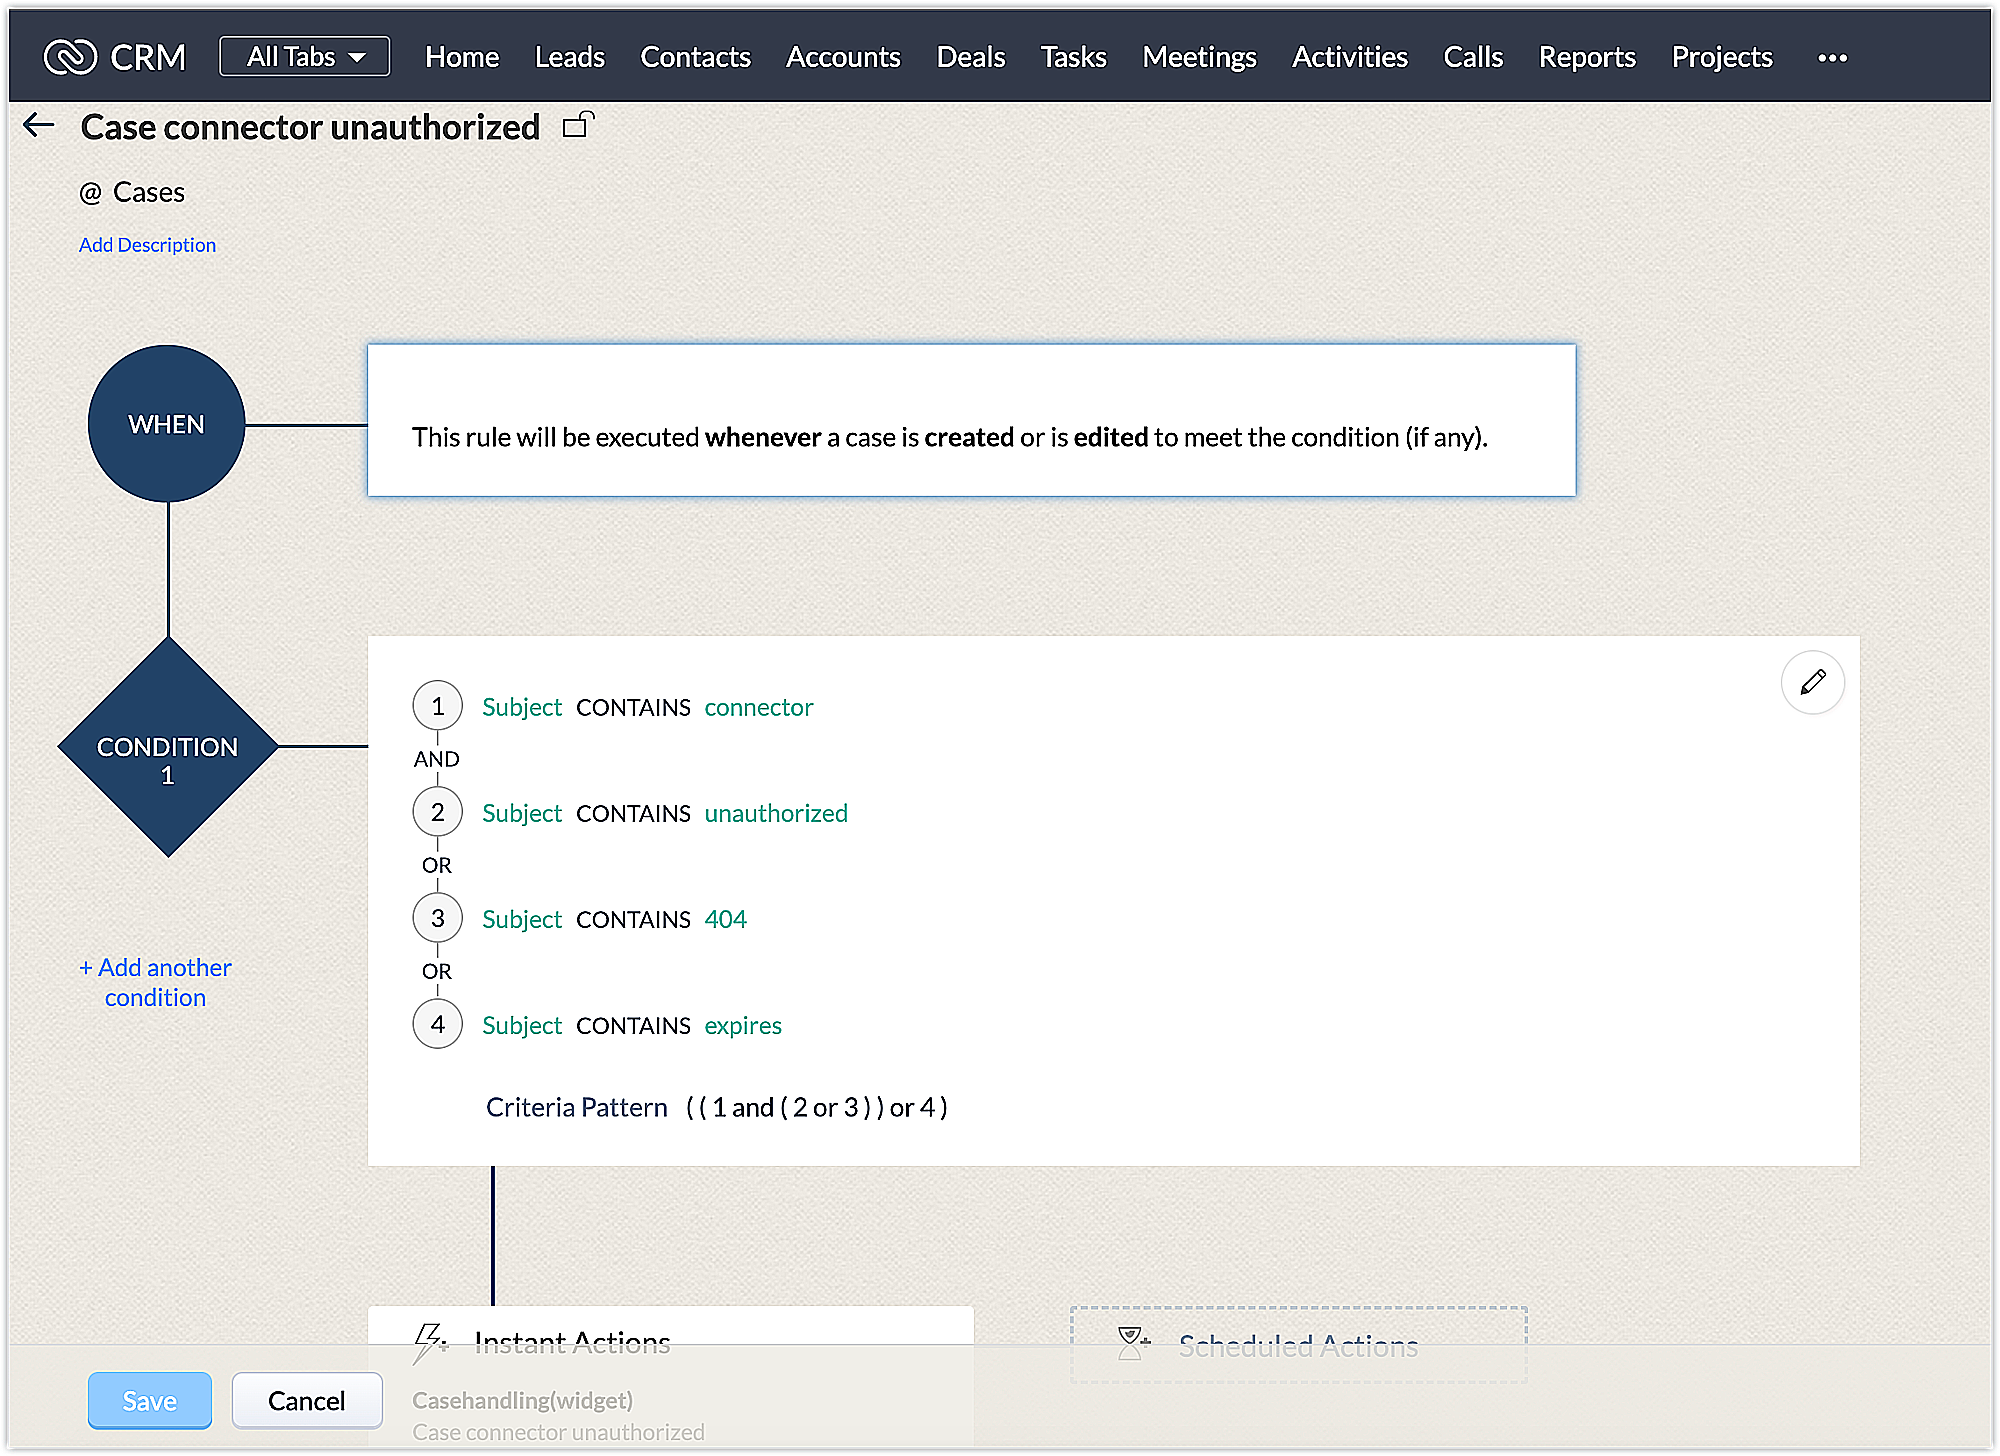
When a widget is not loading or a 404 page not found occurs in the user's Zoho CRM account.
When a connector unauthorized error occurs.
3. First, define a workflow for "Widget not loading" case by specifying the when and condition criteria.
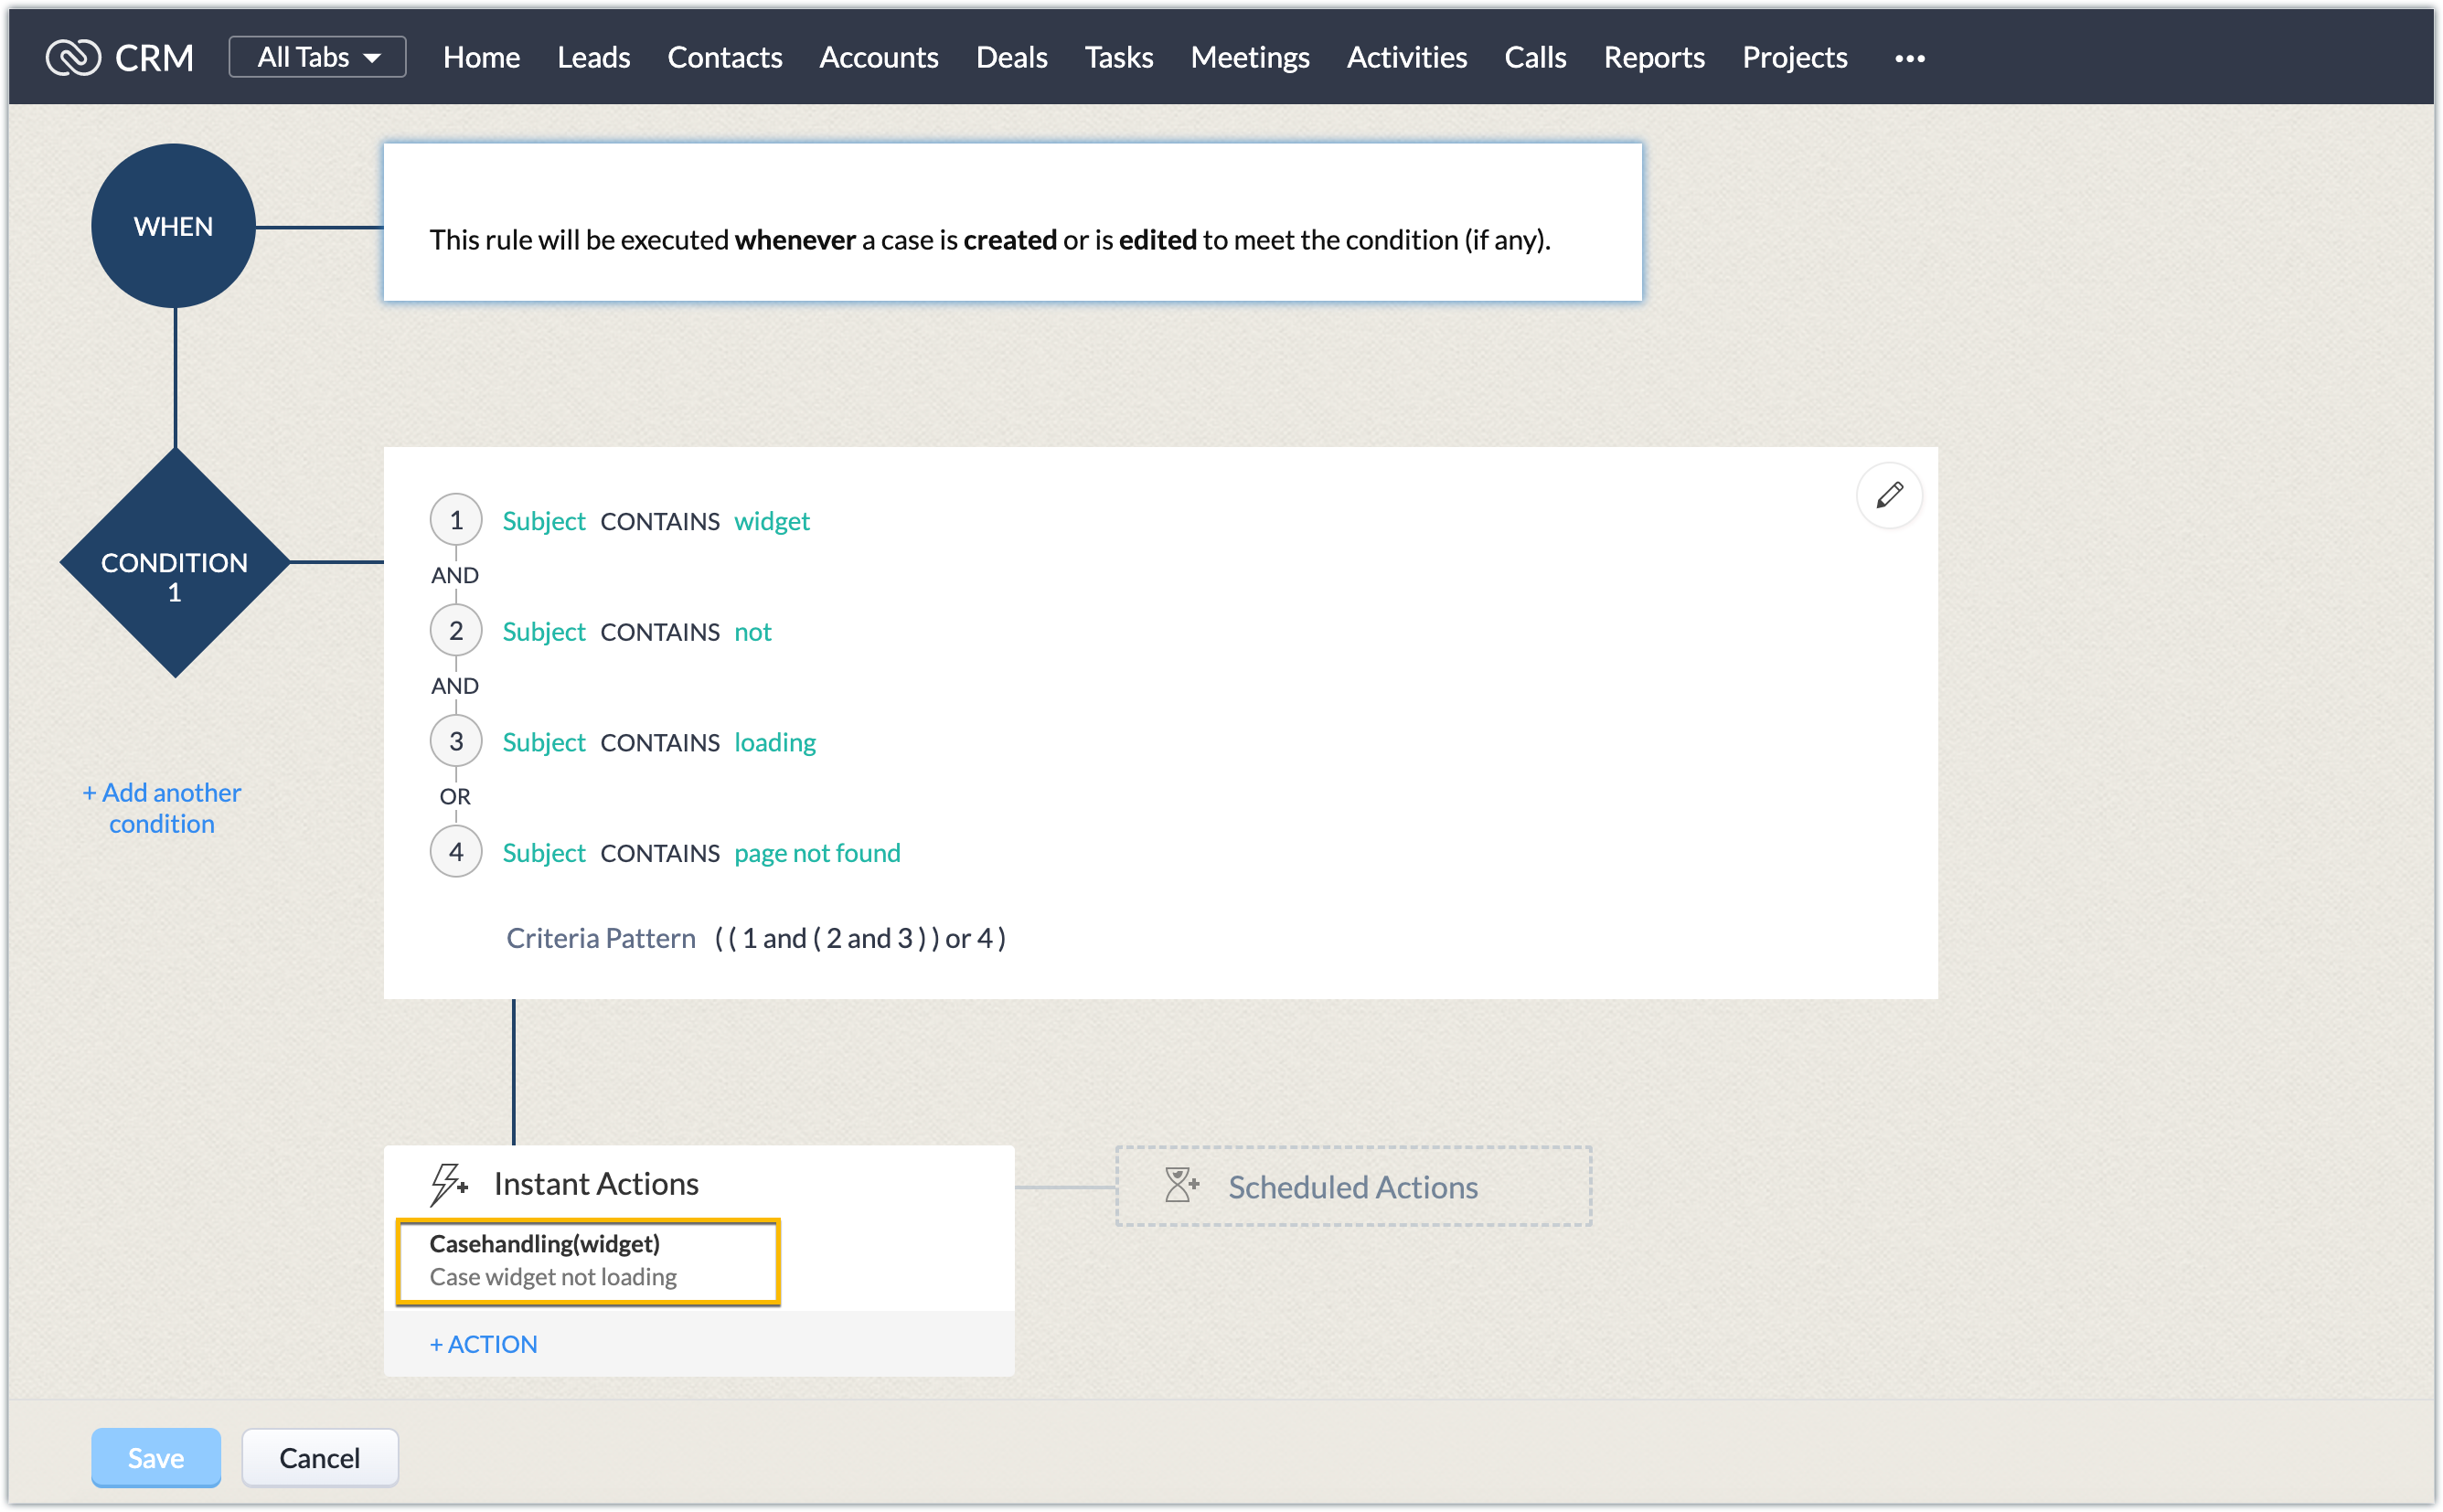
4. Now under "instant actions," you will find the custom action installed as part of the extension. Associate the case handling custom action with this workflow.
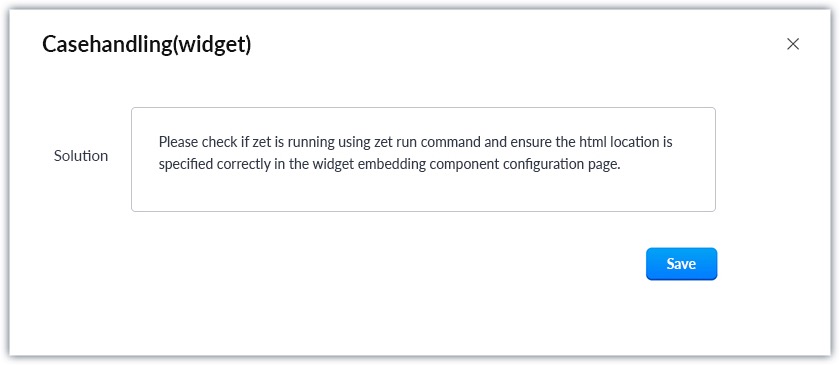
5. Enter the personalized solution in the custom UI displayed.
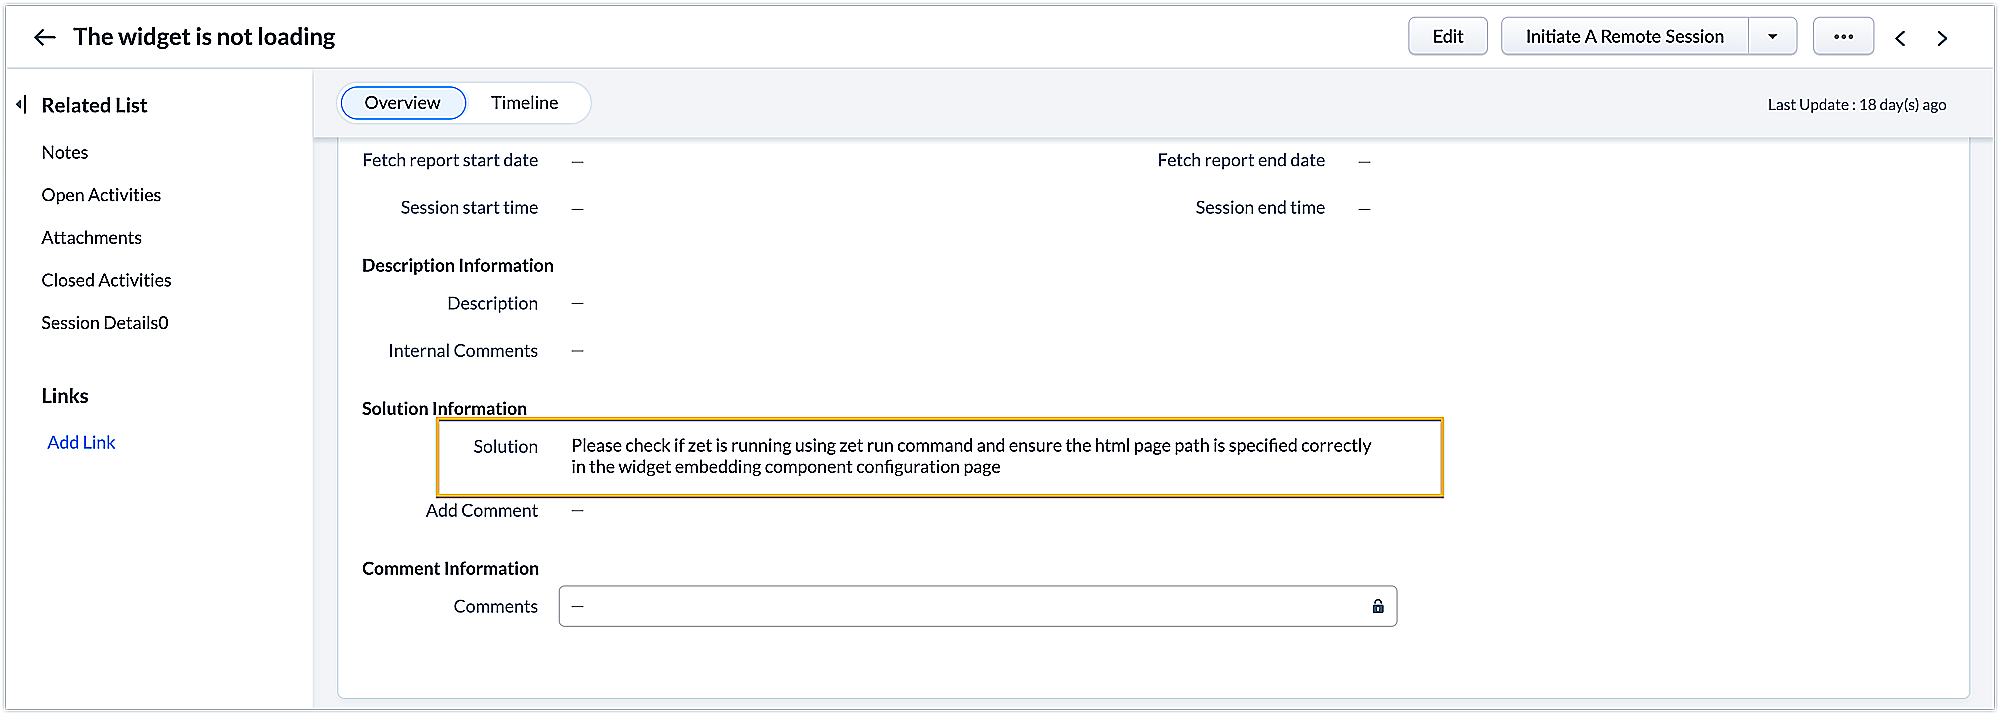
6. Go to the Cases module. Log a case with the Subject field, satisfying the workflow criteria.
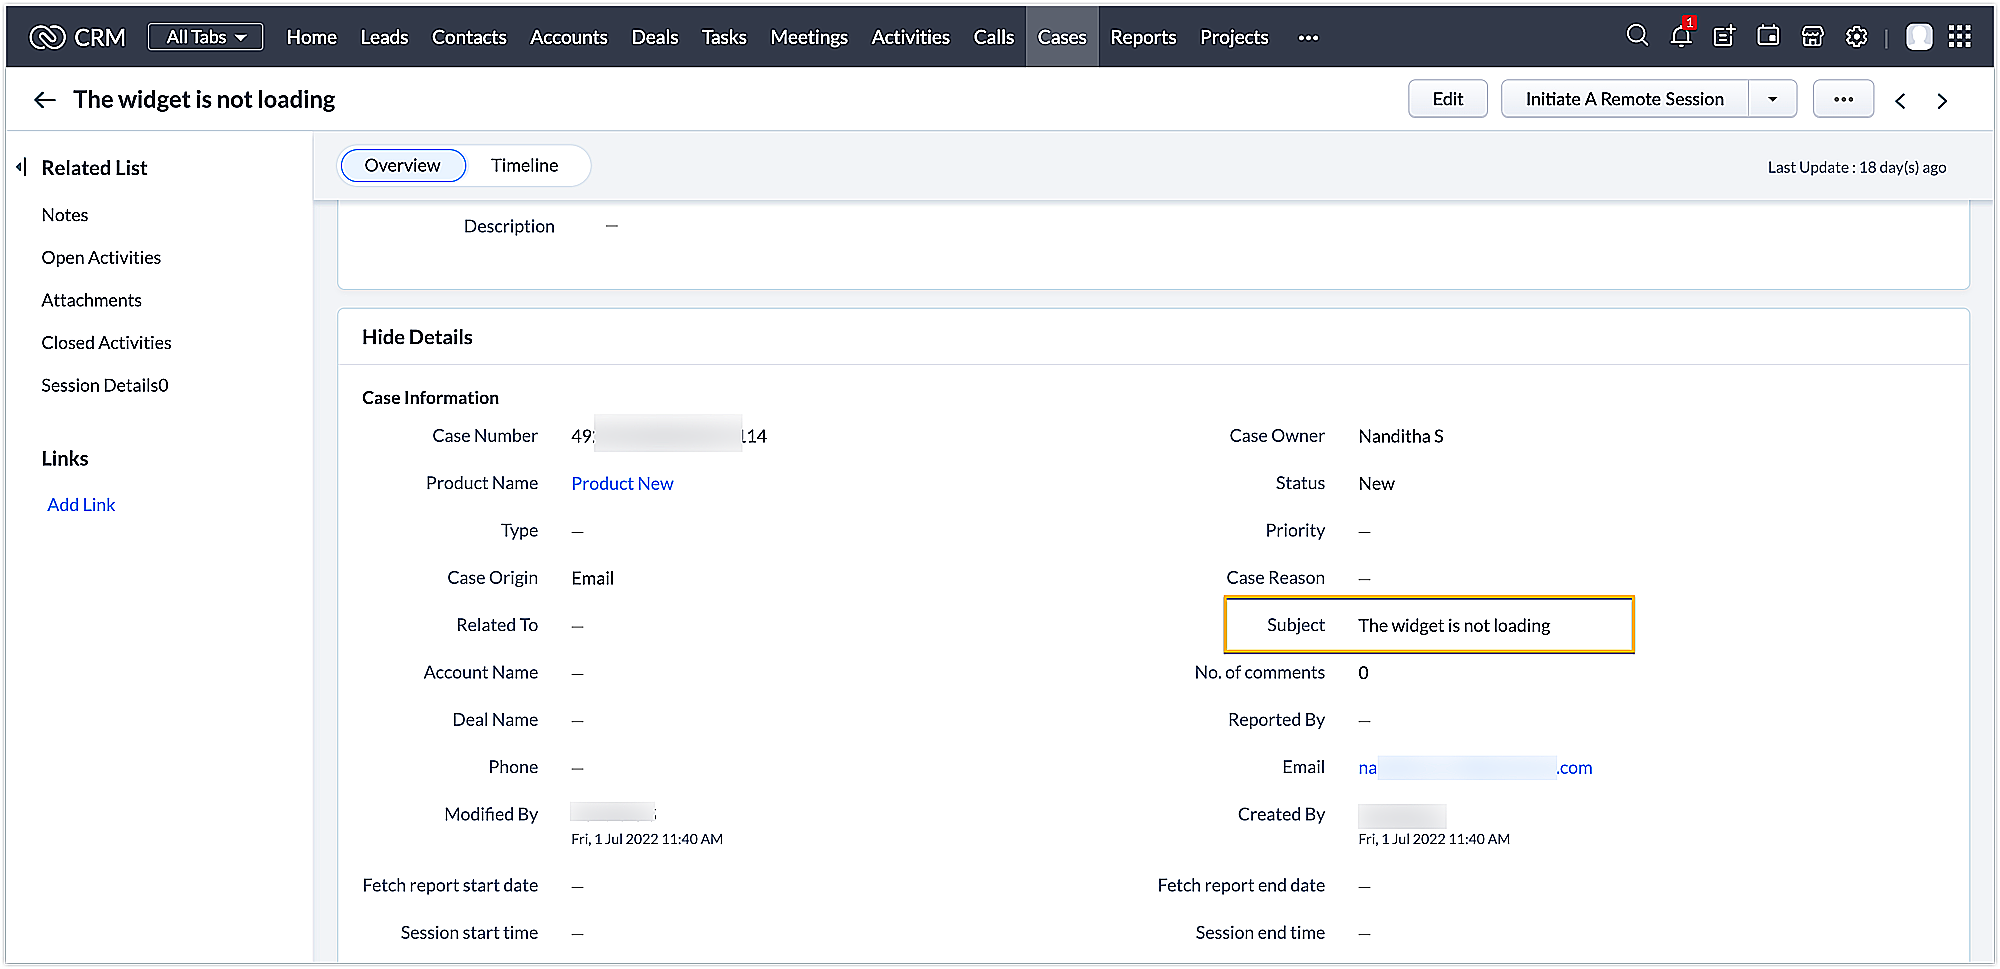
This automatically updates the Solution field with the predefined solution entered by the end user for this workflow.
Similarly, you can create multiple workflows for different cases for which you can define predefined solutions to make the case logging process easy.
In this way, you can use custom actions to ease the end user's work by reusing templates created for them. We hope you find this information useful. Keep following this space for more insights!
SEE ALSO