Task Details Page
The Task Details page serves as a central hub of task information, allowing users to track and modify task details, associate blueprints, annotate files, and initiate conversations.
Access Task Details Page
- Select a project from the Recent Projects section or the Projects tab in the left navigation panel.
- Click the Tasks tab in the top band.
- Click a task you would like to view the details for.
- Click
to go to Comments section.
Click on To add Task Comment via email below the comments box to send an email.
Alternately, click the copy icon, to copy the email alias. Users can send an email to this alias to add a comment. - Click
to view more task information.
- Click
to add followers to the task.
- Click the status drop-down to change the current status.
- Click the cross icon
to close the details view.
- Add a Description by clicking +.
- Click
to Copy Link, Follow, Move, Clone, Delete, Associate Blueprint, or Execute Macro Rule.
Edit Tasks
- Click on a task to open the details page.
- Add to or update the necessary fields. The changes will be saved automatically.

Task duration cannot exceed 10 years.
Default Fields in Task Details Page
Field Name | Description |
Associated Team | Identifies the teams responsible for executing the task. It helps in delegating tasks and ensures accountability. |
Owner | Assigns specific individuals as the owners of the task. Owners are typically responsible for overseeing the task's progress and ensuring its completion. |
Work Hours | Defines the estimated time required to complete the task. It can be specified as standard work hours, such as eight hours per day, or as flexible work hours. |
Status | Indicates the current stage of the task. Predefined status include Open, In Progress, In Review, To be Tested, On Hold, Delayed, Closed, and Cancelled. |
Start Date | Sets the date when the task is expected to begin. It helps in planning and scheduling the task's execution. |
Due Date | Specifies the deadline for completing the task. It serves as a target date for the team to work towards. |
| Duration | Indicates the estimated time frame within which the task should be completed. It can be specified in days or hours. Task duration cannot exceed 10 years. |
Priority | Assigns a priority level to the task, such as None, Low, Medium, or High. It helps in prioritizing tasks based on their importance. |
Completion Percentage | Tracks the progress of the task, indicating the percentage of work completed. |
Tags | Assigns keywords or labels to the task, enabling efficient search and filtering of tasks. |
Reminder | Sets notifications or reminders for the task, ensuring that team members are alerted about upcoming deadlines or important actions. |
Recurrence | Enables recurring tasks, meaning the task will automatically repeat at regular intervals. It is useful for tasks that need to be performed on a regular basis. |
Billing Type | Applicable when project budget is enabled. It allows for associating the task with a specific billing type. |
Additional Task Information
- Comments: Add comments while modifying or resolving the task. Use the screen-grabber to share screenshots or the in-built draw tool to highlight or obscure areas.
- Subtasks: View and manage subtasks associated with the task.
- Log Hours: Track the time spent on resolving the task. Enter the start and end time for accurate time logging.
- Documents: Attach and share screenshots using the screen-grabber. Access attachments added in the comments.
- Forums: Associate relevant forum posts to the task. Link to discussions related to the task for easy reference.
- Dependency: View and set dependencies between tasks.
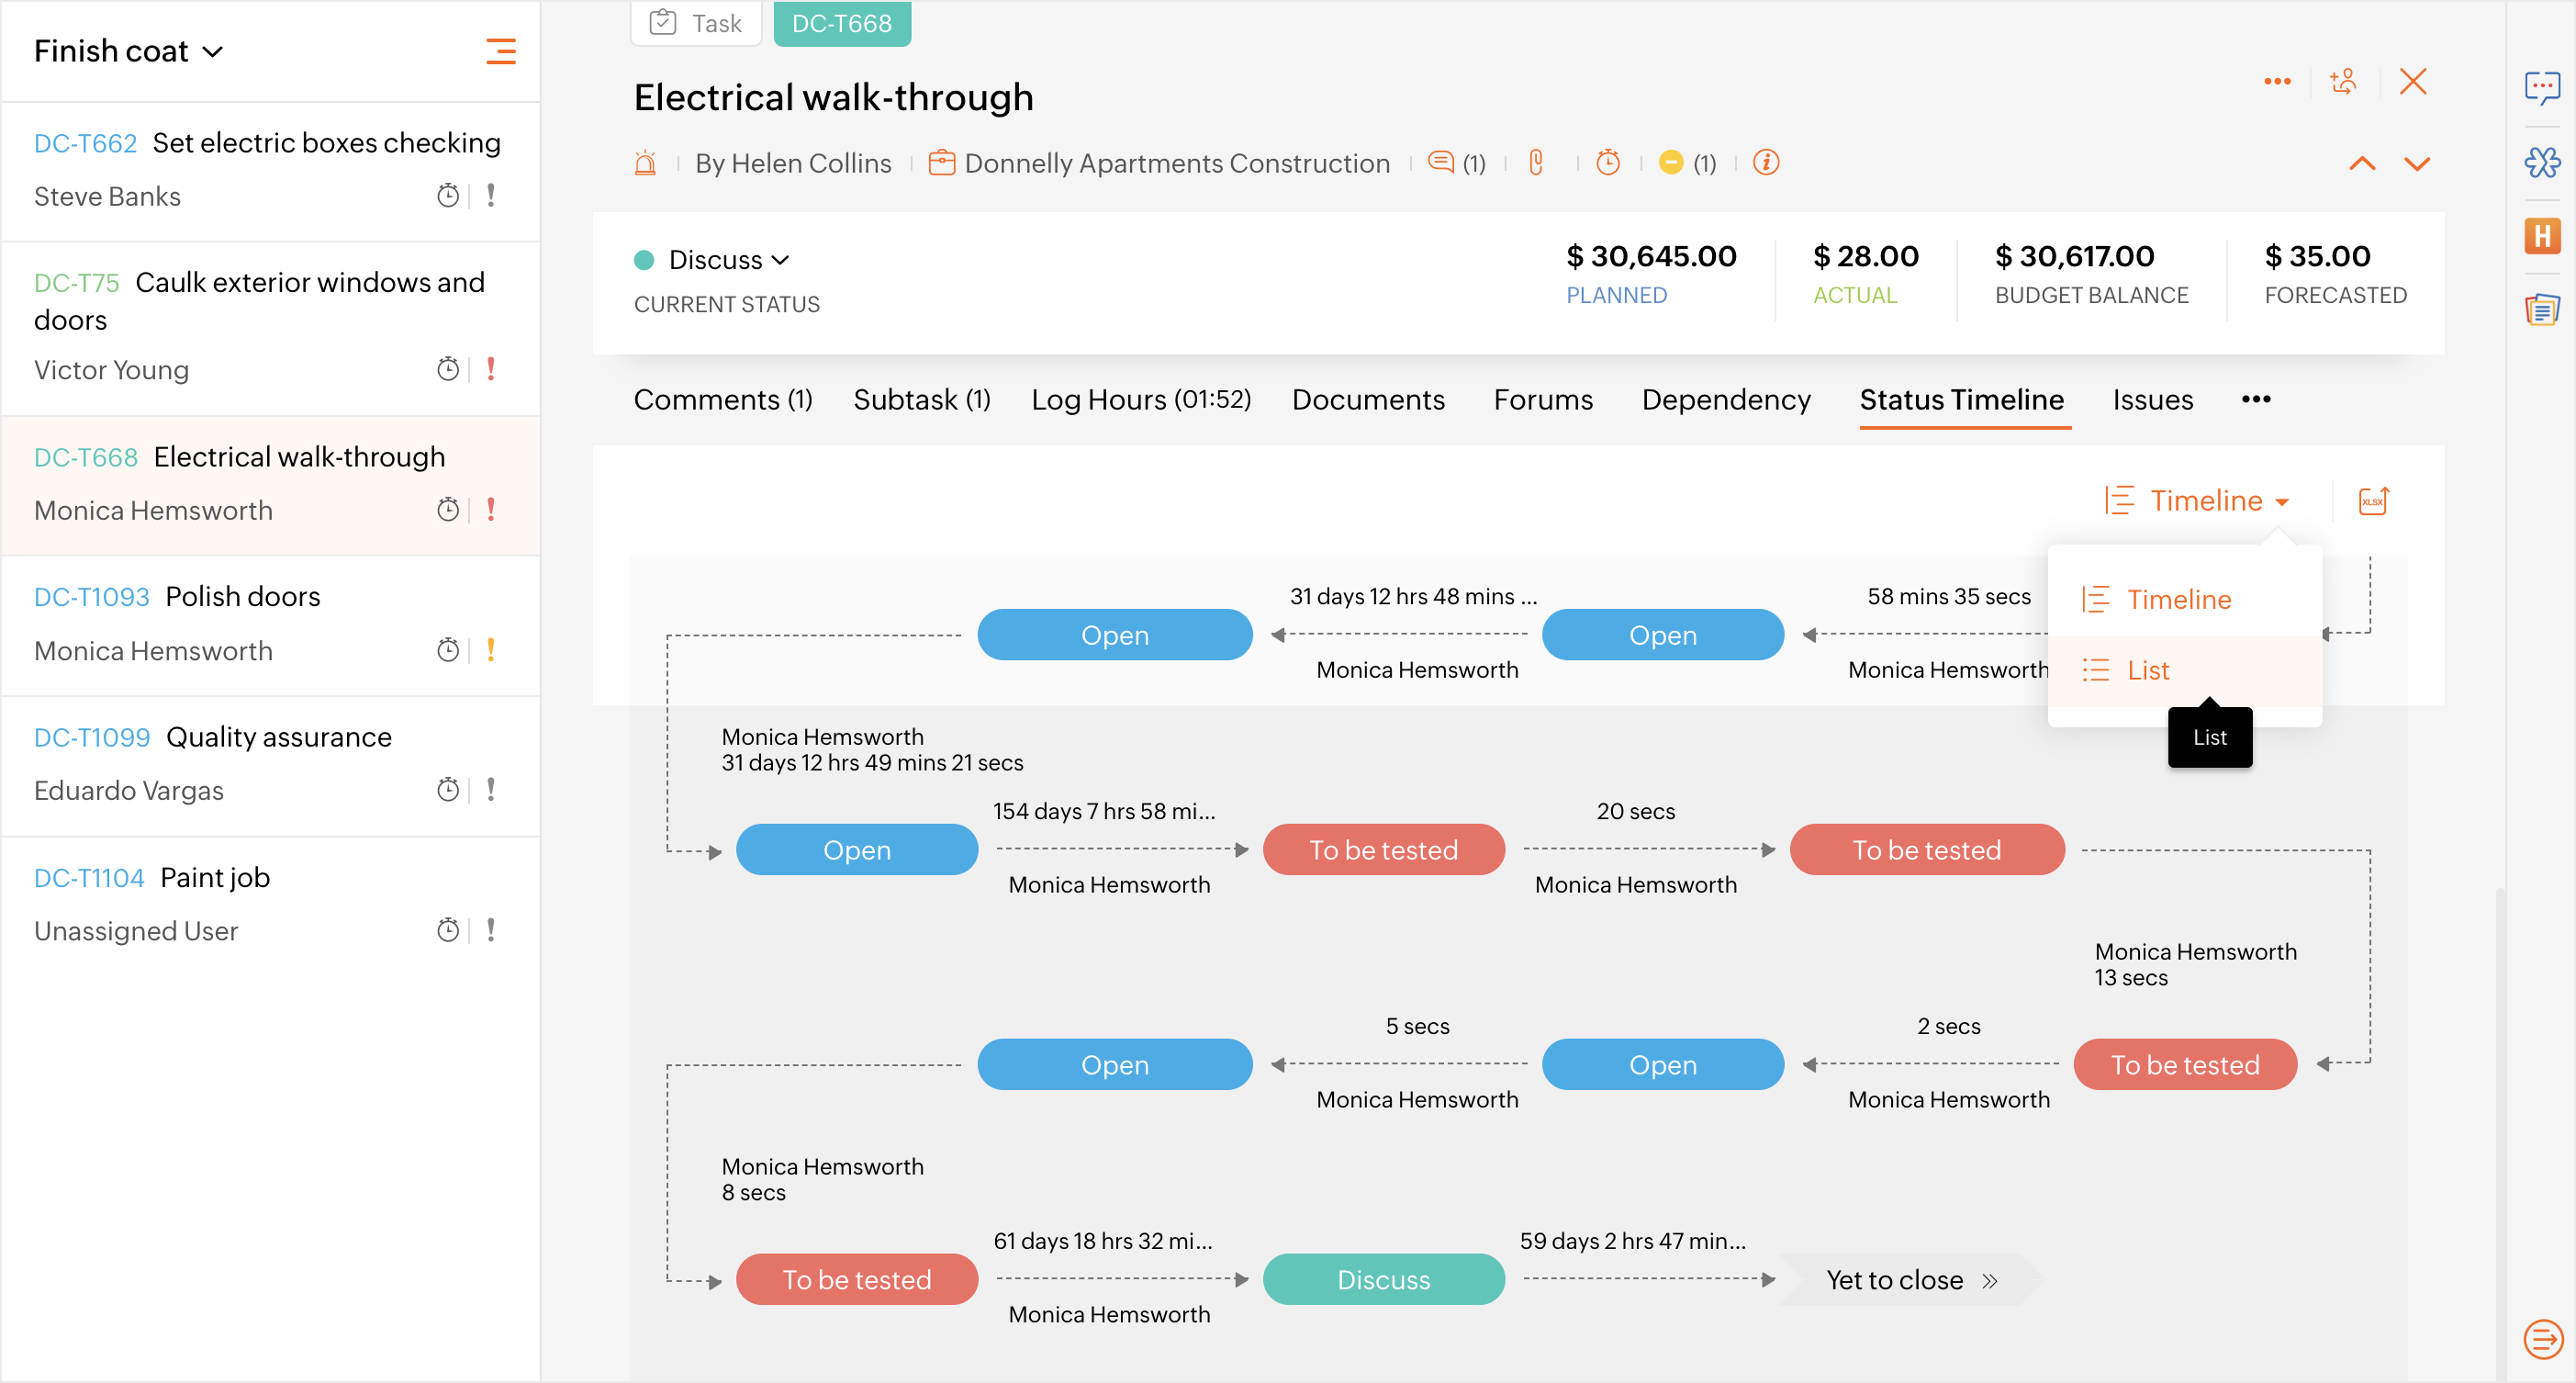
- Status Timeline: View a visual representation of the task's status history. Track the task's progress over time.
- Issues: Associate issues related to the task. Link to issues that need to be addressed as part of the task.
- Activity Stream: Track all activities related to the task. See who has made changes to the task and when.
- Extensions: Click to view extensions installed in your portal.
Set Reminder
- Select the Reminder Type:
- Daily: Send reminders every day.
- On a Date: Select Specific Date (enter date and time from the Select Date Field), Created Date, Start Date, Due Date, or Completion Date.
- Before a Date: Select Start Date or Due Date, then enter the number of days to remind before the selected date.
- After a Date: Select Created Date, Start Date, Due Date, or Completion Date, then enter the number of days to remind after the selected date.
- Enter the Time for the reminder and add users to notify them about the task.
- Select an Email Template to use the existing template or click Create Mail Template to create a new one.
- Click Set Reminder.
Start a timer for tasks
- Click the
icon to initiate the timer.
- Click the pause button and click Update to log the task duration.
- Click the stop button when the task is complete.
- Select the task as Billable or Non-billable, provide any relevant Notes, and specify the Cost per Hour.
- Click Update to save changes, or click Remove to delete the timer.
Annotate Files
- Click
and add an attachment by clicking Drop files or adding attachments.
- Select a file and click Attach Files.
- Hover over the attached file and click the Annotate icon
.
- Use the annotate tools to markup the file.
- Click Done.
Associate Issues
Associate issues with a task to track and close the task as well as the associated issues. While completing tasks, you can opt to enable or disable the alert message about the associated issues in Org Settings.
- Scroll down to the bottom of the details page and click on the Issues tab section at the bottom of the task details page.
- Click Associate Issues, enter the existing issue title or issue ID to search and select the issue in Select Issues box.
- Click Enter/Return to link the selected issues to the task.
Note: You can disassociate the issue from the task, if required. Hover over the linked issue and then click  .
.
View Dependency Status
The task details page displays the dependency status of the task. This refers to whether the task is either waiting ( ) for other tasks to be completed or blocking () other tasks from starting.
Hovering over the status will show the list of affected tasks. The dependent tasks can be accessed by clicking on the task name.
Associate Blueprint to a Task
- Click
in the top-right corner.
- Click Associate Blueprint.
- Select a blueprint and select a status to map the task.
- Click Map to apply blueprint to the task.
Start Conversations Via Task
- Select a project from the Recent Projects section or the Projects tab in the left navigation panel.
- Click the Tasks tab in the top band.
- Click on a task to open the details page.
- Click the chat icon(
) on the right to start a discussion.
- The task owners and creators are the default participants.
- Add new participants before you start the discussion.
- Click the chat to open and catch up on the previous discussions.
- You can also delete or edit a conversation. To edit or delete a particular conversation hover over it, click
and select the Edit or Delete option.

You can start conversations via task only when the Zoho Cliq chat is enabled.