Working with the ASAP Add-On for the Web
Introduction
The ASAP add-on for websites makes your help center available within quick reach for your end-customers. By embedding this add-on with your website, you can provide your customers with easy access to your:
-
Customer support team (to raise tickets)
-
Knowledge base (to access help articles)
-
User community (to interact with other customers)
-
Zia Bot (to find quick answers through Zia, our AI-powered virtual assistant)
You can choose to display the same add-on across all the pages of your website or a unique add-on for each webpage. Following the latter approach would deliver contextual support for your customers. For instance, if you run an e-commerce business, you can display a department-specific add-on, on the page for each department, i.e., the add-on for the Electronics page can be configured to display help articles related to electronics alone, while the add-on for the Footwear page can be configured to display help articles related to footwear alone, and so on.
With ASAP your end-customers do not have to navigate to a different page on your website to access help articles or seek help from your customer service personnel or interact with fellow users of your service or product. They just have to click a single icon on your website.
Setting up the ASAP Add-On
To include the ASAP add-on in your website, you must first embed a code snippet in your website's HTML source code.
To setup the ASAP add-on
-
In the Zoho Desk portal, click the Setup icon.
-
Select ASAP under Channels.
The ASAP for the Webpage appears. -
Click the Create Web Add-On button.
-
The Create Web Add-On page appears.
-
Under Add-On Details, configure the following settings, as required:
-
Name: Name of the add-on; this name appears on screen when your end-customers hover over the ASAP icon on your website
-
Departments: Department(s) from which information must be displayed; you can either select all departments or a specific department
-
Tab Selection: The help modules that you want to make available through the ASAP add-on. The toggle switches next to each module help you enable or disable the modules, as required.
Note: To include Zia Bot in your ASAP add-on, you must first enable the Bot option in the Zia preferences page (Setup --> General --> Zia).
-
Authentication Method: Method for authenticating users and providing access to more help components accordingly
-
Anonymous - In this method, end-users are considered guest users. They can only submit tickets and view posts in the user community. They cannot view the tickets they submitted or actively participate in the user community.
-
JWT - In this method, end-users are considered authenticated users. In addition to the activities that guest users can perform, authenticated users can also view the tickets they submitted and actively participate in the user community (with rights to perform actions, such as following a topic, adding a topic, and adding a comment to existing posts). For more information on JWT authentication, refer to this article.
6. Click the Save button.
The ASAP add-on gets created in your Zoho Desk portal.7. A Code Snippet section appears in the Add-On Details tab.
8. Copy the code snippet and paste it before the closing <body> tag in your website's HTML source code.

-
Make sure to include the code snippet in the HTML source code of all the individual pages that must display the add-on.
-
If you want each webpage to display a department-specific add-on, create a unique add-on for each department and embed the respective code snippet on each page.
-
The department settings of an ASAP add-on cannot be changed after the code snippet is generated. Therefore, make sure to select the right department(s) while creating the add-on.
After you paste the snippet in the HTML source code, the ASAP icon appears on your webpage, making it easy for your customers to seek help.

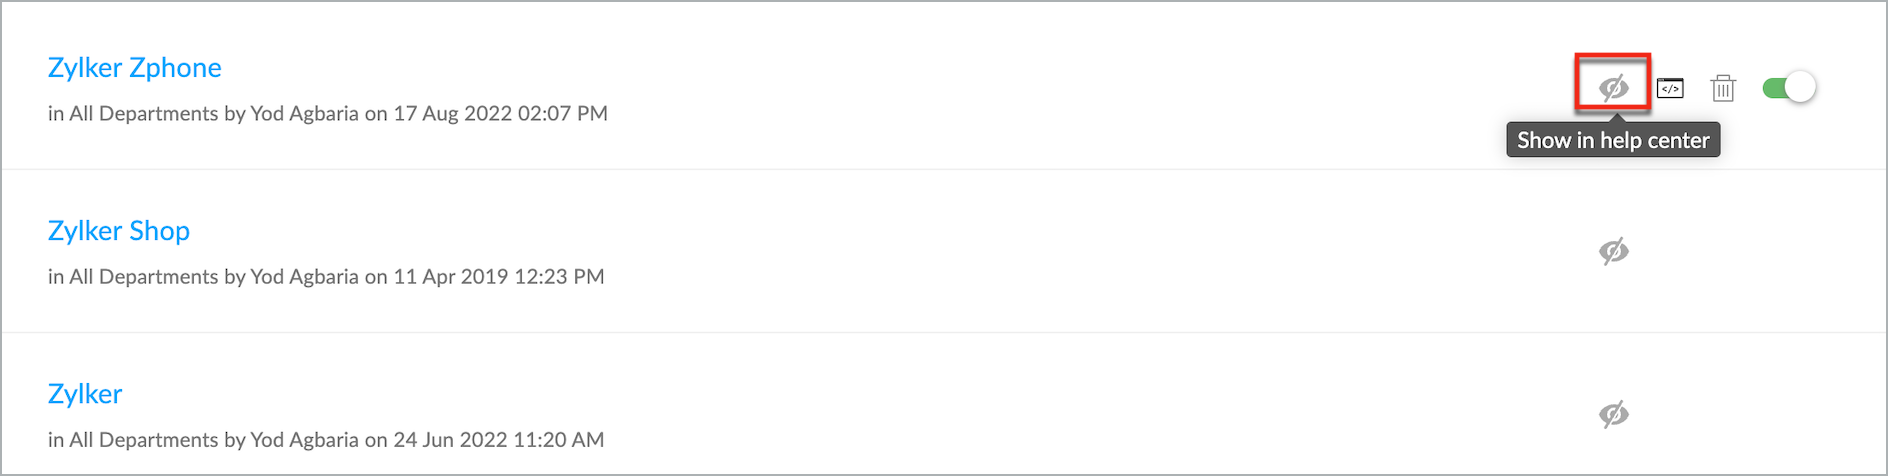
If you enable the Show in help center icon, then the associated ASAP will be displayed in your help center. Please note that you will be able to choose only one ASAP to show in the help center.
Customizing the ASAP Icon
You can change the appearance and position of the icon on your website according to your need, using the different customization options available.
To customize the ASAP icon
-
On the Zoho Desk portal, click the Setup icon.
-
Click ASAP under Channels.
The list of active ASAP instances appears.
-
Click the desired add-on name to customize.
The Add-On Details page for that add-on instance appears.
-
Navigate to the Customization tab.
-
Under the Customization tab, choose the desired icon, shape, position, and theme.
You can use one of the default themes or define a custom theme for your add-on window.
-
Click the Save button.
Also read: