Salesforce for Zoho Directory
Prerequisites
A System Administrator role in Salesforce
Configure SAML in Zoho One /Directory
1. If you're a Zoho One user:
- Sign in to Zoho One
, then click Directory in the left menu.
- Go to Marketplace, then click Browse Applications.
- Use the search bar to find and install Salesforce.
2. If you're a Zoho Directory user:
- Sign in to Zoho Directory
, then click Admin Panel in the left menu.
- Go to Applications, then click Add Application.
- Use the search bar to find and add Salesforce.
3. Name your app and enter your Subdomain.
 Note: To find the subdomain of your URL, sign in to salesforce as a system administrator. Click the gear icon, select Open advanced
 Setup , then enter "My Domain" in the Quick Find bar. Click My Domain from the results, scroll down to My Domain Name to find your subdomain. For example, if your Salesforce URL is https://zylker.my.salesforce.com, then your URL Subdomain is "zylker".
4. Click Add.
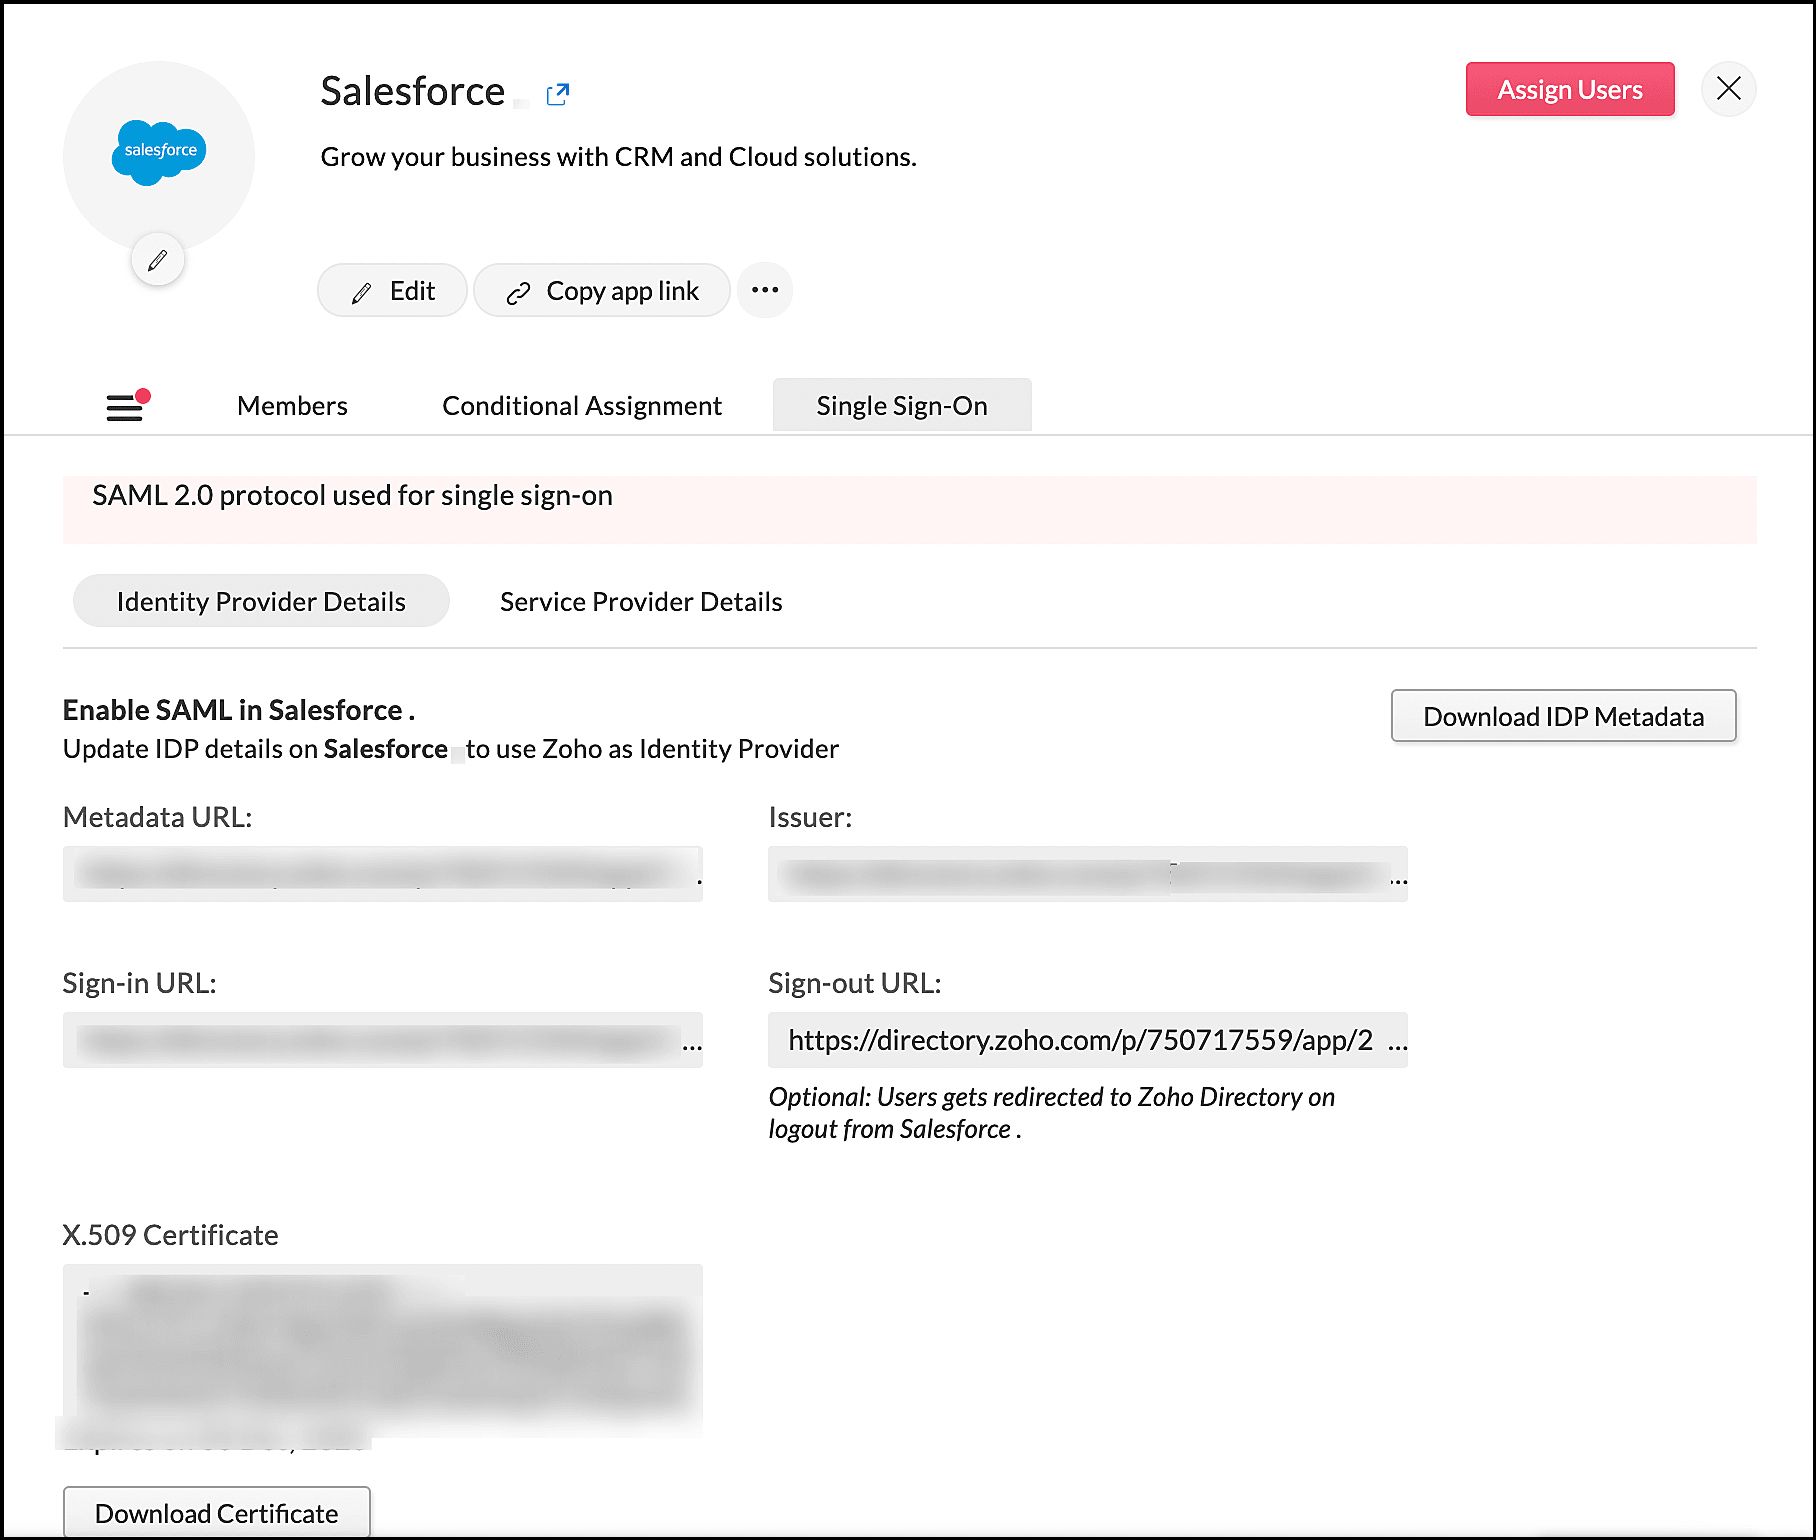
5. Click the Single Sign-On tab.
6. Click Service Provider Details to check and verify the SP details. You can also edit them if needed.
7. Click Identity Provider Details, then click Download IDP Metadata. A metadata file will be downloaded.
Configure SAML in Salesforce
- Sign in to your Salesforce account as a system administrator.
- Click the icon
, select Open Advanced Setup under Quick Settings.
- Enter "Single" in the Quick Find bar and click Single Sign-On Settings below identity from the results.
- Under Single Sign-On Settings click Edit.
- Below the fields Delegated Authentication and Federated Single Sign-on using SAML check Disable login with Salesforce credential and SAML Enabled options, respectively.
- Click Save.
- Under SAML Single Sign-On Settings, click New from Metadata File and upload the IdP metadata file to configure it automatically.
- Click Save.
Just-in-time provisioning
Just-in-time (JIT) provisioning creates a Salesforce account for users during their first SSO attempt, so you don't have to do it manually for each user.
To enable JIT provisioning:
- Under SAML Single Sign-On Settings, click Edit next to your SAML setting name.
- Under Just-in-time User Provisioning, Check User Provisioning Enabled and choose Standard as the User Provisioning Type.
- Click Save.
Note: Standard JIT Provisioning would satisfy most users' needs, but you might want to choose Custom SAML JIT with Apex handler if you need more control over account provisioning.
Test the SAML connection
Return to the Zoho Directory Admin Panel.
- Go to Applications, then click Salesforce.
- Click Assign Users, choose yourself from the list, then click Assign.
- Click the icon
next to the app's name. If everything is working, you should be signed in automatically and taken to Salesforce's homepage.
Make app visible to all users
After successfully testing the SSO, you can make Salesforce available for all users to access from their My Apps pages.
To make Salesforce visible to all users:
- Sign in to the Zoho DIrectory Admin Panel.
- Go to Applications, then click Salesforce.
- Click Unhide.
- You can now access Salesforce from Zoho Directory's My Apps page.