Ecommerce solutions for Shopify
If your store is on the Shopify basic plan, your contacts and their order related information can not be synced to your Zoho Campaigns account.
The Zoho Campaigns and Shopify integration is mainly designed to bridge the gap between your marketing efforts and ecommerce activities. This integration lets you:
- Import your products into Zoho Campaigns for promotions.
- Import your customers and their details.
- Import the details of orders placed in your store.
- Gain detailed insights on your total and average store revenue.
If you've already integrated with Shopify, you can access Zoho Campaigns' ecommerce solution for your Shopify store by disconnecting and re-integrating your Shopify account.
If you re-integrate your Shopify account, existing syncs that you have with Shopify will be disabled.
To connect your Shopify store:
- From the navigation toolbar select Ecommerce.
- Take a quick look at what happens if you connect your store with Zoho Campaigns.
- Integrate with Shopify if you haven't done it yet.
- Upon integrating, your online store and the data in it (customers, products, store domain, currency used) will be connected and synced with Campaigns.
Note : You can integrate only one of your Shopify store into Zoho Campaigns.
Now, let's see the different subtabs in Zoho Campaigns with the integration.
Shopify - Summary
In this section, you can see:
- Total number of orders placed in your store.
- Total revenue generated in your store.
- Average revenue of your store.
- Note: Total revenue calculated will be inclusive of all the taxes and the shipping charges.
Zoho Campaigns - Summary
In this section, you can see:
- Total number of promotional emails sent from Campaigns.
- Total number of automated emails created here.
- Total number of orders placed via the promotions sent from Campaigns.
- Average revenue generated.
- Total revenue generated via Campaigns.
Store products
In this sub tab, you can see your store's products, the product codes, price and the time when they were added or modified.
Customers
Your store's customers will be listed in the Customers subtab with all their details. Select individual customers to learn more details about them, such as the purchase they made, revenue they've generated, their most recent purchase, and more. In Campaigns, your customers will be divided into two categories.
Marketing allowed
These are the customers who have opted in for and are eligible to receive emails from you. These customers, at some point of time, might have entered their email addresses on your website and opted in to receive emails from your store.
Marketing not allowed
These are the customers who might have either not subscribed to your newsletters or might have unsubscribed or opted out to receive emails from your store. Customers who enter their email addresses in any of your forms but did not check the box to receive emails from your store will be considered as Marketing not allowed.
Create promotion
To create a product promotional email campaign:
- From the navigation toolbar choose Ecommerce.
- Click Create in the top-right corner of the page and click Promotional Email or click Create Promotion in the Promotion subtab.
- Enter the basic info of the campaign and click Next.
- Select the products that you want to promote in the campaign.
- Select the mailing lists to which you want to send the campaign.
Alternatively, you can create a promotional campaign for your online store just like how you create a advanced campaign.
- From the navigation toolbar, choose Email Campaigns.
- Click Create Campaign in the top-right corner.
- Scroll down to the Ecommerce section and click Create New dropdown.
- Select either Regular campaign or A/B test based on your choice.
- Select the store for which would you like to create a promotional campaign.
- Integrate with Shopify if you haven't done so yet.
- Enter the basic info of the campaign and click Next.
- Select a template for your campaign.
- Use the Product component in the template editor to add your store products in the content.
- Choose the mailing lists to which you want to send the campaign.
- Send your campaign.
Automated emails
One of the most crucial parts of your sales funnels is customer workflows and re-engagement using automated follow-up emails. Interpreting the process that customers undergo when they explore, analyze, and purchase from you is essential to know the next step that you need to take to keep the engagement pushing along the way. There are two types of automated emails that you can create for your customers.
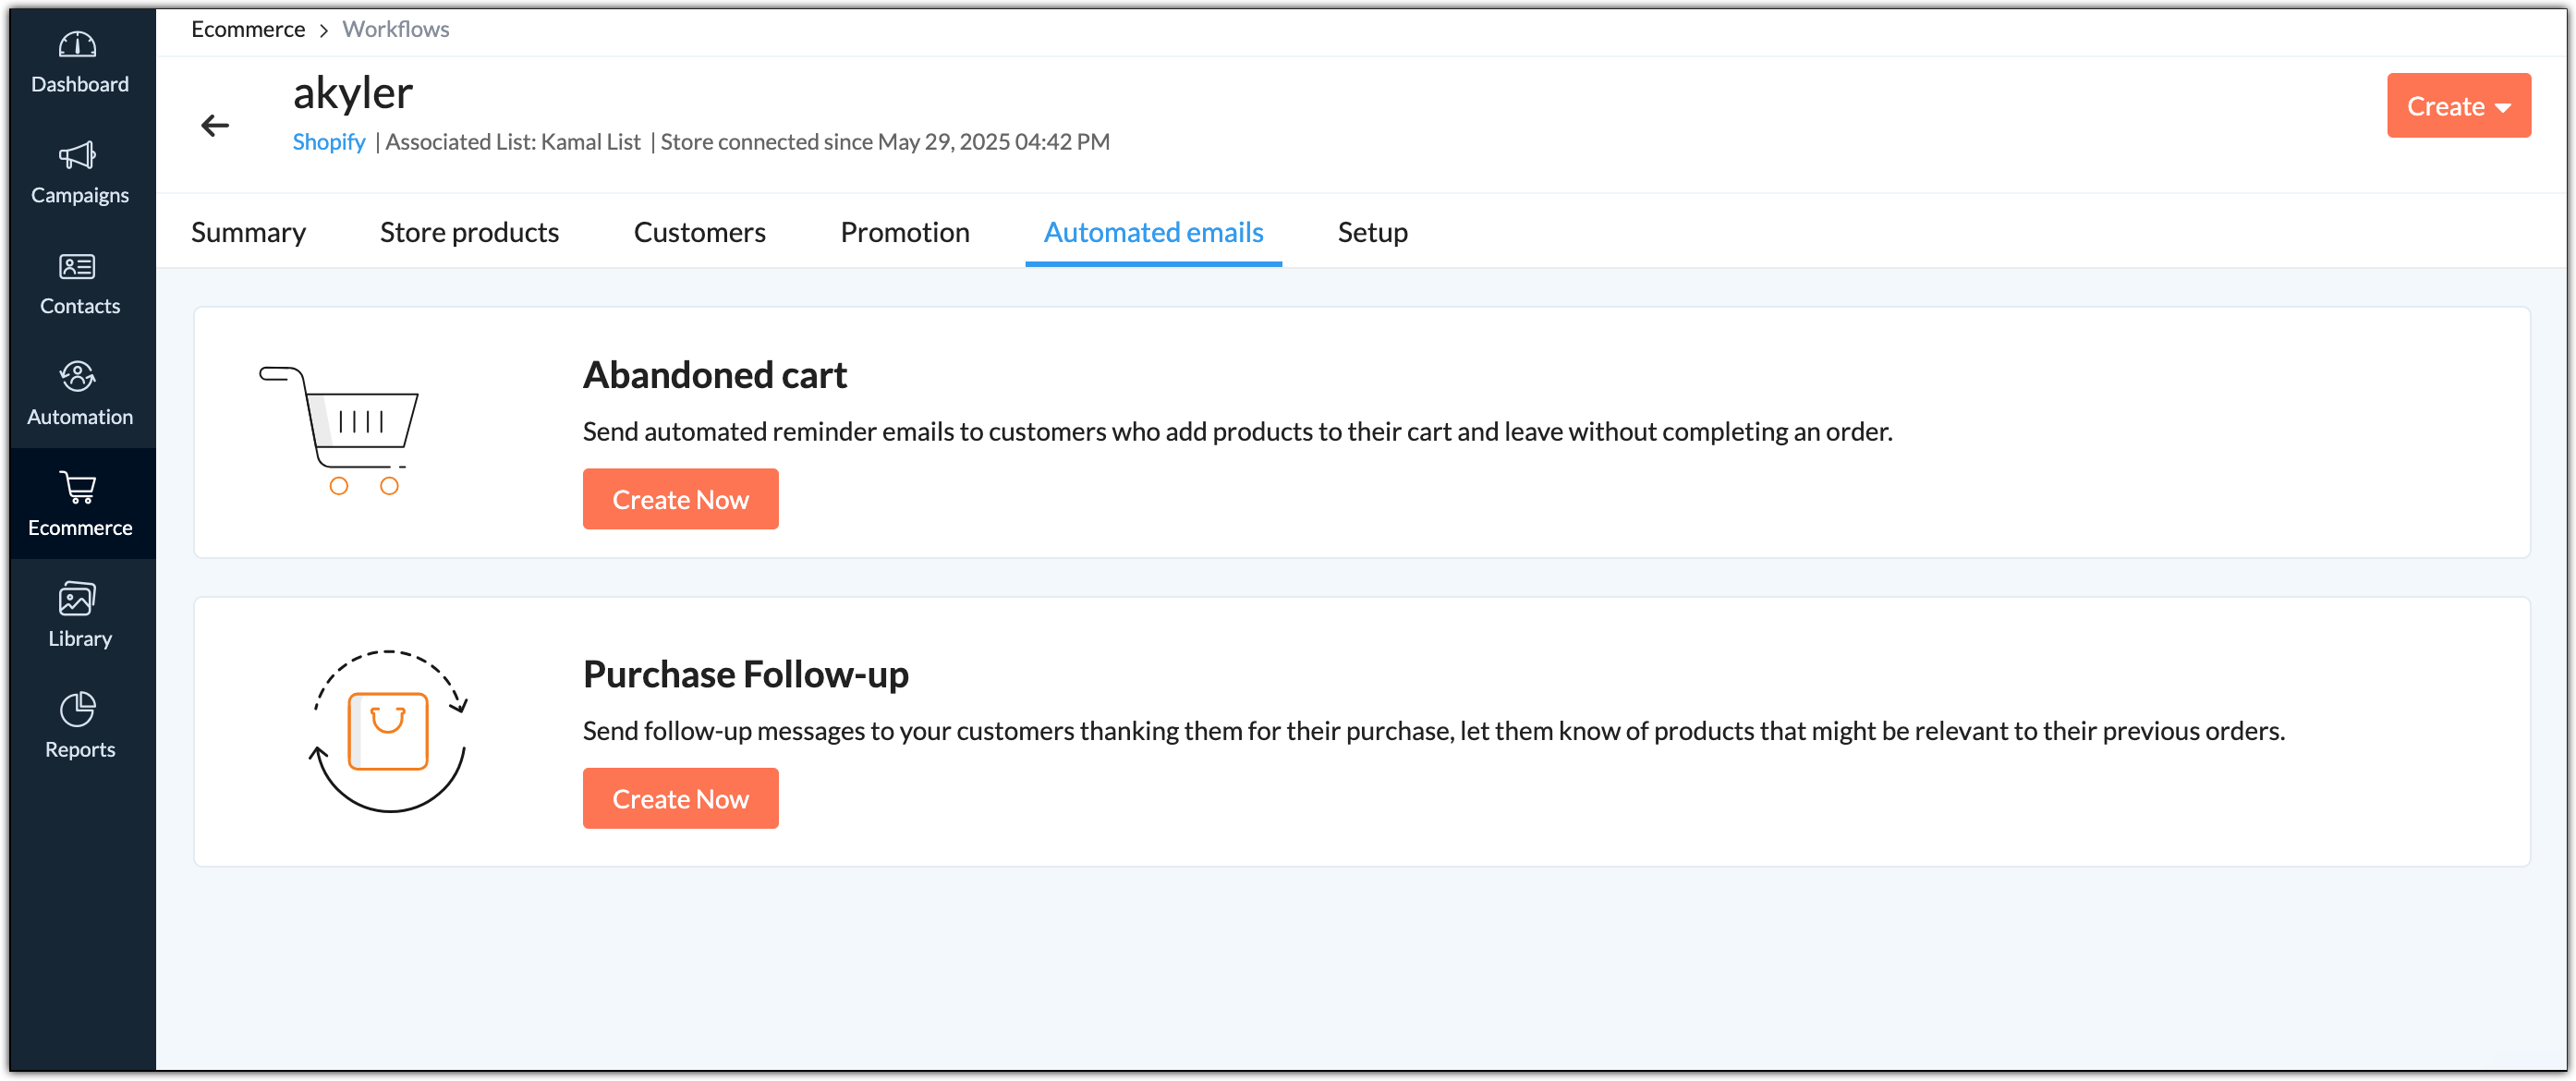
- Abandoned cart: Send automated reminder emails to customers who add products to their cart and leave without completing an order using Abandoned cart template.
- Purchase follow-up: Send follow-up messages to your customers thanking them on their purchase, let them know of products that might be relevant to their previous orders using Purchase follow-up. This template will be triggered only on completion of a purchase.
Segmentation
Segment your customers based on the items they have or have not purchased, average and the total amount they have spent on purchases, total orders, and the most recent order they have placed. Segment your customers based on a certain criteria for personalized and relevant marketing communications with them. To create a segment for your ecommerce customers:
- From the navigation toolbar, choose Contacts and select Manage lists.
- Select the mailing list that you have connected with your store to manage your customers.
- Choose Segments subtab at the top and click Segment from the dropdown.
- Click the top-right Add icon and select Segment from the dropdown.
- Alternatively, from the navigation toolbar, choose Contacts and select Segments.
- Click Create button on the top-right corner and select Segment or Bulk Segment.
- In segment creation page, do the following:
- Name - Give a name to your segment.
- Criteria - In this case, select a relevant ecommerce criteria.
- Click Save.
Note:
- You can choose to set more than one criteria while creating segments.
- Segments created before November 17, 2021 will be listed under the respective mailing lists until September 30, 2022. You cannot edit these segments, however you can clone them.
- Segments created after November 17, 2021 are organization-level segments and they will be listed under Contacts -> Segments.