Routing forms


A routing form is a pre-booking form that helps direct customers to the right booking page before they schedule an appointment. It collects information from customers and evaluates their responses to automatically route them to the most appropriate booking page. This is ideal for businesses that offer multiple services or locations, helping customers reach the right booking page quickly while improving scheduling accuracy and provides a more personalized booking experience.
1. How routing forms work
You can create forms with relevant fields and configure routing logic that determine where customers are directed after submitting the form. Each routing form has a unique shareable link, similar to a booking page, that you can send to customers. Customers submit the routing form by providing the required information, and based on their responses, they are directed to one of the following destinations:
- Booking page – Route customers to the appropriate booking page so they can schedule the right event type/service with the right staff or resource.
- External URL – Redirect customers to an external website for the next step in the process.
- Custom message – Display a personalized message with instructions or additional information instead of redirecting customers.
Example
A healthcare provider offers appointments for multiple specialties, including general medicine, cardiology, and dermatology. Before booking, patients fill in a routing form with questions about their symptoms. Based on their responses, the routing logic evaluate the information and automatically direct each patient to the appropriate specialist's booking page. This ensures patients schedule the right appointment without requiring manual assistance.
A healthcare provider offers appointments for multiple specialties, including general medicine, cardiology, and dermatology. Before booking, patients fill in a routing form with questions about their symptoms. Based on their responses, the routing logic evaluate the information and automatically direct each patient to the appropriate specialist's booking page. This ensures patients schedule the right appointment without requiring manual assistance.
1.1 Routing logic
Routing logic determines where customers are directed after they submit a routing form. You can route customers based on the values they enter in the form by creating conditions using the form fields and defining a destination for each condition.
For example, a hospital can ask patients to select their Reason for visit. If a patient selects Dental, they can be directed to a Dentist's booking page. If they select Cardiology, they can be directed to a Cardiologist's booking page. If they select Orthopedics, they can be directed to an Orthopedist's booking page. You can also create more advanced routing by combining multiple conditions using AND or OR operators. Here, the hospital can configure rules such as:
- Reason for visit = Orthopedics AND Patient type = New → Direct the patient to the New Patient Orthopedics booking page.
- Reason for visit = General OR Visitor type = Medical representative → Direct the visitor to the Front Desk booking page.
Watch how routing forms work
Who can access this feature? | |
Available on | |
Super admin and admins | Can create and manage routing forms |
Workspace admins | Can create and manage routing forms within their assigned workspaces. |
Managers and staff | Cannot access the routing forms |
2. Create a routing form
- Click the Admin Center
icon and select Routing Forms under Organization.
- Click New Routing Form. The Create Routing Form pop-up will be opened.
- Enter a form name in the Create Routing Form pop-up and Click Create.
- Click +Add Field in the Form tab to create fields that collect customer information for routing.
- Add the required fields to collect customer information using the +Add Field button in the top-right corner of the Form tab. The added fields appear under the Fields section.
- Provide the label for the form submission button in the Button section.
- Click + Add Logic in the Logic tab to define routing logic based on customer responses.
- Configure the routing logic based on form field values:
- Define the If condition by selecting a form field, choosing the appropriate operator, and specifying the required value.
Note: Available operators vary by field type and may include options such as equals, contains, greater than, before, domain is, and is empty. - Select AND or OR if you want to combine multiple criteria to the if condition.
- AND: All conditions must be met.
- OR: At least one condition must be met.
- Click + Add condition to add more If conditions to the routing logic.
- Select AND or OR to combine multiple If conditions.
- Define the Then action by selecting a destination under Route to.
- Choose one of the following routing destinations:
- External URL: Redirect customers to an external website or webpage.
- Custom Message: Display a custom message to customers after they submit the form.
- Booking Page: Click the dropdown to choose the event type to direct customers to a required booking page.
- Click Save to apply the changes.
- Click + Add Logic to configure multiple logics for the routing form.
- Select a destination under Otherwise, Route to for customers whose responses do not match any of the configured logics.
- Choose one of the following fallback destinations:
- Booking Page: Click the dropdown to choose the event type to direct customers to a required booking page.
- External URL: Provide any URL to redirect customers to a default external website or webpage.
- Custom Message: Provide the custom message to be displayed when no conditions are met.
Once configured, share the routing form link with your customers. When customers submit the form, their responses are evaluated against the configured routing logic and they are automatically directed to the appropriate destination.
3. What to expect after creating a routing form
Once a routing form is created, you can share it with your customers. As they submit the form, you can track and review each submission from the Responses tab. The Responses tab provides the following details for each submission:
- Submitted On – Displays the date and time when the form was submitted.
- Result – Shows the routing outcome generated based on the customer's responses, such as a booking page, custom message, or other configured destination.
- View – Opens the complete response details, allowing you to review the answers provided by the customer and the resulting routing action.
This helps you monitor form activity, understand customer requirements, and verify that the configured routing logic is working as expected.
4. Manage routing forms
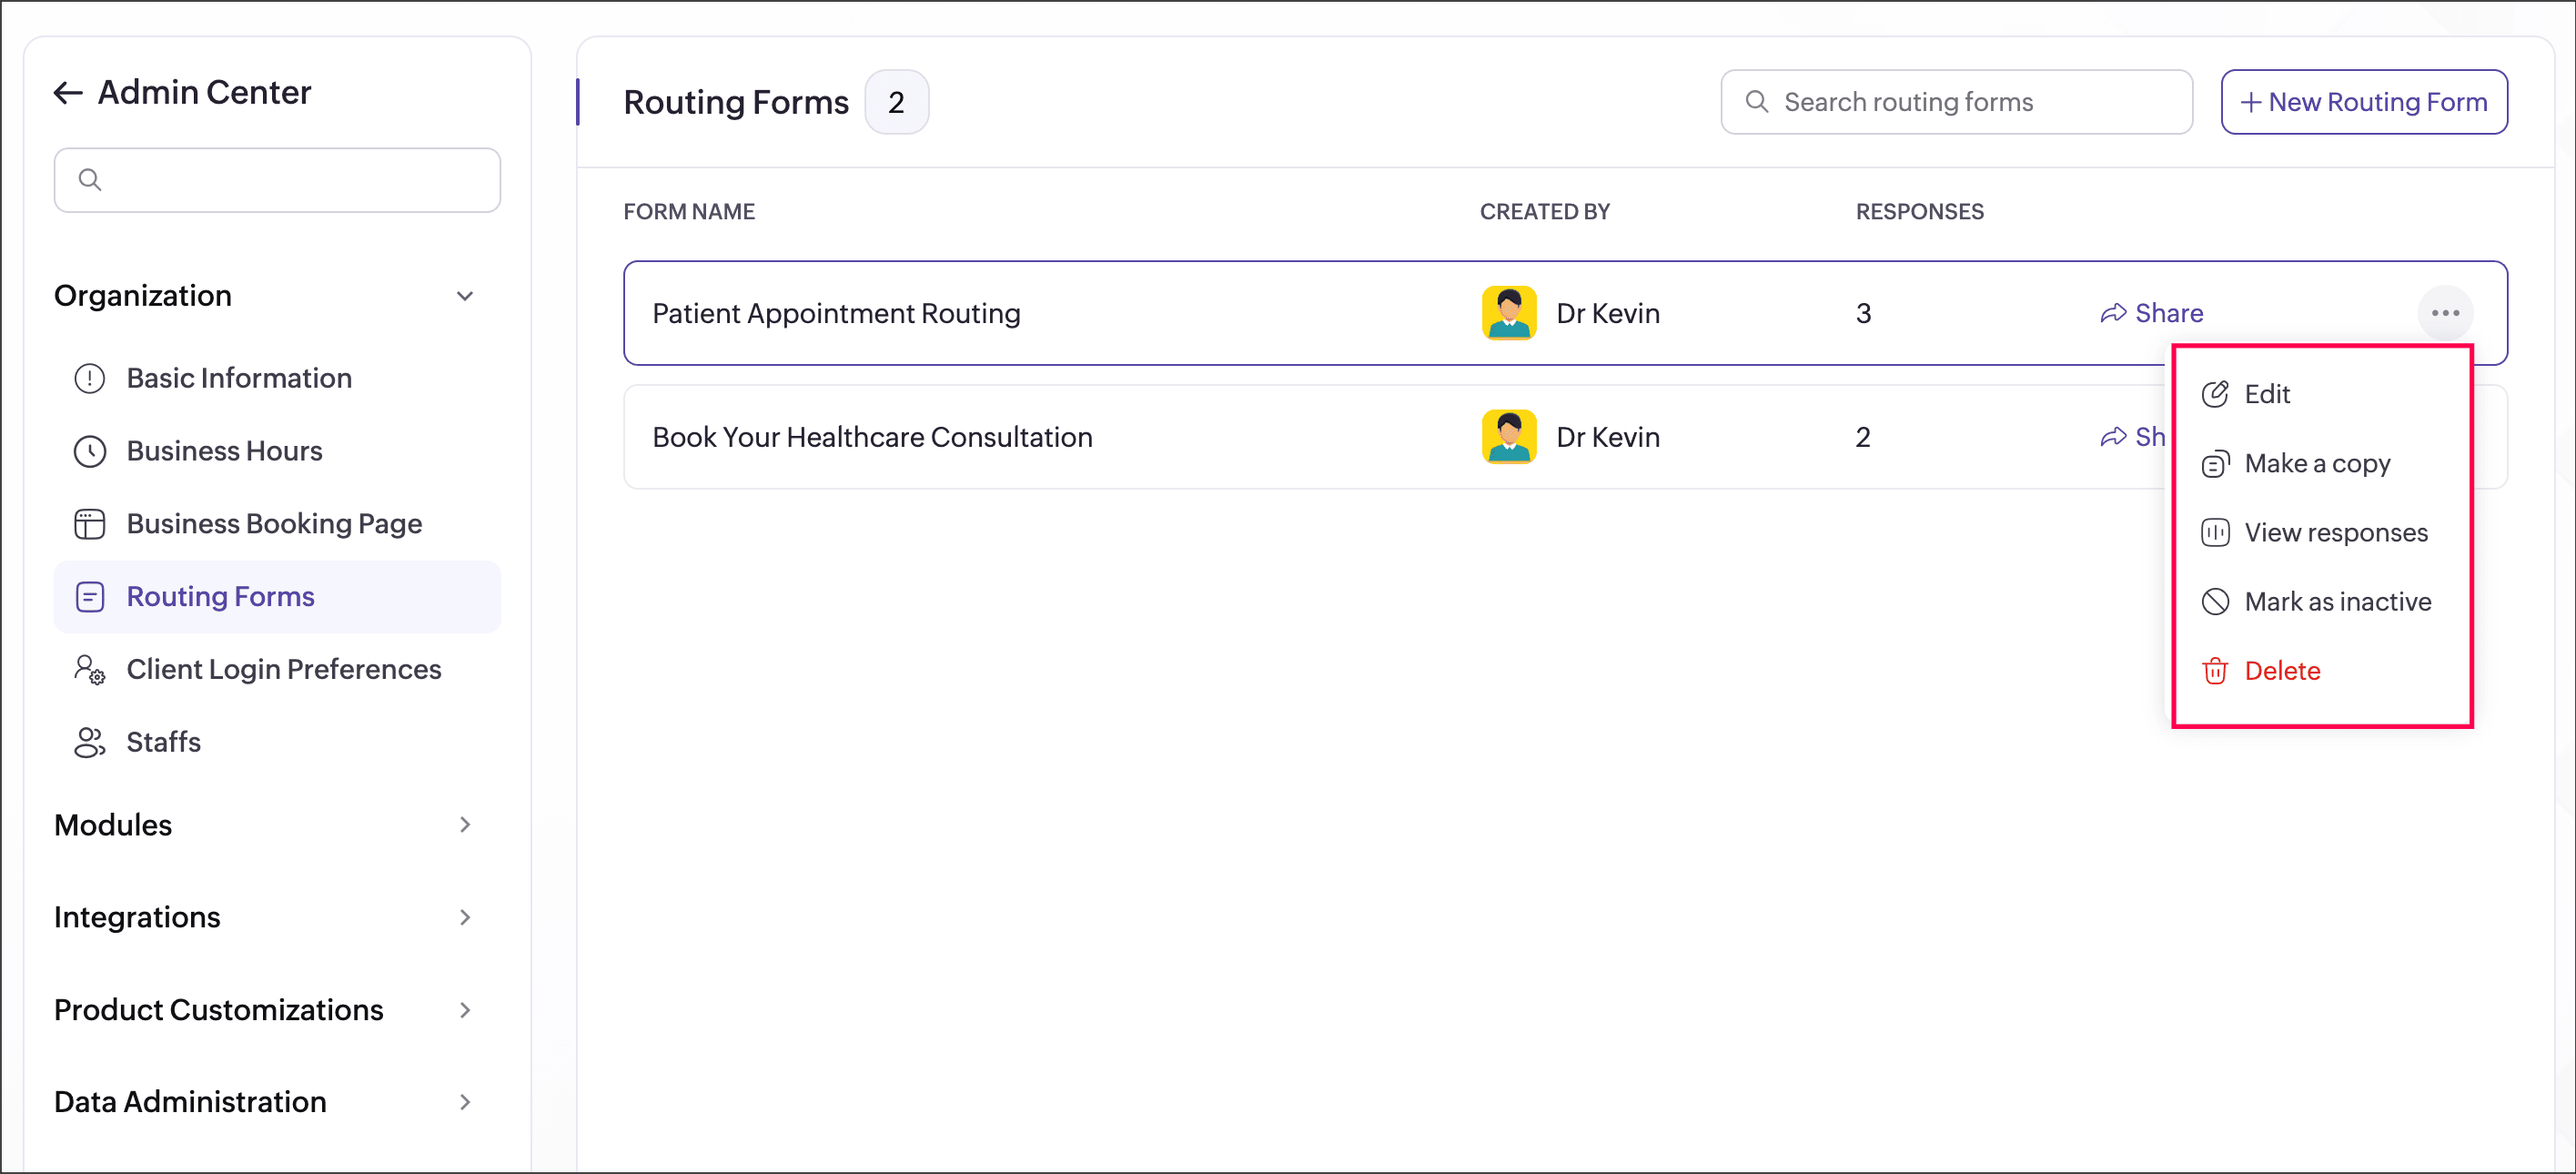
The Routing Forms list displays all the created forms along with key details such as the Form Name, Created By, Responses, and Share status. You can use the option  icon next to a form to manage its settings. These actions allow you to update form settings, copy the form, view responses, control form availability, delete forms, and perform other form-related tasks from a single place.
4.1 Share a routing form
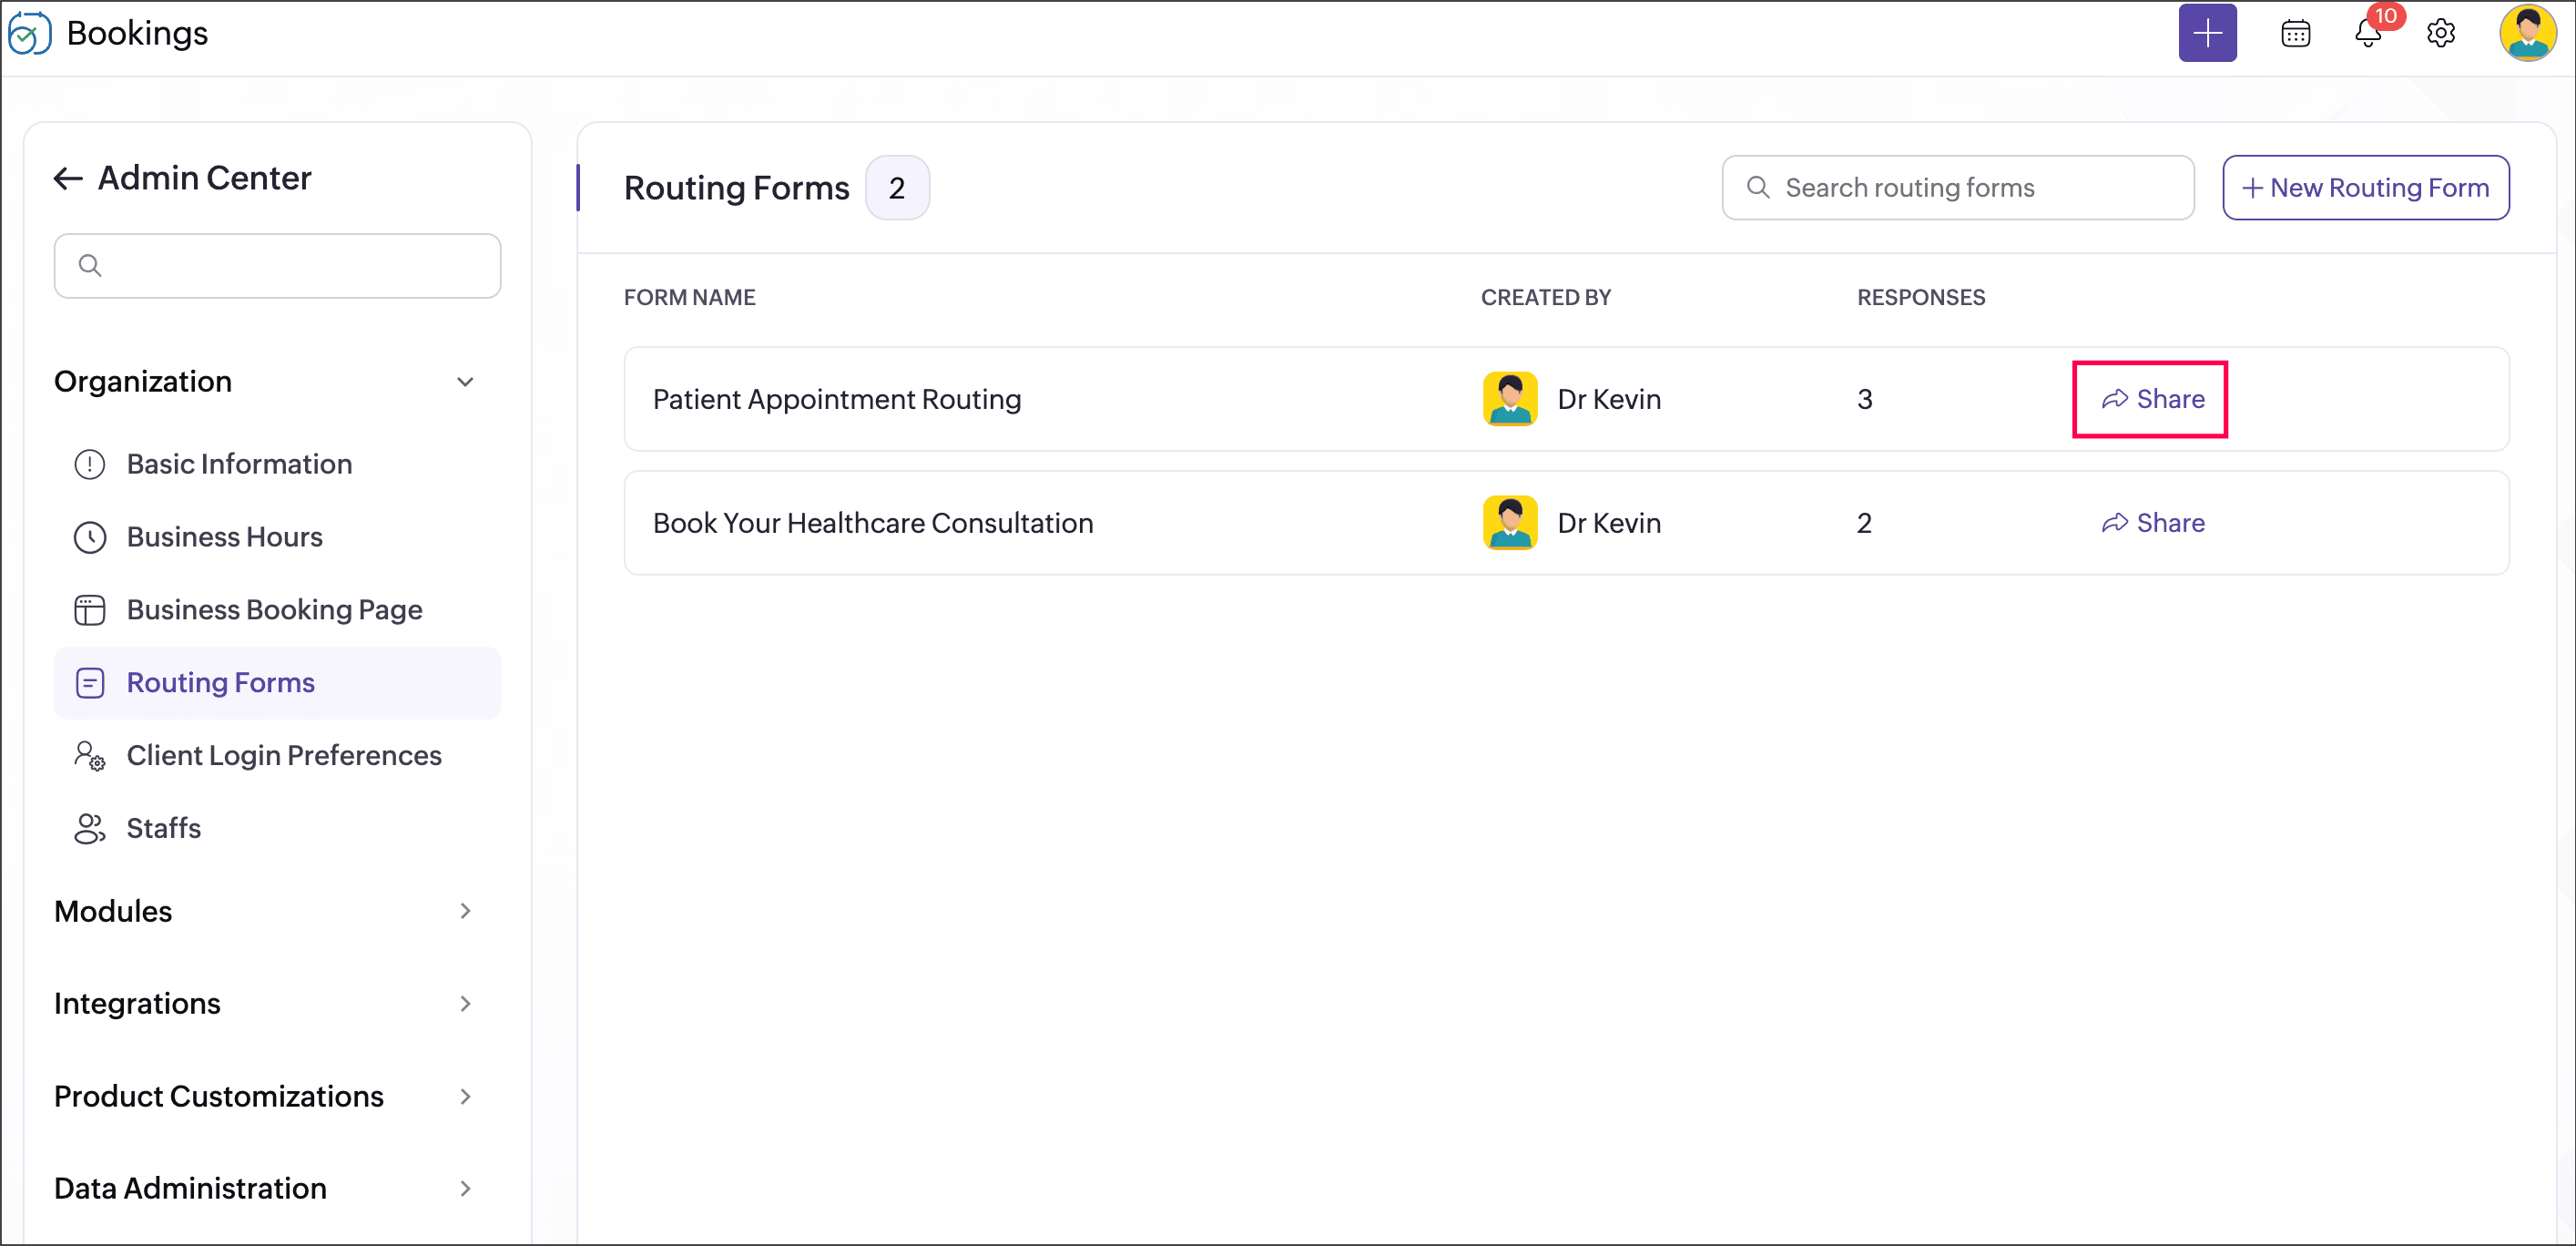
You can share the routing form directly with the customers or use routing forms on websites to guide customers through a personalized scheduling experience before they reach a booking page.
To share routing form
To share routing form
- Navigate to the Routing Forms under Organization in the Admin Center
.
- Click Share adjacent to the required routing form.
- Copy and share the URL with customers or embed it on your website.
4.2 Edit a routing form
You can edit a routing form to update its routing logic, form fields, button text, and other settings. This allows you to modify the customer journey and routing experience without creating a new form.
To edit a routing form:
- Navigate to the required routing form and click the option
icon.
- Click Edit.
- Make the required changes and save the form.
4.3 Copy a routing form
You can duplicate an existing routing form to quickly create a new form with the same configuration. The copied form includes the original form fields, routing logic, and settings, which can be modified as required.
To copy a routing form:
- Navigate to the required routing form and click the option
icon.
- Click Make a copy. A pop-up box will be opened.
- Provide a name for the duplicating routing form and click Copy.
The routing form will be duplicated successfully and can be shared with your customers.
4.4 View routing form responses
You can view all responses submitted through a routing form. Use these responses to understand customer requirements, track form submissions, and review the routing outcomes generated based on customer inputs.
To view routing form responses:
- Navigate to the required routing form and click the option
icon.
- Click View Responses.
- Review the submitted responses.
- Click View to see the form entries of the response.
4.5 Mark a routing form as active or inactive
You can activate or deactivate a routing form based on whether it should accept new submissions. Deactivating a routing form prevents customers from accessing or submitting the form temporarily, while reactivating it makes the form available for use again.
To mark a routing form as active or inactive:
- Navigate to the required routing form and click the option
icon.
- Click Mark as Active or Mark as Inactive.
4.6 Delete a routing form
You can delete a routing form that is no longer required. Deleting a routing form permanently removes the form and all its collected responses. Deleted routing forms and their responses cannot be restored.
To delete a routing form:
- Navigate to the required routing form and click the option
icon.
- Click Delete.
- Confirm the deletion.
 Note: Deleting a routing form is permanent and cannot be undone.
Points to note
Changes made to a routing form apply only to future submissions and do not affect existing responses.
Routing outcomes depend on the configured conditions. Review your routing logic carefully before sharing the form with your customers.
FAQ
Can I route customers to different booking pages based on their answers?
Yes. You can create routing logic using form responses and direct customers to different booking pages based on the conditions you define.
What happens if no routing condition matches?
Customers will be directed to the destination configured under Otherwise, Route to.
Can I view the routing results for each appointment?
Can I edit a routing form after it has been shared?
Yes. You can edit the form fields, routing logic, button text, and other settings at any time. Changes will apply to future submissions.
Can I temporarily stop customers from using a routing form without deleting it?
Yes. You can mark the routing form as inactive. Inactive forms cannot accept new submissions and can be reactivated whenever required.
Related Links