Set up sync with Zoho Creator
Zoho Creator is an AI-powered, low-code application development platform that allows users to create custom applications on their own, with minimal coding experience. The intuitive drag-and-drop interface empowers developers and business users to build web and mobile applications that satisfy all their unique requirements with ease.
Any Zoho Creator application will have a form, reports and pages. In Zoho Creator's reports section, you can view the contacts and other details. These contact details can be imported from Zoho Creator to your Zoho Campaigns account.
Any Zoho Creator application will have a form, reports and pages. In Zoho Creator's reports section, you can view the contacts and other details. These contact details can be imported from Zoho Creator to your Zoho Campaigns account.
Setup a Sync
To sync your Zoho Creator account with Zoho Campaigns:
- From the Navigation Toolbar, choose Sync Settings under Contacts.
- Hover over Zoho Creator and click Associate New Account. Click on Continue in the new page that appears.
- The two apps will be connected. You will see a screen as shown below. You can proceed with adding a sync.
- Click on Active Syncs to view the page where your active syncs are listed. In this page you can click on Add New Sync to add a new sync.
- Once you click on Add New Sync you will see a page where you can set up a new sync. Select the module to be synced. Once you select the module, all the records in that module
from Zoho Creator will be synced to All Contacts
view of Zoho Campaigns.
- Enter the following details in Set up Sync page,
- Application Name - Select the Zoho Creator application from which you want to import data.
- View Name - Select the corresponding view from which contacts can be imported.
- Select the List in Zoho Campaigns to which you want to import the contacts.
- Choose Subscription type: Marketing or Non-marketing.
- Select the topics to associate to the synced contacts.
- Choose the Lawful basis for communication.
- Enable Update empty field value if
required. By enabling this, values of fields removed in Zoho Creator
will also be updated with empty values in the respective field of Zoho
Campaigns.
- Schedule a Sync time to sync the records periodically. However, the first sync will be initiated immediately as soon as you initiate a sync.
- Click Next.

Notes:
- Both
your Zoho Campaigns and Zoho Creator accounts must be
registered under the same email address for this integration to take
place.
- It is not possible to set up multiple syncs using the Add New Sync option. Only one sync can be set up.
- In order for you to choose the Topics, you need to have more than one topic created in your Zoho Campaigns account.
- In Zoho Campaigns, under Settings -> Compliance Settings -> if you enable GDPR Settings, the Lawful basis for communication option will be available for choosing when setting up the sync.
Map your Fields
In Map your Fields, you can choose the Zoho Creator fields such as Email Address,
First Name, Last Name, Mobile Number for mapping against the fields you create in
Zoho Campaigns.
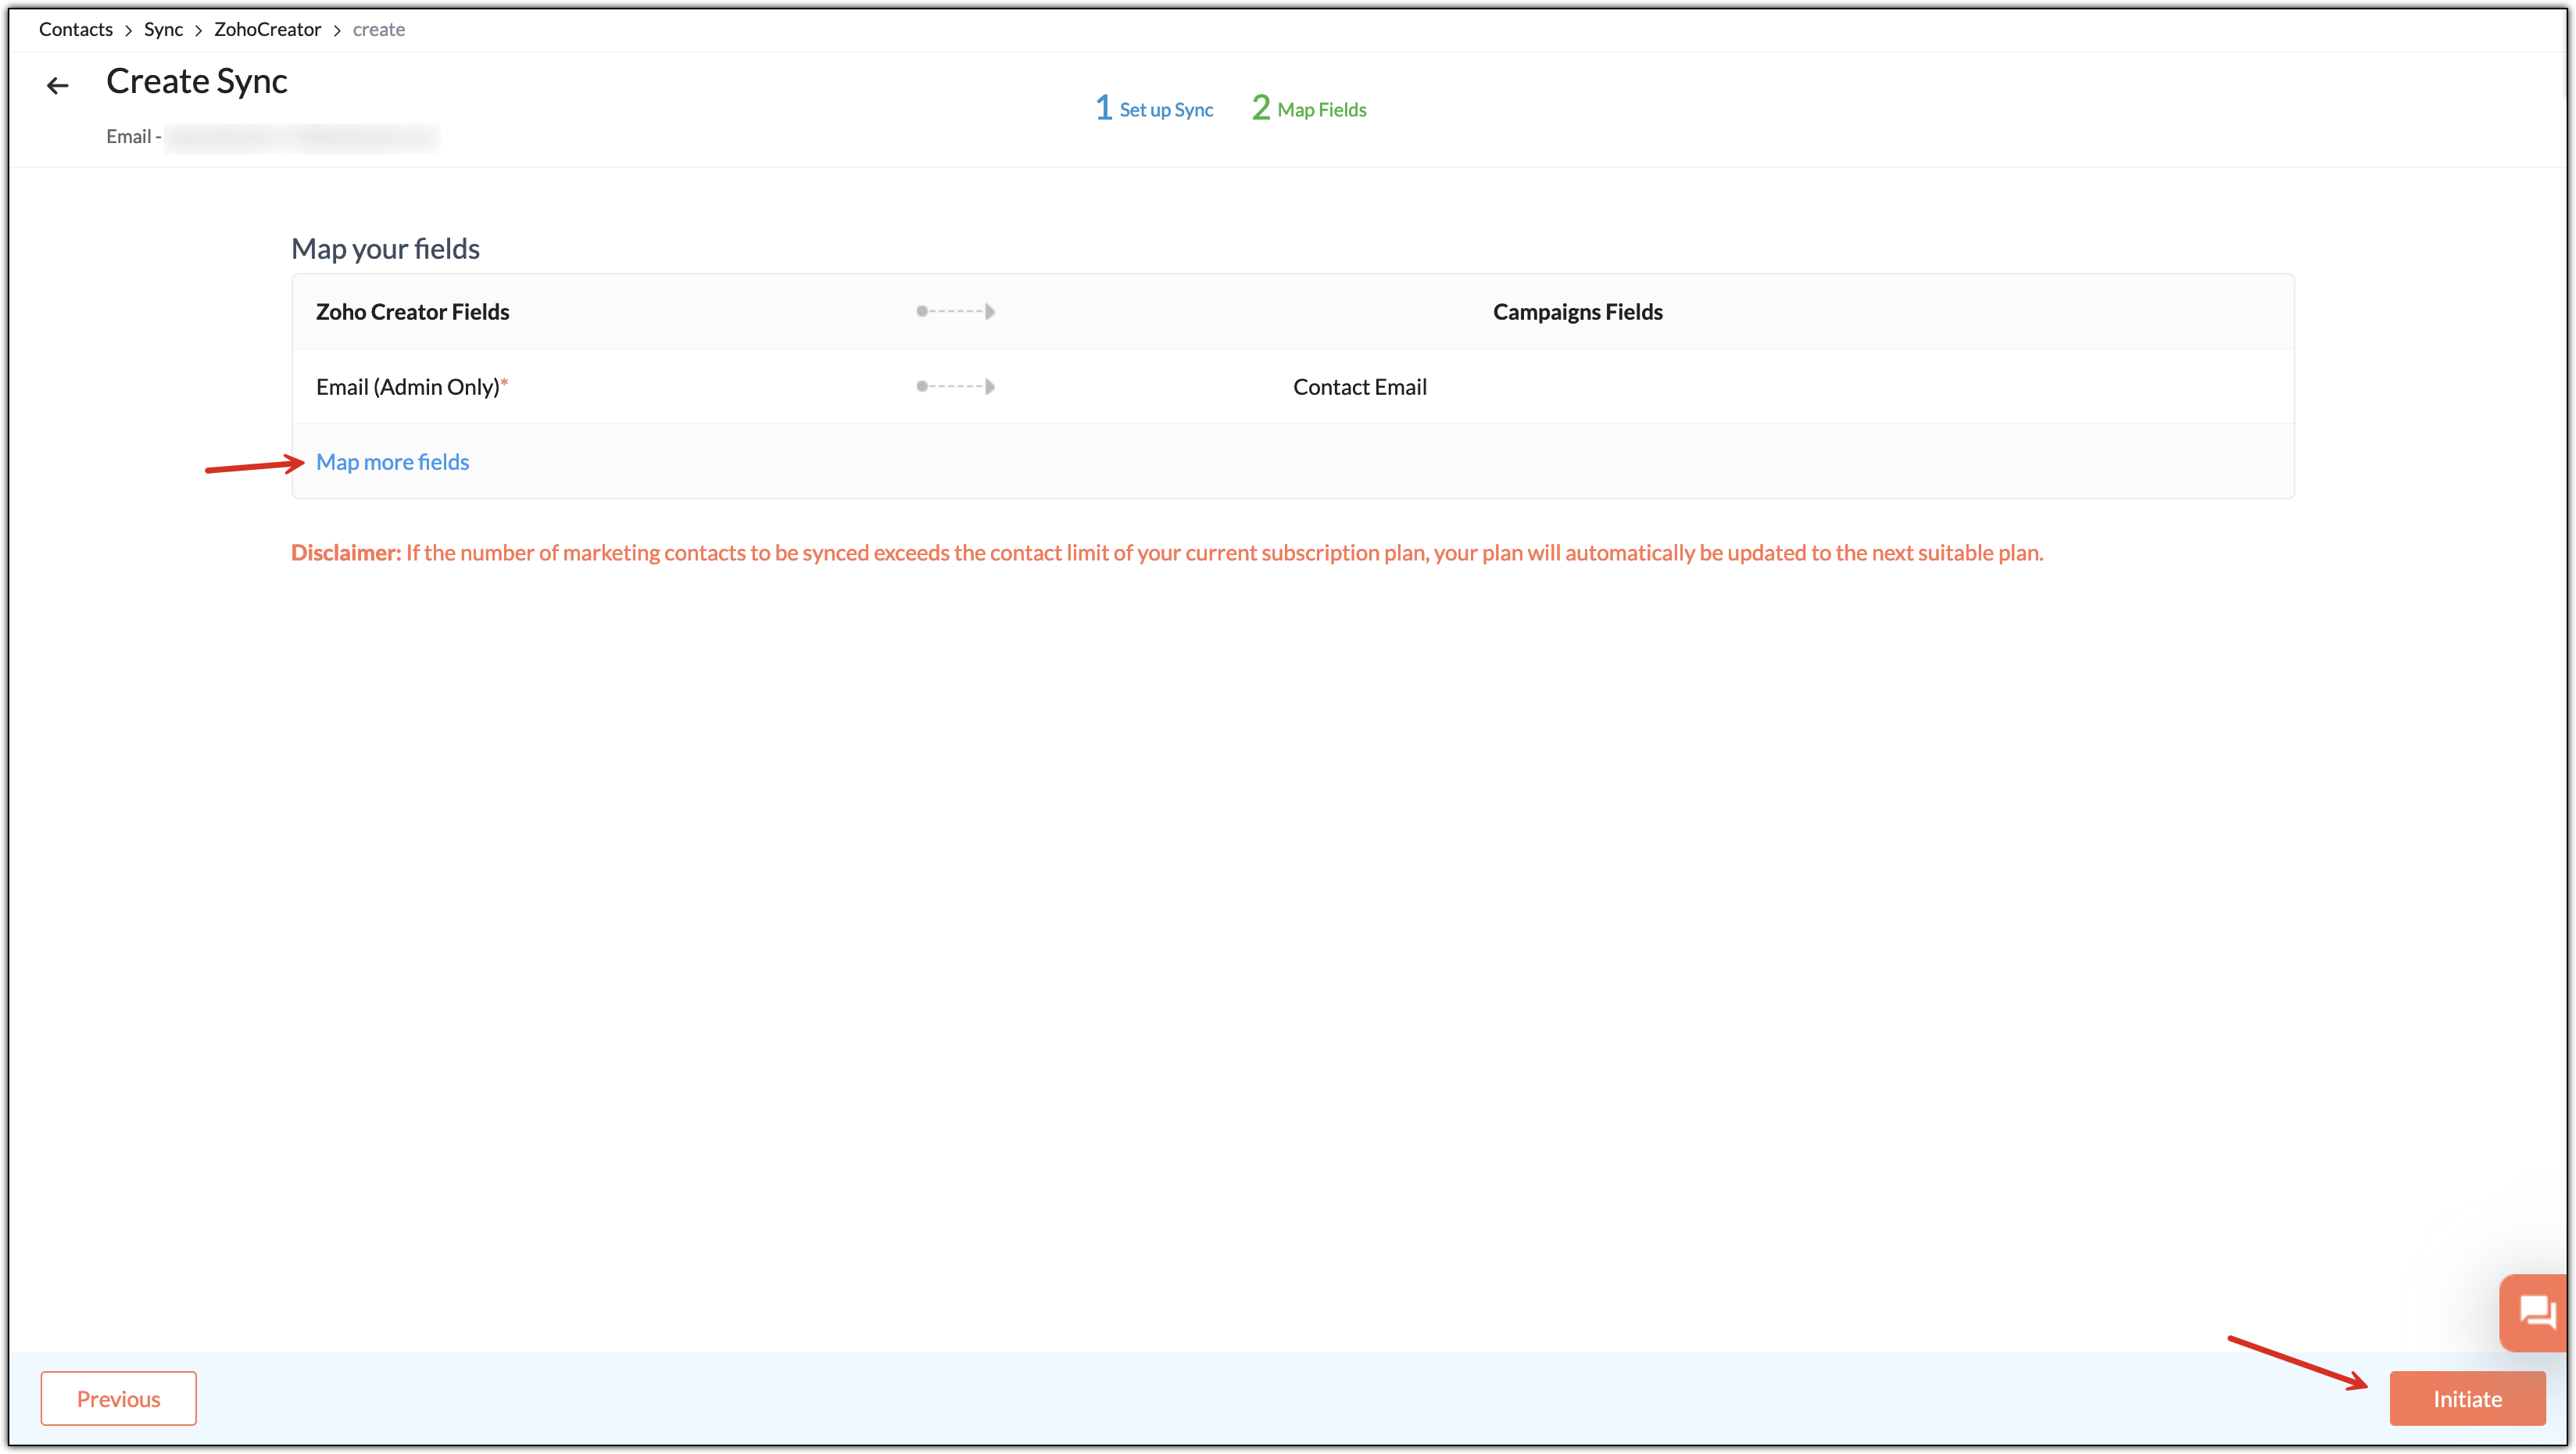
- Click Map more fields to map additional fields.
- Click Initiate once you are done.
- The New Field checkbox above the Zoho Campaigns field will automatically create a new
field with the same name as the Zoho Creator field selected if that
field is already not present in Zoho Campaigns.
- When you click on Initiate once the field mapping is done, you may see a pop-up regarding the Disclaimer about auto-upgrade.
- Once the sync is completed, you will see the Configuration screen of the
sync where you can find essential information about the sync.
Note:If you want to map a field from Zoho Creator against a Zoho Campaigns field but are not able to find this field in the drop-down, it may be because this field would not be present in the particular view of Zoho Creator that you have synced. You must include that field in the view. For that, you need to edit the application in Zoho Creator, click on this view from left side, hover over the view and choose Configure Fields for Web option. In the slide-in window that appears, click on Add Fields and include the desired field in the view.
Sync Detail View
To see the detail view of the sync,
- From the Navigation Toolbar, choose Sync Settings under Contacts.
- Hover over Zoho Creator. Click on the Active Syncs to see the list of syncs.
- Click on the sync to view the details of the sync such as the Configuration, Field Mapping, and Sync History.
- If you click on Pause Sync button at top right, the sync will be paused.
- You can click on Resume Sync button to resume the sync.
Edit Sync Configuration
- From the Navigation Toolbar, choose Sync Settings under Contacts.
- Hover over Zoho Creator. Click on the Active Syncs to see the list of syncs.
- Click on the sync name to see the sync detailed view.
- Click Edit at top right to edit the sync.
- Click Next to edit field mapping. Then, click Initiate.
Sync History
To view sync history:
- Click Contacts in the Navigation Toolbar, then click Sync Services.
- Hover over Zoho Creator. Click on the Active Syncs to see the list of syncs.
- Click on a sync to view the details of the sync such as the Configuration, Field Mapping, and Sync History.
- Click on Sync History tab at the top.
- Here you can see a detailed view of your sync list:
- Sync time - The time at which the sync was performed.
- Total records - Total number of contacts synced at the given time.
- Added - Number of new contacts added at the given time.
- Updated - Number of existing contacts updated.
- Skipped - Number of contacts not synced since they didn't match the sync criteria.
The icon beside the skipped count allows you to export the list of the
skipped records.
Disable Integration
To disable the integration between Zoho Campaigns and Zoho Creator:
- Go to Settings. Under Integration section click on Apps.
- Search for Zoho Creator, hover over it, and click on View details.
- At far right of the next page click on Deny.
- In the pop-up that appears, click on Go Ahead once you've read the effects of disabling this integration.