Google Drive
Your form attachments will be saved to Google Drive when you choose this option.
To do this,
- In your form builder, go to Settings > Submissions & Storage > Manage Form Attachments from the left menu.
- Choose Google Drive.
- Authenticate Zoho Forms to access your Google Drive account.
- Choose between the options to create folders automatically or manually map file attachments to specific folders in Google Drive.
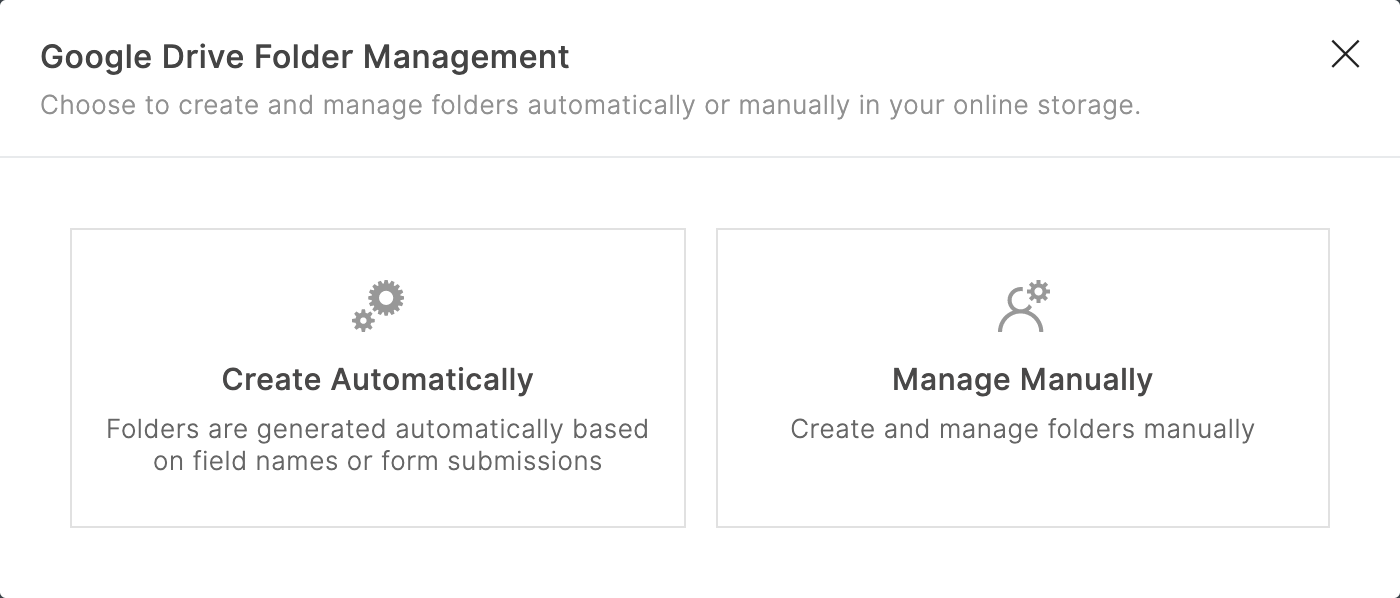
Create Automatically
When you choose Create Automatically, you can either choose to create folders automatically in the file attachment field's name or create separate folders dynamically for each form entry to store the files uploaded.
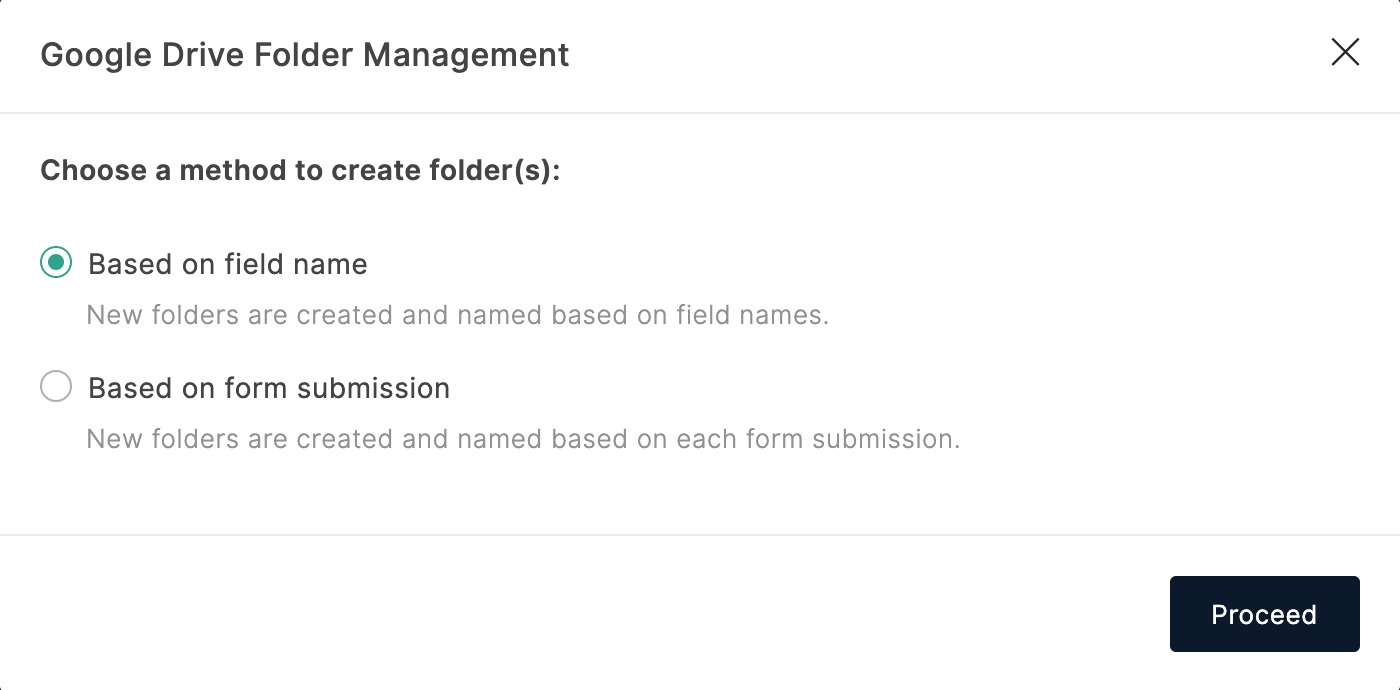
If you choose to create folders automatically based on field name,
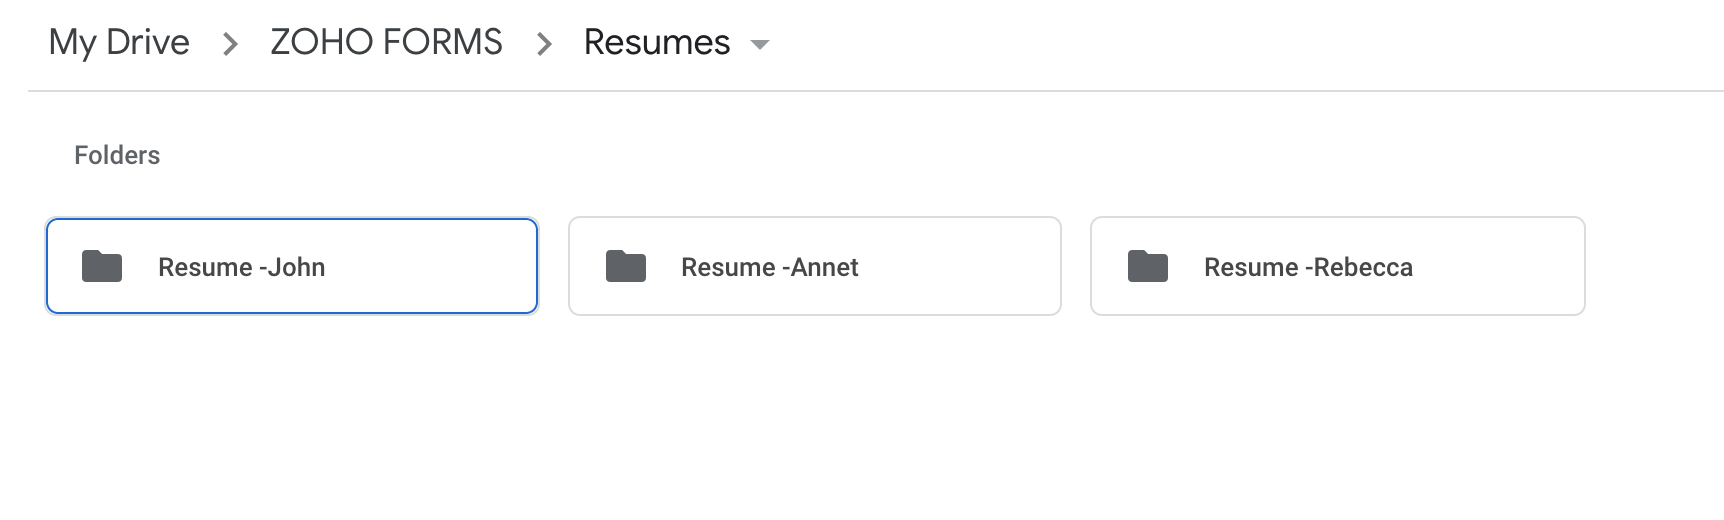
- A new folder labeled as ZOHO FORMS will be created in Google Drive.
- A subfolder will be created in the name of the form (e.g., Job Application) under ZOHO FORMS.
- All attachments from this form will be saved in folders created in the corresponding file attachment field's name (e.g., Resume, Experience certificate, passport).
Here is an illustration showing the folder structure in Google Drive:
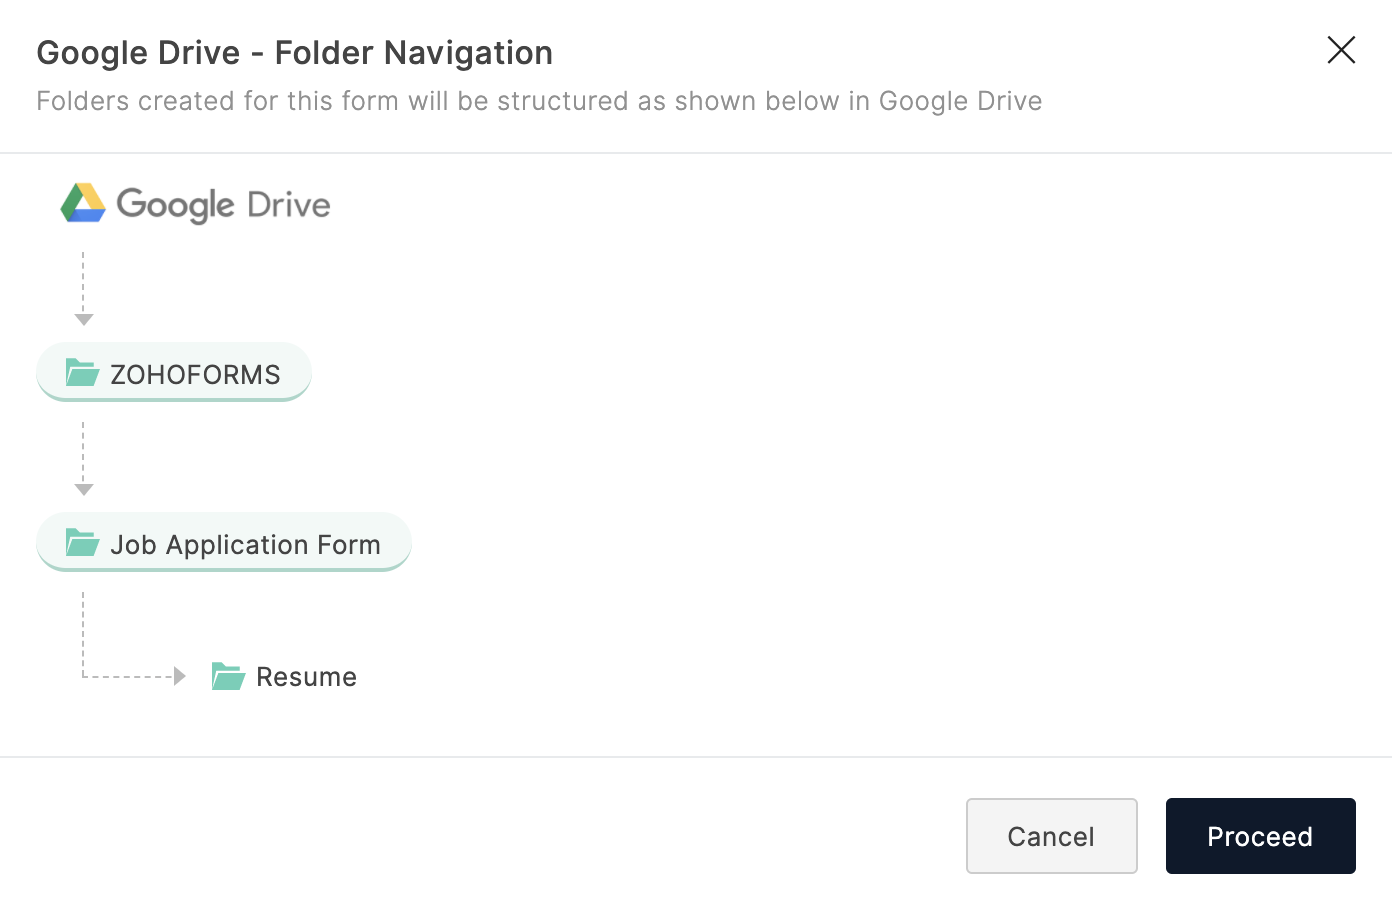
Click Proceed.

Note:
- If you choose to create folders automatically based on field name, you cannot remap attachment fields to other folders for saving the files. However, you will be able to rename file attachments when you save them in Google Drive.
- The file name can have a maximum of 150 characters
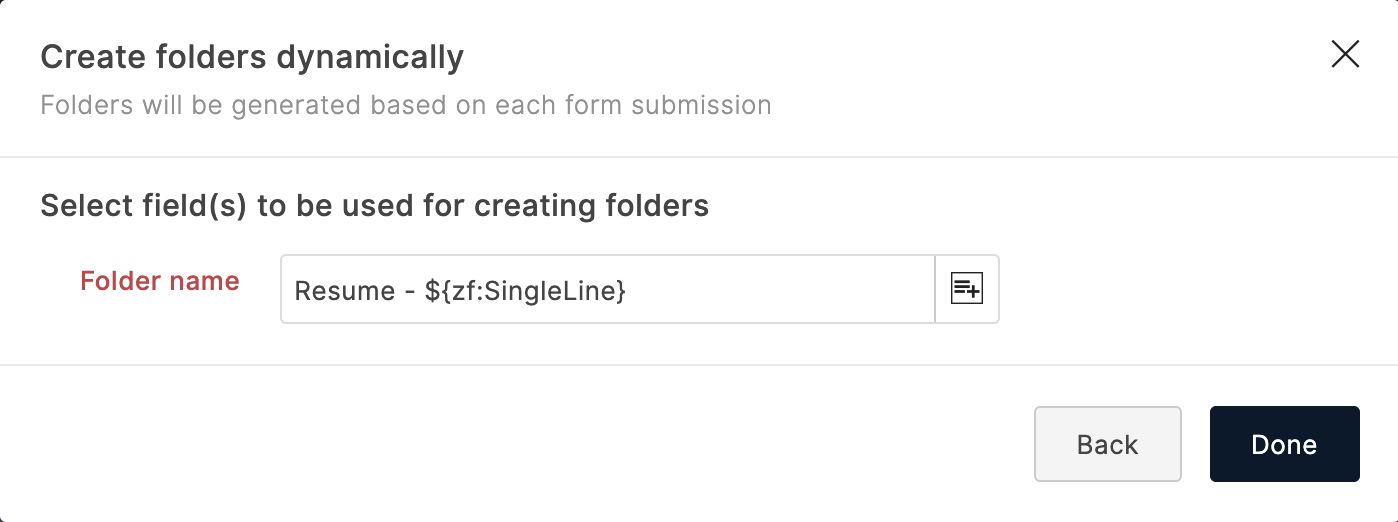
If you choose to create folders automatically based on form submission,
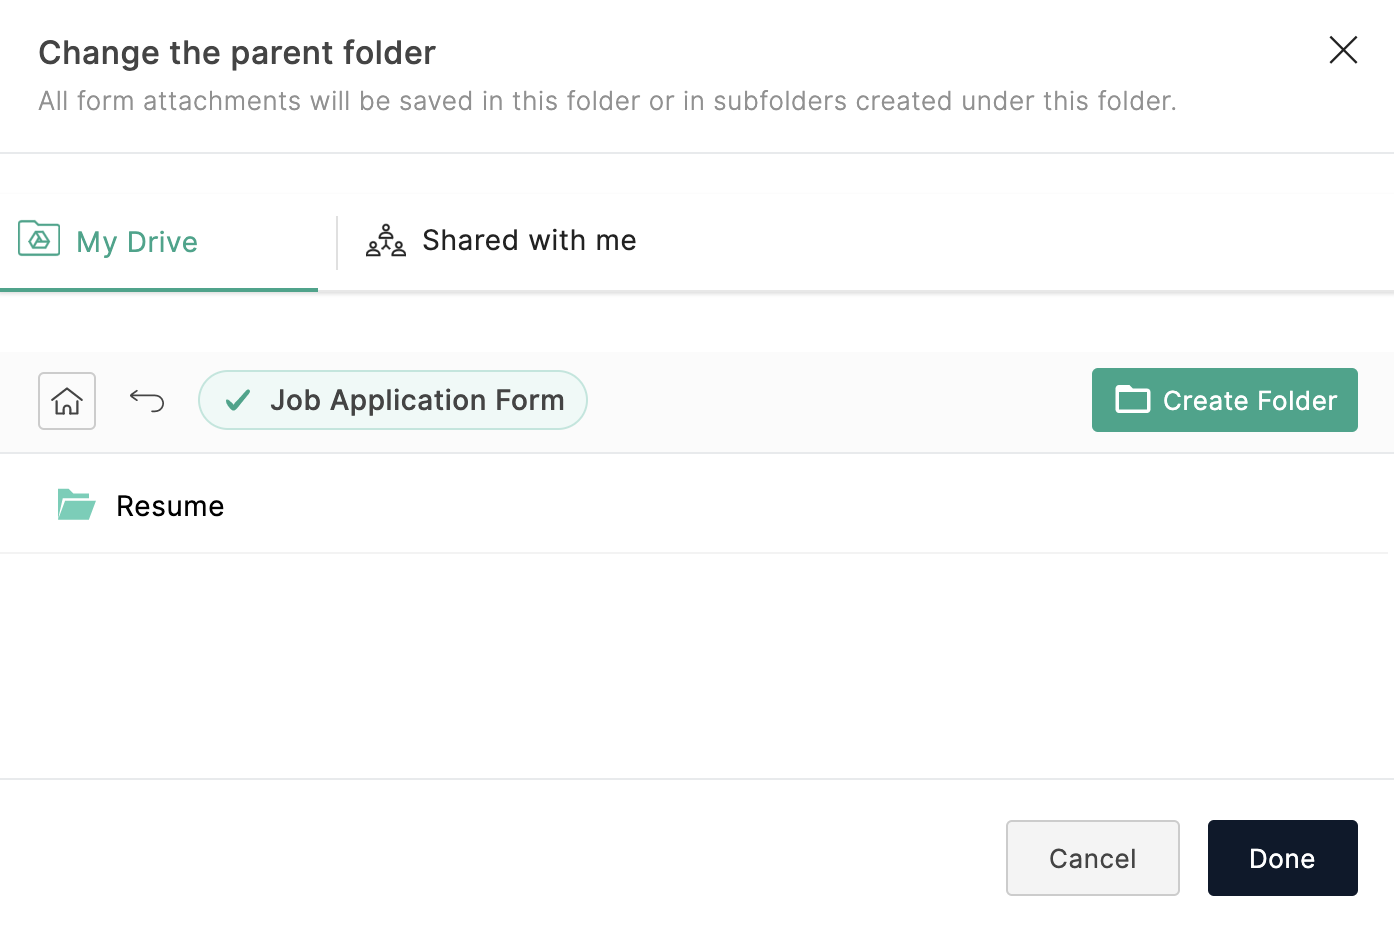
- Pick a parent folder (e.g., ZOHO FORMS) or create a new folder in Google Drive where you wish to store the files uploaded.
- Enter a name for the folder that gets created within the parent folder with each form entry. To distinguish between the folders created with each form entry, include field responses with the folder name by clicking the
 icon and selecting the required fields from the list.
Note: The folder name can have a maximum of 100 characters.
Click
Done.
For example, you can store the resumes uploaded by your recruits in separate folders named after them.
You can choose to store each form submission as a PDF and store merged documents.
Manage Manually
When you choose Manage Manually, you can manually map attachment fields to folders in Google Drive. You can choose to save such attachment files under My Drive or Shared with me.
- If you choose to save attachments under My Drive, select an existing folder or create a new folder to save the files. If no folder is selected or created, then all the files will be directly stored under My Drive.
- If you choose to save attachments in a shared folder, select the folder under which you want to save the files under Shared with me tab.
Click
Done.
If you want to change the file-saving location from My Drive to
Shared with me or vice-versa, click the pencil icon next to the folder name and choose the desired location.
You can choose to
store each form submission as a PDF and store merged documents.
Note:
- You can remap attachment fields to other folders if you choose to manage manually. You will also be able to rename file attachments when you save them in Google Drive.
- The file name can have a maximum of 150 characters.