List management
List management in Zoho Marketing Automation allows you to create List under which you can categorize or segregate your Contacts based on desired criteria. This article provides a detailed view of contacts with respect to lists.
How to create a list?
To create a list:
- From the Navigation Toolbar, choose Contacts and select Lists.
- Click Create List in the top-right corner.
- Fill out a name for your list. This is for internal reference.
Lists best work for existing Contacts present in your Zoho Marketing Automation account. If you want to add new Contacts to a List, you can either do that when creating a contact (Contacts -> View Contacts) or by going to the List itself and adding the Contacts there.
How to add contacts to list?
Once your list has been created, you can use multiple methods to add contacts:
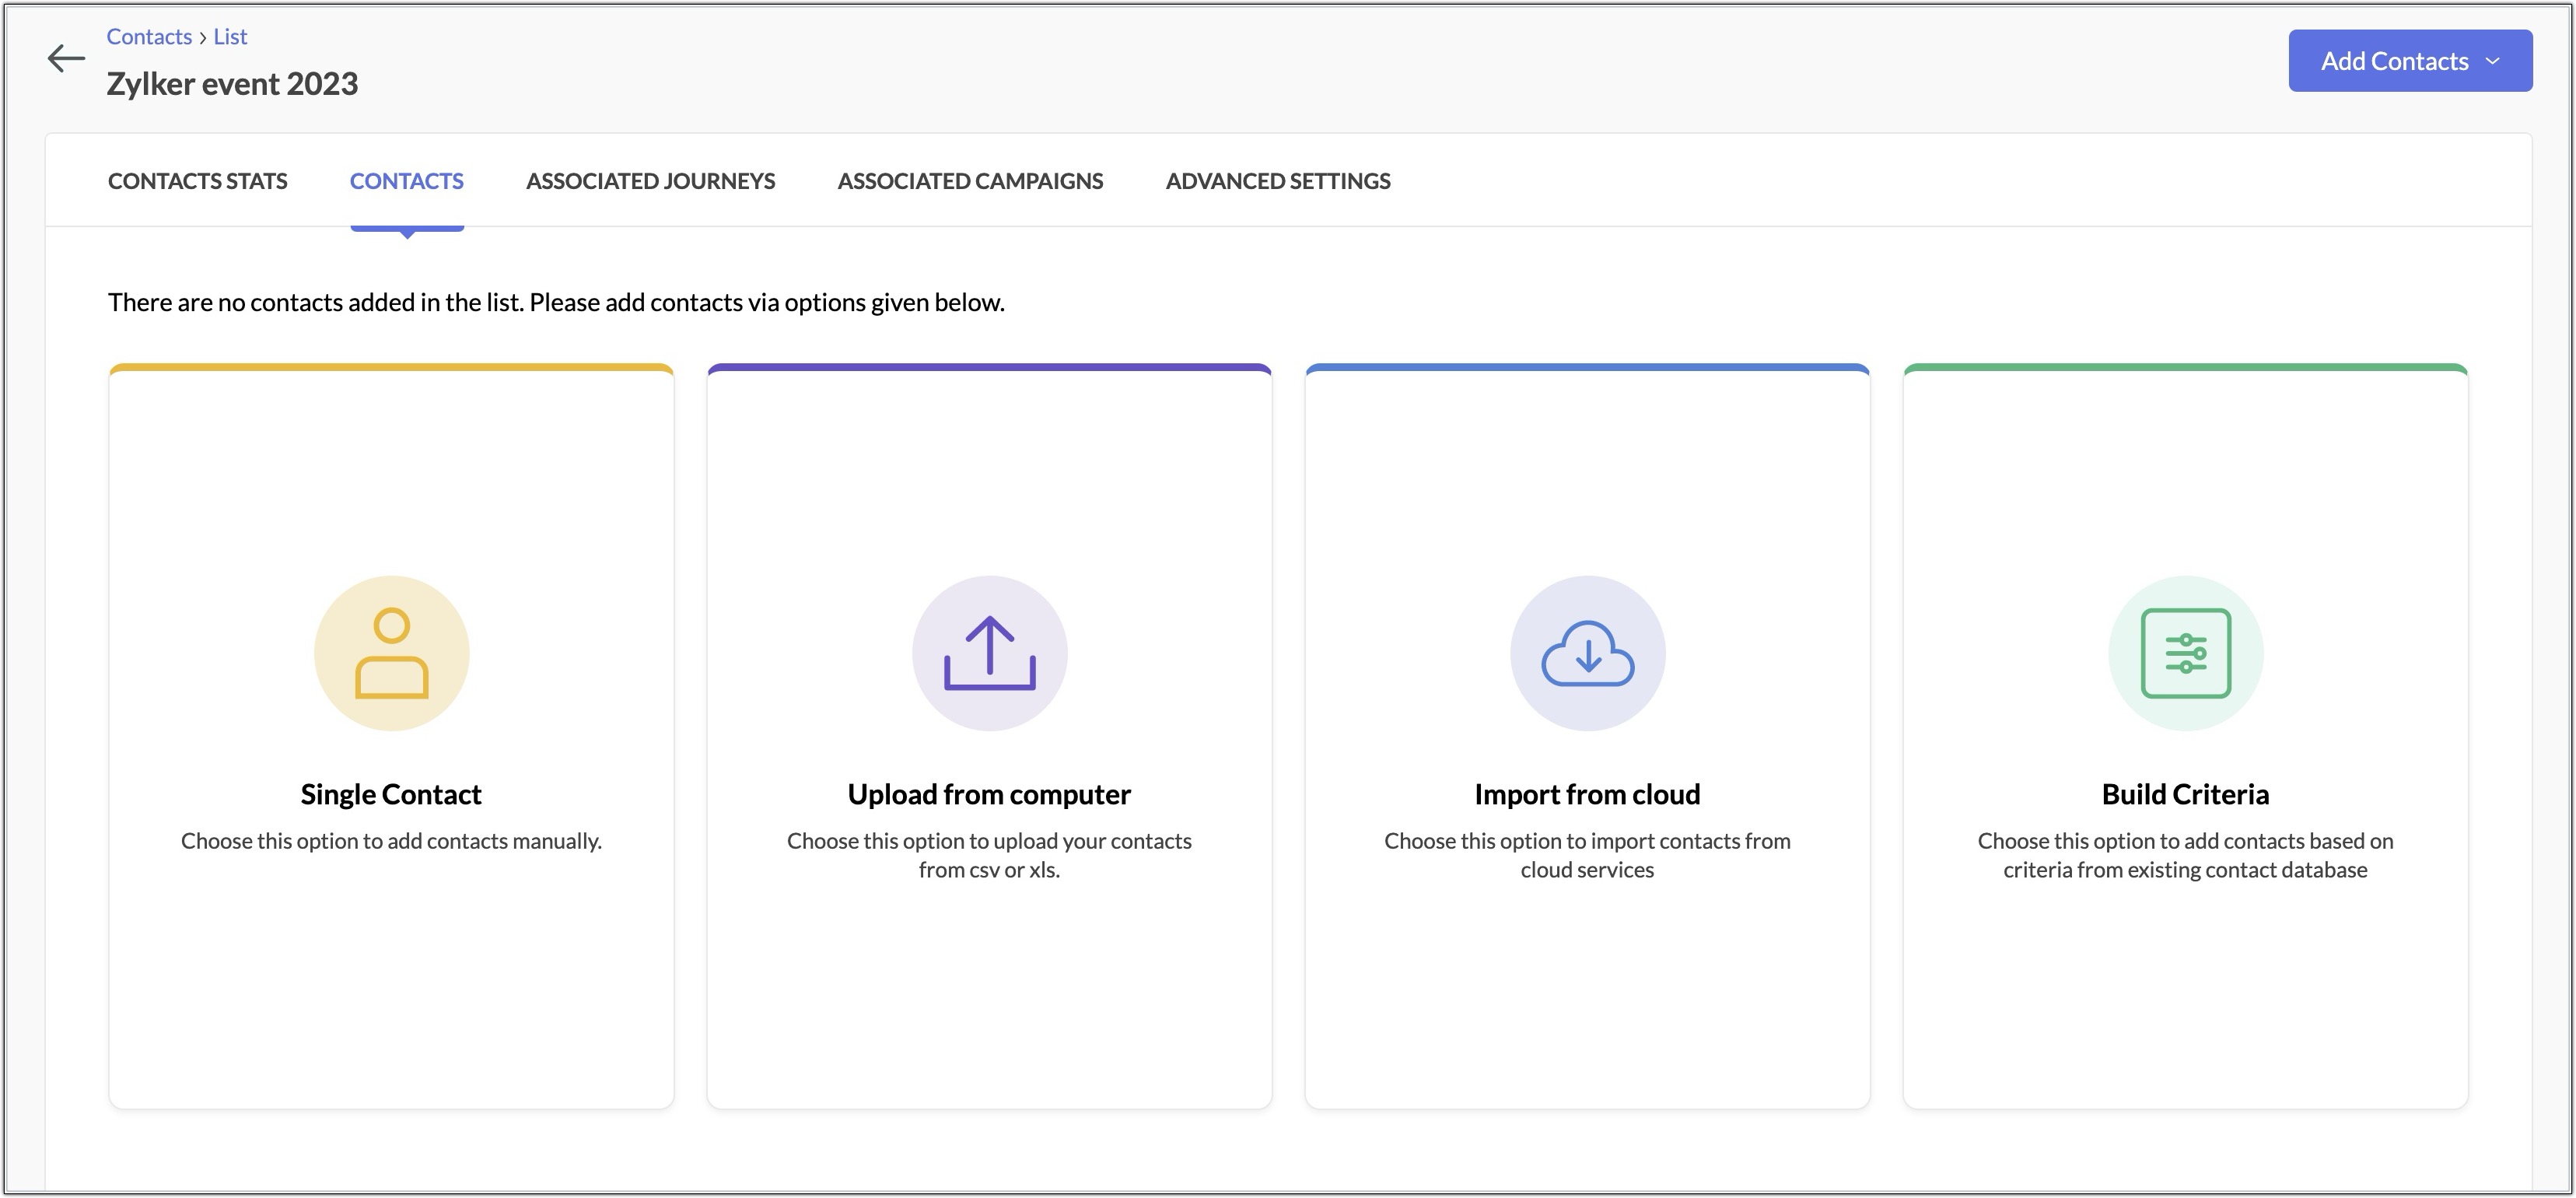
- Add Contact – Manually add a contact.
- Upload from computer - Add contacts from files saved on your computer.
- Import Contacts – Import contacts from your computer, Zoho CRM, or Google Sheets.
- Build criteria – You can also define criteria based on which contacts are added to list. This option is not dynamic, it will not automatically add new contacts to the list or remove contacts from the list based on criteria after the list has been created.
Assign Topics
You can associate the contacts in a list with a topic.
- From the Navigation Toolbar, choose Contacts and select List.
- Click the list you wish to edit.
- Open the list and select the required contacts.
- Click the More Actions icon and then click Assign Topics.
- A pop-up will appear where you can a choose topic. You can also choose multiple topics by choosing another topic after the first one.
- Click the Proceed button to confirm.
Delete list
Sometimes, you may feel a list is no longer needed. Although you can delete a list, you don't necessarily have to delete the contacts in the list. You can delete just the list and still maintain the contacts that were in the list.
To delete a list:
- From the Navigation Toolbar, choose Contacts and select Lists.
- Hover over the list you wish to delete.
- Click the More Actions icon at far right, then click Delete.
- A pop-up will appear where you can delete the list.
- Click the Delete button to confirm.

Note: You can select the checkbox to delete the contacts that are associated with this list. Please note that this option will delete these contacts from all the other lists or segments as well.
Clone list
If you would like to have the same list, but with a different name for different purpose, you can clone an existing list within a couple of clicks rather than creating a new list. Once the list gets cloned, you can rename it.
- From the Navigation Toolbar, choose Contacts and select List.
- Click More Actions icon at far right and click Clone. Your list will be cloned.
- To rename the cloned list, click on it. Hover over the list name at top left, a pencil icon will appear beside it. Click on it and rename the list.
Export contacts
You can export the contacts of a list to create a backup data. You can choose the fields, file format that you want to export.
To export contacts of a list:
- From the Navigation Toolbar, choose Contacts and select Lists.
- Open the list that you want to export. Select all contacts.
- Click the More Actions icon at far right, then click Export Contacts.
- A pop-up will appear where you need to fill out the following information:
- Filter by Date – Select date and time and choose if you want to export all contacts or based on added/updated time.
- Select Fields – Choose the fields you wish to export.
- File Name and format – Give a suitable name and choose the file format you wish to use. Click on .CSV to change the file format to .XLS or .TSV or .JSON.
- Click Export.
Clear List
You can delete the contacts of a list while keeping the list intact.
To clear contacts of a list:
- From the Navigation Toolbar, choose Contacts and select Lists.
- Hover over the list that you want to clear.
- Click the More Actions icon at far right, then click Clear list.
- A pop-up will appear. Click Clear Contacts to confirm.
Mass update fields
You can update a specific field for bulk contacts in a simple and quick way.
To mass update contacts of a list:
- From the Navigation Toolbar, choose Contacts and select Lists.
- Open the list for which you wish to mass update the contacts.
- Select the required contacts using checkboxes present to left of each contact.
- Click the More Actions icon at far right, then click Mass Update.
- Fill out the following information:
- Select the field from drop-down menu you wish to update.
- Specify a value for the field to be updated or you can check the Clear field value checkbox to remove the values associated with the field.
- Click the Proceed button to complete the mass update.
Other Bulk operations in Lists
You can do other bulk operations within a particular list for the contacts present in that list. These actions are the same as the bulk operations present under the View Contacts section with the only difference being that these actions are performed on the contacts present in a list instead of for all the contacts.
Changing the subscription type:
- From the Navigation Toolbar, choose Contacts and select Lists.
- Open the list in which you wish to mass update the subscription type of the contacts.
- Select the required contacts using checkboxes present to left of each contact.
- Click on Change subscription type icon.
- Choose the Subscription type for the contacts.
- Click
Deleting the contacts:
- From the Navigation Toolbar, choose Contacts and select Lists.
- Open the list in which you wish to delete the contacts.
- Select the required contacts using checkboxes present to left of each contact.
- Click on Delete icon at far right.
- Confirm by clicking Delete Contacts button in the confirmation dialog box.
 Note: If you delete contacts from a particular list, these contacts will also be deleted from other lists they were a part of.
Assigning/Removing Tags:
- From the Navigation Toolbar, choose Contacts and select Lists.
- Open the list in which you wish to mass update the tags for the contacts.
- Select the required contacts using checkboxes present to left of each contact.
- Click on Tag icon
at far right.
- If you want to assign tags to contacts, choose Assign tags option and if you want to remove tags from contacts, choose Remove tags option.
- From the list of tags, Select the tags you want to assign or remove.
- Click Proceed.
Contacts Stats
The Contacts Stats page contains all of your imported contacts' details. You can view a generated report on your contacts after the import is complete.
To view the stats:
- From the Navigation Toolbar, choose Contacts and select Lists.
- Click the list you want to see, you will land on the list's Contacts Stats page.
In the Contacts Stats page, you can view the number of newly added, unsubscribed, and bounced contacts. You can also view the associated lists and journeys, contact stage, contact source and location. Just click one of the numbers to view the related contact details.
List Key
List Key is an unique key used to identify to which list contacts need to be imported using APIs. The Subscribe API makes use of list key as a parameter.
To find the list key:
- Select Contacts form Navigation Toolbar. Choose Lists from the sub menu.
- Click on the list for which you want to set an entry criteria.
- Navigate to Advanced Settings tab at the top and click List Key.
- Click Copy icon in the list key section. The key will be copied to your clipboard.
Why are some of my contacts ignored?
There are a few reasons why you may see some contacts excluded from your list:
- Bounced - Mail was undeliverable to the contacts or the email address doesn't exist.
- Blocked- Contacts blocked by Zoho Marketing Automation.
- Do-Not-Mail - Contact has been moved to do-not-mail registry.
- Role-based email addresses - Contact address is generic. For example, info@, administrator@, careers@, service@, or support@.
- Duplicate Entries - Contact is present more than once in the file.
- Invalid Pattern - Contact has an email address in an invalid format. For example, "johngmail.com", "jane@aol", or "ted@zylkercom".
- Empty Email - Contact's email address field is empty.
- Other Errors - Contacts categorized as miscellaneous and don’t fall into the above mentioned categories.
Why aren't group email addresses accepted while importing?
Zoho Marketing Automation restrict the import of group email addresses and email addresses which has a '+' symbol such as info@zylker.com, support@zylker.com, support+help@zylker.com, test+1@zylker.com, admin@zylker.com, and help@zylker.com. These email addresses have a high probability of email getting landed in the spam folder.