How to create a Custom Label in Zoho Writer
Overview
Custom Label creation in label templates allows you to define the exact dimensions, sheet layout, and margins for any label stock that does not match a standard preset. This ensures that what you design aligns precisely with what prints, regardless of the label size or sheet format you use.
For example, configure a 3.9" x 5.2" label on a Letter-sized sheet with 2 columns, 2 rows, and specific gap and margin values to match your physical label stock exactly.
Steps
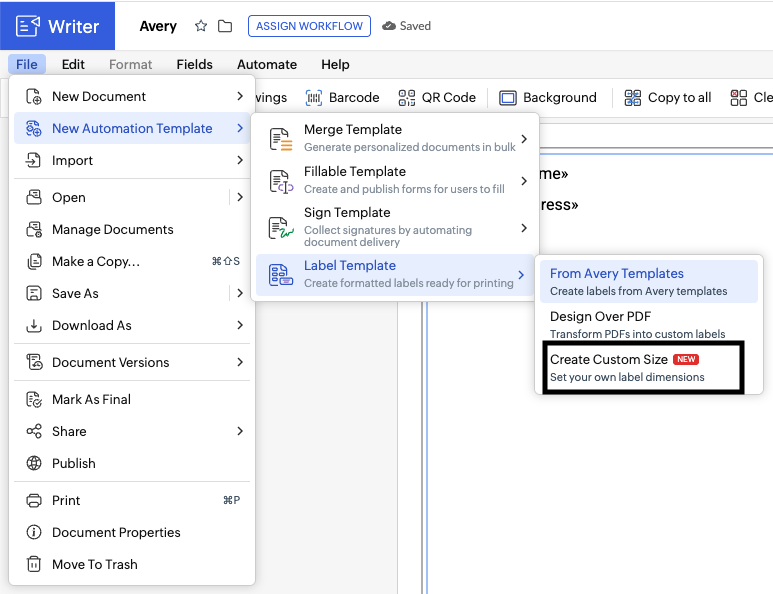
1. Click File -> New Automation Template -> Label Template -> Create Custom Size.
2. Under Label Properties, enter the Width and Height of an individual label to match your label stock.
3. Under Paper Properties, select the Page Size (e.g., Letter, A4) and set the Orientation to Portrait or Landscape.
4. Expand Advanced Options and configure the following:
- Left Margin and Top Margin: the distance from the edge of the sheet to the first label.
- Number of Columns and Number of Rows: the label grid on the sheet.
- Horizontal Gap and Vertical Gap: the spacing between adjacent labels.
5. Use the unit selector (bottom left) to switch between Inches, Centimetres, or Millimetres as needed.
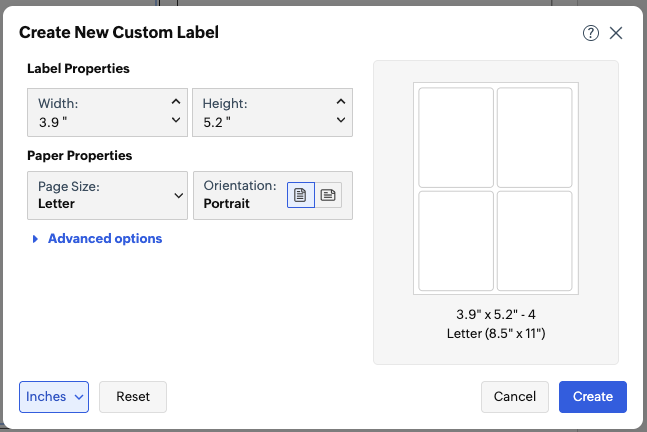
6. Review the live preview on the right to verify the sheet layout before proceeding.
7. Click Create to apply the custom label configuration to your template.