Email Blocklist in Zoho Bookings
Greetings from the Zoho Bookings team!
We’re excited to introduce Email Blocklist in Zoho Bookings, a new feature that helps you decide who can schedule appointments through your booking pages. You can now block specific email addresses or entire domains to prevent spam, fraudulent, or malicious bookings across your business.
We’re excited to introduce Email Blocklist in Zoho Bookings, a new feature that helps you decide who can schedule appointments through your booking pages. You can now block specific email addresses or entire domains to prevent spam, fraudulent, or malicious bookings across your business.
With Email Blocklist, you can:
- Block bookings from specific email addresses.
- Restrict bookings from entire domains or organizations.
- Configure a custom block message for customers.
How it works
You can add either individual email addresses or entire domains to the blocklist to restrict bookings across the organization.
Examples:
- Blocking alex@example.com prevents bookings only from that email address.
- Blocking example.com restricts bookings from all email addresses under that domain.
When a customer attempts to book an appointment, Zoho Bookings checks the entered email address against the configured blocklist. If a match is found, the booking will be prevented and the configured block message will be displayed on the booking page.
Getting started is simple:
- Open Admin Center and click Email Blocklist under Data Administration.
- In the Add to Blocklist pop-up, choose email or domain to the add them to the blocklist.
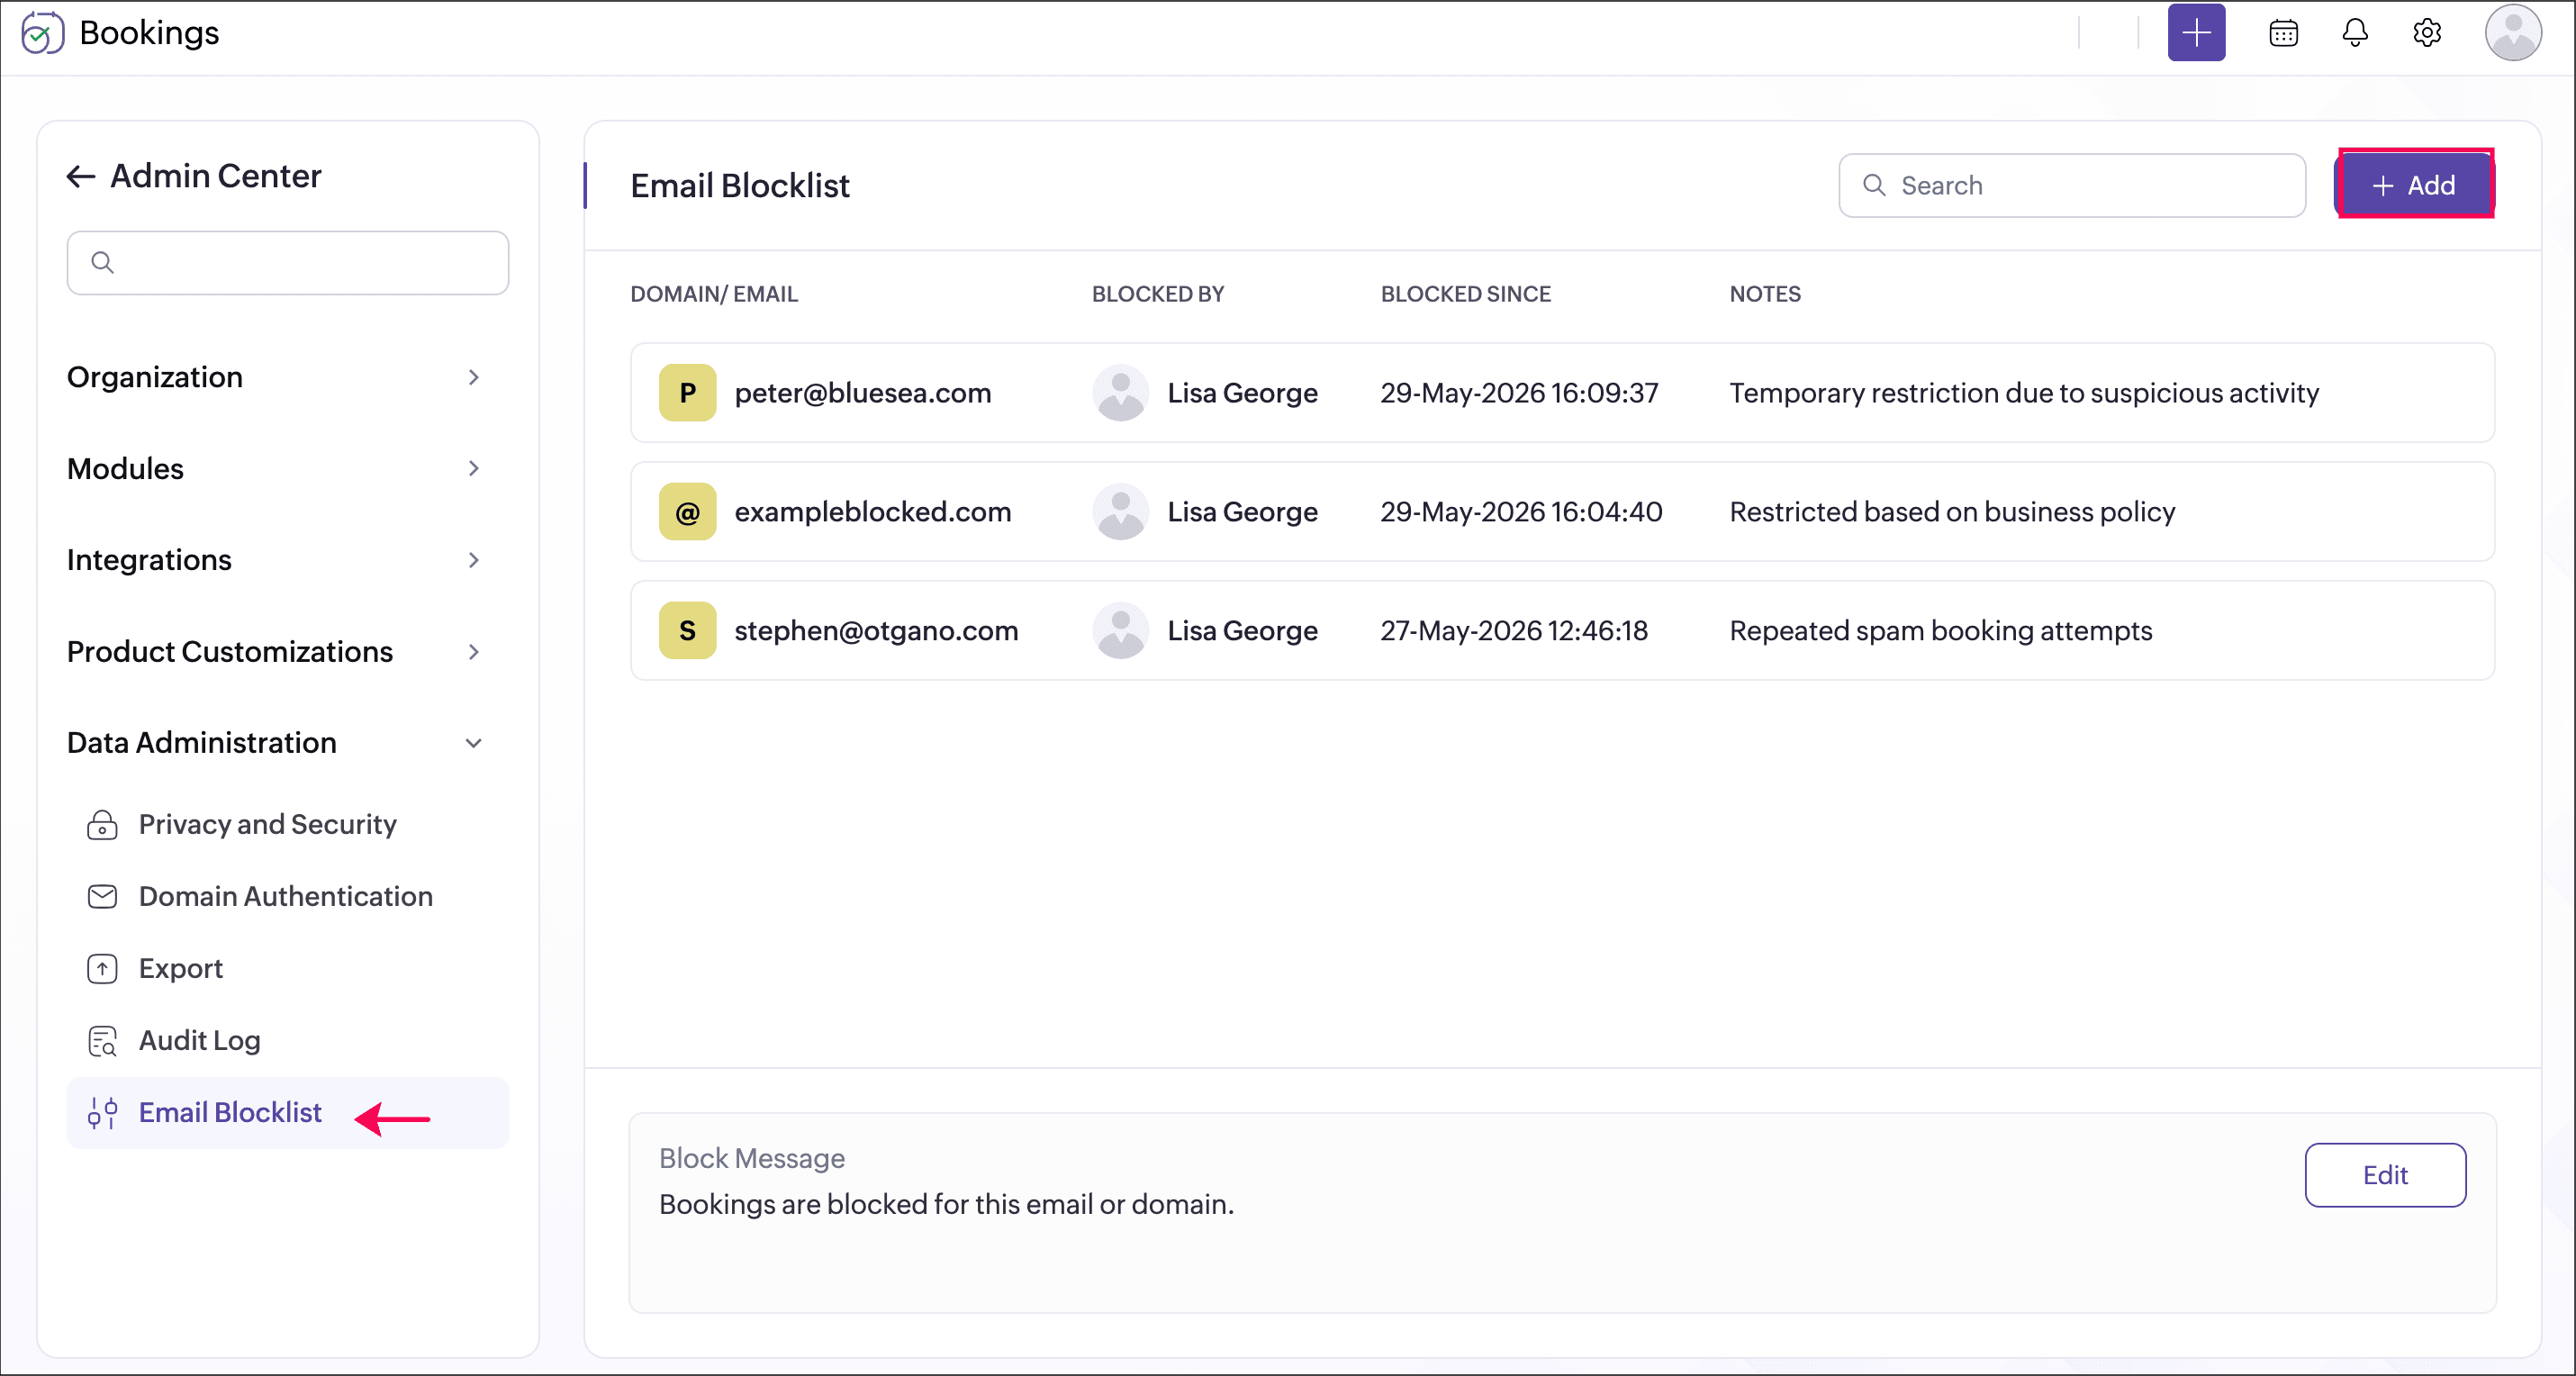
- Include a note about the restricted domain or email for reference. This note will be displayed in the Email Blocklist listing page for admins.
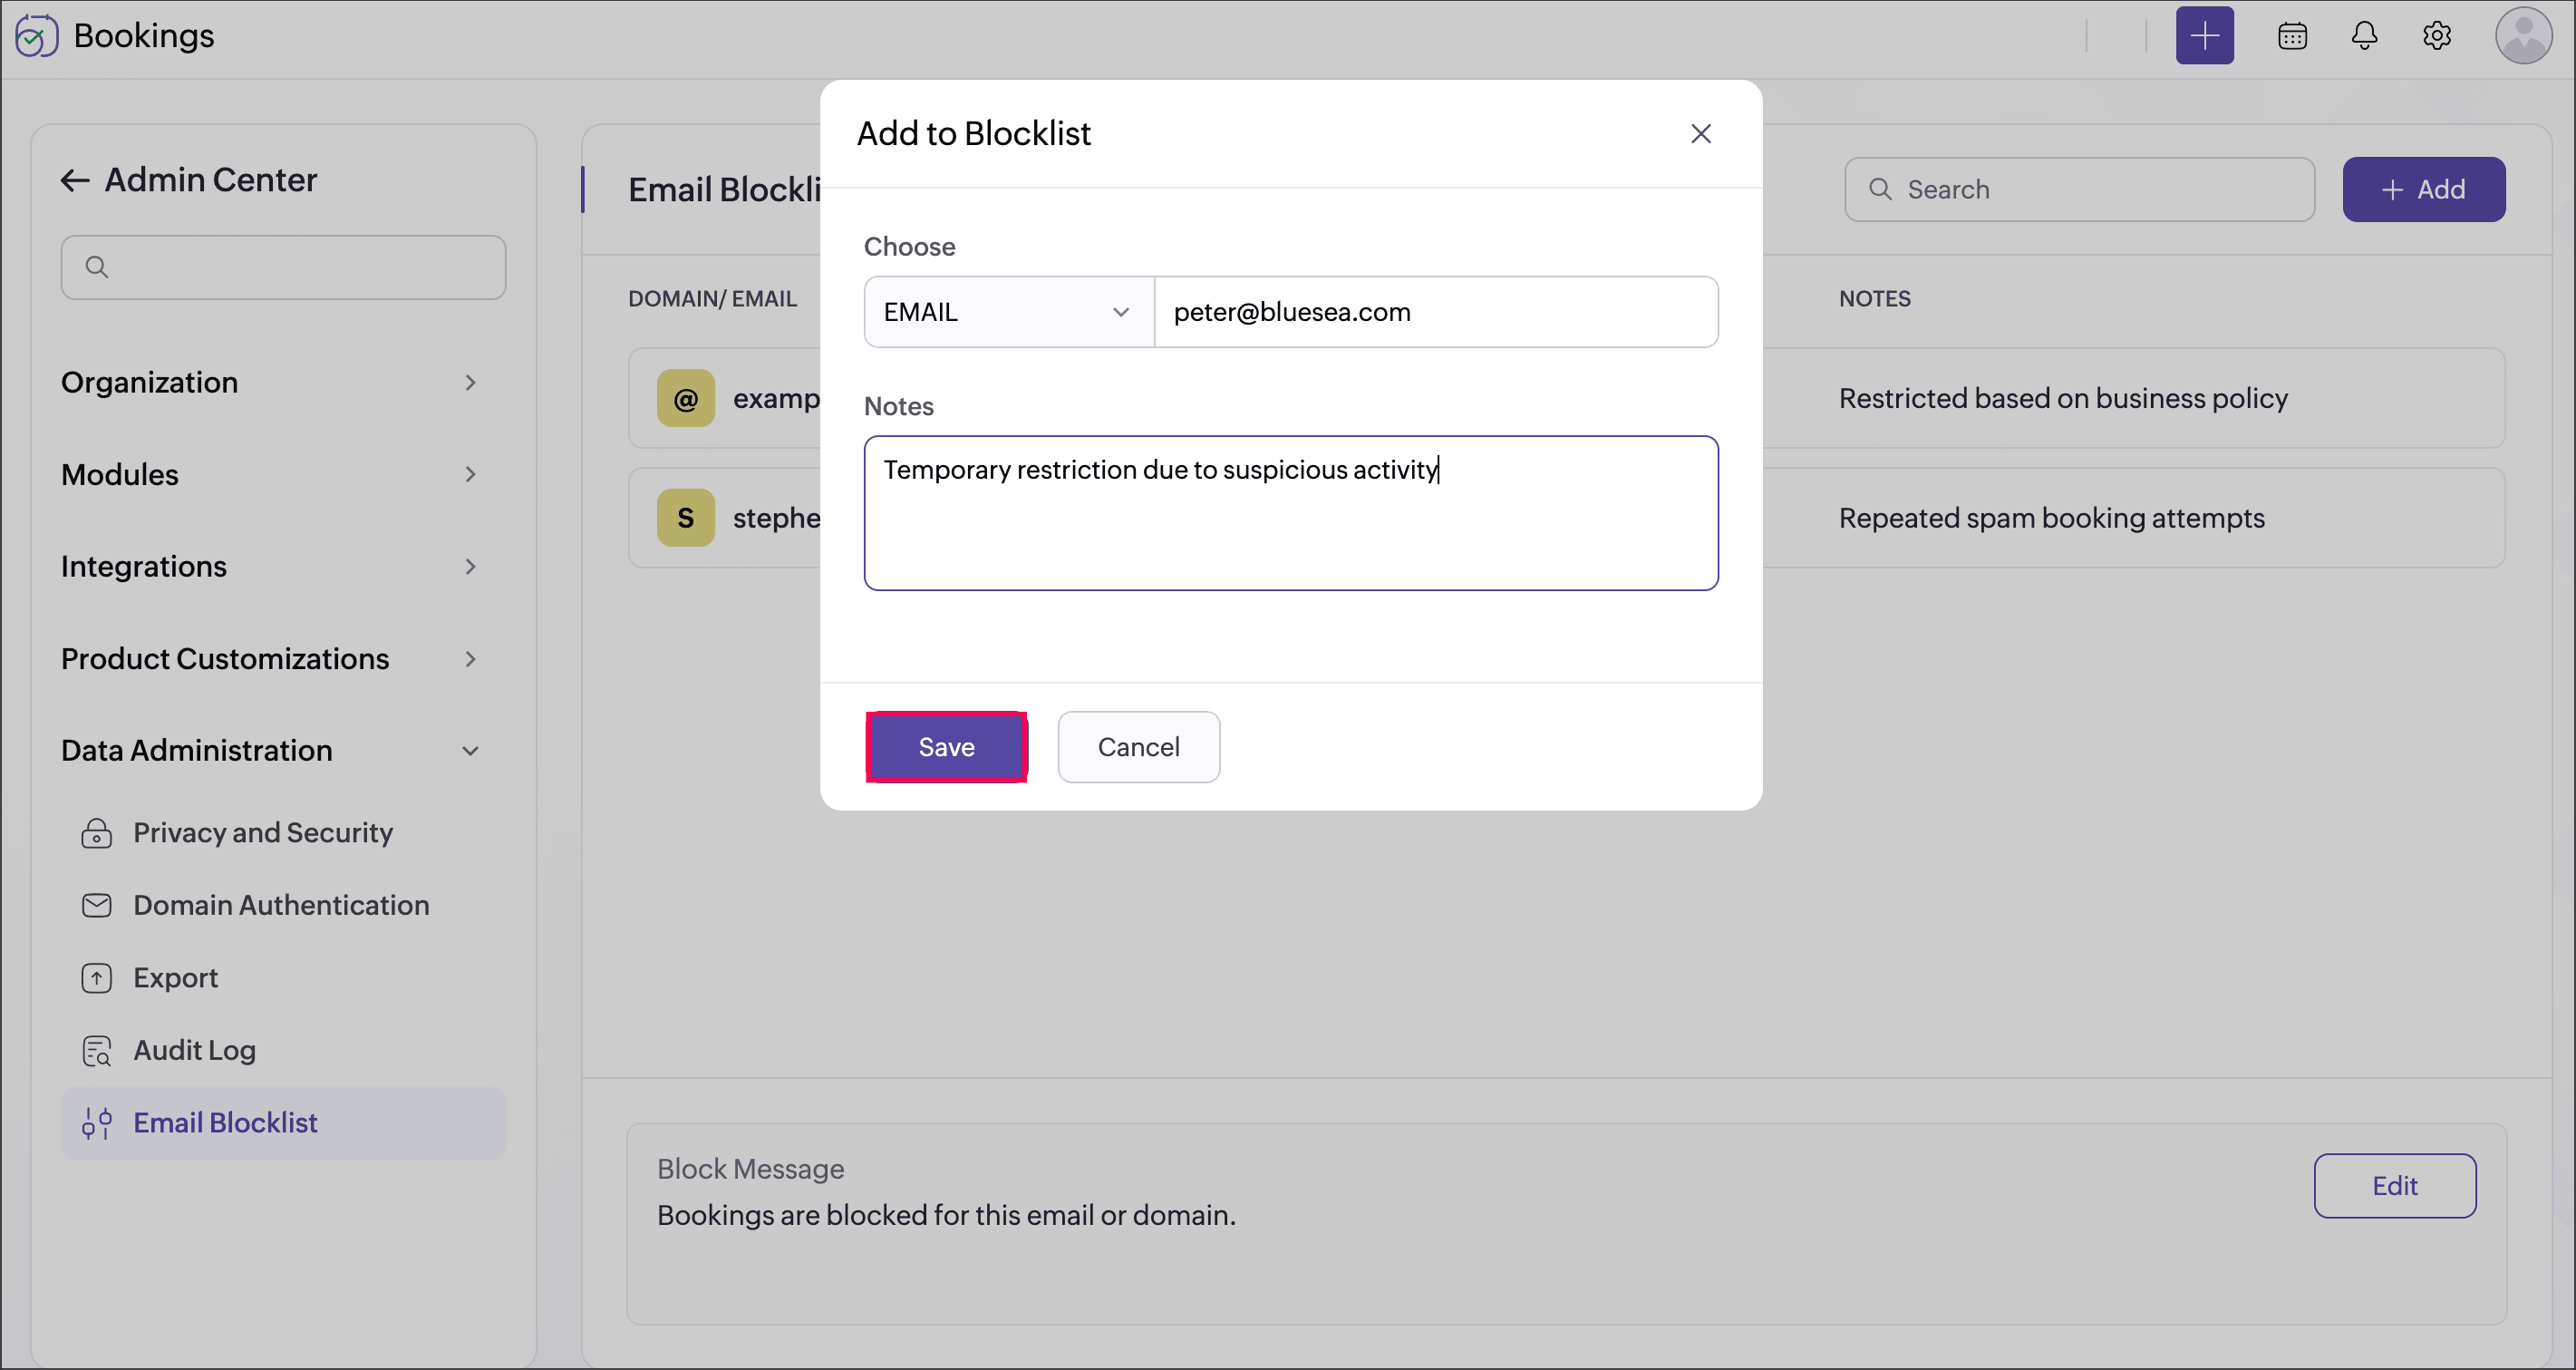
- Click Save.
Additionally, you can configure a block message to be displayed on the booking page when bookings are attempted using the blocked email address or domain.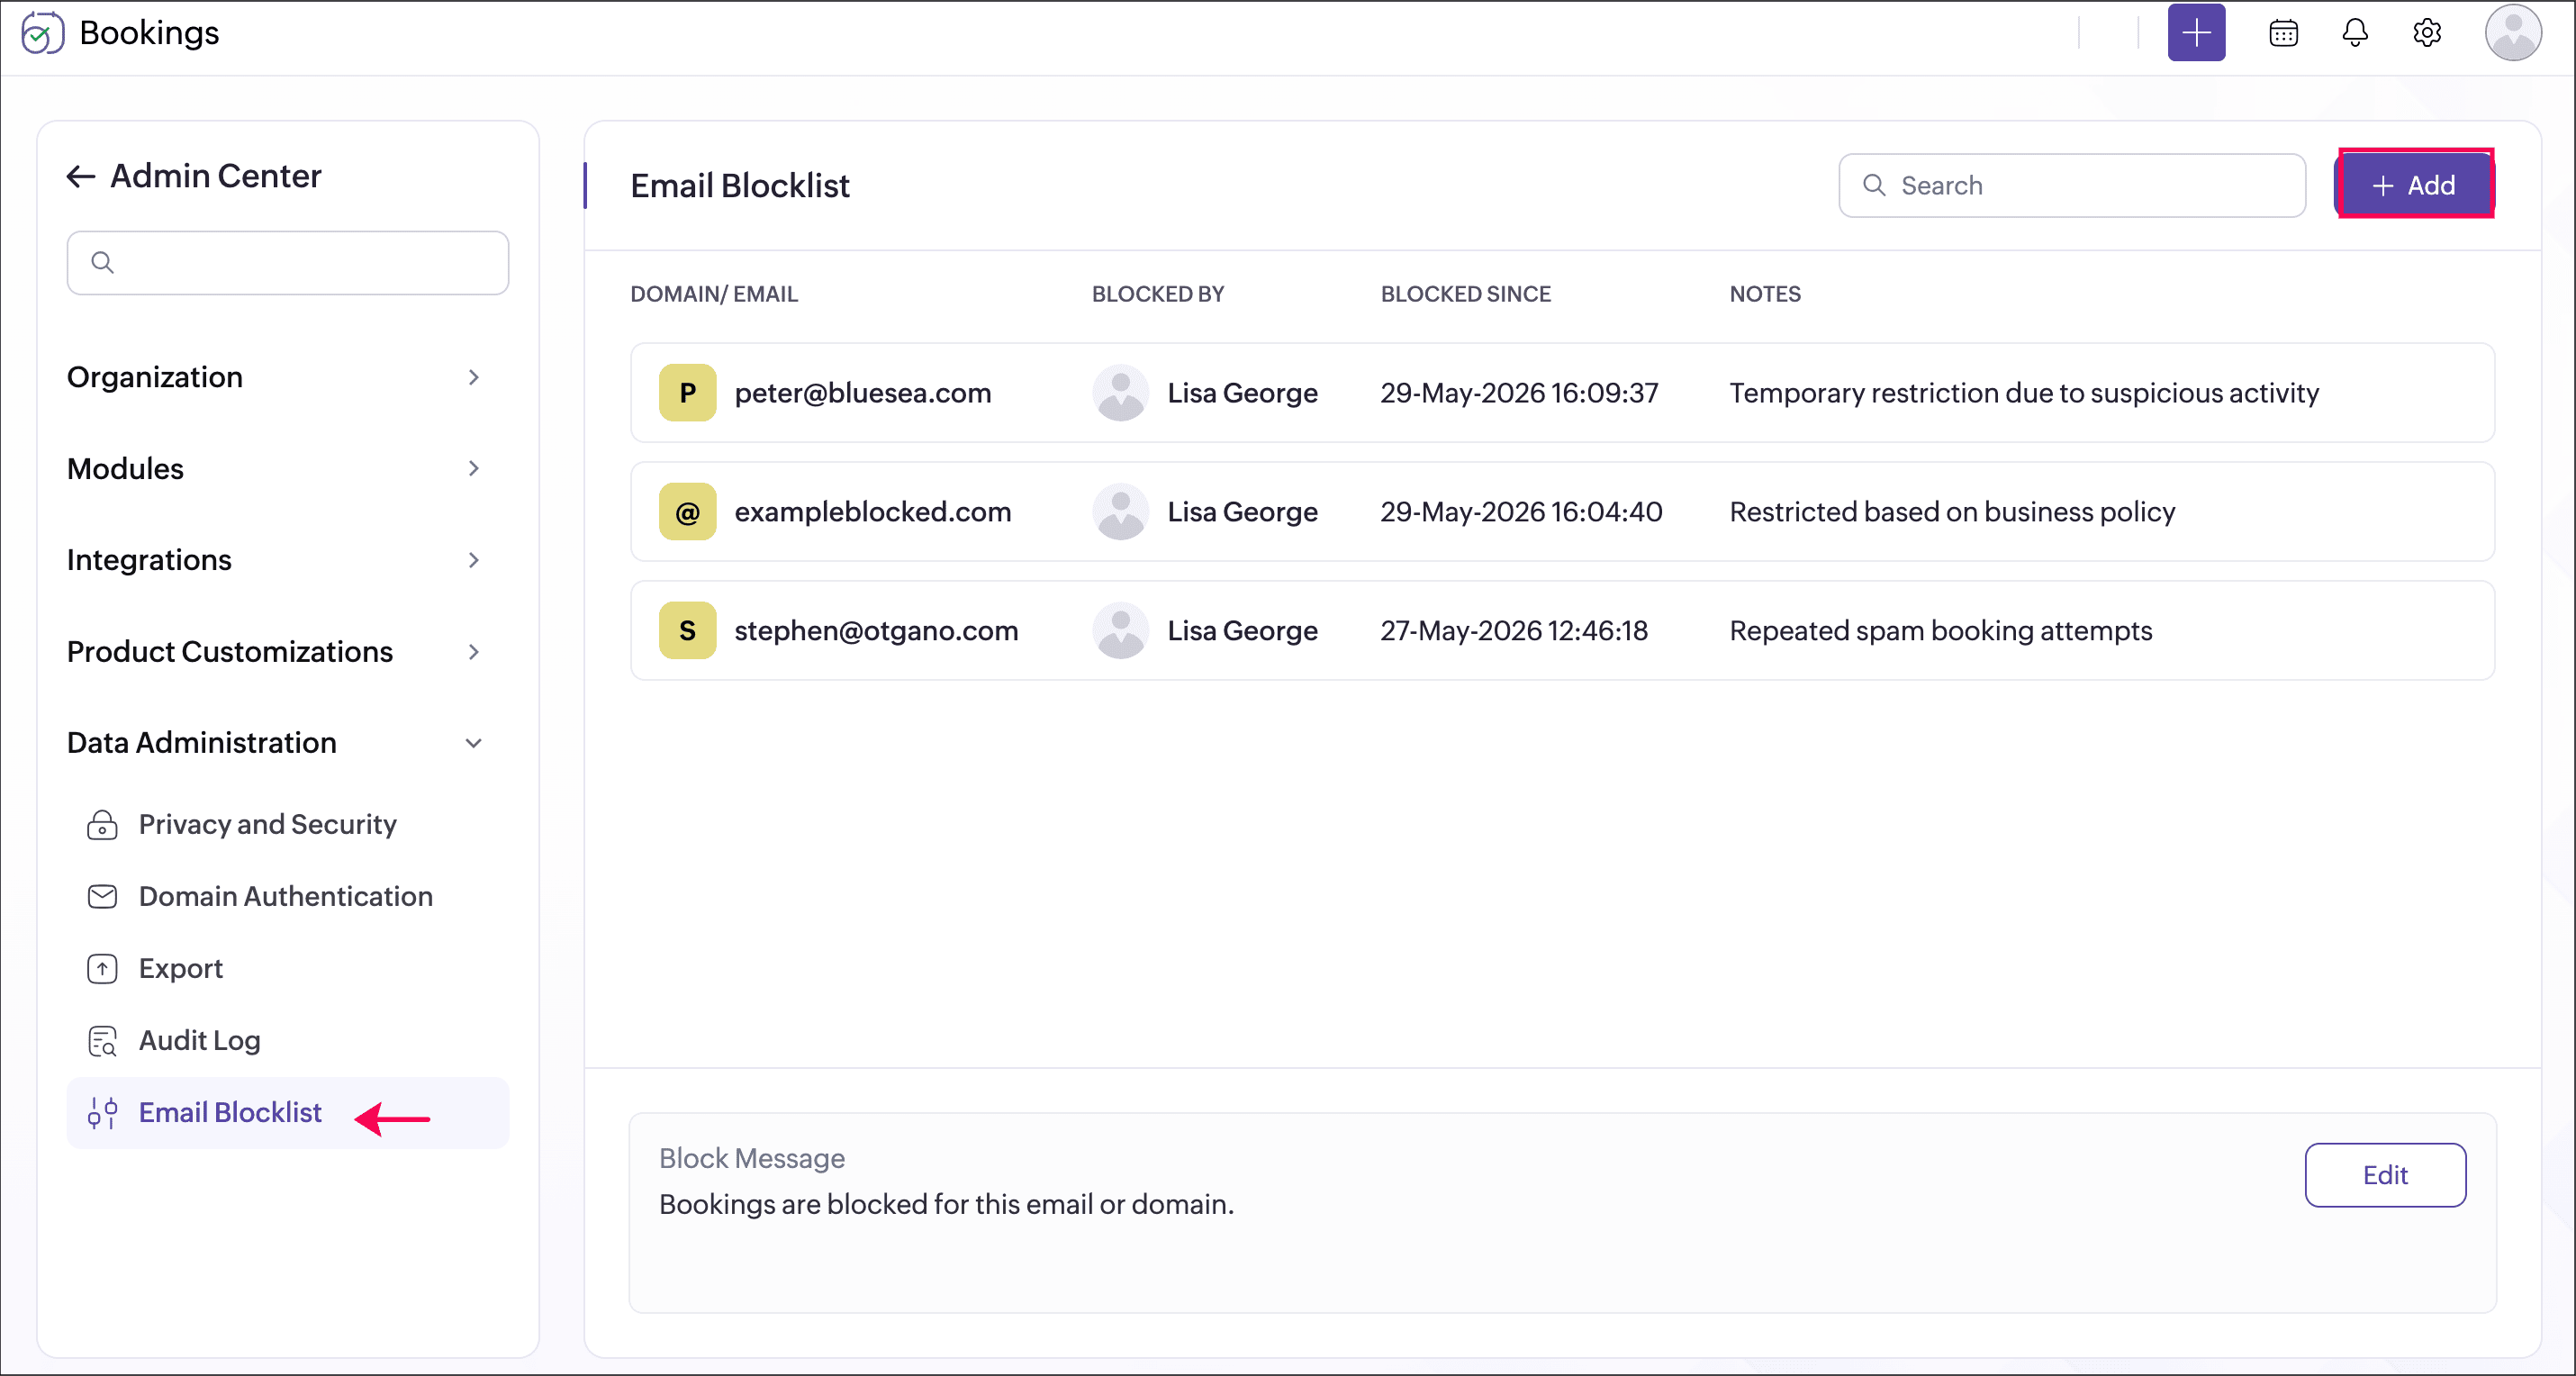
Why this matters
Email Blocklist helps businesses to reduce spam bookings, fake users, malicious sources, or repeated invalid requests.
Availability: This feature is available for premium plans.
We hope this feature helps you create a more secure and reliable scheduling experience. Share your feedback in the comments or write to us at support@zohobookings.com. We’d love to hear from you!
Regards,
The Zoho Bookings Team
The Zoho Bookings Team