Introducing AWS authentication for connections in Deluge
Hello everyone,
We're incredibly excited to announce the all-new AWS authentication for connections in Deluge! This highly anticipated feature simplifies connecting to Amazon Web Services, opening up a world of possibilities and allowing you to seamlessly integrate your Zoho apps with the power and scalability of the AWS cloud.
What does this mean for you?
This new integration empowers you to connect and access AWS services like S3 directly from within Deluge. This eliminates the need for third-party tools to achieve a connection between Zoho and AWS. It also allows you to harness AWS's scalability for handling massive datasets while utilizing Deluge's power for complex transformations.
How does it work?
AWS is now offered as a custom connector in Deluge. This AWS connection utilizes Signature Version 4 authentication, the most up-to-date and secure method for authenticating requests to AWS services. It offers several key advantages that help protect your AWS credentials and prevent unauthorized access.
Availability
The new AWS authentication for connections is available across all Zoho services that support Deluge connections. This means you can use it within your existing Zoho applications, be it CRM, Books, Mail, or others, to unlock new possibilities.
Creating an AWS connection
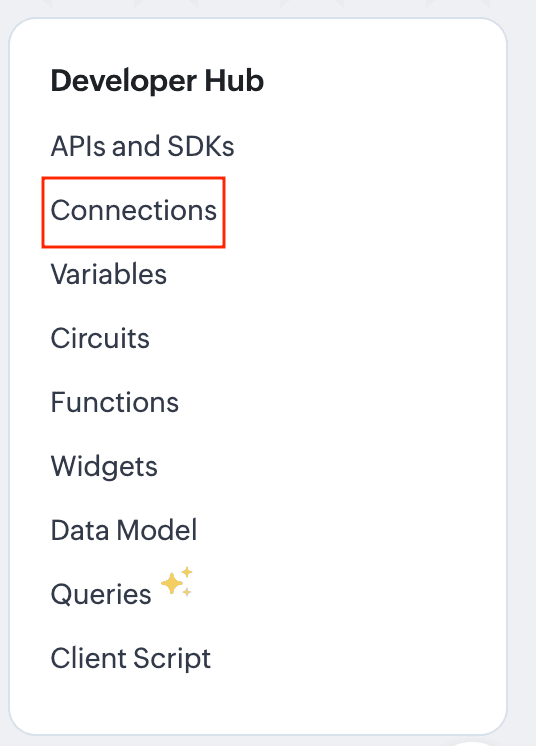
- Navigate to the Connections section of the desired Zoho service. For this example, we'll use Zoho CRM. For Zoho CRM, you can access it under Settings -> Developer Hub -> Connections.
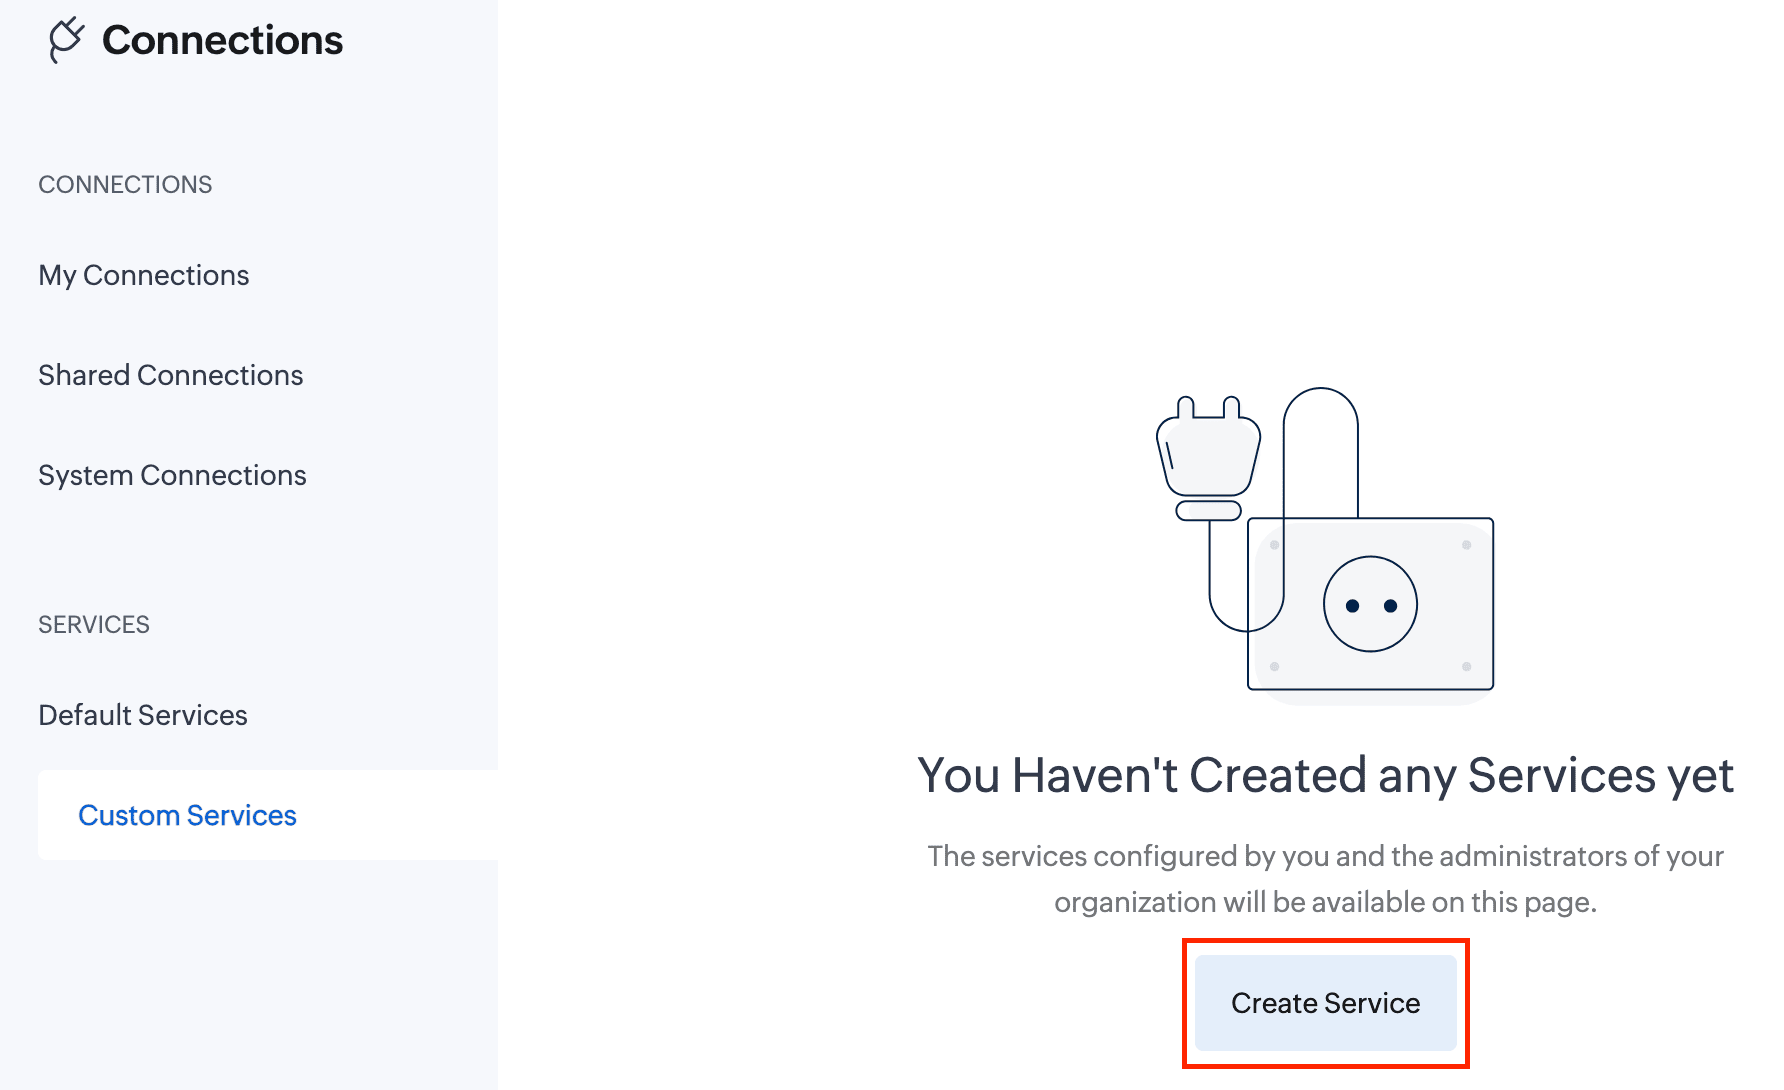
- In the Connections section, go to Custom Services and click the Create Service button.
- On the Create Service page, enter the following details:
Service Name: awss3 //Custom connector name
Service Link Name: awss3
Authentication Type: AWS Signature
Service Name: s3 //Amazon service name
AWS Region: Enter your AWS region. To find your AWS region, log in to your AWS account and navigate to Console -> S3 -> General Purpose Buckets. Locate your storage buckets and copy the AWS region (e.g., us-east-1) displayed next to the required bucket.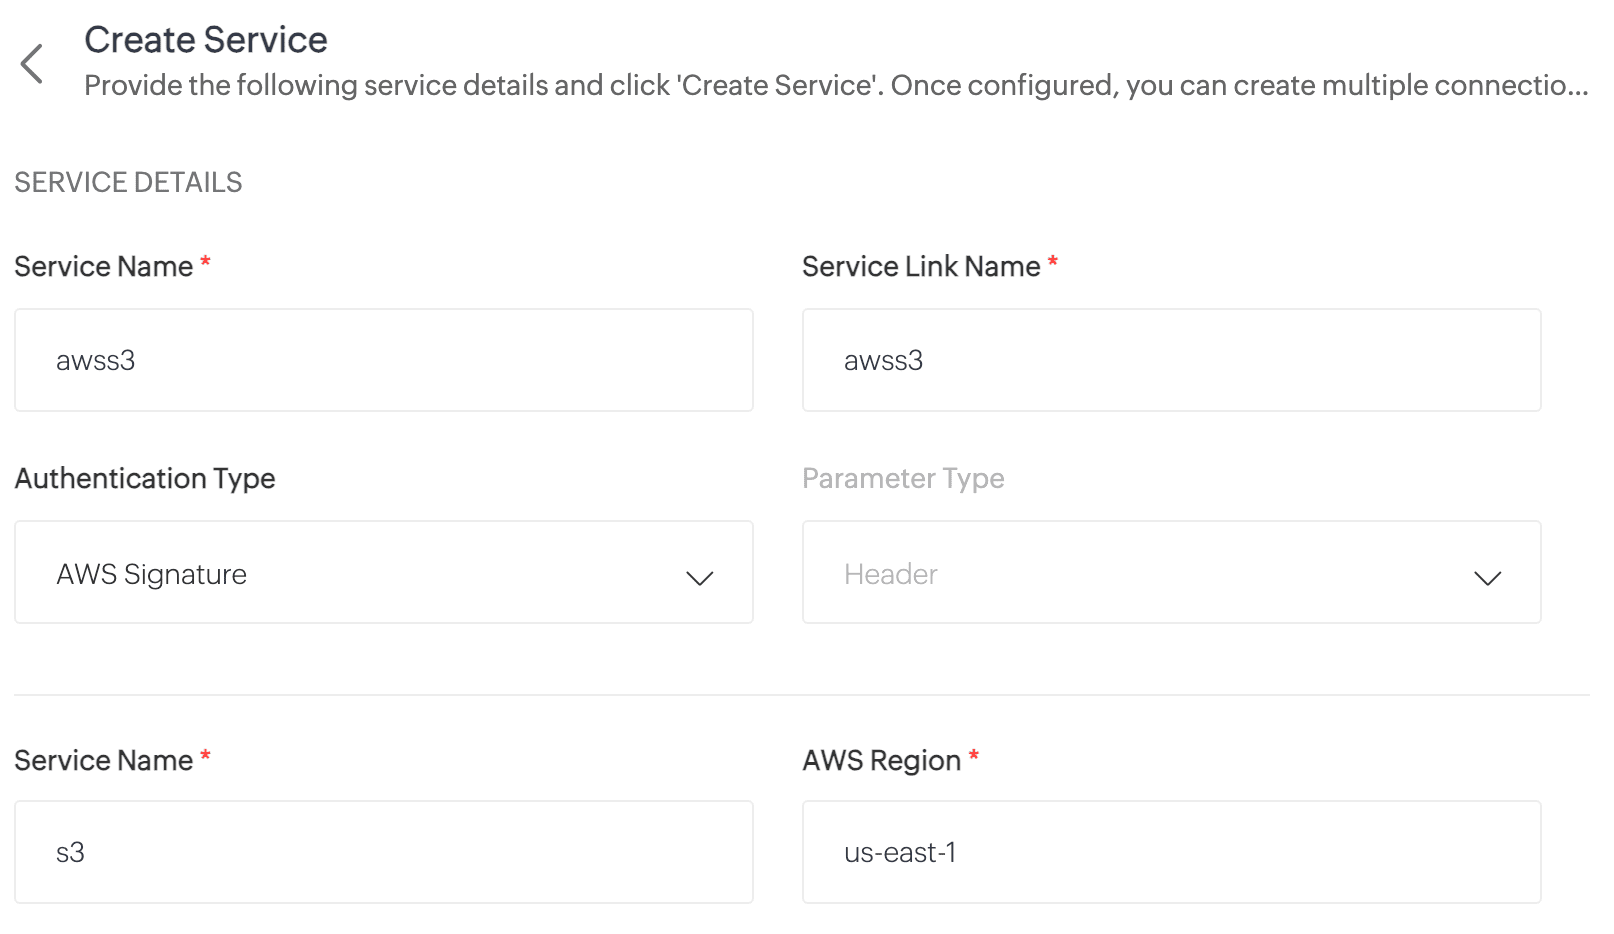
- Click Create Service. The AWS S3 custom service will now be created.
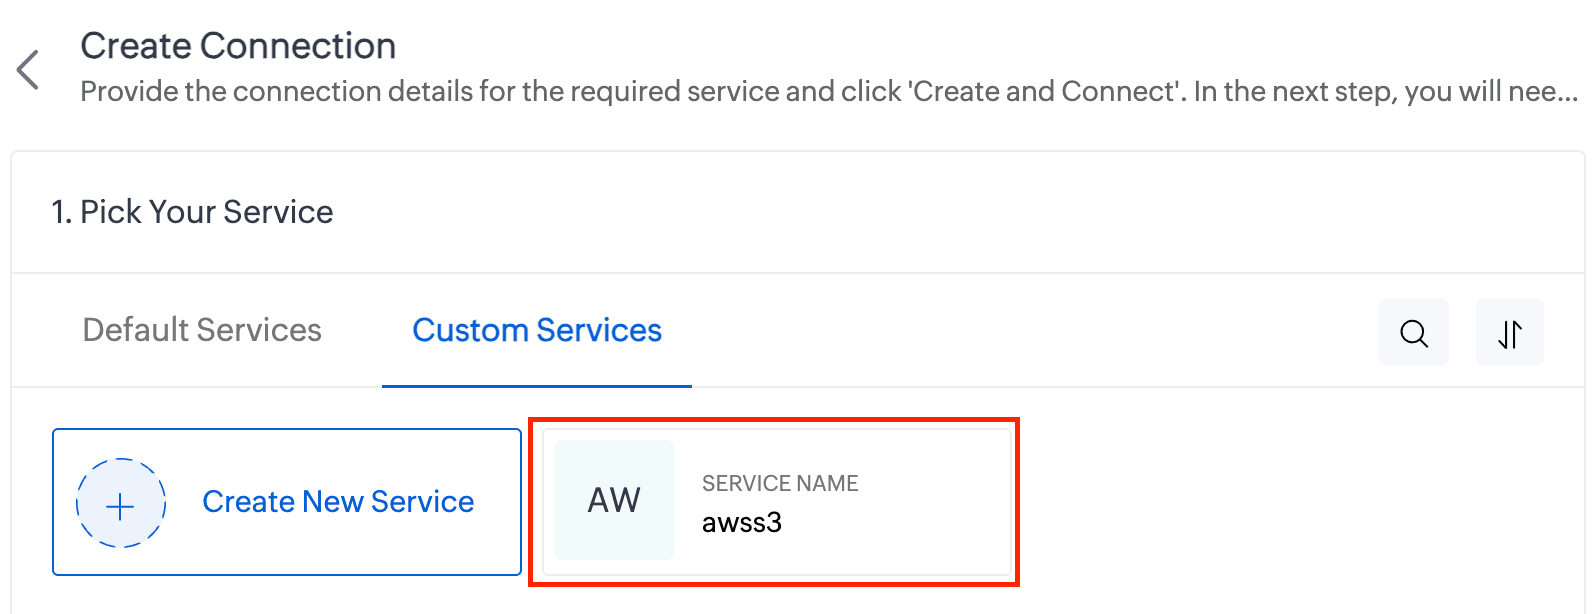
- Now, navigate to My Connections and click Create Connection.
- On the Create Connection page, go to Custom Services under Pick Your Service and select awss3.
- Enter the Connection Name and Connection Link Name. Then click Create and Connect.
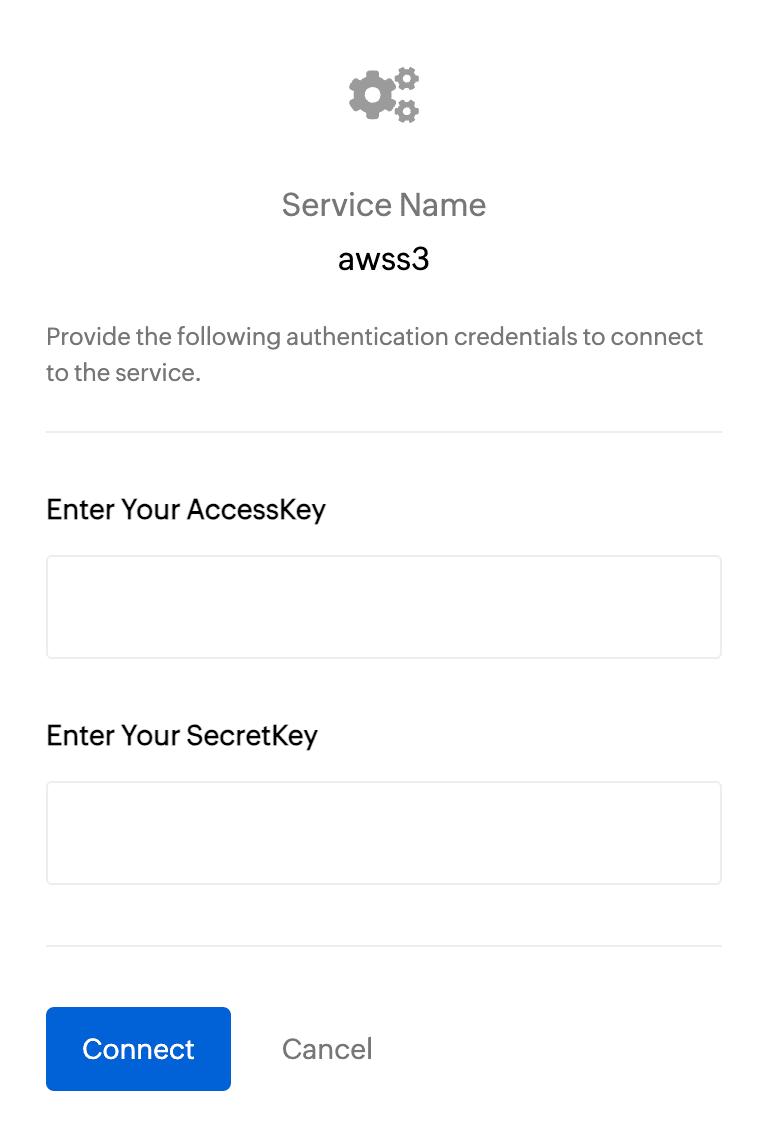
- You'll be redirected to the AWS authorization page, where you'll need to enter your Access Key and Secret Key.
To get the Access Key and Secret Key:- Log in to your AWS account and navigate to IAM.
- In the left pane, under Access Management, click Users.
- Select the required user from the list.
- On the User Details page, go to the Security Credentials section.
- Under Access Keys, click Create Access Key.
- On the next page, choose Command Line Interface (CLI) as the use case and click Next.
- Click Create Access Key.
- Copy the Access Key and Secret Key, then paste them into the respective fields on the AWS authorization page.
- Finally, click Connect.
- Your AWS connection has now been successfully created!
Working with AWS connections
Now you can utilize this AWS connection to integrate with AWS services and perform various actions, such as storing and retrieving data from Amazon S3. This connection can be leveraged across Zoho services (such as functions) to automate your data workflows.
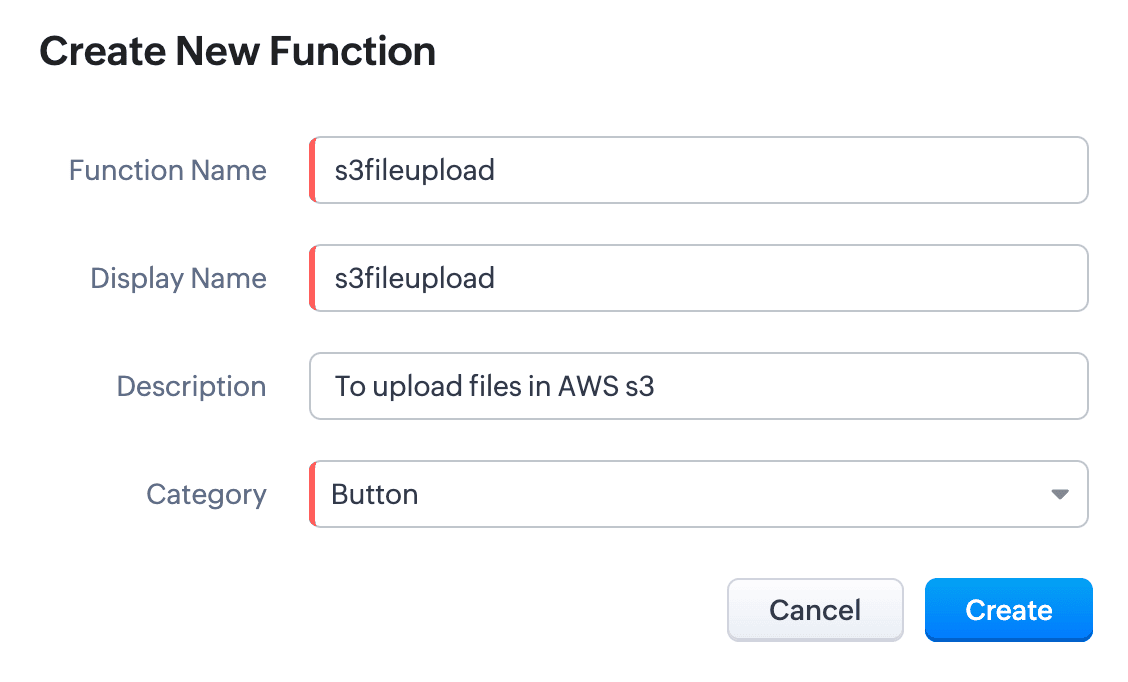
For example, let's create a function to upload a file to AWS S3:
- Create a new function. Name the function and choose the appropriate type.
- Write the required scripts in the Deluge editor.
Here's a sample script which fetches a file from a given URL and uploads it to an AWS S3 bucket using the configured AWS connection:
 fileResponse = invokeUrl
[
url:"https://filesamples.com/samples/document/txt/sample1.txt"
type: GET
];
file = tofile(fileResponse,"sample1.txt");
// Upload the file to AWS S3
awsResponse = invokeUrl
[
"https://<your-bucket-name>.s3.amazonaws.com/<file-name>" // Replace with your bucket name and file name
type: PUT
parameters:file
content-Type : "application/octet-stream"
connection: "awss3" // Use the AWS connection created earlier
detailed:true
];
// Log the response
info awsResponse; - Execute the function by clicking the Save and Execute button.
- Switch to your AWS account, go to Console -> S3 -> General Purpose Buckets, and select the required bucket.
- You’ll see the sample file from the script listed under the Objects section. Every successful execution results in the file being uploaded to the bucket
Use cases
- Zoho CRM: You can automatically back up important customer documents from Zoho CRM to AWS S3. For instance, when a new file (e.g., contracts, proposals) is uploaded to a CRM record, a Deluge function can be triggered to fetch and store the file in S3 storage.
- Zoho Books: You can store and retrieve invoices from Zoho Books to AWS S3. When an invoice is generated, a Deluge function fetches the PDF and uploads it to an S3 bucket. This can act as centralized space for all your invoices.
We have comprehensive documentation covering everything you need to know about Deluge connections. For more information, visit our Deluge Connections help doc.
Note: Please be aware that Zoho Creator has its own Connections feature, and we are working to bring AWS connections to Creator soon.
That’s all from us on the AWS connector! We hope you find it valuable and make the most of it across Zoho services. Give it a try, explore its possibilities, and let us know your thoughts.
And if you need any assistance, don’t hesitate to reach out to us. We’re always happy to help.
Regards,
The Deluge Team
The Deluge Team
Topic Participants
Ashwin Vishal R
Sticky Posts
Function #41: Sync Associated Subforms!
Welcome back everyone! The last custom function showed how to update a Contact with Product details from it's Related list in Deals. This week, let's look at a function that lets you update subform records in two modules simultaneously when one of them is updated. Business scenario Let's look at how subform helps in an education institution that has deployed Zoho CRM. National Public School, Austin (made up, of course!) has set up Zoho CRM and it follows the same relationship pattern of "Students",
Recent Topics
email
Hi My crm email is not working, can you check, I have zoho one account.Need option to see Mass Emails & Cadences in Gmail Outbox OR a dedicated Zoho Outbox
Hi everyone, Right now, when we send 1:1 emails from gmail (with gmail API connected to Zoho CRM), those emails appear both in gmail's sent folder and in Zoho CRM. That works well. But when we send Mass Emails or Cadence emails form Zoho CRM, they areI can't found API for Sales Receipts
Hello May you please help me to find an API document for Sales Receipts to get data and retrive a custom fields like Invoice and credit notes RegardsKaizen #205 - Answering Your Questions | Managing Picklists and Enabling History Tracking via Zoho CRM APIs
Hello everyone! Welcome back to another post in our Kaizen series. In this post, we will look at how you can manage picklist fields in Zoho CRM using APIs. This topic was raised as feedback to Kaizen #200, so we are taking it up here with more details.Multiple Vendor SKUs
One of the big concerns we have with ZOHO Inventory is lack of Vendor Skus like many other inventory software packages offer. Being able to have multiple vendor skus for the same product would be HUGE! It would populate the appropriate vendor Sku forInternally created tickets
Hi there When tickets are created internally on-behalf of customers - there is nothing to show that the ticket was created by an internal agent. This means, that it's easy for our agents to confuse tickets which were created by internal team members andAutomatically change website passwords
Hi everyone, We just switched to a Professional package to also use the "Automatically change website passwords" function. But I cannot find anything about it, how to use it, anywhere. Does anyone know how I can use this function? Best, CasparChange Invoice Prices for an Effective Date
Hi, It would be a really good feature to be able to change the prices on invoices/recurring invoices from an effective date in the event of price increases. For instance, I am in the process of increasing prices that will be effective from a specific"Other Current Asset" accounts as "Paid Through" accounts in Expense
It would be incredibly useful to be able to assign accounts of type Other Current Asset as Paid Through accounts in Expense. Currently, Other Current Liability are permitted as Paid Through Accounts. This makes sense, as Credit Cards are current liabilities.Multi column open text questions that allows respondents to add rows for additional information
I need to create a question that has 2 columns with open text, but I also need to allow respondents to click a "+" button, or something similar, so that they can add additional information if they choose to. I've tried using the Multiple Textboxes typeBot Filtering & Apple Mail Privacy Protection Compliance in Zoho Campaigns
Dear Campaigns Users, The wait is over! We’re excited to announce that the enhanced bot filtering feature is now live in Zoho Campaigns. This update brings greater accuracy to your email campaign reports by distinguishing real user engagement from automatedDécouvrons les détails qui simplifient vos journées de travail avec Trident
Nous nous installons dans des routines efficaces et rodées avec le temps. Chaque matin, nous ouvrons nos e-mails, passons aux messages, consultons notre agenda, puis attaquons nos tâches. Ce processus nous semble maîtrisé, mais est-il réellement optimiséIssue with Purchase Rate Showing as “0” After Importing Items List
Dear Zoho Books Support Team, Good day. I’m reaching out regarding an issue I’m facing while importing my items list into Zoho Books. Despite mapping all fields correctly and including the purchase price for each product in my Excel file, the PurchaseAPI for Task Entity in Zoho Books
I’m working on automating task creation in Zoho Books via a custom button in the Bills Module. The goal is to create a task in the Tasks Module and assign it to the Finance Team, so they can track progress efficiently. While reviewing Zoho Books documentation,create invoice in zoho books from the zoho forms
Is there a native way to have create invoice in zoho books, when zoho form is completed?Email undelivered
GOod Day I am always receiving an uncategorized-bounce to my email. I am not sure why this is happening.Add inventory_valuation_method to items endpooints
To ensure consistent item creation it would be helpful to have the inventory_valuation_method (FIFO vs WAC) be able to be set at item creation or as an update (consistent with current behavior where it is not allowed for items with existing transactions)Use Zoho to send sales receipts for Gocardless transactions
I've been using gocardless for years and have d/d mandates set up on there. Each week we get bulk payments from customer d/d's. However, we need to send sales receipts to these customers. So I know I can sync mandates into Zoho, and then I can set upZoho - Gocardless sales receipts
I've been using gocardless for years and have d/d mandates set up on there. Each week we get bulk payments from customer d/d's. However, we need to send sales receipts to these customers. So I know I can sync mandates into Zoho, and then I can set upIntroducing Rollup summary in Zoho CRM
------------------------------------------Moderated on 5th July'23---------------------------------------------- Rollup summary is now available for all organizations in all the DCs. Hello All, We hope you're well! We're here with an exciting update thatIntroducing Connected Workflows in Zoho CRM for Everyone : Free Your Teams to Focus on What Matters
Hello Everyone, We’re thrilled to introduce the next big evolution in Zoho CRM for Everyone -- Connected Workflows. This new feature builds on our commitment to deliver a CRM that’s truly inclusive, adaptable, and designed for consistent collaborationIntroducing Connected Records to bring business context to every aspect of your work in Zoho CRM for Everyone
Hello Everyone, We are excited to unveil phase one of a powerful enhancement to CRM for Everyone - Connected Records, available only in CRM's Nextgen UI. With CRM for Everyone, businesses can onboard all customer-facing teams onto the CRM platform toCooling-off Period Just Got Better: More Coverage, More Control
We’ve enhanced the Cooling-off Period feature in Zoho Recruit to give you more control over repeat applications and referrals. This helps you maintain a cleaner, more efficient recruitment pipeline. With this enhancement, you can: Prevent duplicate candidateRevenue Management: #7 Revenue Recongition in Construction & Real Estate Industry
If you are in the construction or real estate business, you are used to long project timelines and progressive invoicing to keep up with your billing. But when does revenue get recognized? Will it happen when the contract gets signed? At different milestonesTikTok (and other social platform) Messages and comments of the past
When I link a social channel, Zoho will show in "Inbox", "Messages" and "Contact" sections the interaction done in the past? (comment, messages...)Email Integration - Zoho CRM - OAuth and IMAP
Hello, We are attempting to integrate our Microsoft 365 email with Zoho CRM. We are using the documentation at Email Configuration for IMAP and POP3 (zoho.com) We use Microsoft 365 and per their recommendations (and requirements) for secure email we haveHow do I fix this? Unable to send message; Reason:554 5.1.8 Email Outgoing Blocked.
How do I fix this? Unable to send message; Reason:554 5.1.8 Email Outgoing Blocked.Restrict Employee mail deletion
Dear Zoho, Is there a way where i can restrict my employees to delete any mails from their account554 5.1.8 Email Outgoing Blocked.
Hi guys, I just singed up for mateusz.nowicki@zoho.com mail and I can't send any mails.. Why? Everytime I try to send something I got error like the one in the screenshot. Please, help me.Zoho IP blocked by SpamHaus
ERROR CODE :550 - 5.7.0 Your server IP address is in the SpamHaus SBL-XBL database, byeFile Upload in Creator's Subfrom
Hello Sir/Madam, Here is a Problem......... Scenario: In CRM One Custom Module (Payments) have one File Upload Field now we have to Upload that File into Creator's Custom Form (Documents) have one Subform (Documents) in Document Upload Field using DelugeError AS101 when adding new email alias
Hi, I am trying to add apple@(mydomain).com The error AS101 is shown while I try to add the alias.Trigger workflow base on email clic
Searching the help and forum, I see that there were workflow trigger rules based on email. But now, I can't find this type of trigger when I create a custom workflow. What I'm looking for would be to automate the sending of an email for a new prospect,Bigin Form Acknowledgement
How to troubleshoot and find out why form acknowledgement is not sending emails after form submission?Option to Customize Career Site URL Without “/jobs/Careers”
Dear Zoho Recruit Team, I hope you are doing well. We would like to request an enhancement to the Career Site URL structure in Zoho Recruit. In the old version of the career site, our URL was simply: 👉 https://jobs.domain.com However, after moving toZoho Mail POP & IMAP Server Details
Hello all! We have been receiving a number of requests regarding the errors while configuring or using Zoho Mail account in POP/ IMAP clients. The server details vary based on your account type and the Datacenter in which your account is setup. EnsureEver since the new Android App udpates notifications are not working
notifications are not working for the app is its closed I followed the tutuorial to the notificaction fixed and everythig seems to be right but notifications are not workigZoho Analytics & Zoho Desk - but not all desks
I have several desks in our company and one of those is used by our HR department. I want to bring through the data to the shared Zoho Analytics workspace - except for the HR desk. Can this be excluded at data import stage ?Incoming Emails Not Showing Up in Zoho Inbox
Hi - I have my Zoho email account set up to forward a copy of all incoming emails to a secondary Gmail address, whilst retaining the original email in the Zoho inbox. However, all my incoming emails are currently not showing up in my Zoho inbox, so I'mHow to retrieve my following requests on this forum?
Sorry, but I did not find the proper subforum for this question.Next Page