Tip #6- Steps to create custom email templates in Zoho Assist- 'Insider Insights'
We're excited to share another valuable tip with our Zoho Community members. So far, our Insider Insights series has covered the basics of remote support sessions. Today, we'll guide you through the process creating custom email template. Let's dive right in!
Enhance your remote support sessions with personalized email invitations tailored to your users. Why settle for the ordinary when you can add a unique touch and make a lasting impression on your customers? Here's how:
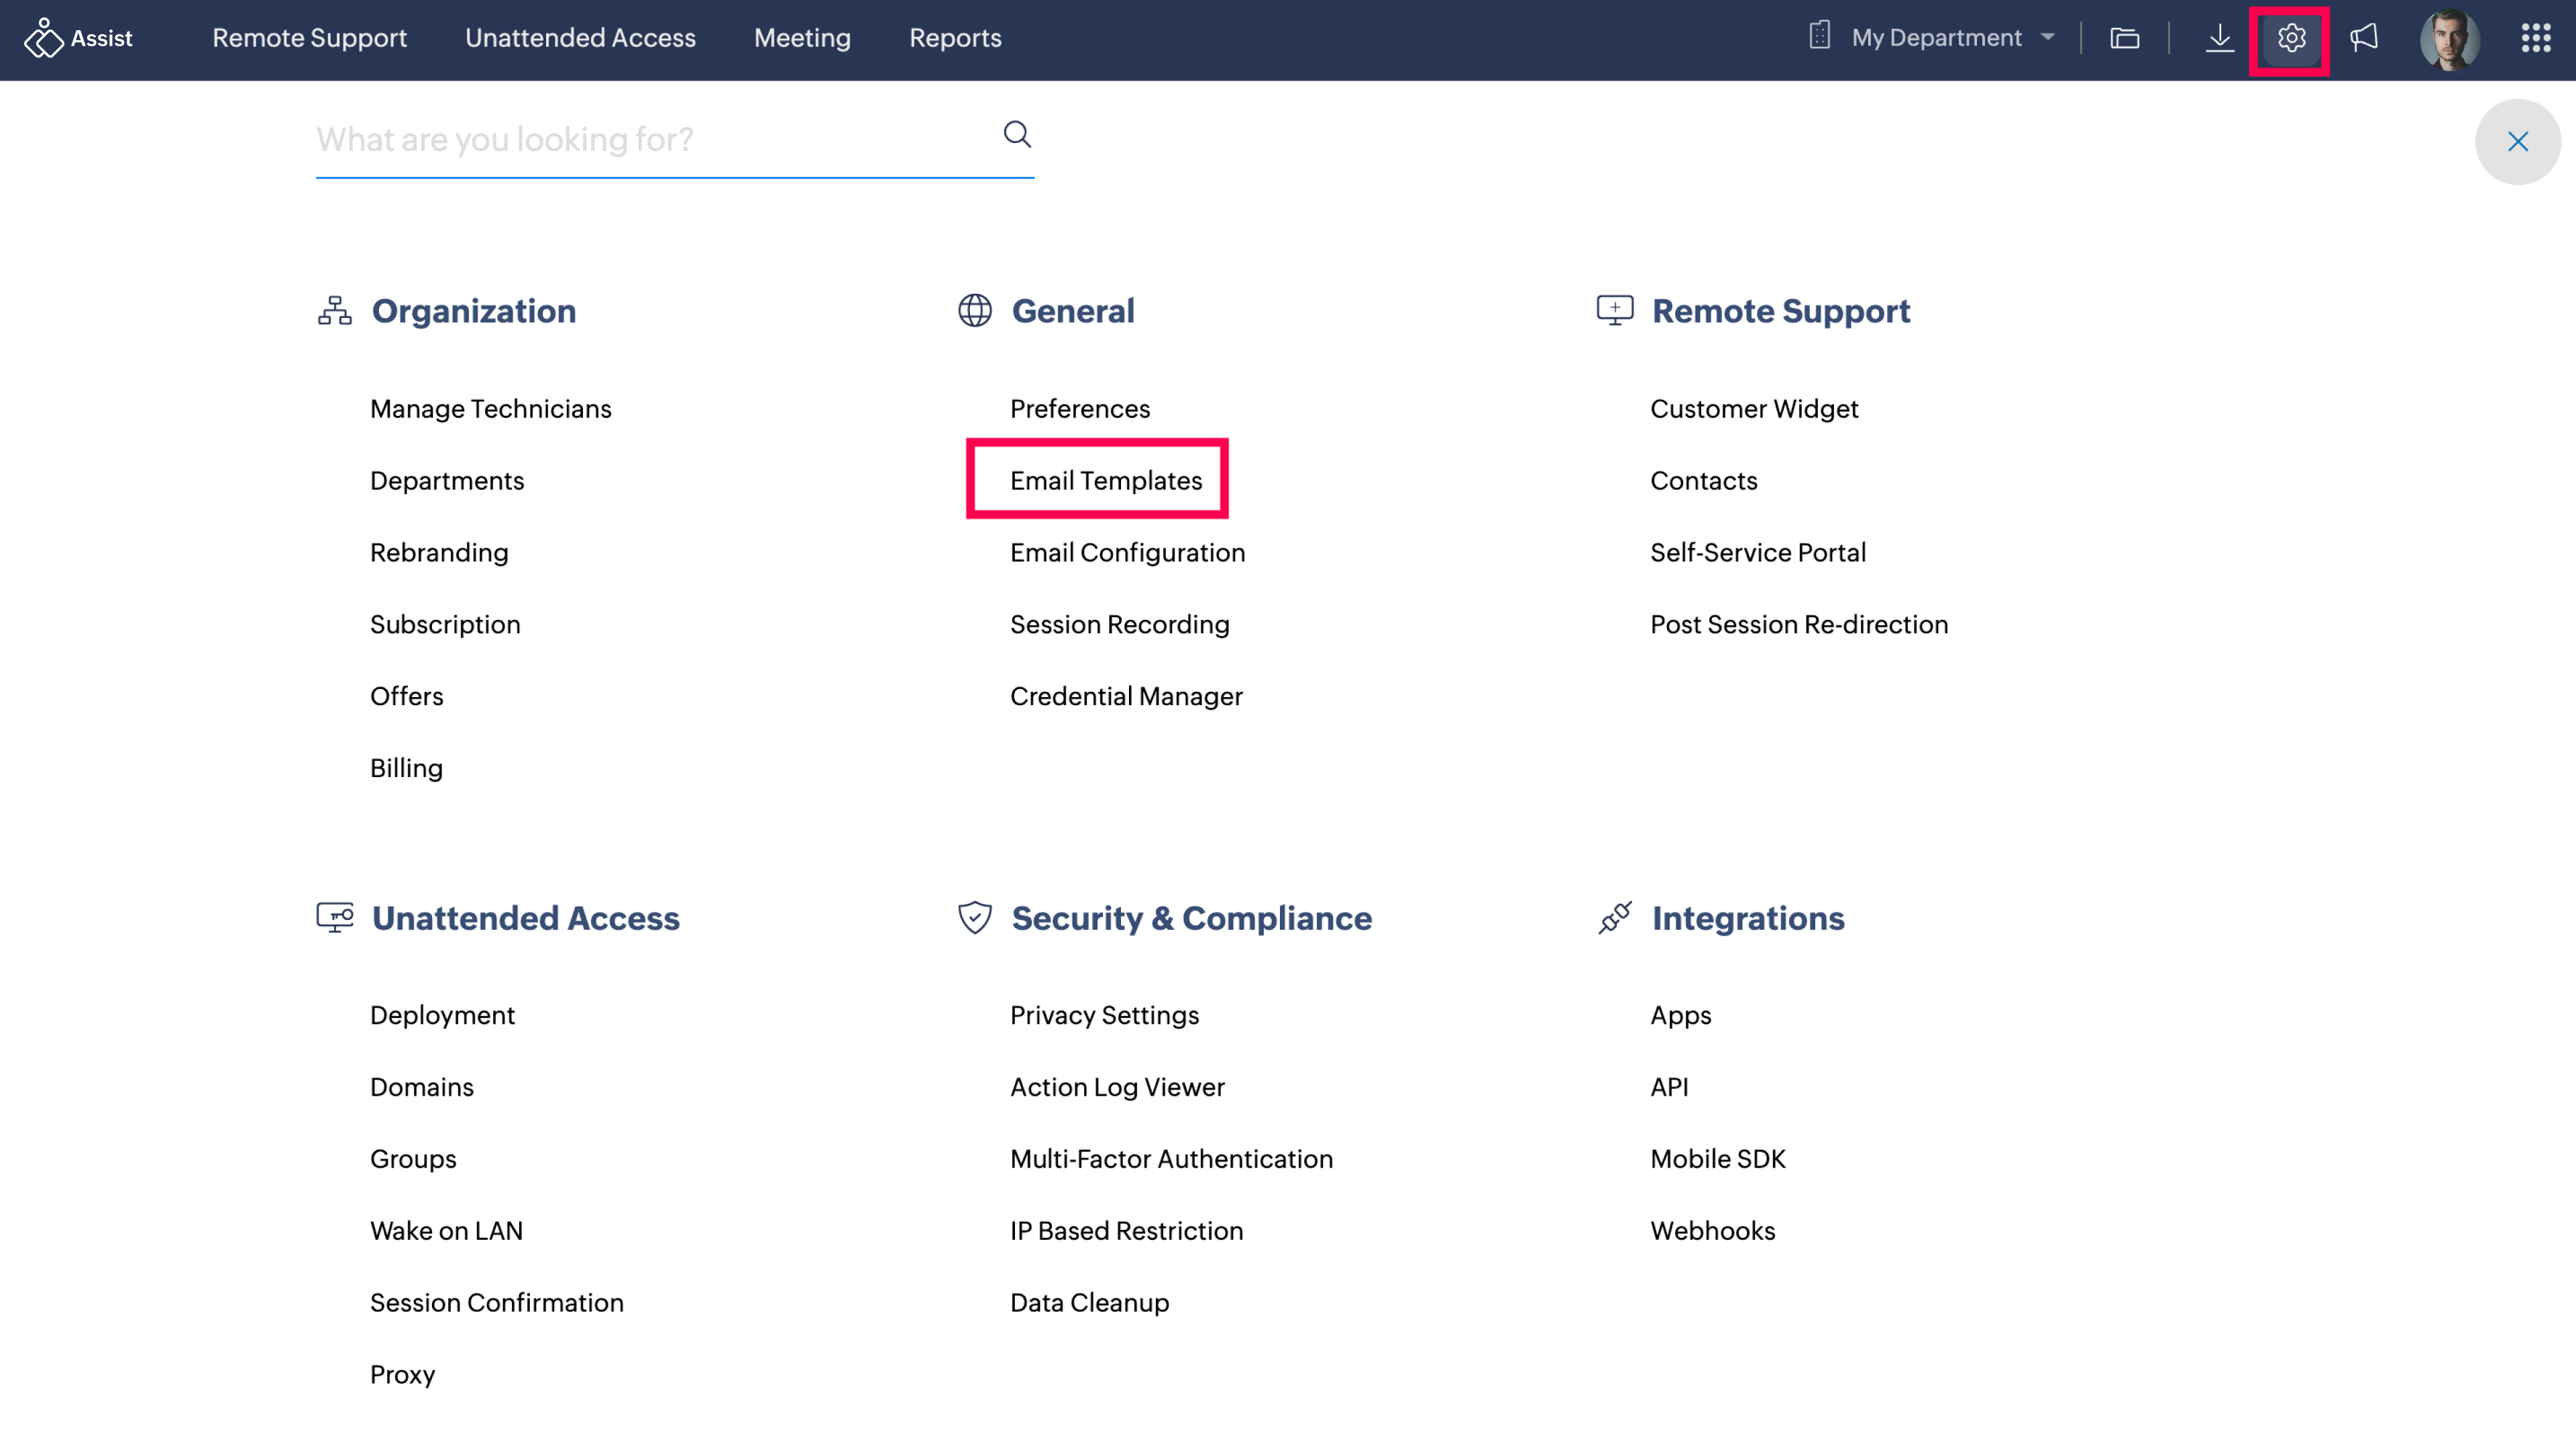
Access email templates: Start by navigating to Settings icon at the top right corner and select Email Template.
Default or customized: You have two choices here. Use the Default Template for standard invites, or opt for the Customized Template to add your personal flair.
Edit with ease: Basic editing tools are conveniently located at the top of the page, making it simple to format your email content.
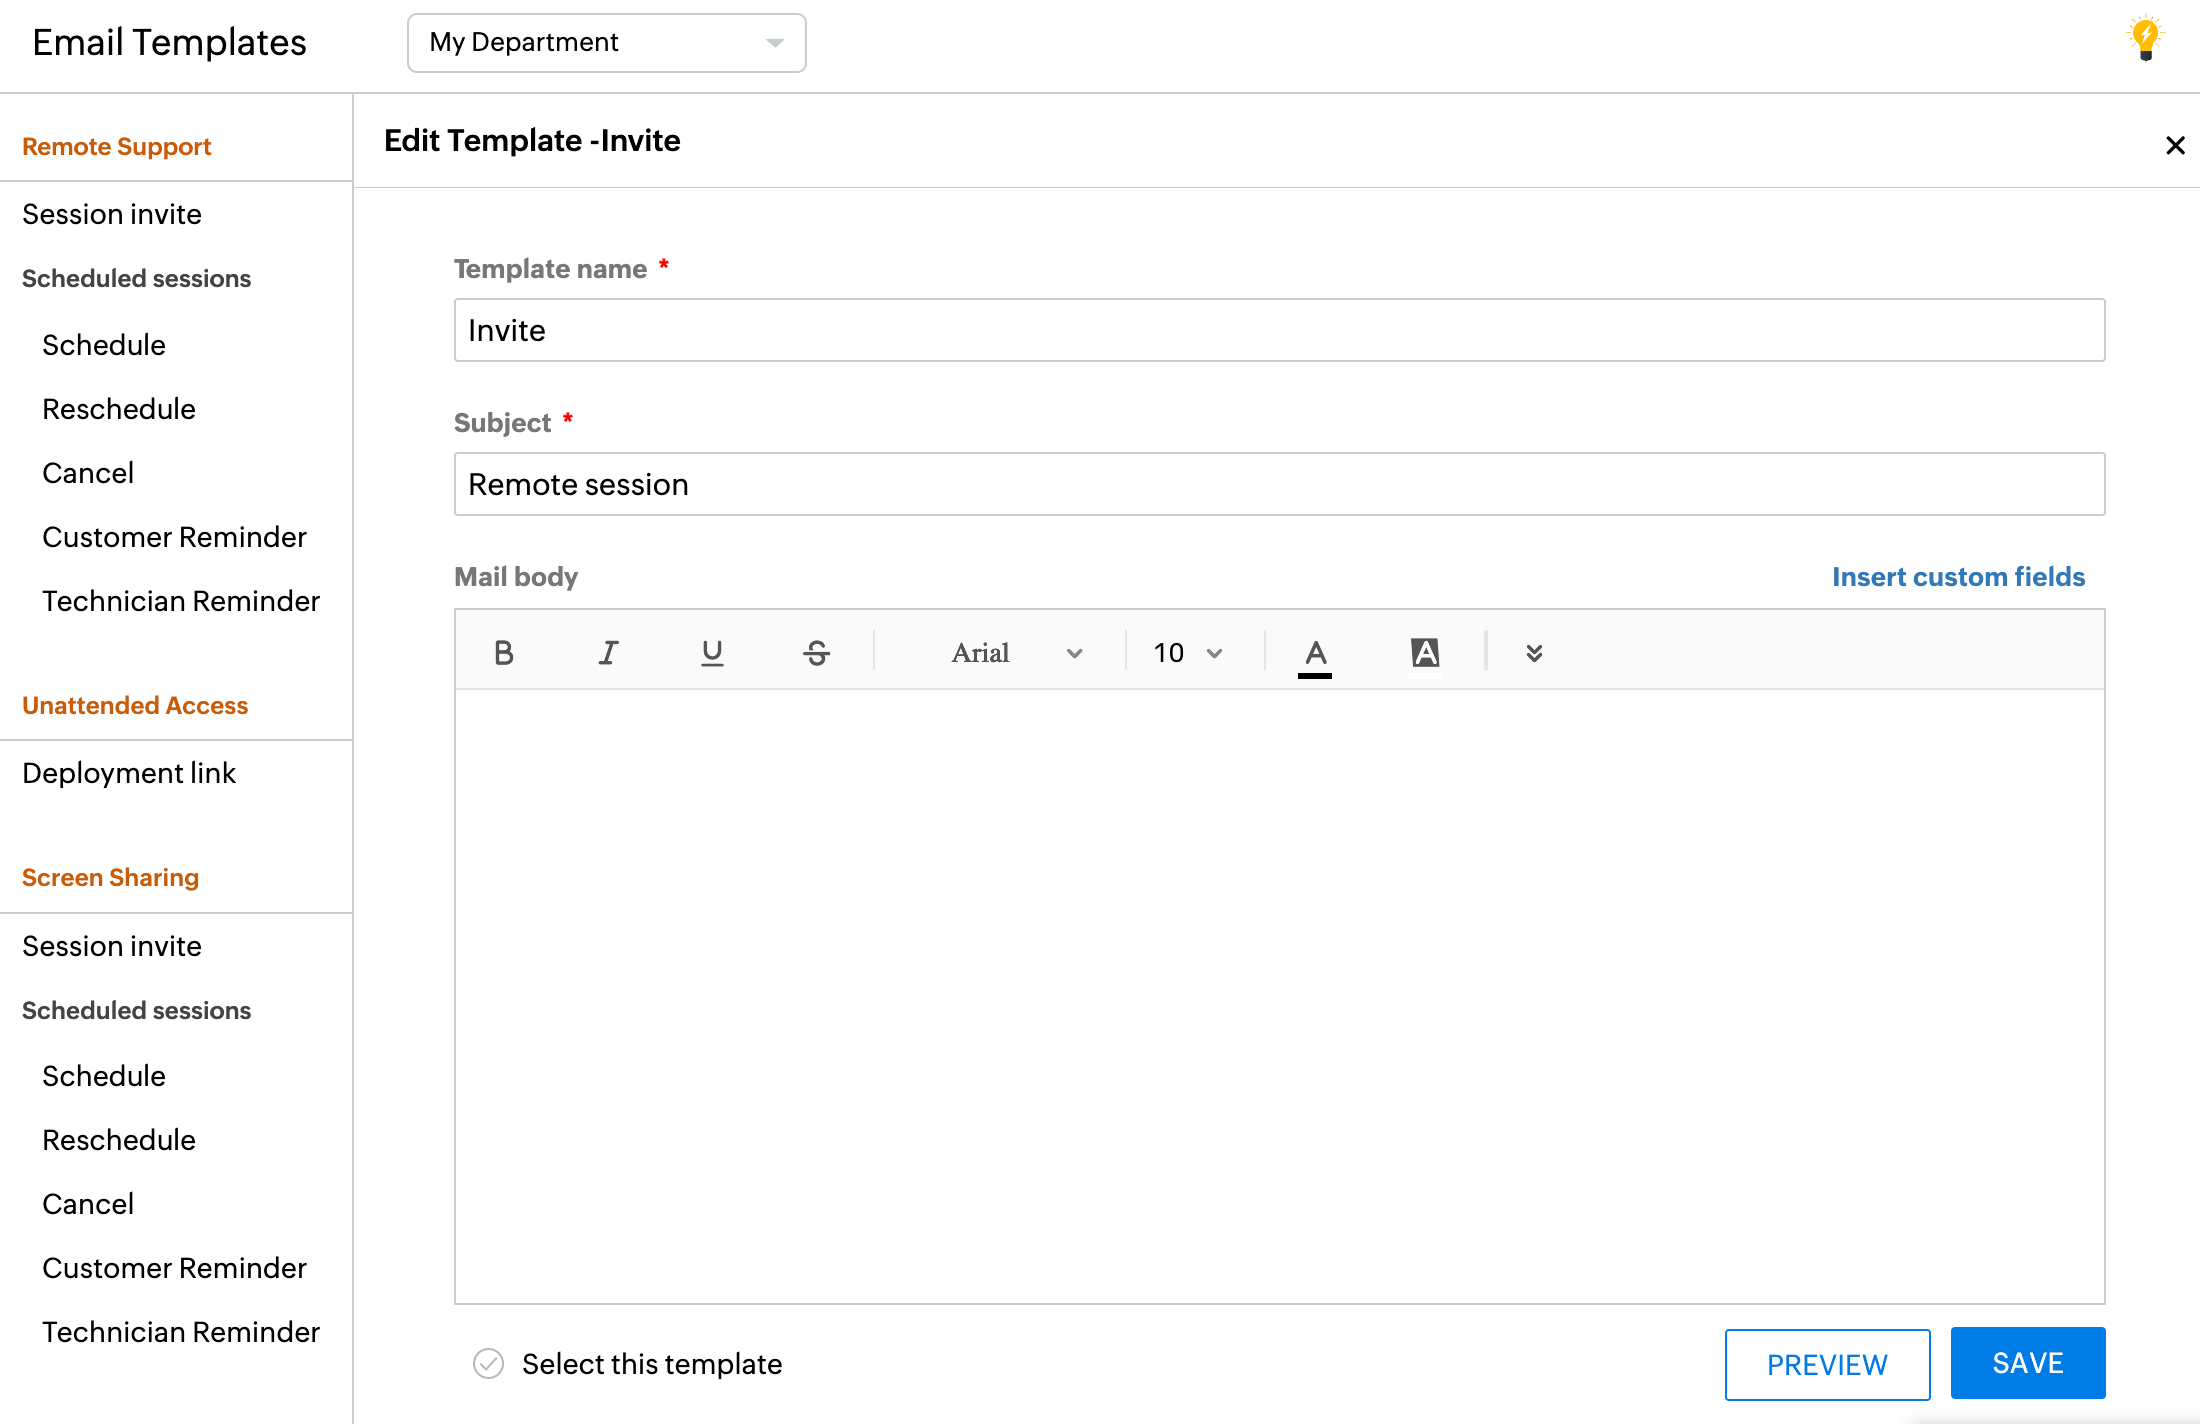
Dynamic custom fields: On the right side of the page, you'll find options to add custom fields. These allow you to incorporate technician names, customer details, organization names, and joining links into your customized content.
Save for later: Don't forget to save your customized email template for future use.
By taking advantage of these customization features, you can elevate your remote support sessions and provide a tailored, professional experience for your customers. So, go ahead and start making your invitations stand out from the crowd!