Posting on LinkedIn Directly from Zoho Cliq
Are you tired of switching back and forth between Zoho Cliq and LinkedIn to make a simple post? Well, there's good news! With the following instructions, you can post directly on LinkedIn from within Zoho Cliq. Let's get started!
Step 1: Generate an OAuth Token
To post on LinkedIn from Zoho Cliq, you'll need to generate an OAuth token. Here's how to do it:
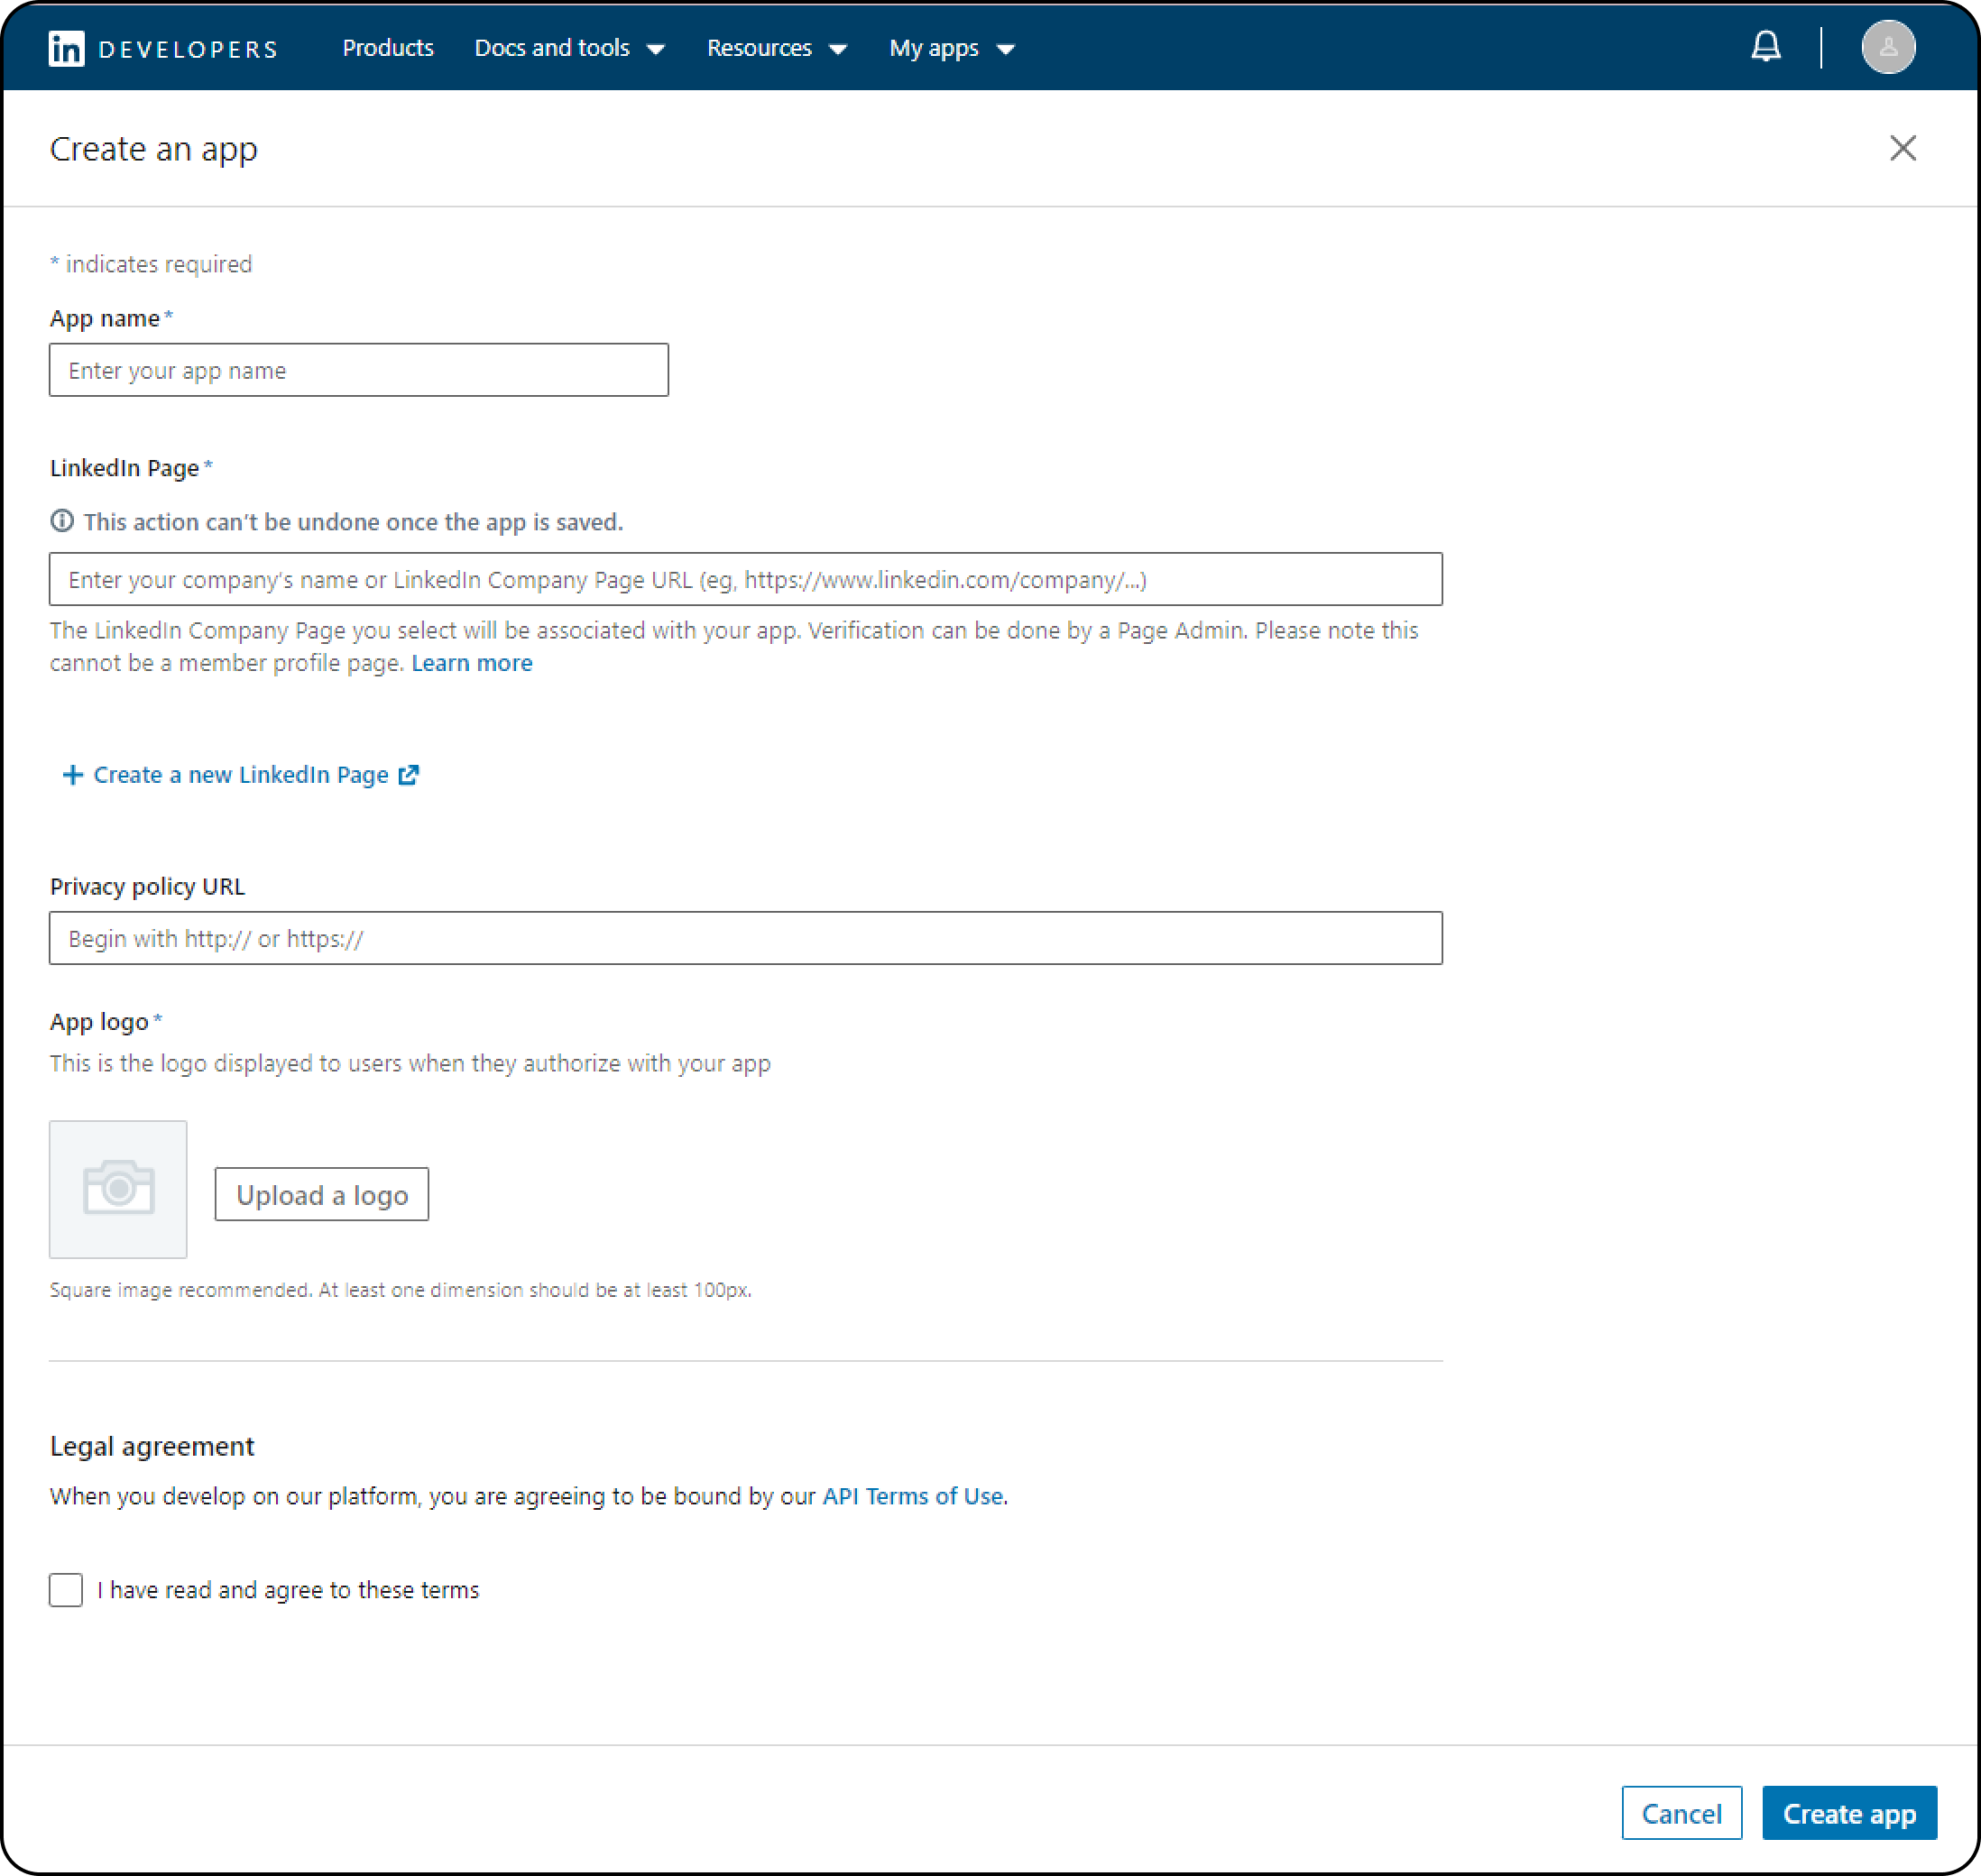
- Go to the LinkedIn Developer page and create a new app by clicking on "Create app"

- Enter your app name, LinkedIn page, and app logo, then agree to the terms and conditions and click on "Create app".
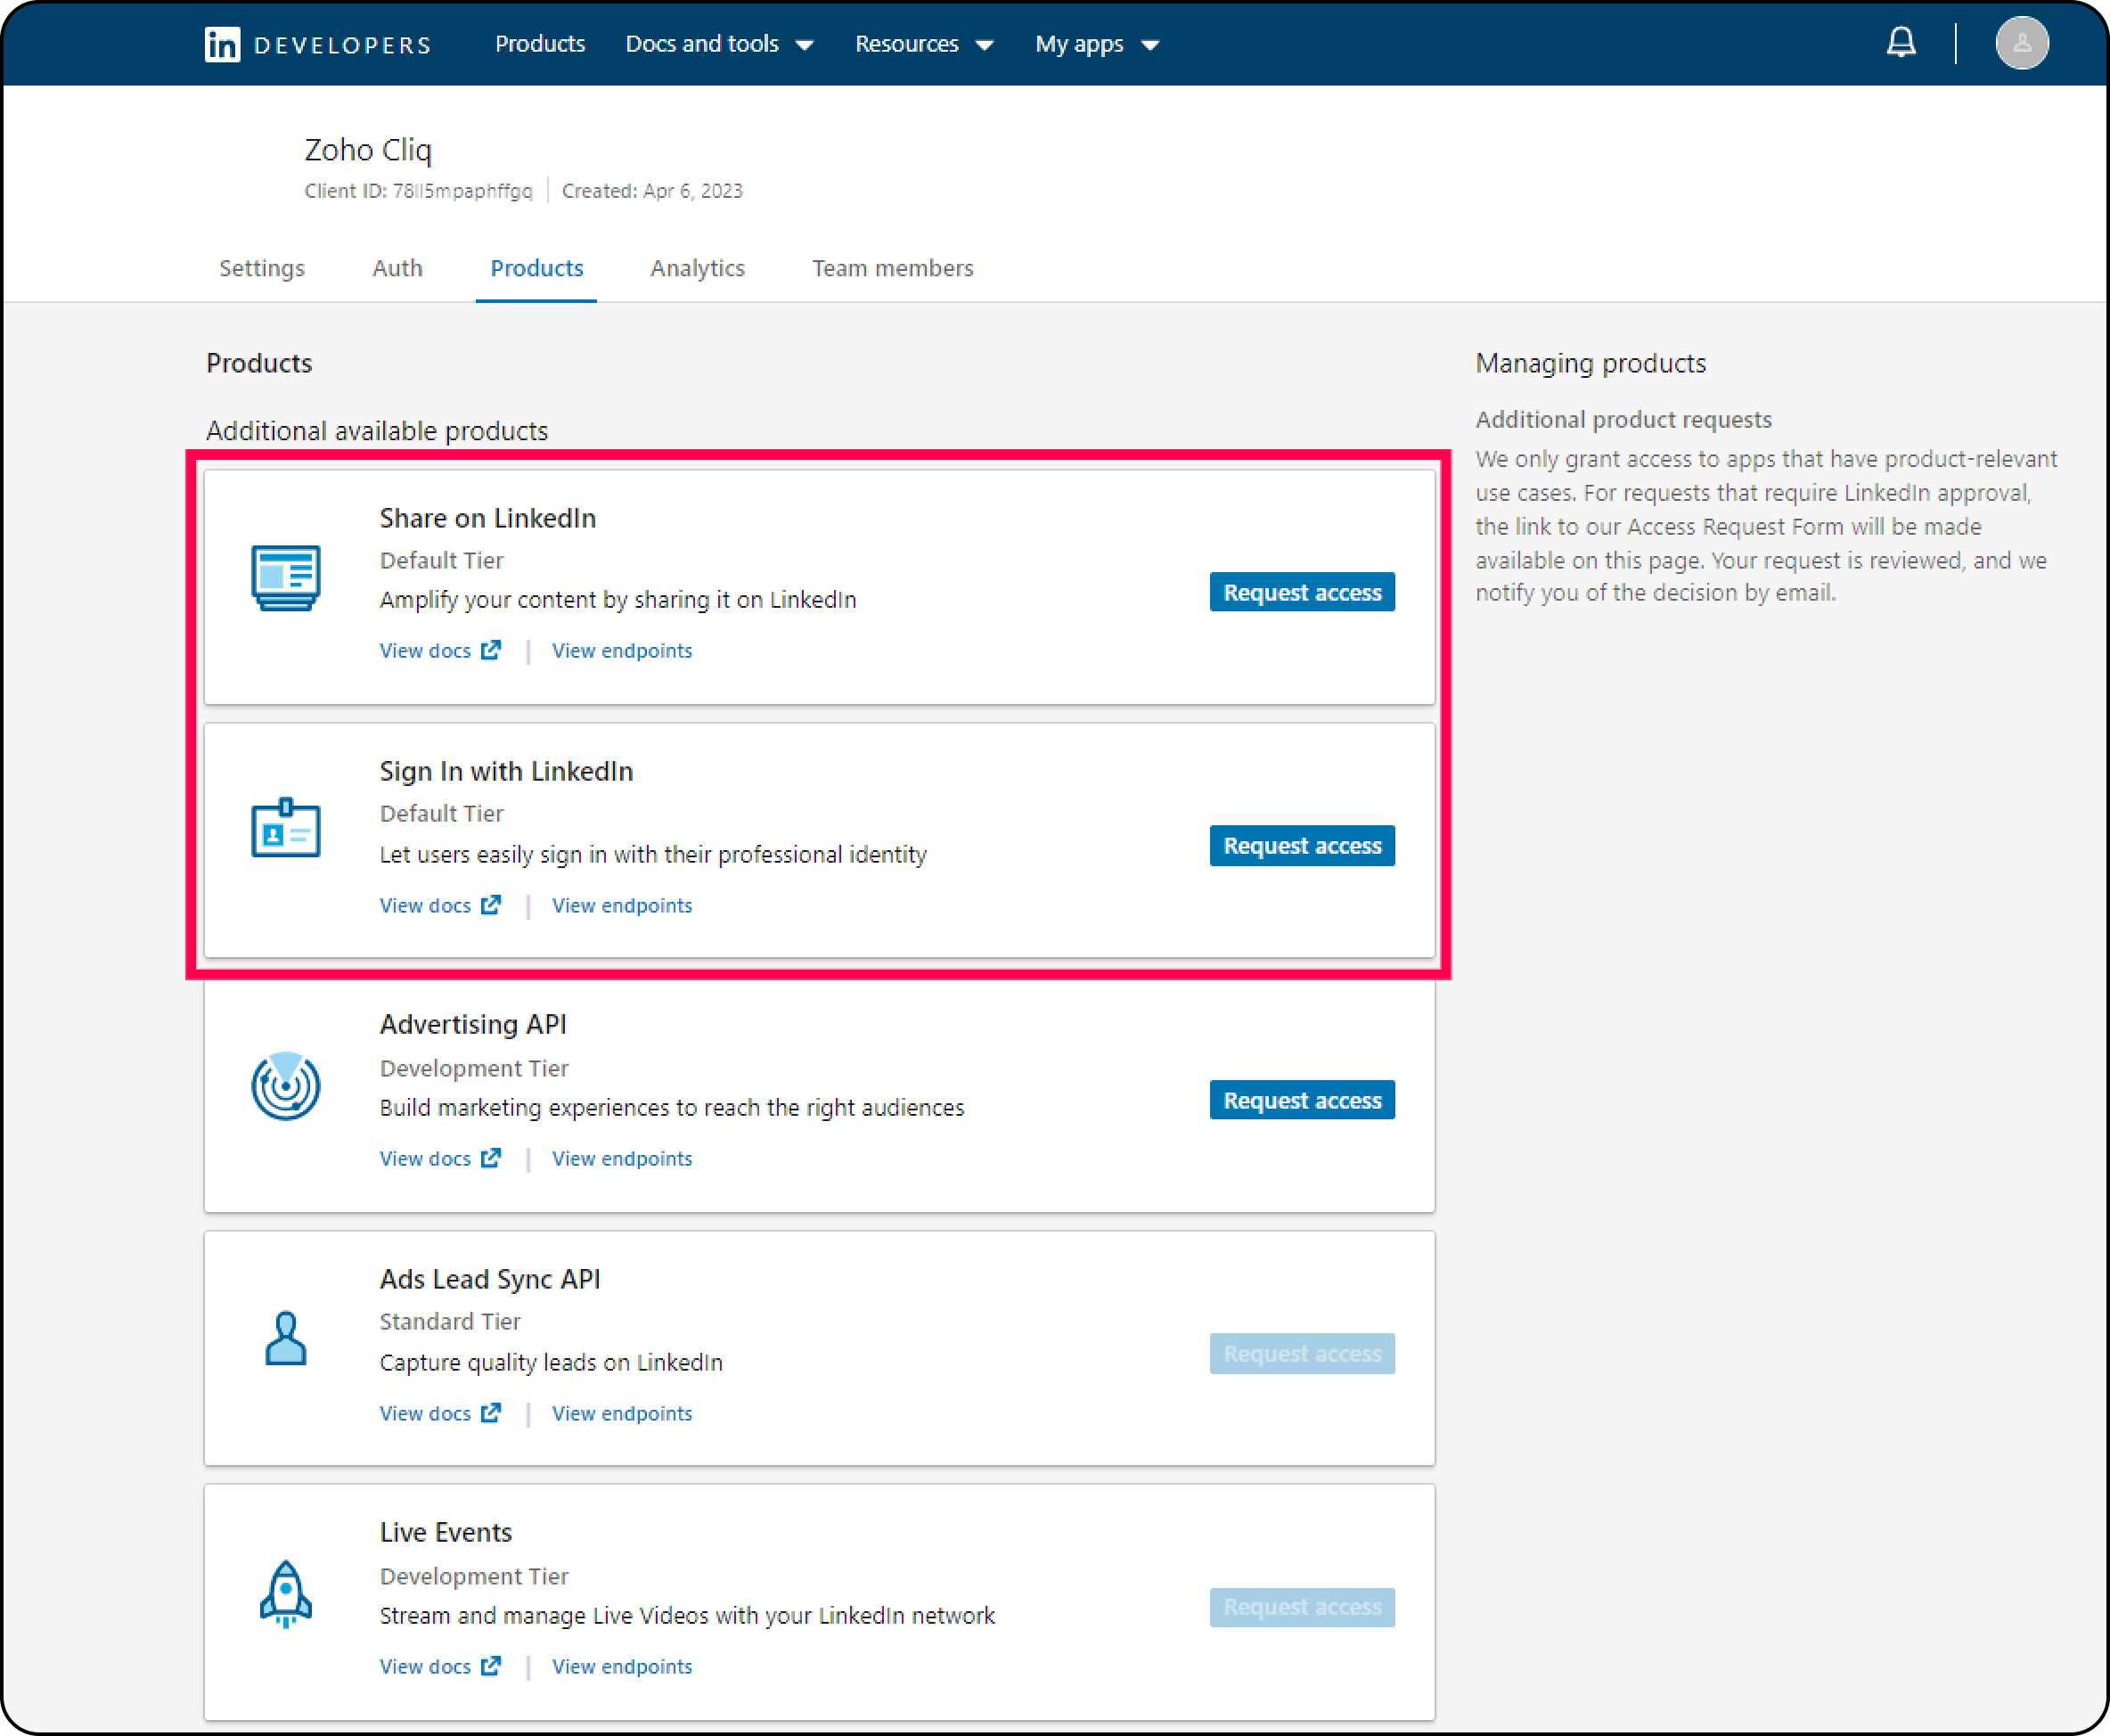
- Navigate to the "Products" tab and request access for "Share on LinkedIn" and "Sign In with LinkedIn".
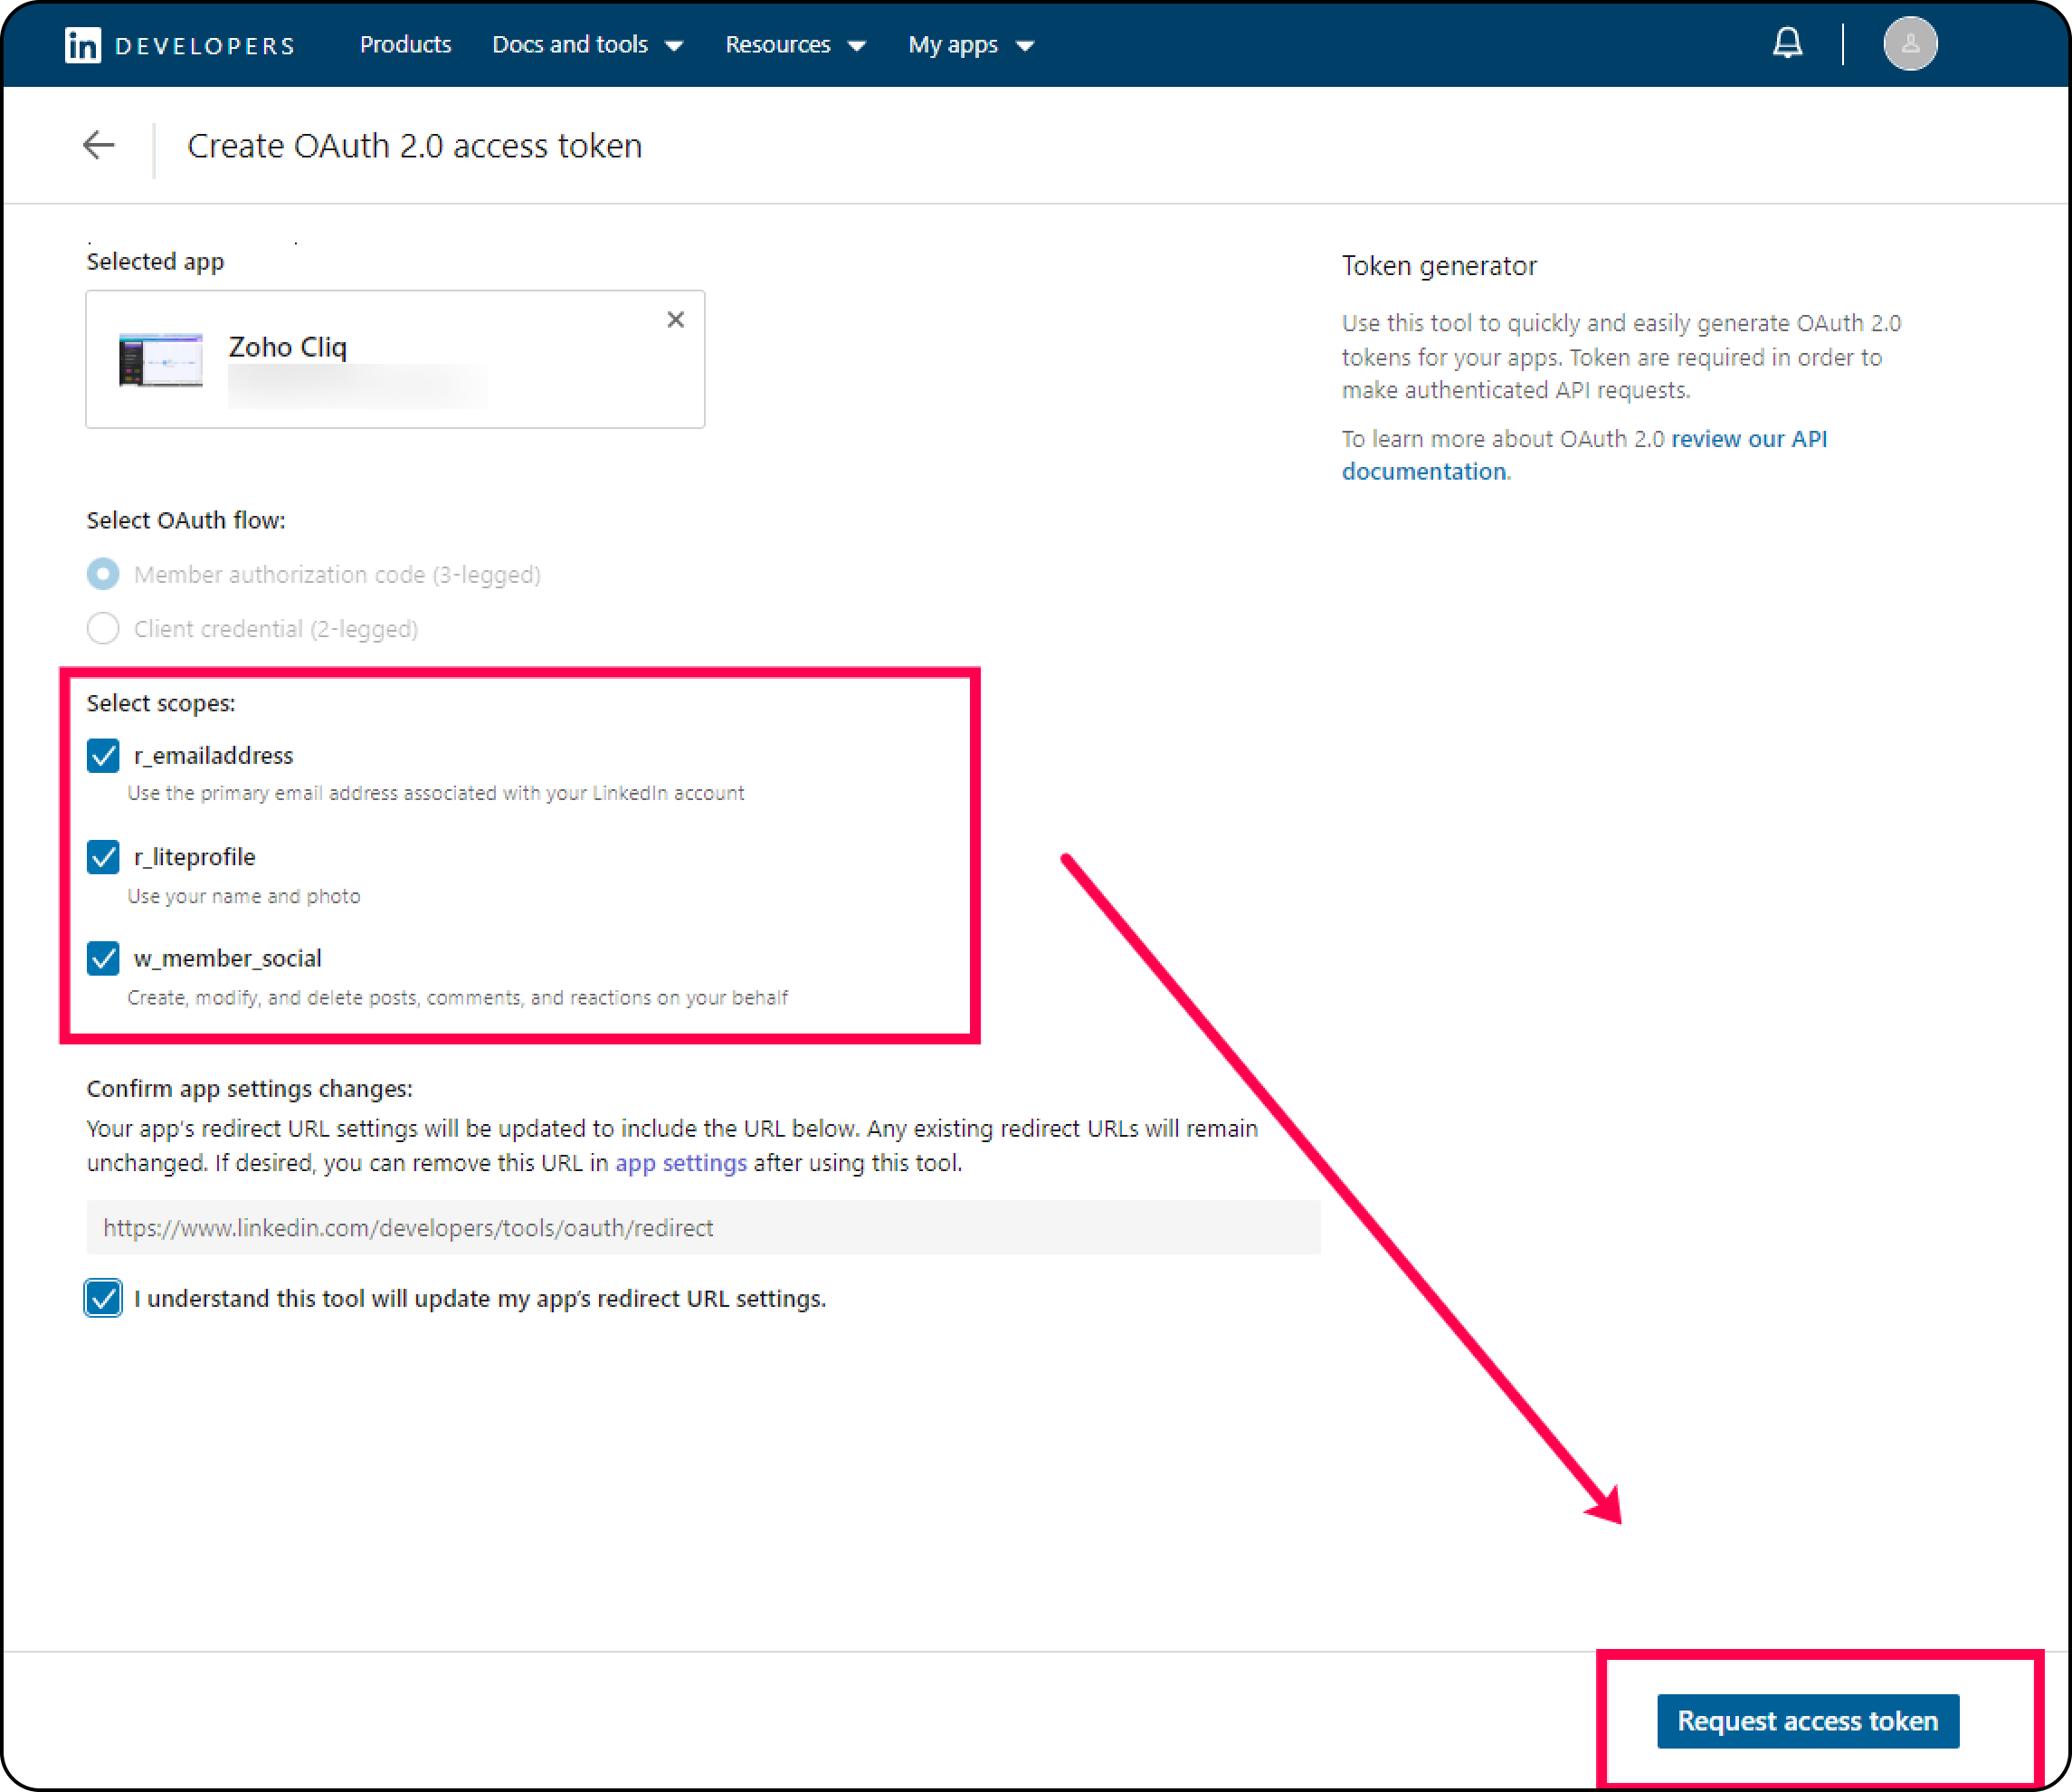
- Go to the OAuth Tools page and create a new access token.
- Congratulations! You've successfully generated an OAuth token.
Step 2: Configure the OAuth Token in Zoho Cliq
Now that you have your OAuth token, it's time to configure it in Zoho Cliq. Here's how:
- Go to https://cliq.zoho.com and navigate to "Profile" > "Bots & tools" > "Integrations" > "Command" > "Create".
- Enter a command name, hint, access level, and click on "Save".
- Copy and paste the following code:
- inputs = List();
- inputs.add({"type":"textarea", "name":"description","label":"Description","placeholder":"What do you want to talk about?","min_length":"0","max_length":"1000","mandatory":true});
- inputs.add({"name":"file","label":"Add a Photo","placeholder":"Please upload a photo to upload.","mandatory":false,"type":"file"});
- return {"type":"form","title":"Create a post","name":"linkedinPost","hint":"","button_label":"Submit","inputs":inputs,"action":{"type":"invoke.function","name":"linkedinPost"}};
- Next, go to "Profile" > "Bots & tools" > "Integrations" > "Function" > "Create".
- Name your function "linkedinPost", enter a hint, choose the function type as form, and click on "Save".
- Copy the code below and paste it inside the form submit handler.
- formValues = form.get("values");
- textContent = formValues.get("description");
- file = formValues.get("file");
- // fetch access token
- token = "Bearer XXXXXXXXXXXXXXXXXXXXXXXXXXXXXX";
- headersMap = Map();
- headersMap.put("Authorization",token);
- headersMap.put("LinkedIn-Version","202208");
- fetchUserID = invokeurl
- [
- url :"https://api.linkedin.com/v2/me"
- type :GET
- headers:headersMap
- ];
- info fetchUserID;
- userID = fetchUserID.get("id");
- if(file.length() == 0)
- {
- params = {"author":"urn:li:person:" + userID,"lifecycleState":"PUBLISHED","specificContent":{"com.linkedin.ugc.ShareContent":{"shareCommentary":{"text":textContent},"shareMediaCategory":"NONE"}},"visibility":{"com.linkedin.ugc.MemberNetworkVisibility":"PUBLIC"}};
- createPost = invokeurl
- [
- url :"https://api.linkedin.com/v2/ugcPosts"
- type :POST
- parameters:params + ""
- headers:headersMap
- detailed:true
- ];
- info createPost;
- }
- else
- {
- initializeParams = {"initializeUploadRequest":{"owner":"urn:li:person:" + userID}};
- initializeUpload = invokeurl
- [
- url :"https://api.linkedin.com/rest/images?action=initializeUpload"
- type :POST
- parameters:initializeParams + ""
- headers:headersMap
- ];
- info initializeUpload;
- imageUrl = initializeUpload.get("value").get("uploadUrl");
- imageID = initializeUpload.get("value").get("image").toList(":").get(3);
- uploadFile = invokeurl
- [
- url :imageUrl
- type :PUT
- parameters:file
- headers:headersMap
- detailed:true
- content-type:"application/octet-stream"
- ];
- info uploadFile;
- if(uploadFile.get("responseCode") == 201)
- {
- params = {"author":"urn:li:person:" + userID,"lifecycleState":"PUBLISHED","specificContent":{"com.linkedin.ugc.ShareContent":{"shareCommentary":{"text":"Good Afternoon everyone"},"shareMediaCategory":"IMAGE","media":{{"status":"READY","description":{"text":"Center stage!"},"media":"urn:li:digitalmediaAsset:" + imageID,"title":{"text":"First LinkedIn Post"}}}}},"visibility":{"com.linkedin.ugc.MemberNetworkVisibility":"PUBLIC"}};
- createPost = invokeurl
- [
- url :"https://api.linkedin.com/v2/ugcPosts"
- type :POST
- parameters:params + ""
- headers:headersMap
- detailed:true
- ];
- info createPost;
- }
- else
- {
- return {"text":createPost.get("responseText").get("message"),"card":{"theme":"10"}};
- }
- }
- if(createPost.get("responseCode") == 201)
- {
- return {"text":"Post created successfully","type":"banner","status":"success"};
- }
- else
- {
- return {"text":createPost.get("responseText").get("message"),"card":{"theme":"10"}};
- }
- return Map();
- That's it! You can now use the command you created in Step 2 to post directly on LinkedIn from Zoho Cliq.
We hope this guide was helpful. Now, you can post on LinkedIn without leaving Zoho Cliq. Happy posting!