Spotlight #11 - Client Users
Hello everyone!

With our rapidly changing work trends, most organizations have started to depend more on external users to contribute to important business operations. The effective management of contract workers (consultants, technicians, or other workers) can improve flexibility by filling skillset gaps, bringing in new perspectives, and making the hiring process quicker and more cost-effective.
This month's spotlight is on WorkDrive's Client Users feature. Client users are external users temporarily added to a WorkDrive Team with limited roles and permissions. This feature could be useful in many different cases, such as:
- A product team working with freelance developers or consultants to manage their current workload.
- A company hiring temporary staff for an event.
- A digital marketing team collaborating with their clients on campaigns
- A media company working with freelance translators for their international projects.
- A textile company working with a third-party web development team to manage their e-commerce platform.
Here's how it works:
Team admins can add client users to the required Team Folders from the Admin Console. Client users can be assigned Organizer, Editor, Commenter, or Viewer roles in a Team Folder for effective collaboration with team members. To invite client users to a team, admins will need to buy licenses for client users separately as an add-on.
The available shared team storage will be accessible to client users just as with team members, but client users will not be allotted separate storage.
Client users will also be able to access WorkDrive's web and mobile (iOS & Android) applications.
Check out our video on using the Client Users feature for more information.
Here's how to invite client users to your team:
- Click Admin Console in the bottom-left corner of your WorkDrive account.
- In the left sidebar of the Admin Console page, click the Client Users tab. This action will display the list of existing client users by default.
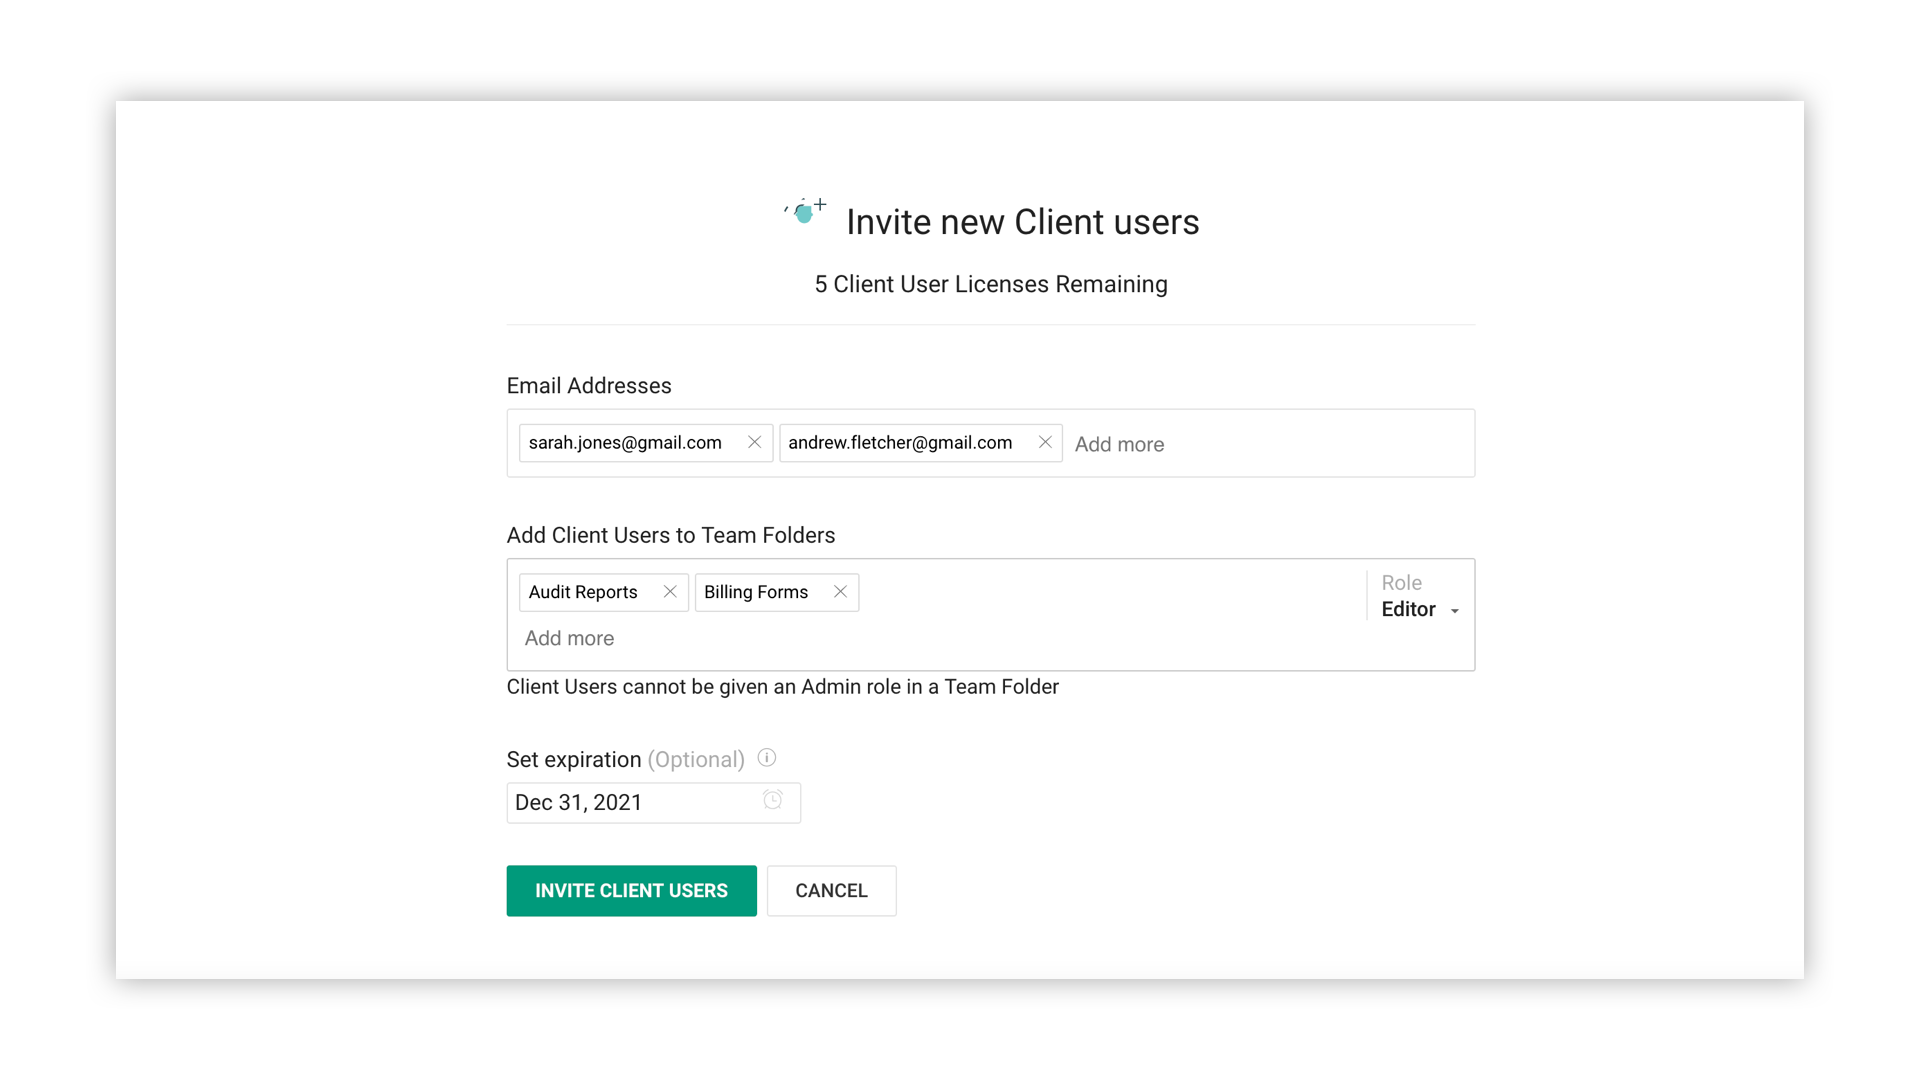
- In the top-right corner, click the INVITE CLIENT USERS button. The Invite new Client Users dialog box will appear with three fields to fill out: Email Addresses, Add Client Users to Team Folders, and Set expiration.
- Enter the required details in these fields and click the INVITE CLIENT USER button at the bottom.
To learn more about managing client users in your Team, you can read the detailed help page of the feature here.
We hope you found this article helpful! Watch this space for more interesting product updates, tips and tricks, and more.