Set up sync with Zoho Invoice
Zoho Invoice is free online invoicing software used for crafting polished invoices to make sure you get paid quickly. You can also create expenses and track time. Integrating Zoho Campaigns with Zoho Invoice allows you to sync customers from Zoho Invoice as Contacts and engage with them consistently using personalized campaigns.
Setup a Sync
- Click Contacts in the Navigation Toolbar, then click Sync Services.
- Hover over Zoho Invoice and click Associate New Account. Click on Continue in the new page that appears.
- In the pop-up that appears, you need to choose the Zoho Invoice organization from which you would like to sync the customers as contacts. Once you have done choosing the organization, click on Proceed.
- The two apps will be connected. You will see a screen as shown below. You can proceed with adding a sync.
- Click on Active Syncs to view the page where your active syncs are listed. In this page you can click on Add New Sync to add a new sync.
- Once you click on Add New Sync you will see a page where you can set up a new sync. Select the module to be synced. You can only choose Contacts (called as Customers in Zoho Invoice). Once you select the module, all the records in that module from Zoho Invoice will be synced to All Contacts
view of Zoho Campaigns.
- Select the List in Zoho Campaigns to which you want to import the contacts.
- Choose Subscription type: Marketing or Non-marketing.
- Select the topics to associate to the synced contacts.
- Choose the Lawful basis for communication.
- Enable Update empty field value if required. By enabling this, values of fields removed in Zoho Invoice will also be updated with empty values in the respective field of Zoho Campaigns.
- Schedule a Sync time to sync the records periodically. However, the first sync will be initiated immediately as soon as you initiate a sync.
- Click Next.

Notes:
- Both your Zoho Campaigns account and Zoho Invoice organization must be registered under the same email address for this integration to take place.
- At any given time, only one Zoho Invoice organization can be connected to Zoho Campaigns. You have to disable the integration of the current organization if you want to sync the Customers from another Zoho Invoice organization.
- It is not possible to set up multiple syncs using the Add New Sync option. Only one sync can be set up.
- In order for you to choose the Topics, you need to have more than one topic created in your Zoho Campaigns account.
- In Zoho Campaigns, under Settings -> Compliance Settings -> if you enable GDPR Settings, the Lawful basis for communication option will be available for choosing when setting up the sync.
Map your Fields
In Map your Fields, you can choose the Zoho Invoice fields to be mapped against the fields you create in Zoho Campaigns.
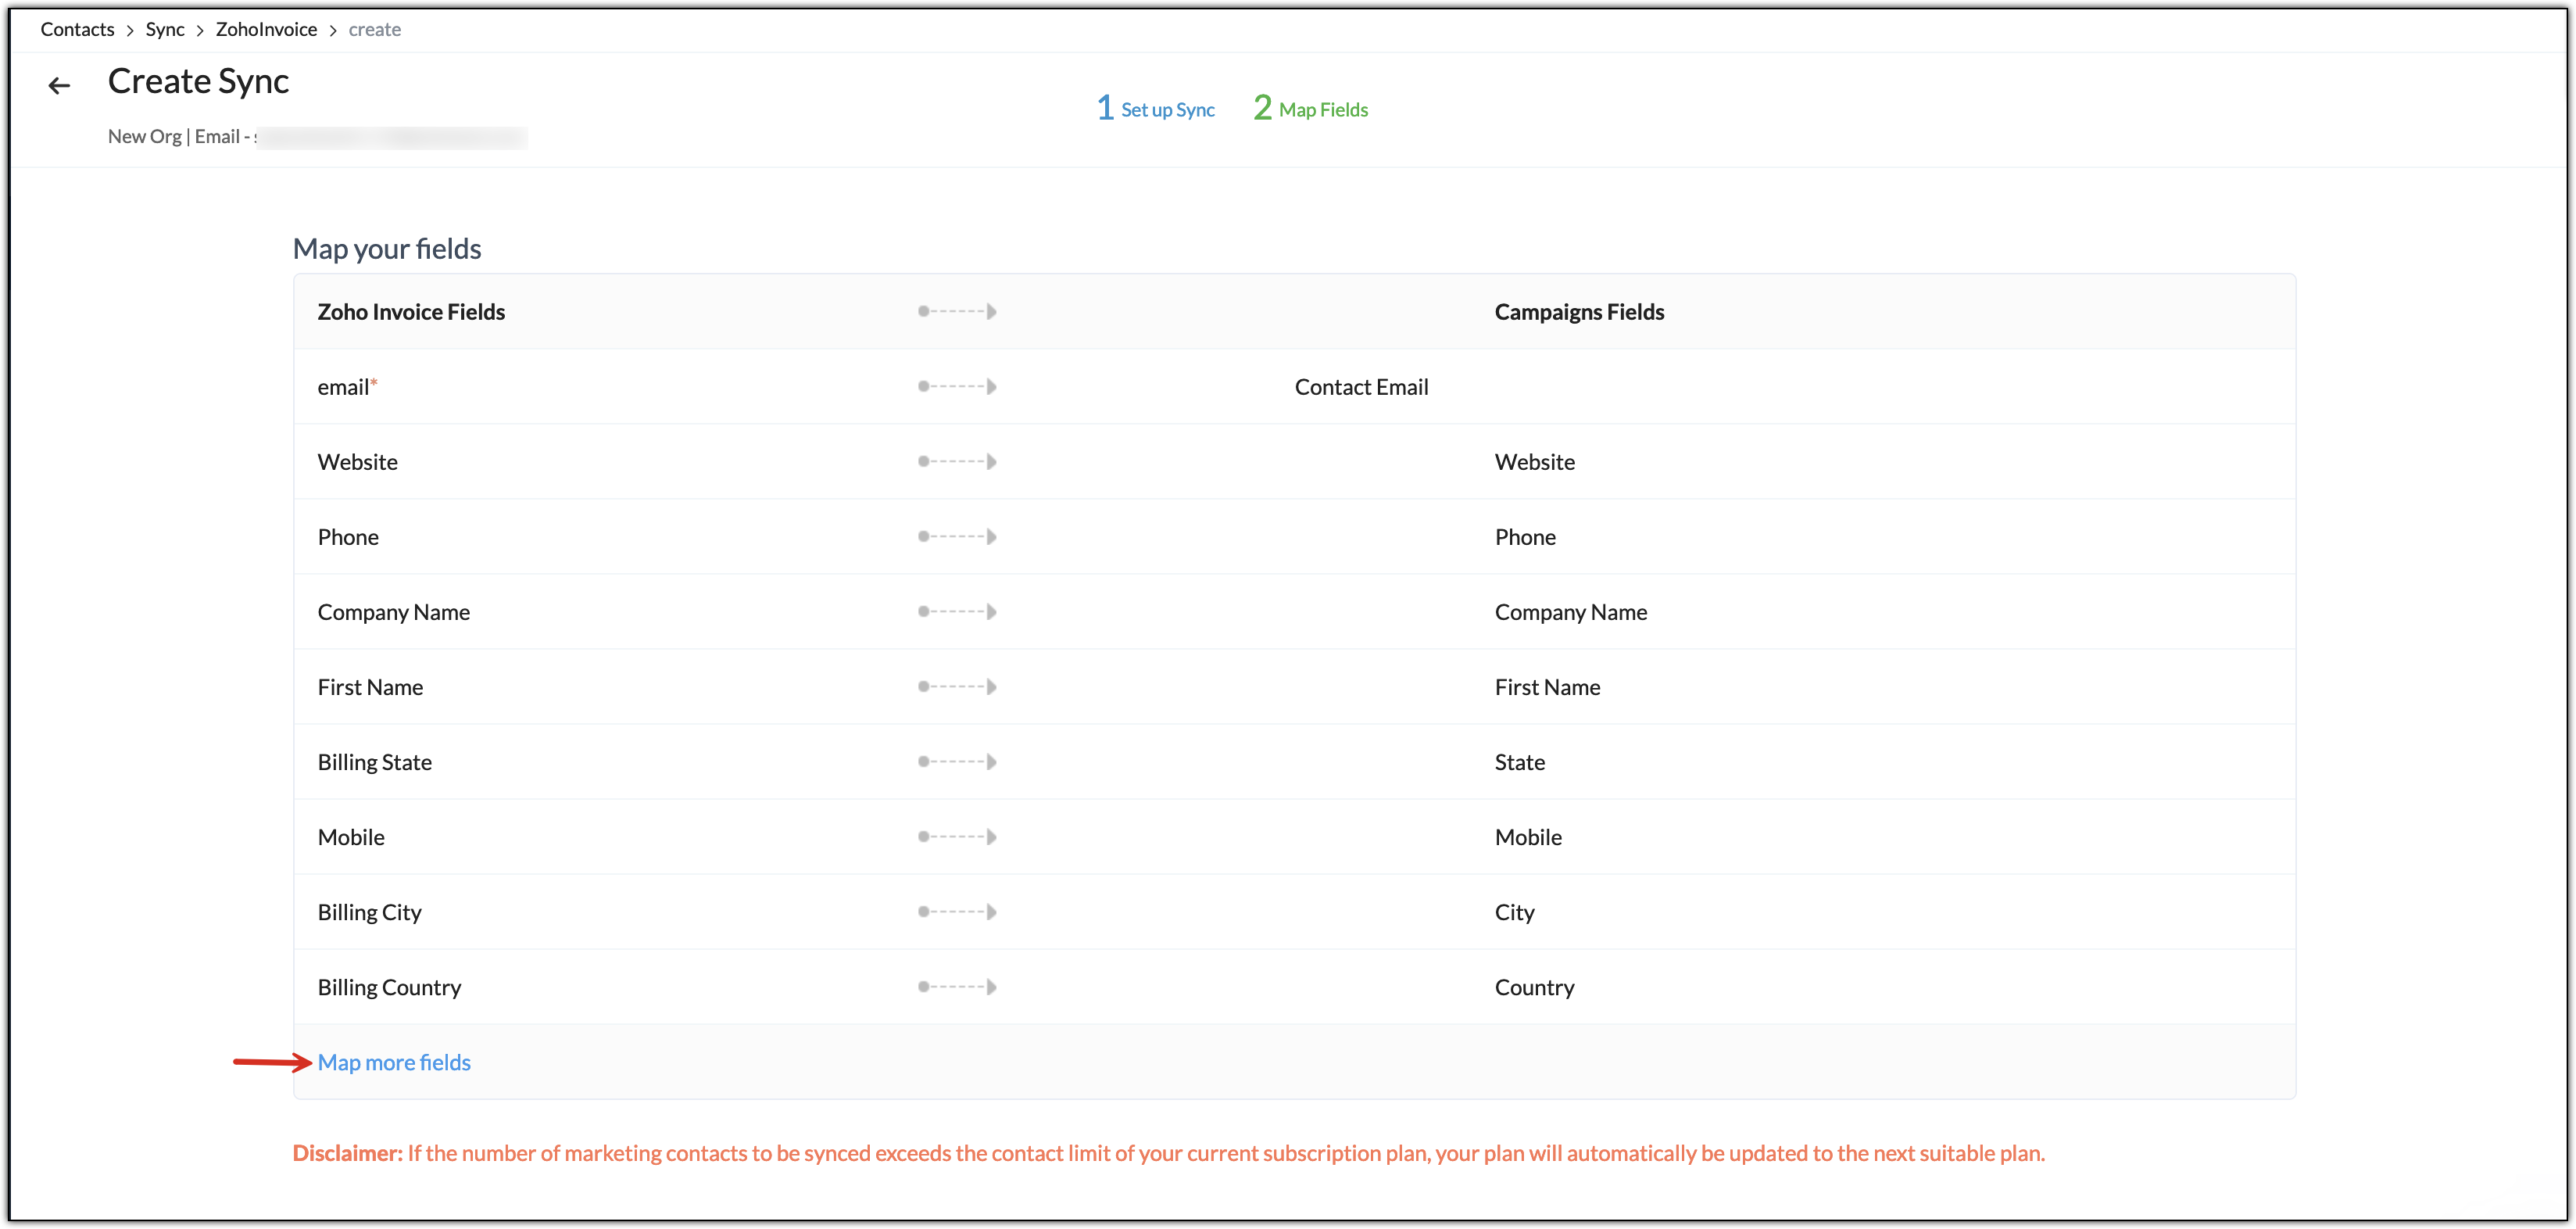
- Click Map more fields to map additional fields.
- Click Initiate once you are done.
- The New Field checkbox above the Zoho Campaigns field will automatically create a new
field with the same name as the Zoho Invoice field selected if that
field is already not present in Zoho Campaigns.
- When you click on Initiate once the field mapping is done, you may see a pop-up regarding the Disclaimer about auto-upgrade.
- Once the sync is completed, you will see the Configuration screen of the
sync where you can find essential information about the sync.
- You will also be notified of the sync completion from the notification section (bell icon) in your Zoho Campaigns account.
Click on the notification button to view the notification related to the sync.
When you click on this notification, you would be taken to this particular sync's Configuration view which is discussed in the next section.
Sync Detail View
To see the detail view of the sync,
- Click Contacts in the Navigation Toolbar, then click Sync Services.
- Hover over Zoho Invoice. Click on the Active Syncs to see the list of syncs.
- Click on the sync to view the details of the sync such as the Configuration, Field Mapping, and Sync History.
- If you click on Pause Sync button at top right, the sync will be paused.
- You can click on Resume Sync button to resume the sync.
Edit Sync Configuration
- Click Contacts in the Navigation Toolbar, then click Sync Services.
- Hover over Zoho Invoice. Click on the Active Syncs to see the list of syncs.
- Click on the sync name to see the sync detailed view.
- Click Edit at top right to edit the sync.
- Click Next to edit field mapping. Then, click Initiate.
Sync History
To view sync history:
- Click Contacts in the Navigation Toolbar, then click Sync Services.
- Hover over Zoho Invoice. Click on the Active Syncs to see the list of syncs.
- Click on a sync to view the details of the sync such as the Configuration, Field Mapping, and Sync History.
- Click on Sync History tab at the top.
- Here you can see a detailed view of your sync list:
- Sync time - The time at which the sync was performed.
- Total records - Total number of contacts synced at the given time.
- Added - Number of new contacts added at the given time.
- Updated - Number of existing contacts updated.
- Skipped - Number of contacts not synced since they didn't match the sync criteria. The icon beside the skipped count allows you to export the list of the skipped records.
Disable Integration
To disable the integration between Zoho Campaigns and Zoho Invoice:
- Go to Settings. Under Integration section click on Apps.
- Search for Zoho Invoice, hover over it, and click on View details.
- At far right of the next page click on Deny.
- In the pop-up that appears, click on Go Ahead once you've read the effects of disabling this integration.