Working with Creator AI Studio in VS Code
 Note: This feature is currently in its beta phase. Early access will be available soon.
What does this page cover
This guide walks you through installing and using Creator AI Studio for VS Code. Once installed, you connect the extension to your Zoho Creator account, configure your preferred LLM and start building directly within VS Code. You can start by either describing your application to the AI, importing an existing app from your account, or editing .ds files of an app you have already exported from Creator.
Availability
-
Available for all paid plans of Zoho Creator.
-
Roles and permissions -
-
Super Admins can configure the LLM provider under Operations → Zia.
-
Super Admins can install and use Creator AI Studio to build and modify applications.
- VS Code (1.114.0 or higher). Make sure you have only one VS Code installation on your machine. To check, run the following command in Terminal:
mdfind "kMDItemCFBundleIdentifier == 'com.microsoft.VSCode*'" | while read -r app; do echo "$app → v$(defaults read "$app/Contents/Info.plist" CFBundleShortVersionString)"; doneIf the output lists more than one path, uninstall the duplicates before proceeding. -
Supported operating systems: Windows, macOS, and Linux.
1. Prerequisites
- An LLM API key configured under Operations -> Zia in your Zoho Creator account .If not configured, the extension by default will use Zoho GenAI, Zoho's in-house AI which is included with all paid plans of Zoho Creator at no additional cost.
- A Git repository and personal access token is required only if you want to use version control with Creator AI Studio. You will need a repository URL and a personal access token with read and write access.
2. Steps to configure Creator AI Studio in VS Code
2.1. Install the extension
Creator AI Studio is currently distributed as a .vsix file. To install it in VS Code:
- Contact Zoho Creator support to get the .vsix file for Creator AI Studio.
- Open VS Code and navigate to the Extensions icon in the left pane (or use the shortcuts Ctrl+Shift+X / Cmd+Shift+X).
- Click the ⋯(meatball) menu in the top-right of the Extensions panel and select Install from VSIX….
- Select the downloaded .vsix file and click Install.
- Once installed, the Creator AI Studio icon will appear in the Activity Bar on the left side of VS Code. Click it to open the extension.
2.2. Link your Zoho Creator account
- Once installed, you would need to connect your Creator account:
- Click the Creator AI Studio icon in the top-right corner of VS Code to open the extension home page.
- Click Sign in with Zoho.
- A browser window with Zoho Accounts sign-up page will open. Log in to your Zoho Creator account and authorize access.
- If your account has multiple workspaces, you will be prompted to select one. If there is only one workspace, it will be selected automatically.
Note: Only workspaces where you have a Super Admin, Admin, or Developer role will be listed. These are the workspaces where you have permission to create or update apps. - Once authentication is complete, you will be redirected back to VS Code.
2.2.1. Switch accounts
To sign in with a different Zoho Creator account:
- Click the Account icon in the chat panel.
- On the Account page, under Creator Account, click Sign out.
- The extension returns to the sign-in screen. Click Sign in with Zoho and authenticate with the account you want to switch to.
Note: Switching accounts will disconnect the current workspace. You will be prompted to select a workspace after signing in with the new account.
2.3. Get to know the extension
Once you are connected to Zoho Creator, Creator AI Studio is ready to use. Here is a quick overview of what you will find in the interface.
2.3.1. App folder
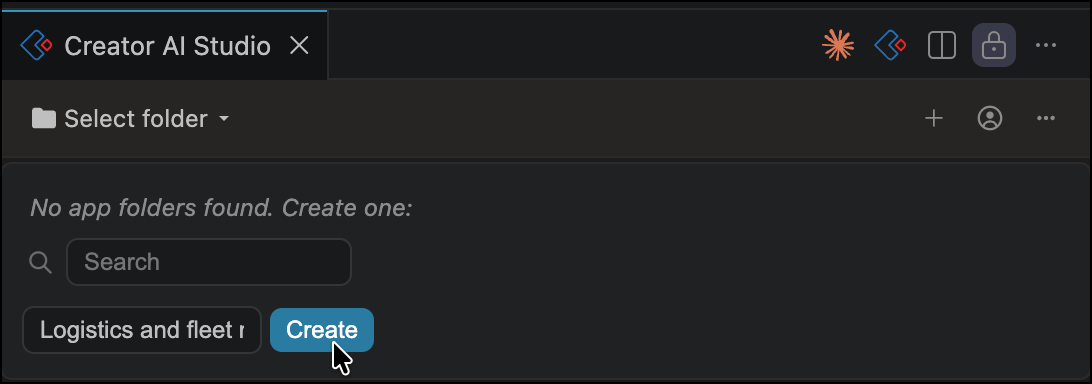
The dropdown at the top-left of the extension shows your current working folder. This is folder on your machine where the .ds files for your apps are stored.
Each application gets its own subfolder here. Selecting an empty folder starts a new app. Selecting a folder that already contains .ds files opens that app for editing. Click it to select or change your working folder.
2.3.2. Meatball menu (⋯)
The meatball menu at the top of the extension gives you access to app management options:
- Import from Creator: Fetches the apps currently in your authenticated Zoho Creator account and brings them into your working directory. This is the quickest way to start working on an existing app.
- Import from file: Import a local folder that already contains .ds files. Use this if you have an app on your machine that was not pulled from Creator directly.
- Country & currency: Set the country context for your app. Country-specific fields like currency and phone number will automatically use the relevant format and defaults. For example, selecting India will set currency fields to INR.
2.3.3. Chat panel controls
The chat panel at the bottom of the extension is where you interact with the AI.
Before entering a prompt, configure the following:
Before entering a prompt, configure the following:
| Control | Options | What it does |
|---|---|---|
| Permission mode |
Ask permission
Edit automatically
Plan mode
|
Ask permission: The AI proposes each change individually and waits for your approval before writing to your .ds files.
Edit automatically: The AI applies changes directly to your .ds files without asking for approval.
Plan mode: The AI first drafts a complete plan covering all the changes it intends to make. You review the plan before proceeding.
|
| AI model | Your configured models (e.g. GPT-5.6-sol) | Select the LLM you want to use for this session. Only models configured under Operations → Zia in your Zoho Creator account will appear here. |
| Effort level | Low / Medium / High | Controls how deeply the AI analyses your prompt before generating output. Higher effort produces more thorough results but uses more tokens and takes a little longer. |
| Attachment (+ icon) | File or document | Upload a file to work with directly. Attach a requirements document, wireframe, data sample, or any file. The AI will read it and use it as the basis for what it builds. |
Note: Token consumption is billed to your configured LLM provider account.
2.3.4. Commands
Use the following commands in the chat panel to perform specific actions quickly.
| Category | Command | Description |
|---|---|---|
| Chat | /clear | Clear chat history for current chat window. Note: Proceed with caution as this will also remove the context the AI has built up for this app, which may affect the quality of subsequent responses. |
| /compact | Summarize the chat to free up token space | |
| /resume | Open a previous chat | |
| /creatorAIStudioQry | Raise a support ticket with your current chat conversation attached, so the support team has full context on your issue | |
| Deploy | /generate-ds | Generates a zip file containing the app's .ds files. |
| /deploy-as-new-app | Upload the DS files to Creator as a new app | |
| /deploy-to-existing-app | Update an existing Creator application with this version | |
| /sample-data | Generate sample data for the active app and upload to Creator | |
| Explore | /review | Review app for UI/UX, efficiency, and security |
| /overview | Entity diagram and app overview | |
| /modules | Key modules breakdown | |
| /dataflow | Data flow analysis |
2.4 Vibe-code with AI
2.4.1. Pick your starting point
You have three ways to get started with Creator AI Studio, depending on whether you are building something new or working on an existing app.
- Build a new app from scratch: Open the chat panel, describe the application you want to build or upload a file containing BRD, flowcharts etc.. The AI will take it from there.
- Import an existing app from Zoho Creator
- Click the ⋯ menu and select Import from Creator.
- Your apps from the authenticated Zoho Creator account will be listed. Select the one you want to work on.
-
The app is downloaded to your working directory as structured .ds files.
-
Describe the changes or additions you want in the chat panel and let the AI build from there.
- Import from local
- Click the ⋯ menu and select Manual Import.
-
Select the local folder containing your .ds files.
-
The app opens in the extension workspace. Describe your changes in the chat panel.
2.4.2. Build with your prompt
Regardless of which option you choose, the AI follows the same process once you enter a prompt:
- Enter your prompt in the chat panel. Describe the requirement from the application you want to build. The more specific you are, the better the output. Optionally attach a requirements document, wireframe, or data sample to give the AI additional context.
- The AI asks you a series of contextual questions based on your prompt to help it understand your requirements more precisely before generating.
Questions are grouped by theme (for example: Users, Workflow, Notifications). Select from the provided options or choose Other to enter a custom response. You can also skip remaining questions. - Once you submit your answers, Creator AI Studio generates a structured plan. This is comprehensive with a numbered list of components it intends to build, each mapped to the corresponding .ds file path in your app. Expand Show details on any component to see more, or click Preview diagram for a visual overview.
- Review and act on the plan. You have five options:
- Approve & Accept Edits: Approve the plan and let the AI apply all changes directly to your .ds files without further prompts.
- Approve: Approve the plan, but the AI will ask for your permission before applying each change.
- Refine with interview: The AI asks you a fresh set of questions and revises the plan based on your answers.
- Refine with feedback: Enter a free-form prompt to modify the plan.
- Cancel: Discard the plan and start over.
- Once approved, Creator AI Studio generates and writes the .ds files according to the plan. You can watch the progress in the chat panel.
- Once the build is complete, you can continue refining by entering a new prompt to extend, modify, or fix any part of the output.
2.4.3. Deploy to Zoho Creator
When you are ready to publish your app to Zoho Creator:
- In the chat panel, run the appropriate required deploy command (/generate-ds, /deploy-as-new-app, or /deploy-to-existing-app). For details, see section 2.3.4. Commands.
- The extension builds your app by combining the .ds files in your local folder and uploads your app to the Zoho Creator account you are logged in with. If the upload encounters an error, the agent will automatically diagnose and fix it, then retry. For errors that cannot be resolved automatically, the agent will stop and suggest raising a support ticket with Zoho Creator support.
- Once the sync is complete, open your Zoho Creator account to access and test the account.
Note: The upload command will upload all changes in your local app folder. Make sure you are satisfied with the output before running it.
2.5. Version control with Git
Creator AI Studio supports Git integration for developers working on existing apps. When configured, changes to your app's .ds files are pushed to your Git repository and synced to Zoho Creator simultaneously. This gives you a full version history of every change you make.
To configure Git:
- Click the Account icon in the chat panel.
- On the Account page, under Version Control · Git, click Configure Git.
- Enter your Repository URL (e.g. https://github.com/user/repo.git) and paste your Access token.
- Click Save.
- Once configured, when you deploy changes using /deploy-to-existing-app, the updated .ds files are pushed to your Git repository and synced to your Zoho Creator account.
Note: Git integration is optional and required only when working on an existing app.
3. Token consumption & performance
- Tokens are consumed from your API key at your configured LLM provider.
- Rate limits and performance vary by provider.
- Higher effort level implies more tokens consumed per session.
- Attaching a file or document to your prompt increases token usage.