Sample iOS Application for users
We have created an application using our Mobile SDK for your better understanding of the different methods and their usage. To install the app, you need to do the following:
- Prerequisites
- Creating the Zoho Creator application
- Registering your app with Zoho
- Installing CocoaPod
- Adding dependency
- Adding the Zoho Creator app to Xcode project
- Creating Objective-C Bridging Header
1. Prerequisites
- A Zoho account. If you do not have an account, sign up for one here.
- Xcode IDE 26.0 (Required for latest SDK version)
- iOS 15 and above
- CocoaPods
 Note:
Note:- If your Mac is powered by Apple Silicon (M1, M2, etc.), it is recommended to run Xcode with Rosetta enabled, as simulator support in Xcode is currently available only via Rosetta destinations.
- It is recommended to use the latest SDK version to ensure compatibility and access to the newest features. CocoaPods installs the latest stable version by default. To use a specific or earlier version, specify it explicitly in your Podfile.
2. Creating the Zoho Creator application
- Download the sample application from this link. The ZohoCreatorSDKDemo.zip file will be downloaded.
- Extract it and locate the Utility.ds file inside it.
- Create a Zoho Creator Application by importing the Utility.ds file into Creator. Learn how
3. Register your app with Zoho
3.1 Users in Creator 5, follow the below steps:
- Navigate to your app's Settings page, then to the Mobile SDK page.
- Under the For Users section, click For iOS. A pane will slide in from the right.
- Select the UI & Core framework.
- Click the Generate Client Credentials. This will generate the client ID, client secret and redirectURI for the iOS app that you want to integrate with your Creator application.
3.2 Users in Creator 6, follow the below steps:
- Navigate to your admin dashboard.
- From the left pane, select Mobile.
- Click Create New Mobile App at the top-right corner.
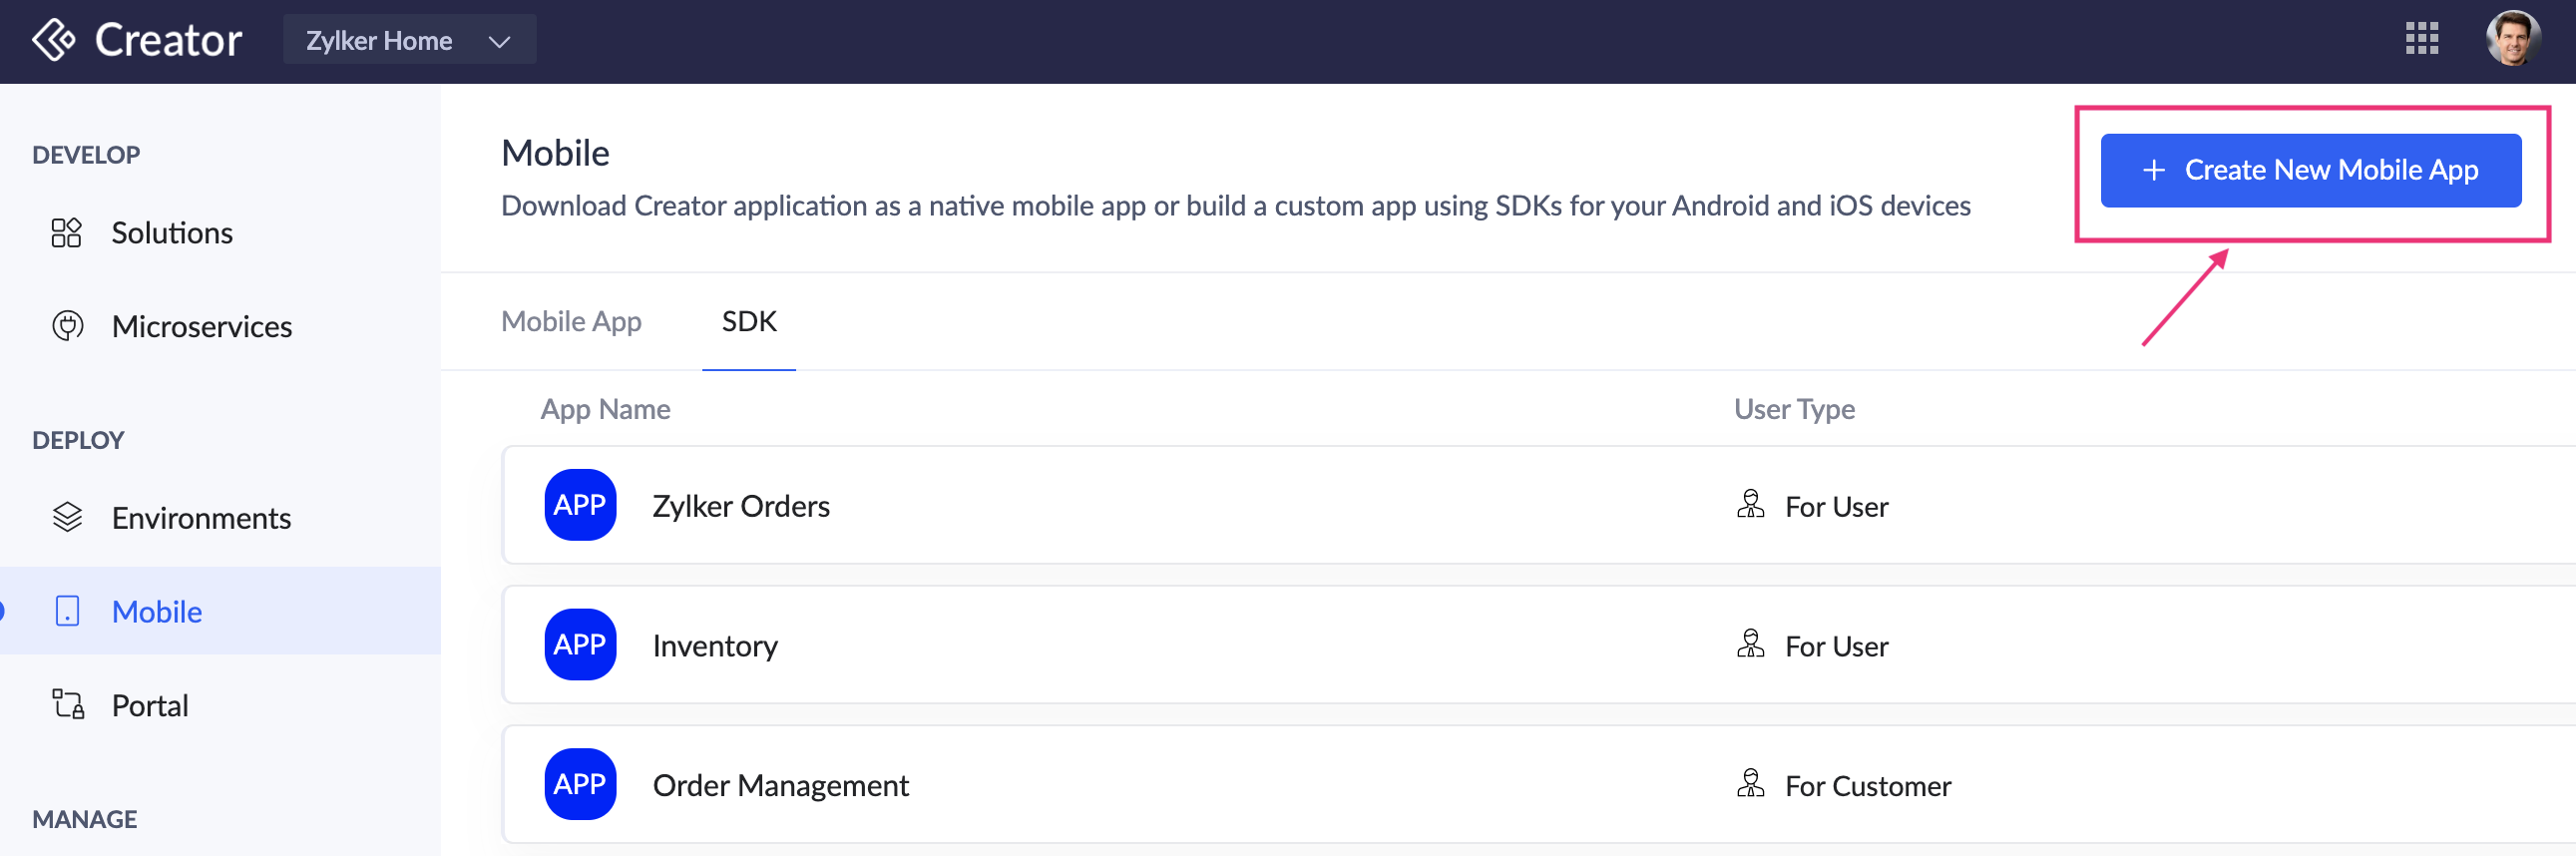
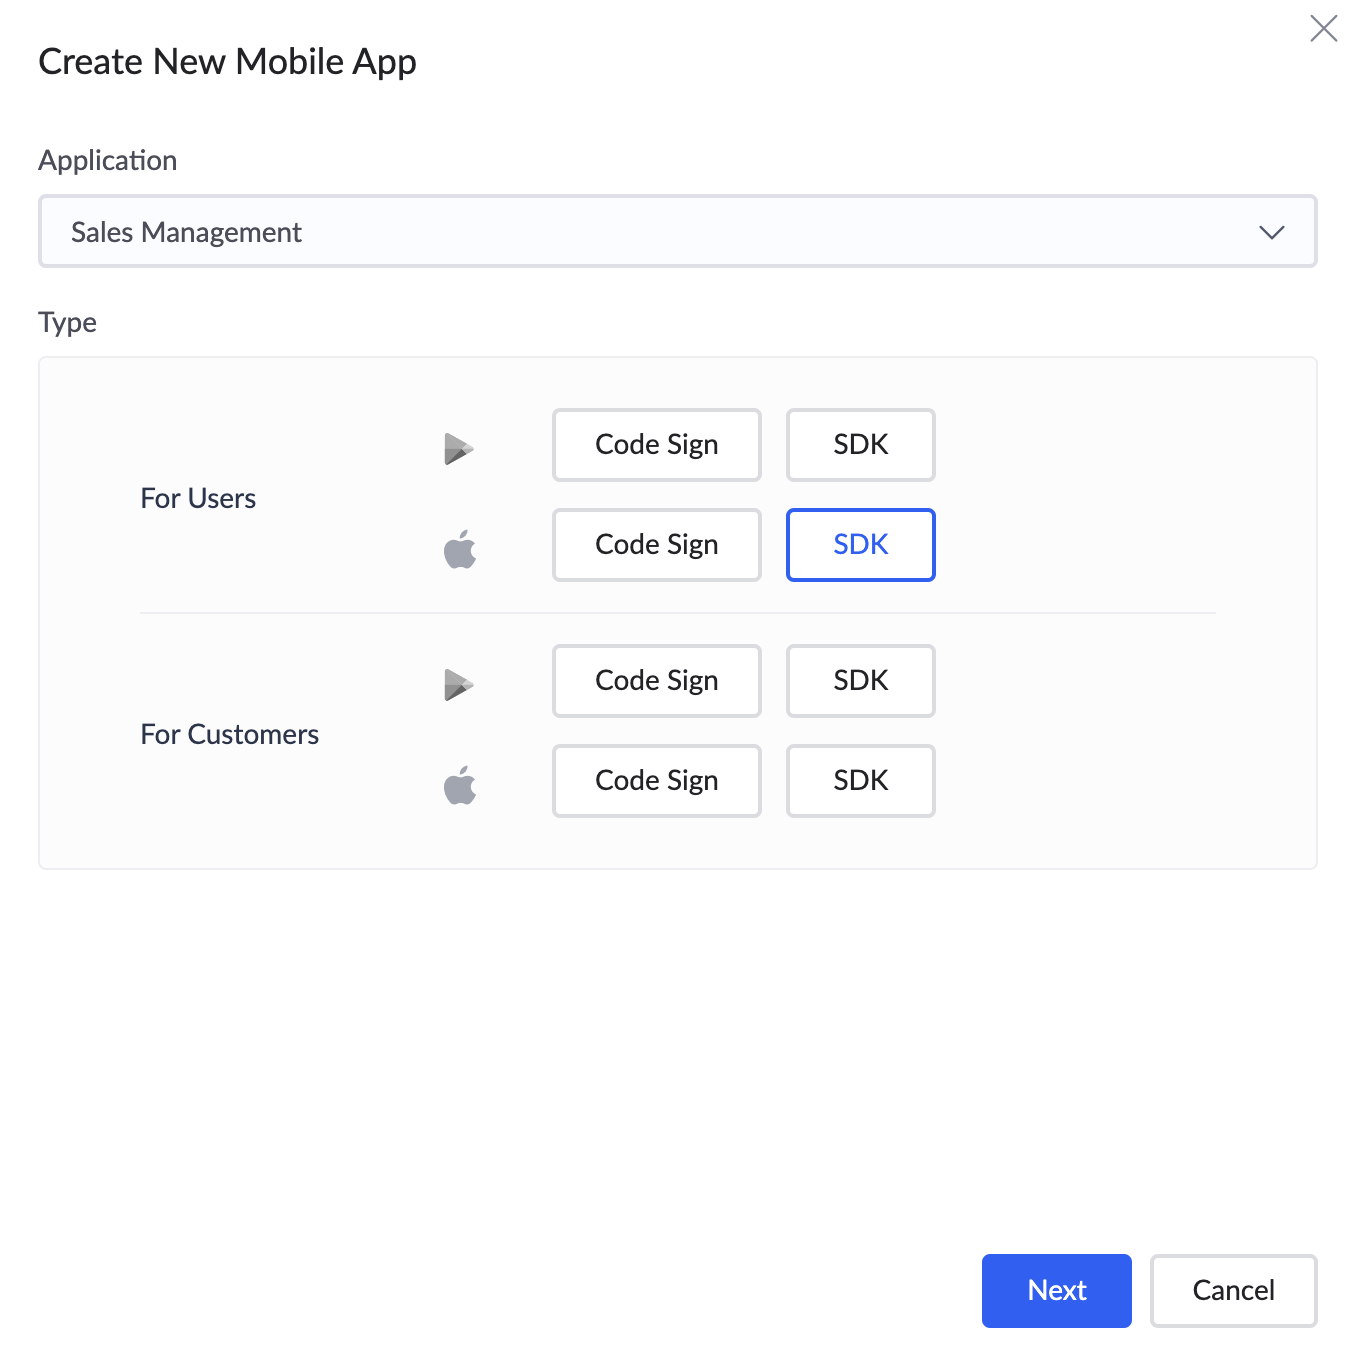
- From the list of applications, select the required app. Select the For Users - SDK under the Apple icon section.
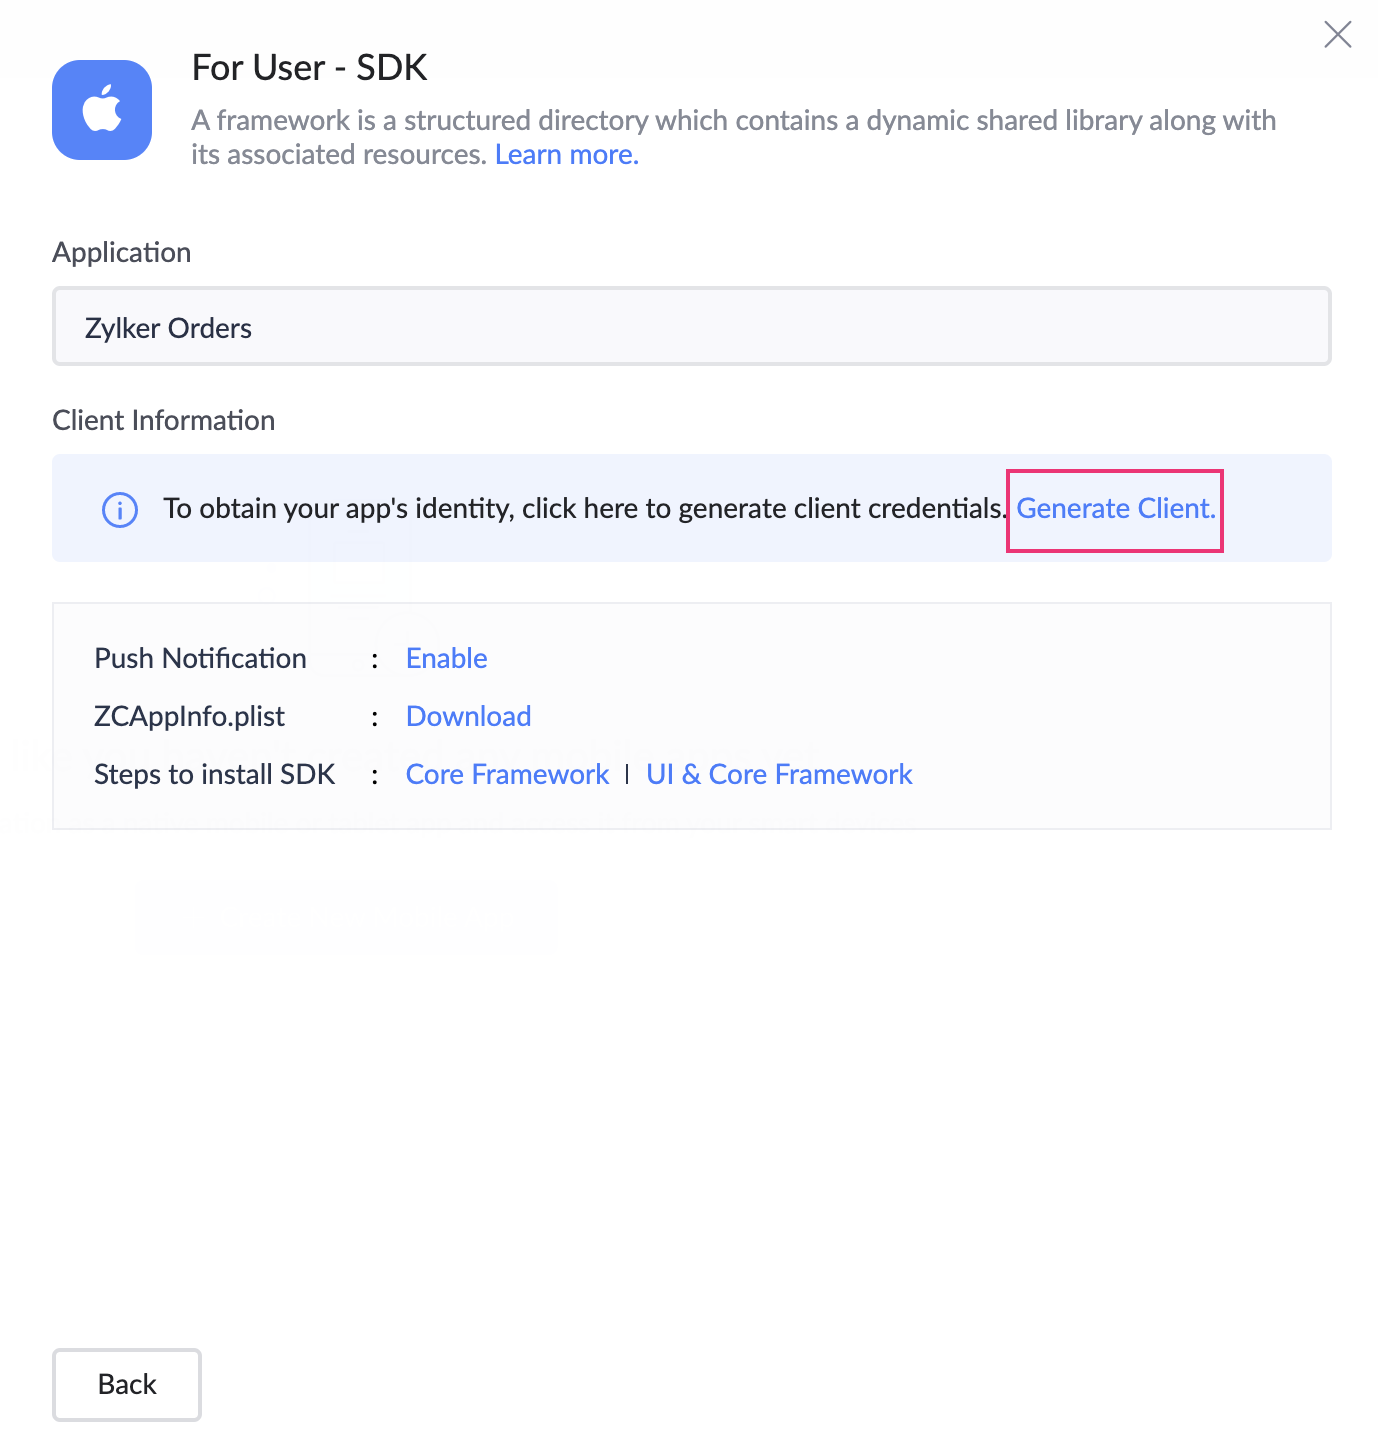
- Click Generate Client. This will generate the client ID, client secret, and redirectURI for the iOS app that you want to integrate with your Creator application.
4. Installing CocoaPod
CocoaPods is a third-party dependency manager for Swift and Objective-C projects.

ote: All the commands should be entered in the Terminal.
To install CocoaPods,
- Open Terminal in your Mac
- Use the below command:
5. Adding dependency
- You can find the podfile file in the ZohoCreatorSDKDemo > native folder (Xcode project directory).

- Ensure that the podfile contains the following:
- Open the Terminal, navigate to the ZohoCreatorSDKDemo > native folder (Xcode project directory), then execute the following command:
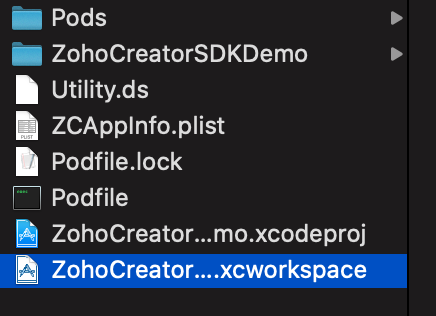
- Open ZohoCreatorSDKDemo.xcworkspace in the XCode project.
6. Adding the Zoho Creator app to your sample Xcode project
- In the downloaded zip file, open ZohoCreatorSDKDemo > native > ZohoCreatorSDKDemo.xcworkspace in XCode and navigate to AppDelegate.swift.
- Fill in all parameters mentioned below:
- URL scheme (Redirect URI) entered should be configured in ZohoCreatorSDKDemo -> Info -> URL Types.

- Download the ZCAppInfo.plist file from the Configure Core Framework tab (refer to steps 1-3 in the above section).
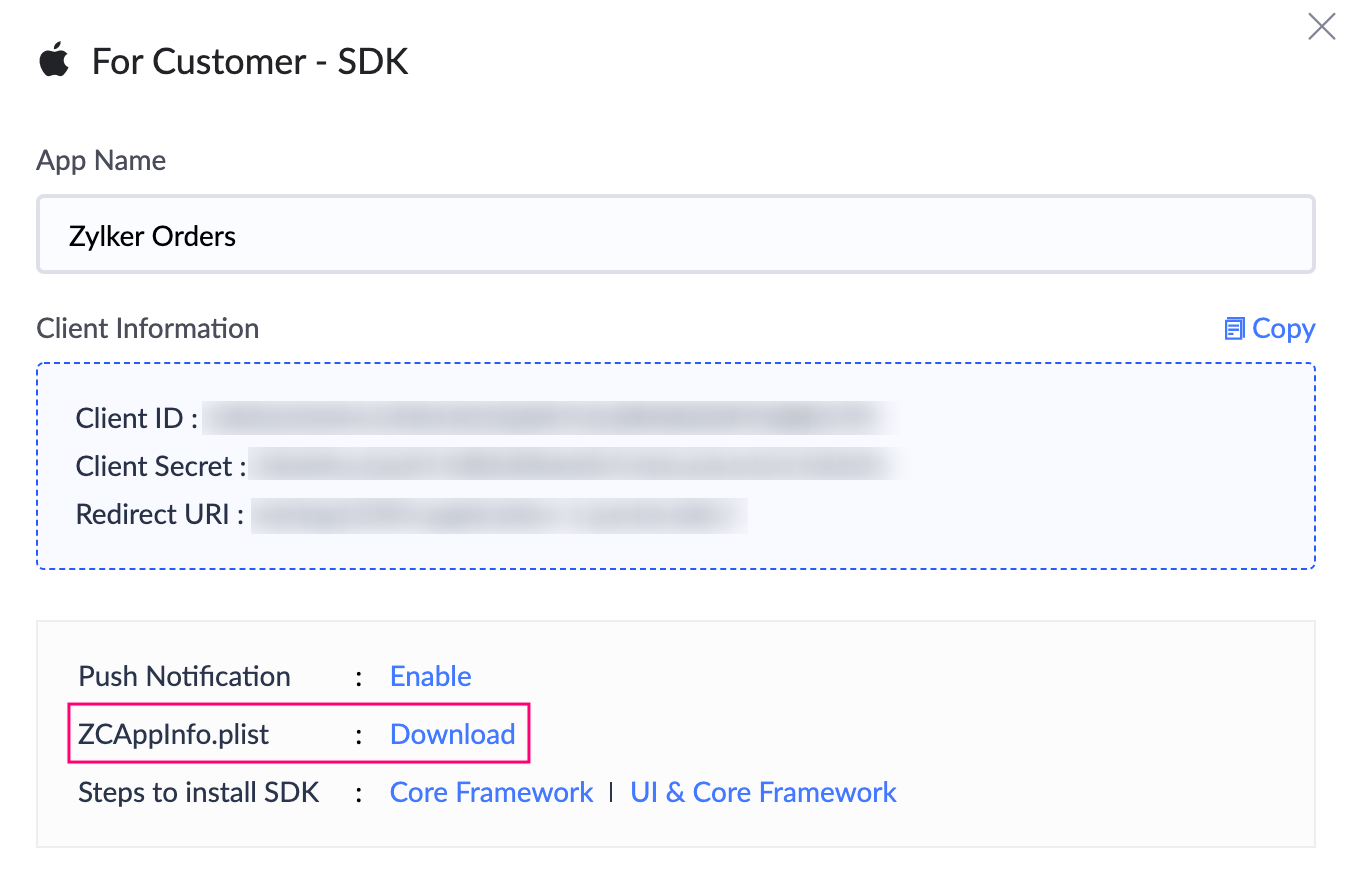
- For C6, refer to the below image.
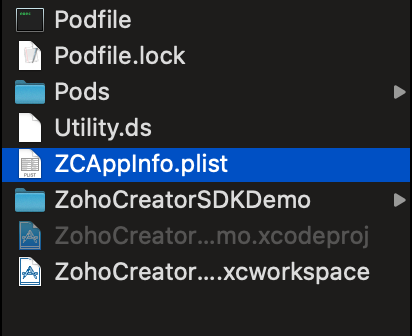
- Move the ZCAppInfo.plist file to the ZohoCreatorSDKDemo > native > ZohoCreatorSDKDemo folder.
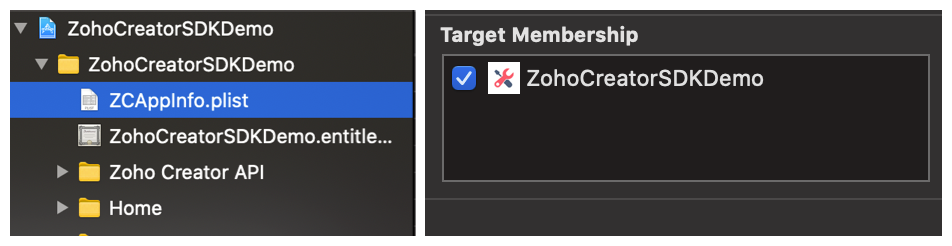
- Add the ZCAppInfo.plist file to the project and attach it to all targets.
7. Objective-C Bridging Header
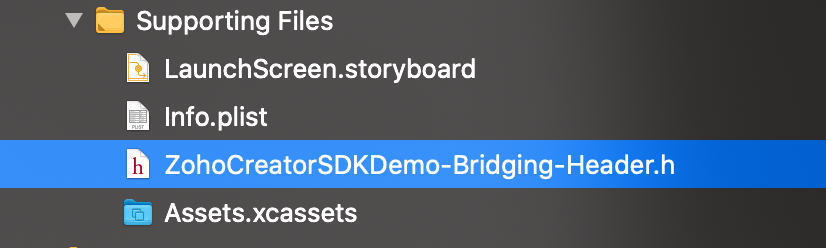
Ensure to check whether the ZohoCreatorSDKDemo-Bridging_header.h file exists in the project. Below image shows where the file is loacted.
If the file is not found, you can create one by following the steps below.
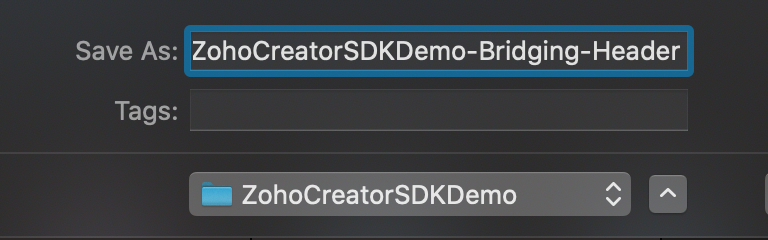
- Select Header File:
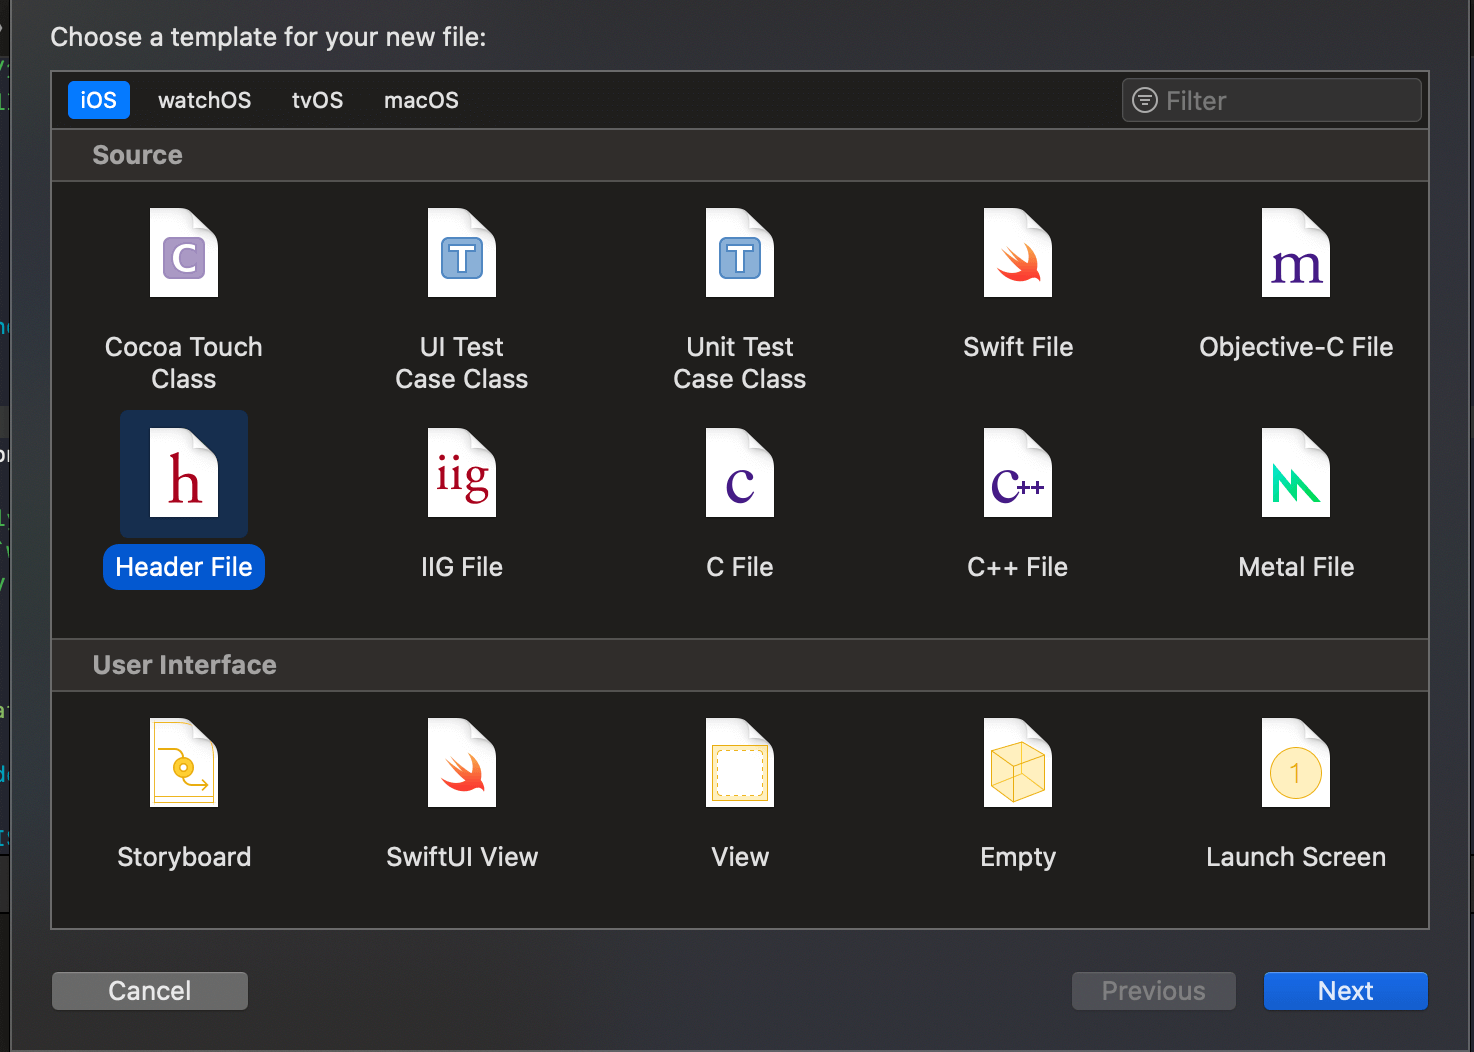
- Enter the name of the Header File.
- Configure the Header File in Project -> Build options.

- Add the following to your Objective-C bridging header:
#import <ZohoAuthKit/ZohoAuth.h> - Compile the project. In case you face any errors while doing these, please refer to this page.