Configuring the Verification Page
The Verification Page lets you control who accesses your form by requiring respondents to verify their identity before they can access the form. You can configure verification methods, set expiration rules, and customize the page appearance.
Adding the Verification Page
In the left pane of your Form Builder, under Form Fields scroll to Advanced Elements and select Verification Page.
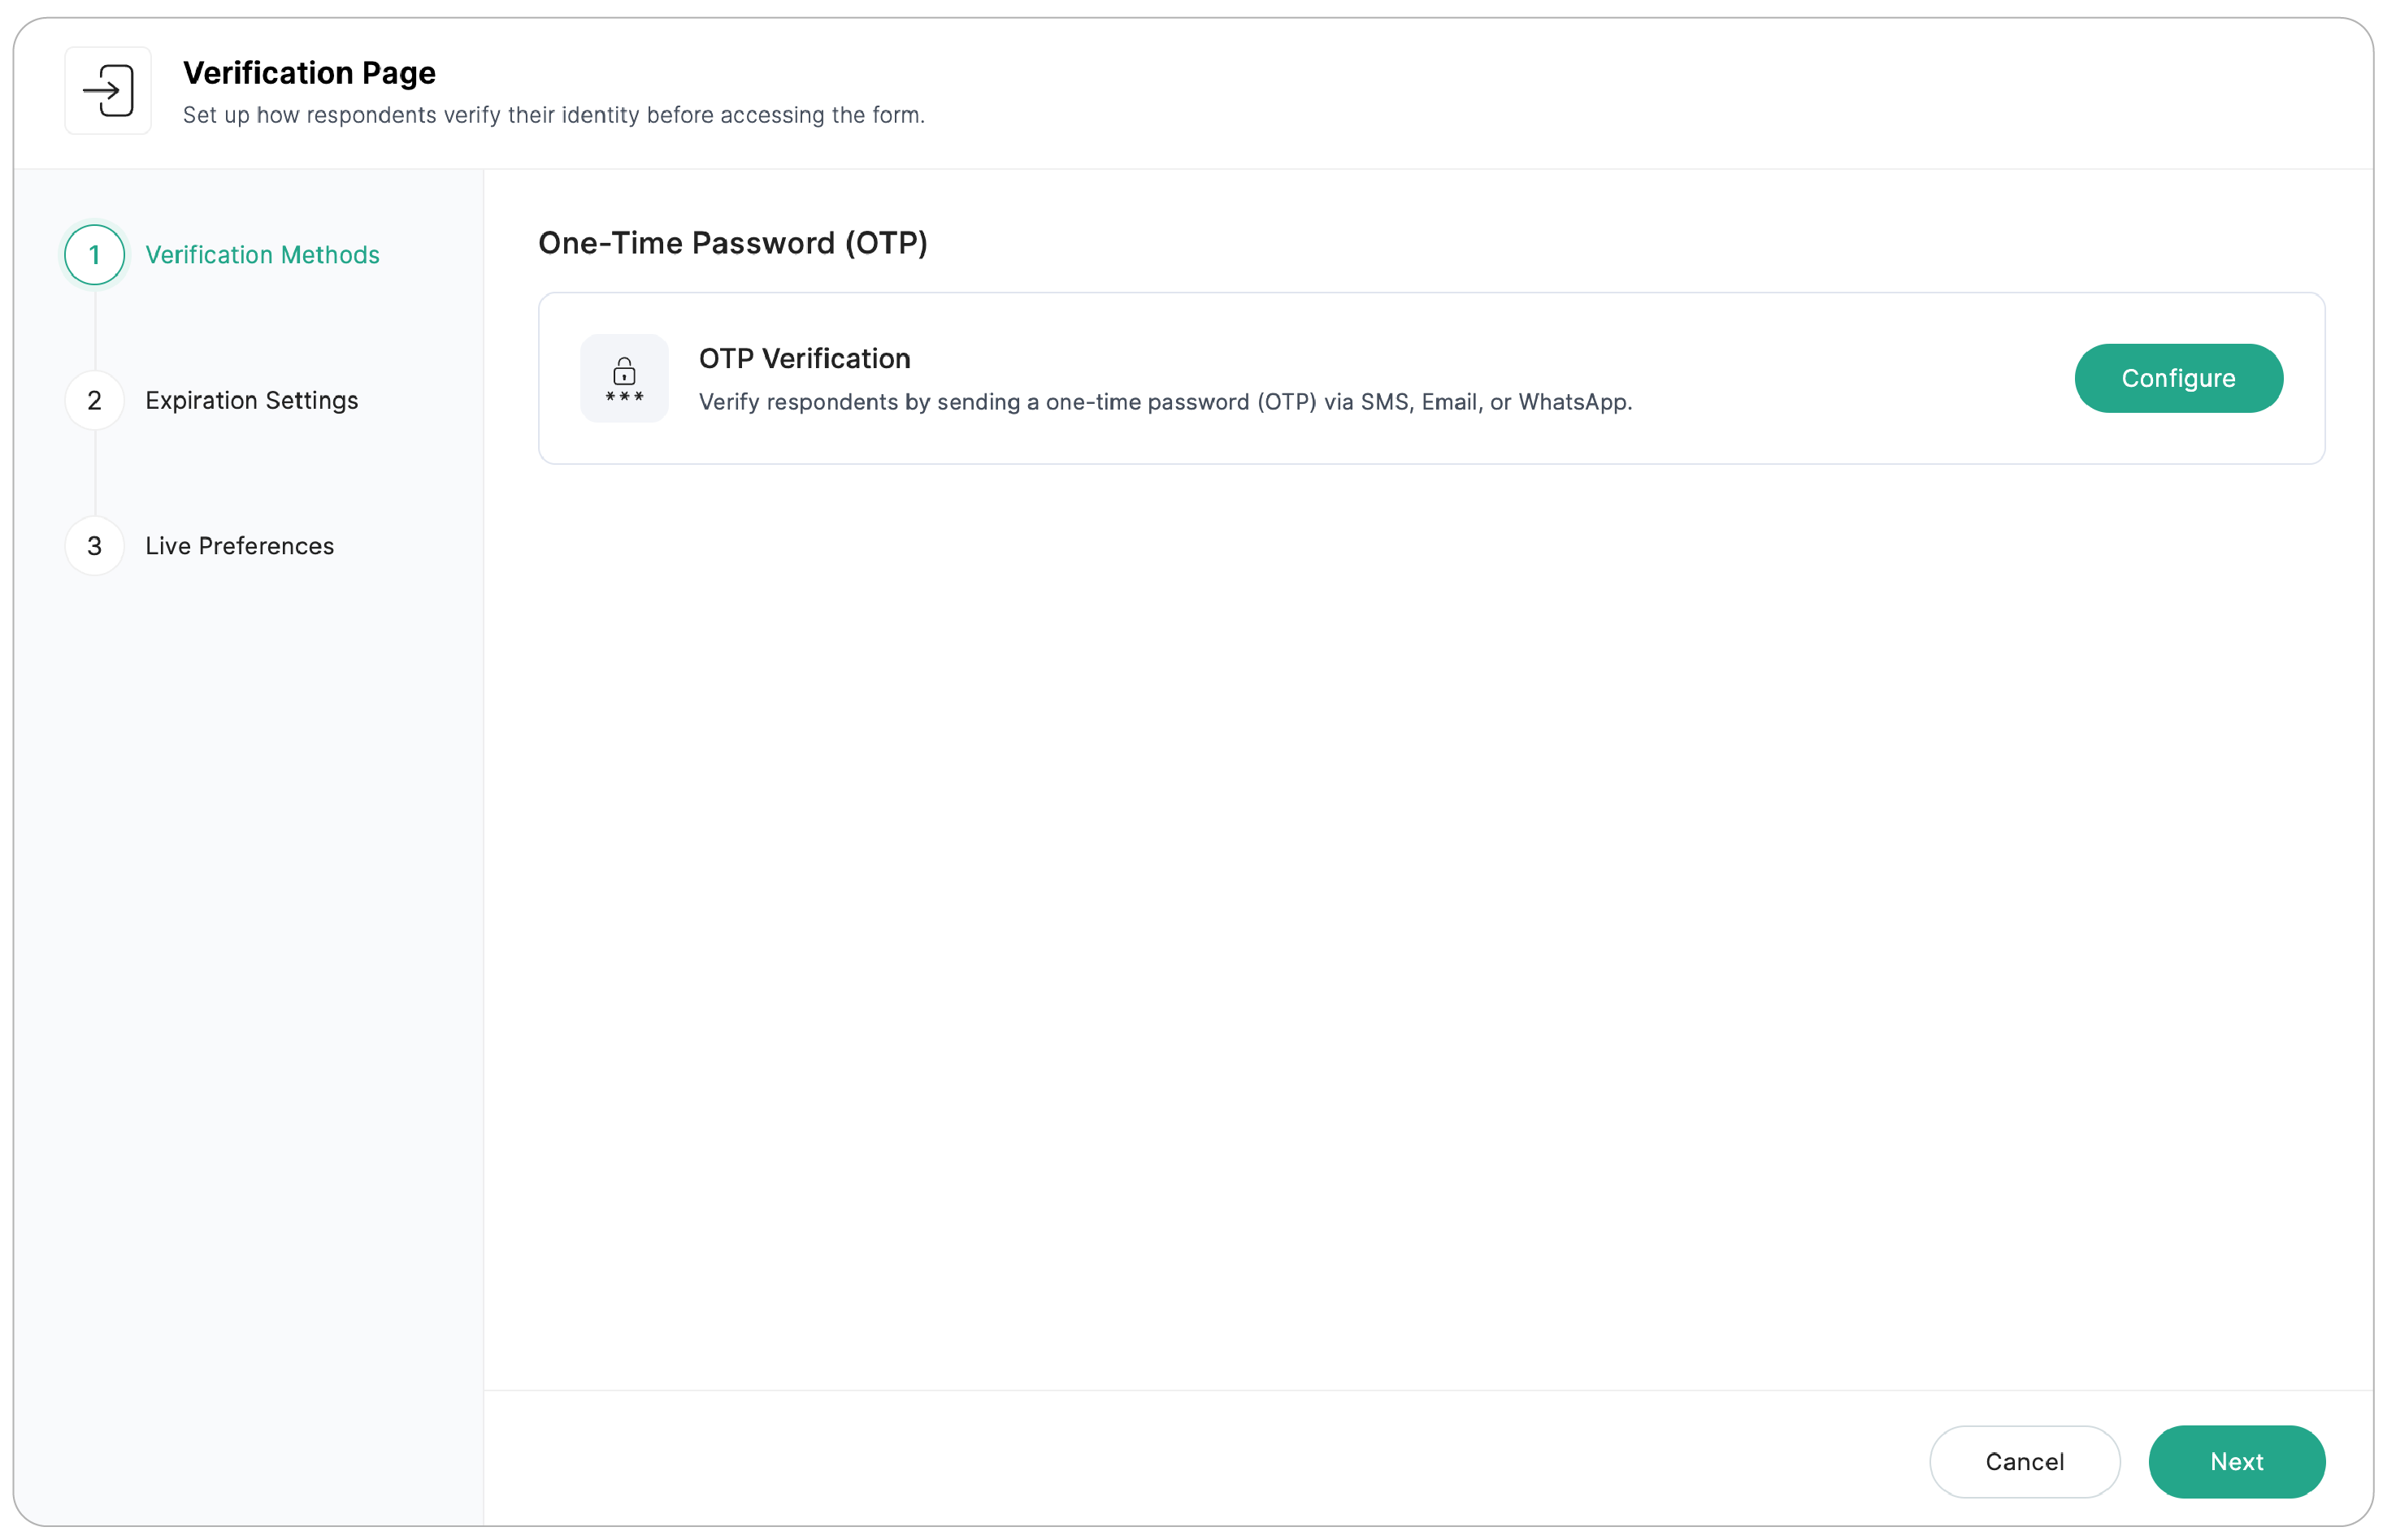
In the Verification Page popup, you can configure the
- Verification Methods
- Expiration Settings
- Live Preferences
Step 1: Verification Methods
One-Time Password (OTP)
OTP verification sends a one-time password to the respondent's email address or mobile number. Respondents enter this code on the Verification Page to access the form.
To configure OTP Verification:
1. Click Configure on the OTP Verification card.
2. In the Configure OTP Verification popup, select the verification method.
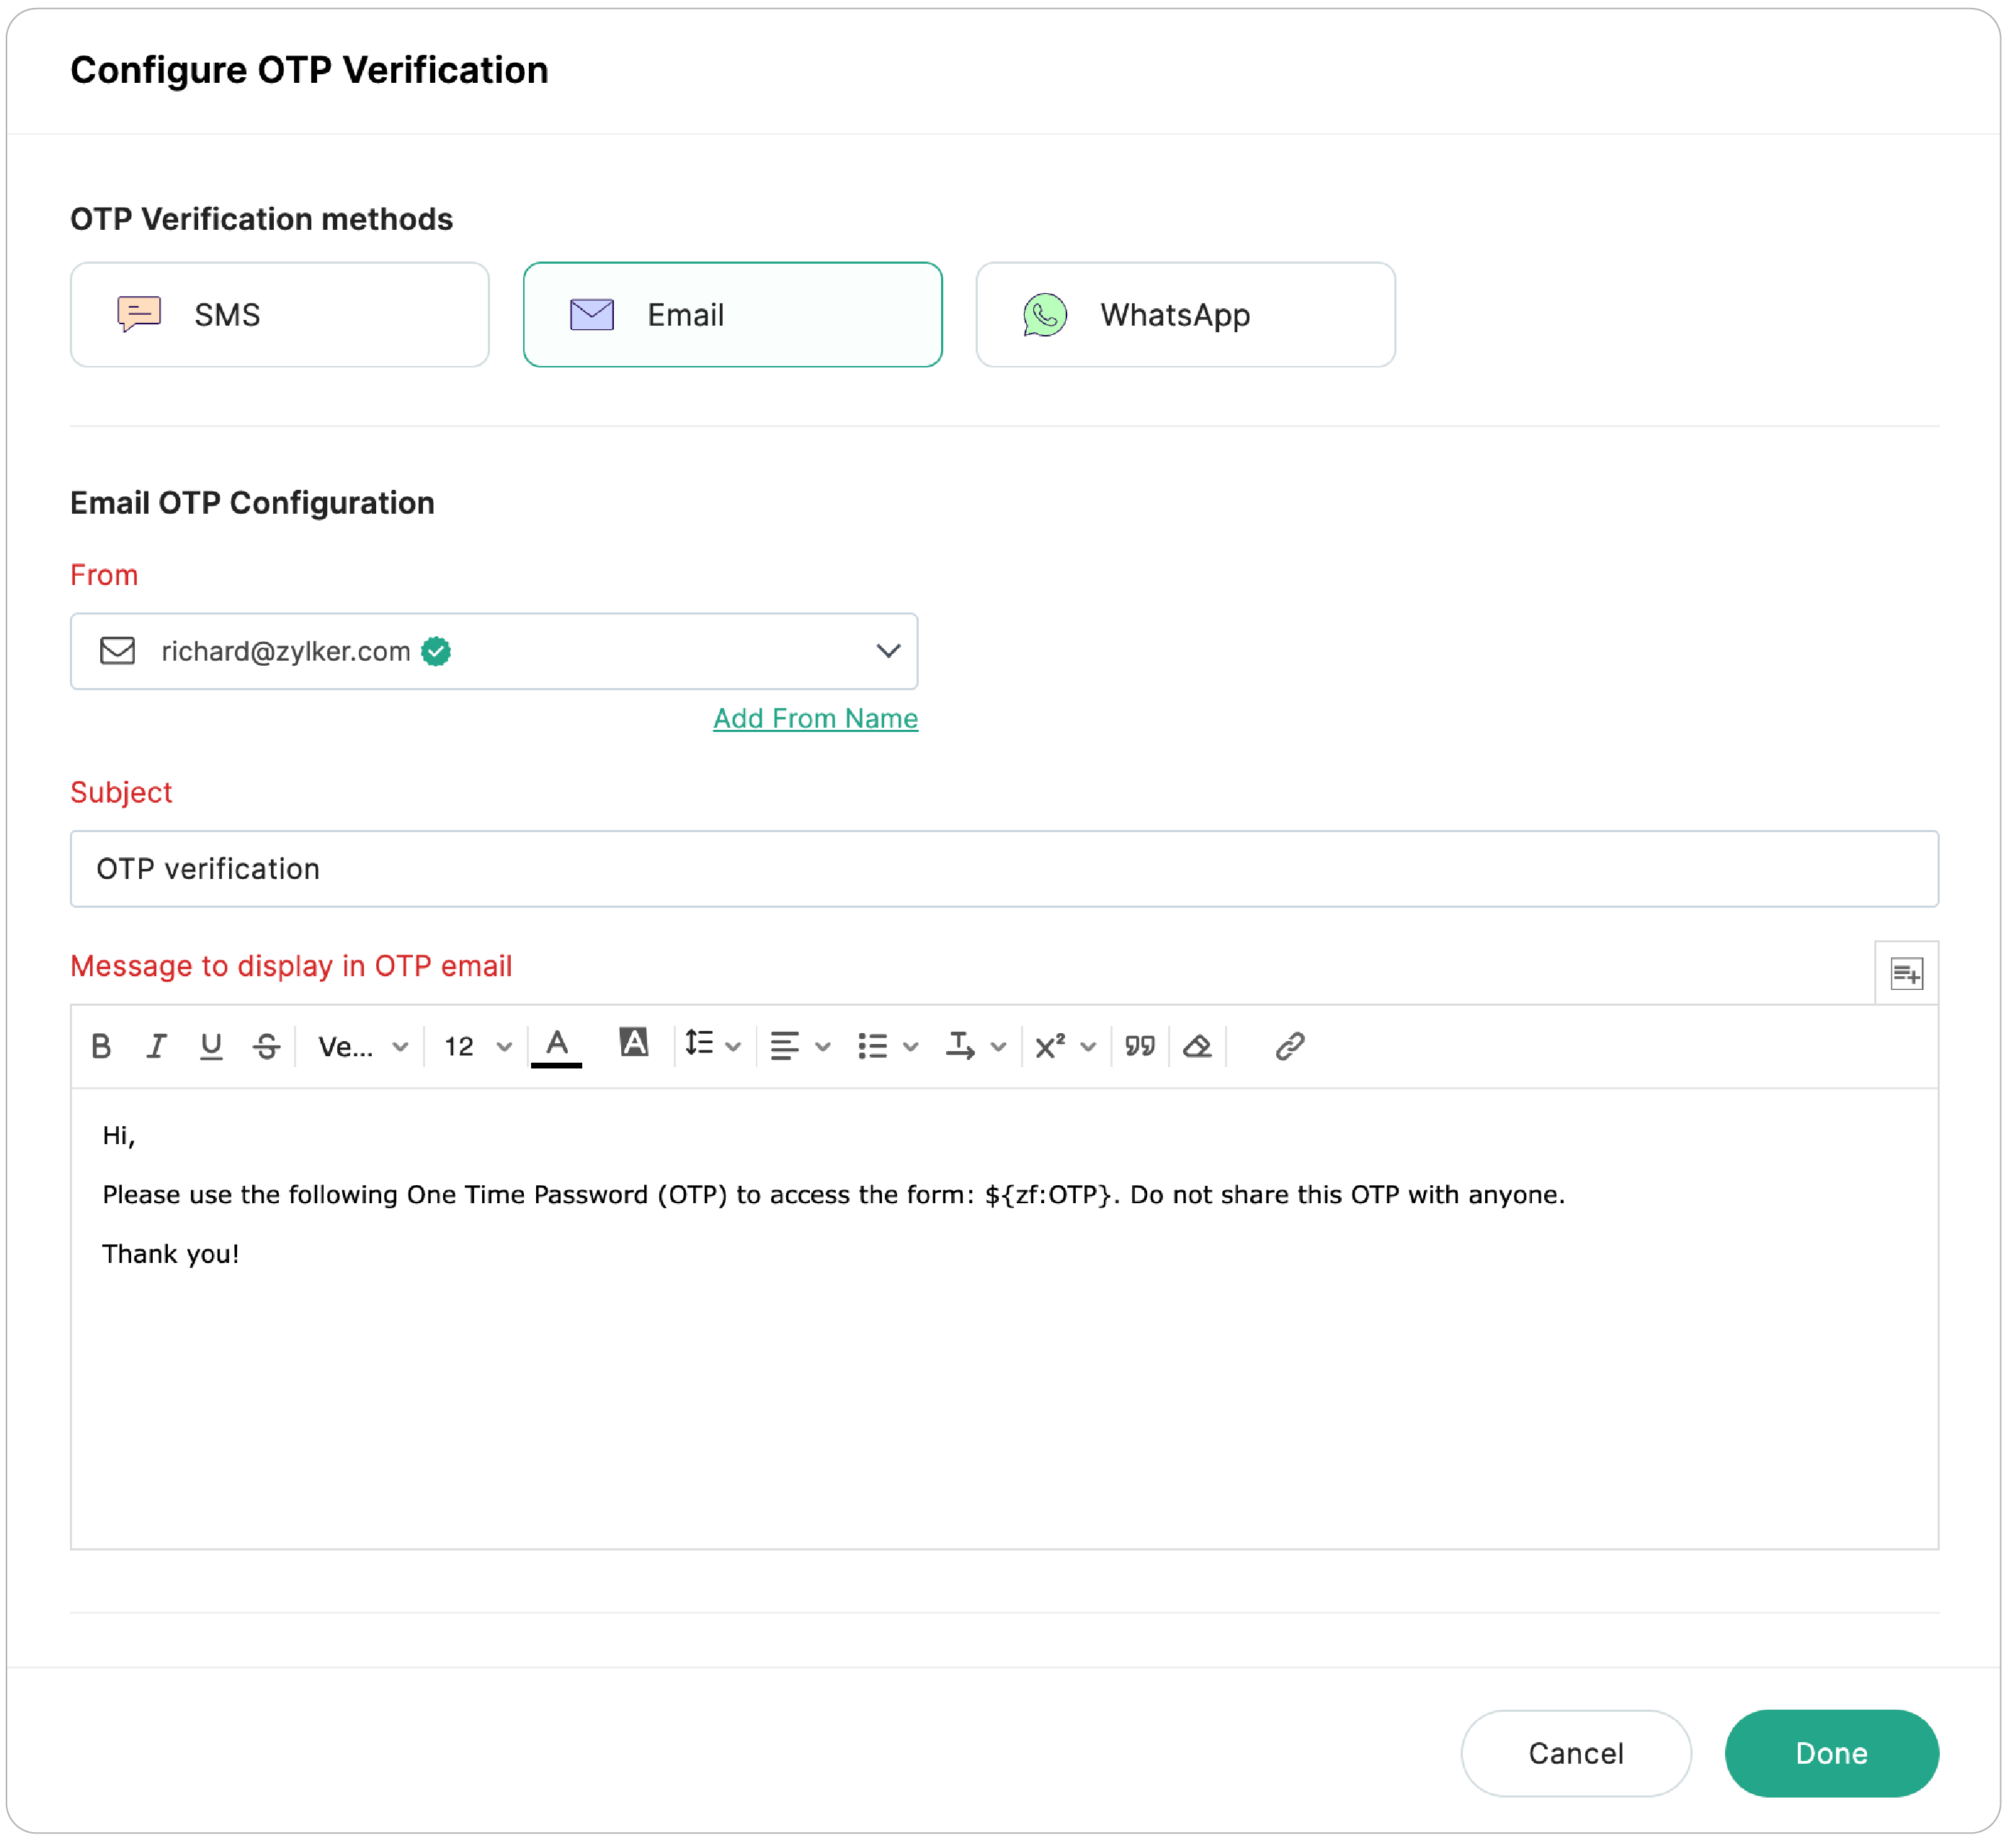
SMS
This requires the respondents to enter their mobile number to receive a one-time password via SMS and verify it before they can access the form. Learn more about setting up OTP configuration via SMS.
Email
This requires the respondents to enter their email address to receive a one-time password via Email and verify it before they can access the form. Learn more about setting up OTP configuration via Email.
WhatsApp
This requires the respondents to enter their mobile number to receive a one-time password via WhatsApp and verify it before they can access the form. Learn more about setting up OTP configuration via WhatsApp.
3. Click Done after completing the configuration for the selected method.
Step 2: Expiration Settings
This settings control how long the form link remains accessible after verification for respondents to complete their activities (Save/Submit form). Once the set time ends, the link expires and the respondent will need to verify again to access the form and the progress will be lost. If disabled, the form will remain valid indefinitely and will not expire.
To set up verified form link expiration:
- Toggle on Set up expiration for the verified form link.
- Under Expires after, enter a value and select the unit as Hours, Minutes, or Days.
- In Message on link expiry, enter the message to display to respondents when the link expires.
- Click Next.

Note: Verification Page and Validated form link can be accessed only if the form is available as per the Form Availability settings.
Step 3: Live Preferences
This lets you customize the logo and content of the Verification Page as it appears to respondents.
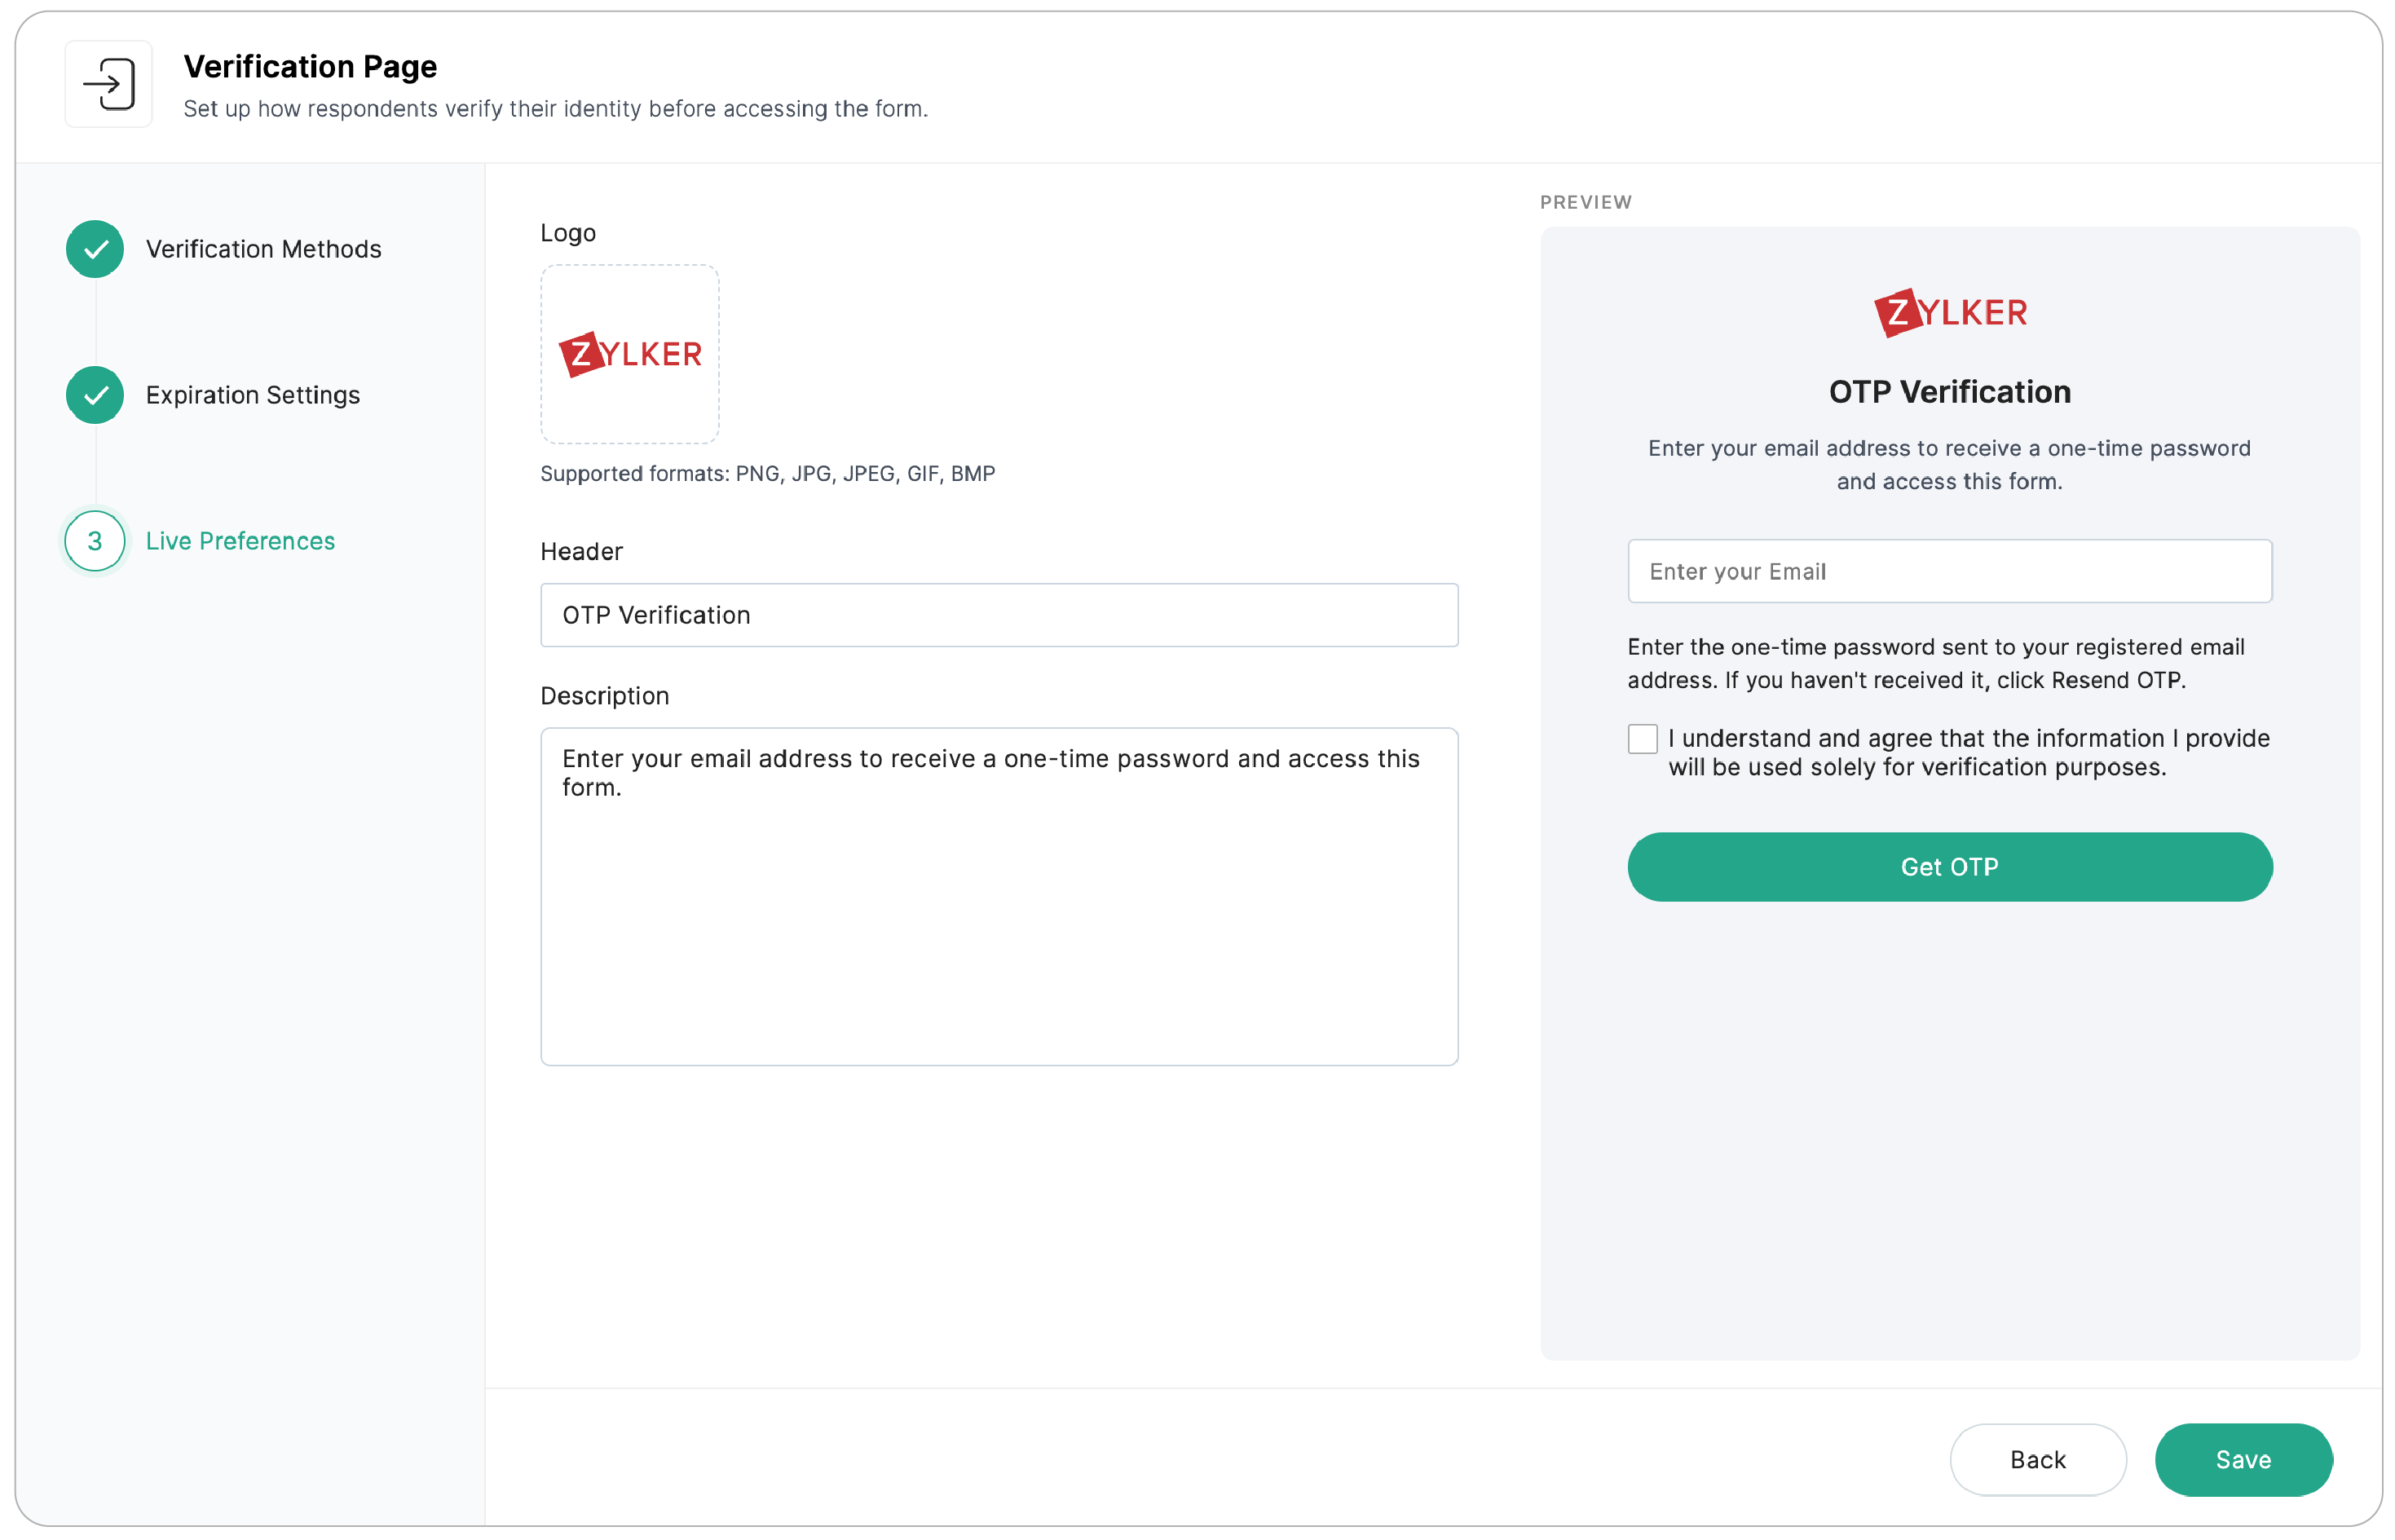
Logo
Upload an image to display on the Verification Page. It can be your organization's logo or a relevant visual. Supported formats are PNG, JPG, JPEG, GIF, BMP.
Heading
This allows you to customize the heading displayed on the Verification Page.
Description
The supporting text shown below the heading. Use this to give respondents brief instructions or context before they begin verification.
Click Save once the configurations are done.
Managing the Verification Page
Once configured, the Verification Page appears as a tab in the builder's top navigation bar, alongside Form Fields. You can click between the tabs to switch between the Verification Page and the form fields.
The Verification Page canvas shows a live preview of how the page will appear to respondents. Hover over the canvas to manage the page.
- Click the edit icon to open the Verification Page configuration and make changes to verification methods, expiration settings, or live preference.
- Click the delete icon to remove the Verification Page from your form entirely.
Editing OTP Verification Configuration
Once OTP verification is configured, the OTP Verification card displays the configured method. To update the OTP configuration:
- Click the edit icon on the Verification Page canvas.
- Click Edit on the OTP Verification card to update the configuration.
Removing OTP Verification
To reset the OTP configuration, click the delete icon on the OTP Verification card. This removes the current OTP configuration and allows you to configure a different verification method.
Enabling and Disabling OTP Verification
You can temporarily enable or disable OTP verification without removing the configuration. Use the toggle on the OTP Verification card to turn it on or off. When disabled, respondents can access the form without verification.
Tracking Verification Details in All Entries
After respondents verify and submit the form, you can view their verification details in the All Entries section.
The Verification Details column in All Entries shows the following information for each submitted entry:
- Verification Method: The method used to verify the respondent, such as SMS, Email or WhatsApp.
- Email / Phone Number: The email address or mobile number used for verification.
- Retry Count: Number of times the OTP was resent.
Non-submitted Records
You can also track OTP delivery and verification status for respondents who accessed the Verification Page but did not submit the form. This helps identify cases where OTPs were not received or where respondents verified but did not complete their submission.
To view non-submitted records:
- Go to All Entries in your form.
- Click Non-submitted Records in the top-right corner.
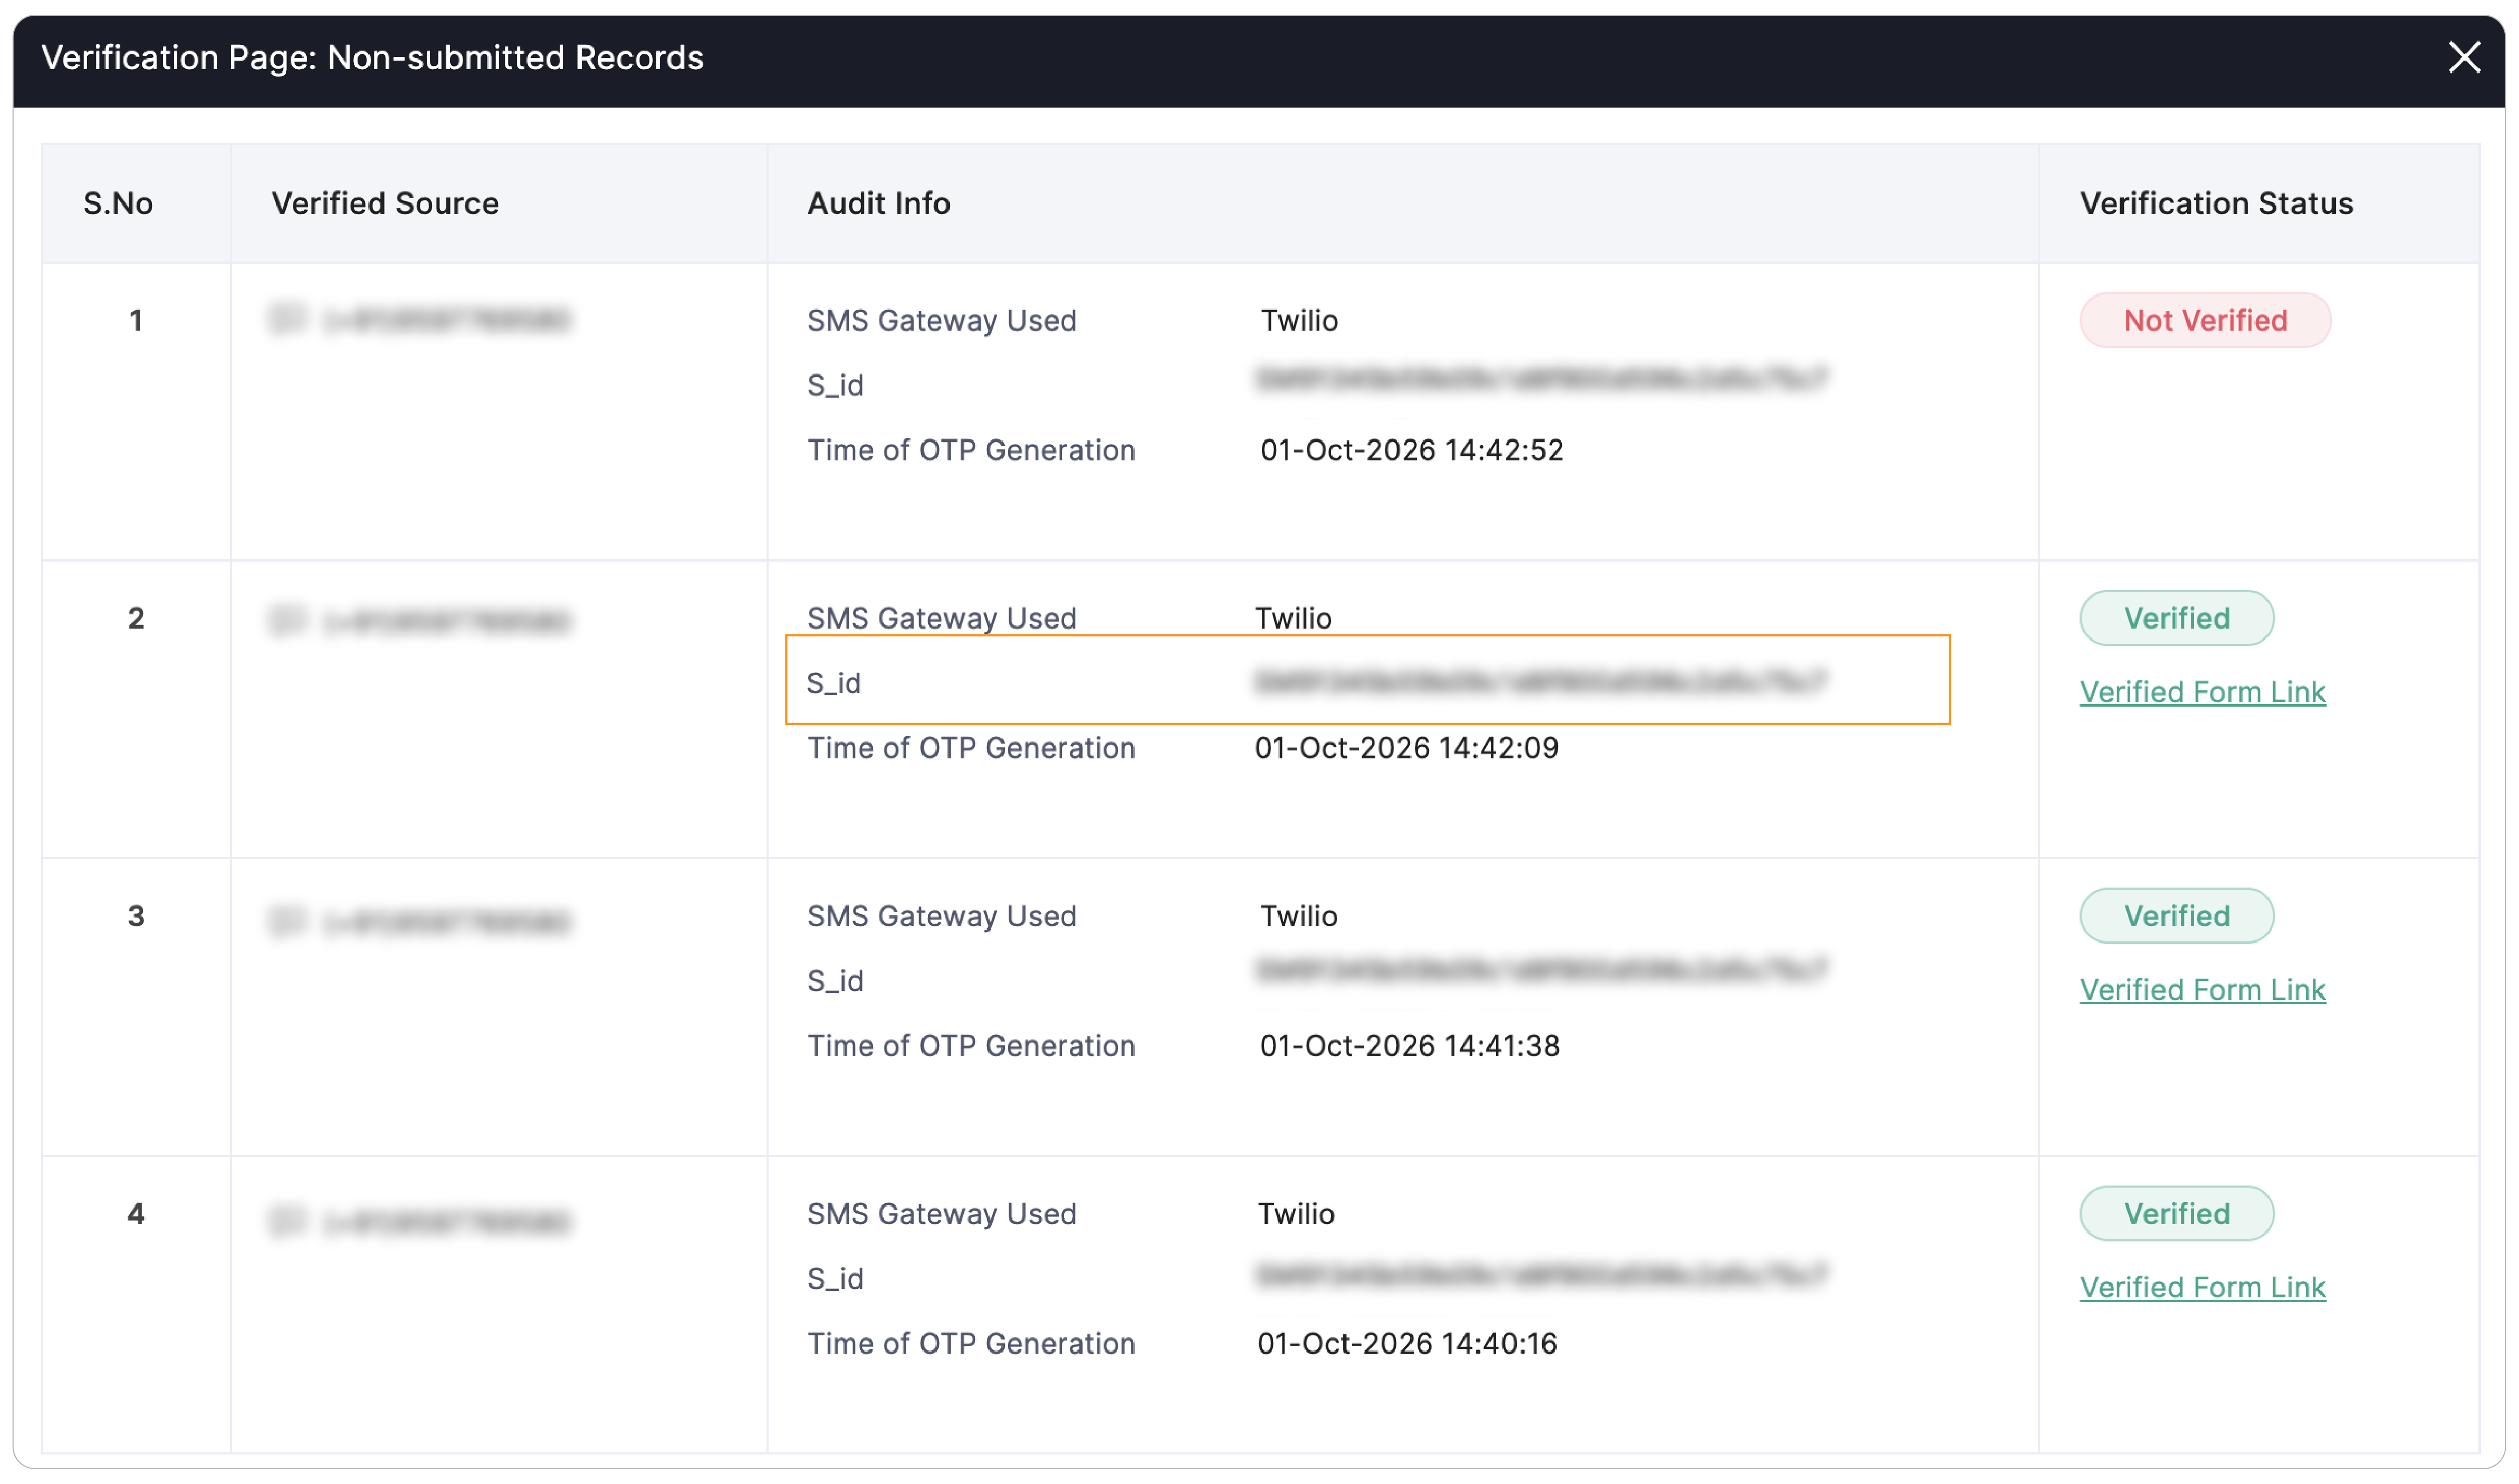
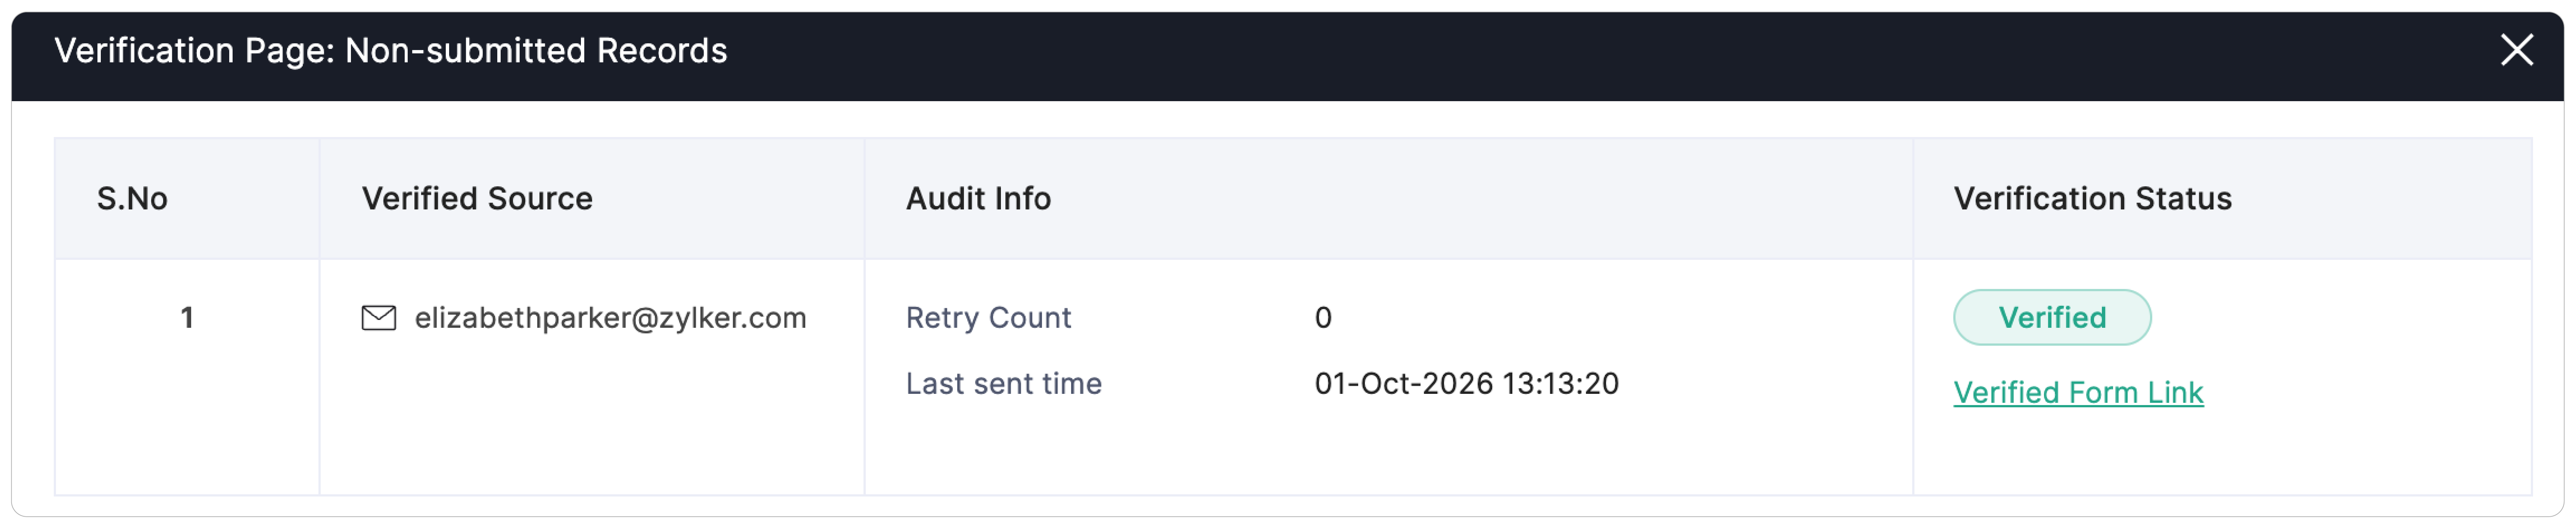
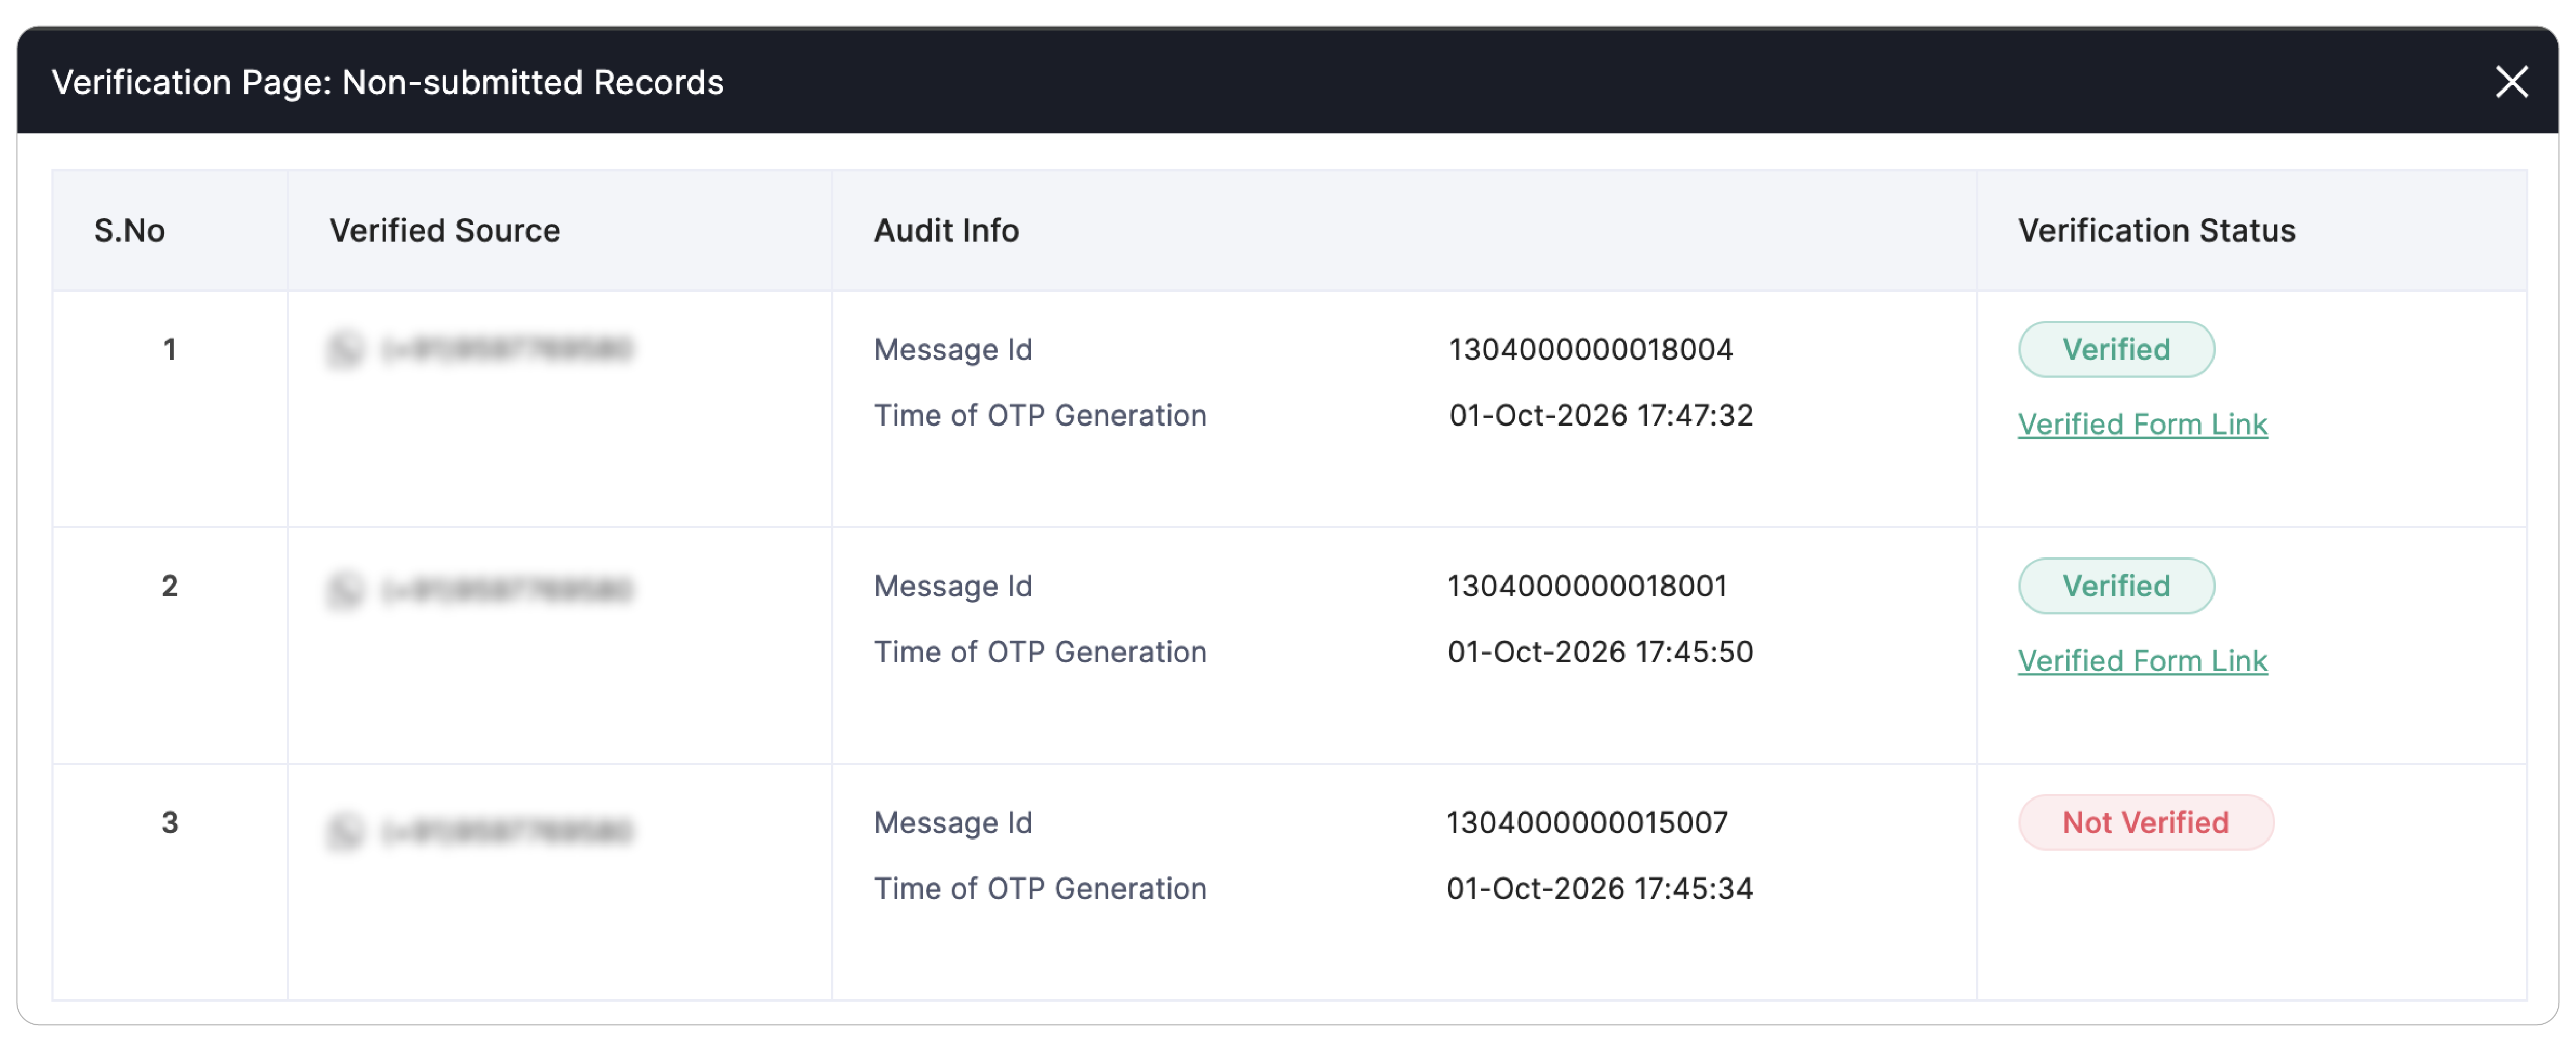
- The popup lists each respondent's Verification Source, Audit Info, and Verification Status.
Verification Source
Here you will find the email address or mobile number the respondent used for OTP verification.
Audit Info
SMS
For SMS OTP, you will find the SMS Gateway used to send the OTP, the Message ID of the OTP message, and the time at which the OTP was generated. Use the Message ID (S_id) in your SMS gateway service to check the delivery status of the OTP.
Email
For Email OTP, you will find the time at which the OTP was verified, along with the OTP Resend Count which displays the number of times the respondent requested a new OTP.
WhatsApp
For WhatsApp OTP, you will find the Message ID of the OTP message and the time at which the OTP was generated.
Verification Status:
Here you will see whether the OTP was verified, and a Verified Form Link if the OTP was verified but the form was not submitted.
Note: Only records from the last 30 days are listed under Verification Page: Non-submitted Records.

You can change the default live form OTP messages under Settings tab > Custom Messages > OTP Verification Messages.
If you choose to translate your form into different languages, the Verification Page messages displayed on accessing the form link will also be translated into the respective languages.
Note: Verification Page can be configured only in our paid plans.