Prefill-Webhook
Overview
Configuring Prefill-Webhook
- Navigate to the Builder tab.
- In the fields panel, go to Prefill.
- Drag and drop the Prefill-Webhook field onto your form to add it.
- A configuration popup will appear now with four steps to complete the setup:
- Field Configuration
- Webhook Settings
- Test & Verify
- Prefill Mapping
1. Field Configuration

- Enter the Field Label for your Prefill-Webhook field.
- Choose the Field Type.
- The supported field types are Single Line, Number, Email, Phone, Dropdown and Radio.
- Click Next.
2. Webhook Settings
In this section, you will configure the webhook:
Webhook Details
- GET
- POST
Authorization Type
- General: Use when the endpoint is public or when you handle authentication via headers or query parameters.
- Connections: Use a pre-configured connection from the Control Panel. If you choose Connections, select the appropriate connection from the Connection Name dropdown list. Click the refresh icon if you have recently added a new connection so that it appears in the list. Read more on creating connections.
 Note: The Connection Name will only list the existing active connections. Read more about Connections.
Data Retrieval Methods
- URL Parameters
- Request Body
- Custom Header
You can add additional information to filter the relevant data. For example, if you add a parameter named department with the value IT, then webhook will send a request like this:
You can set a custom header name and value to be passed with the Webhook request.Enter the name of the header and the value associated with this header.
- The Prefill-Webhook field must be included in either URL Parameters or the Request Body, as it provides the webhook the identifier to retrieve a specific record.
- You can add up to five URL Parameters and Custom Headers each.
- You can add up to five form fields in total, combining both URL Parameters and Request Body. Supported field types include Single Line, Number, Email, Phone, Dropdown, and Radio.
3. Test & Verify
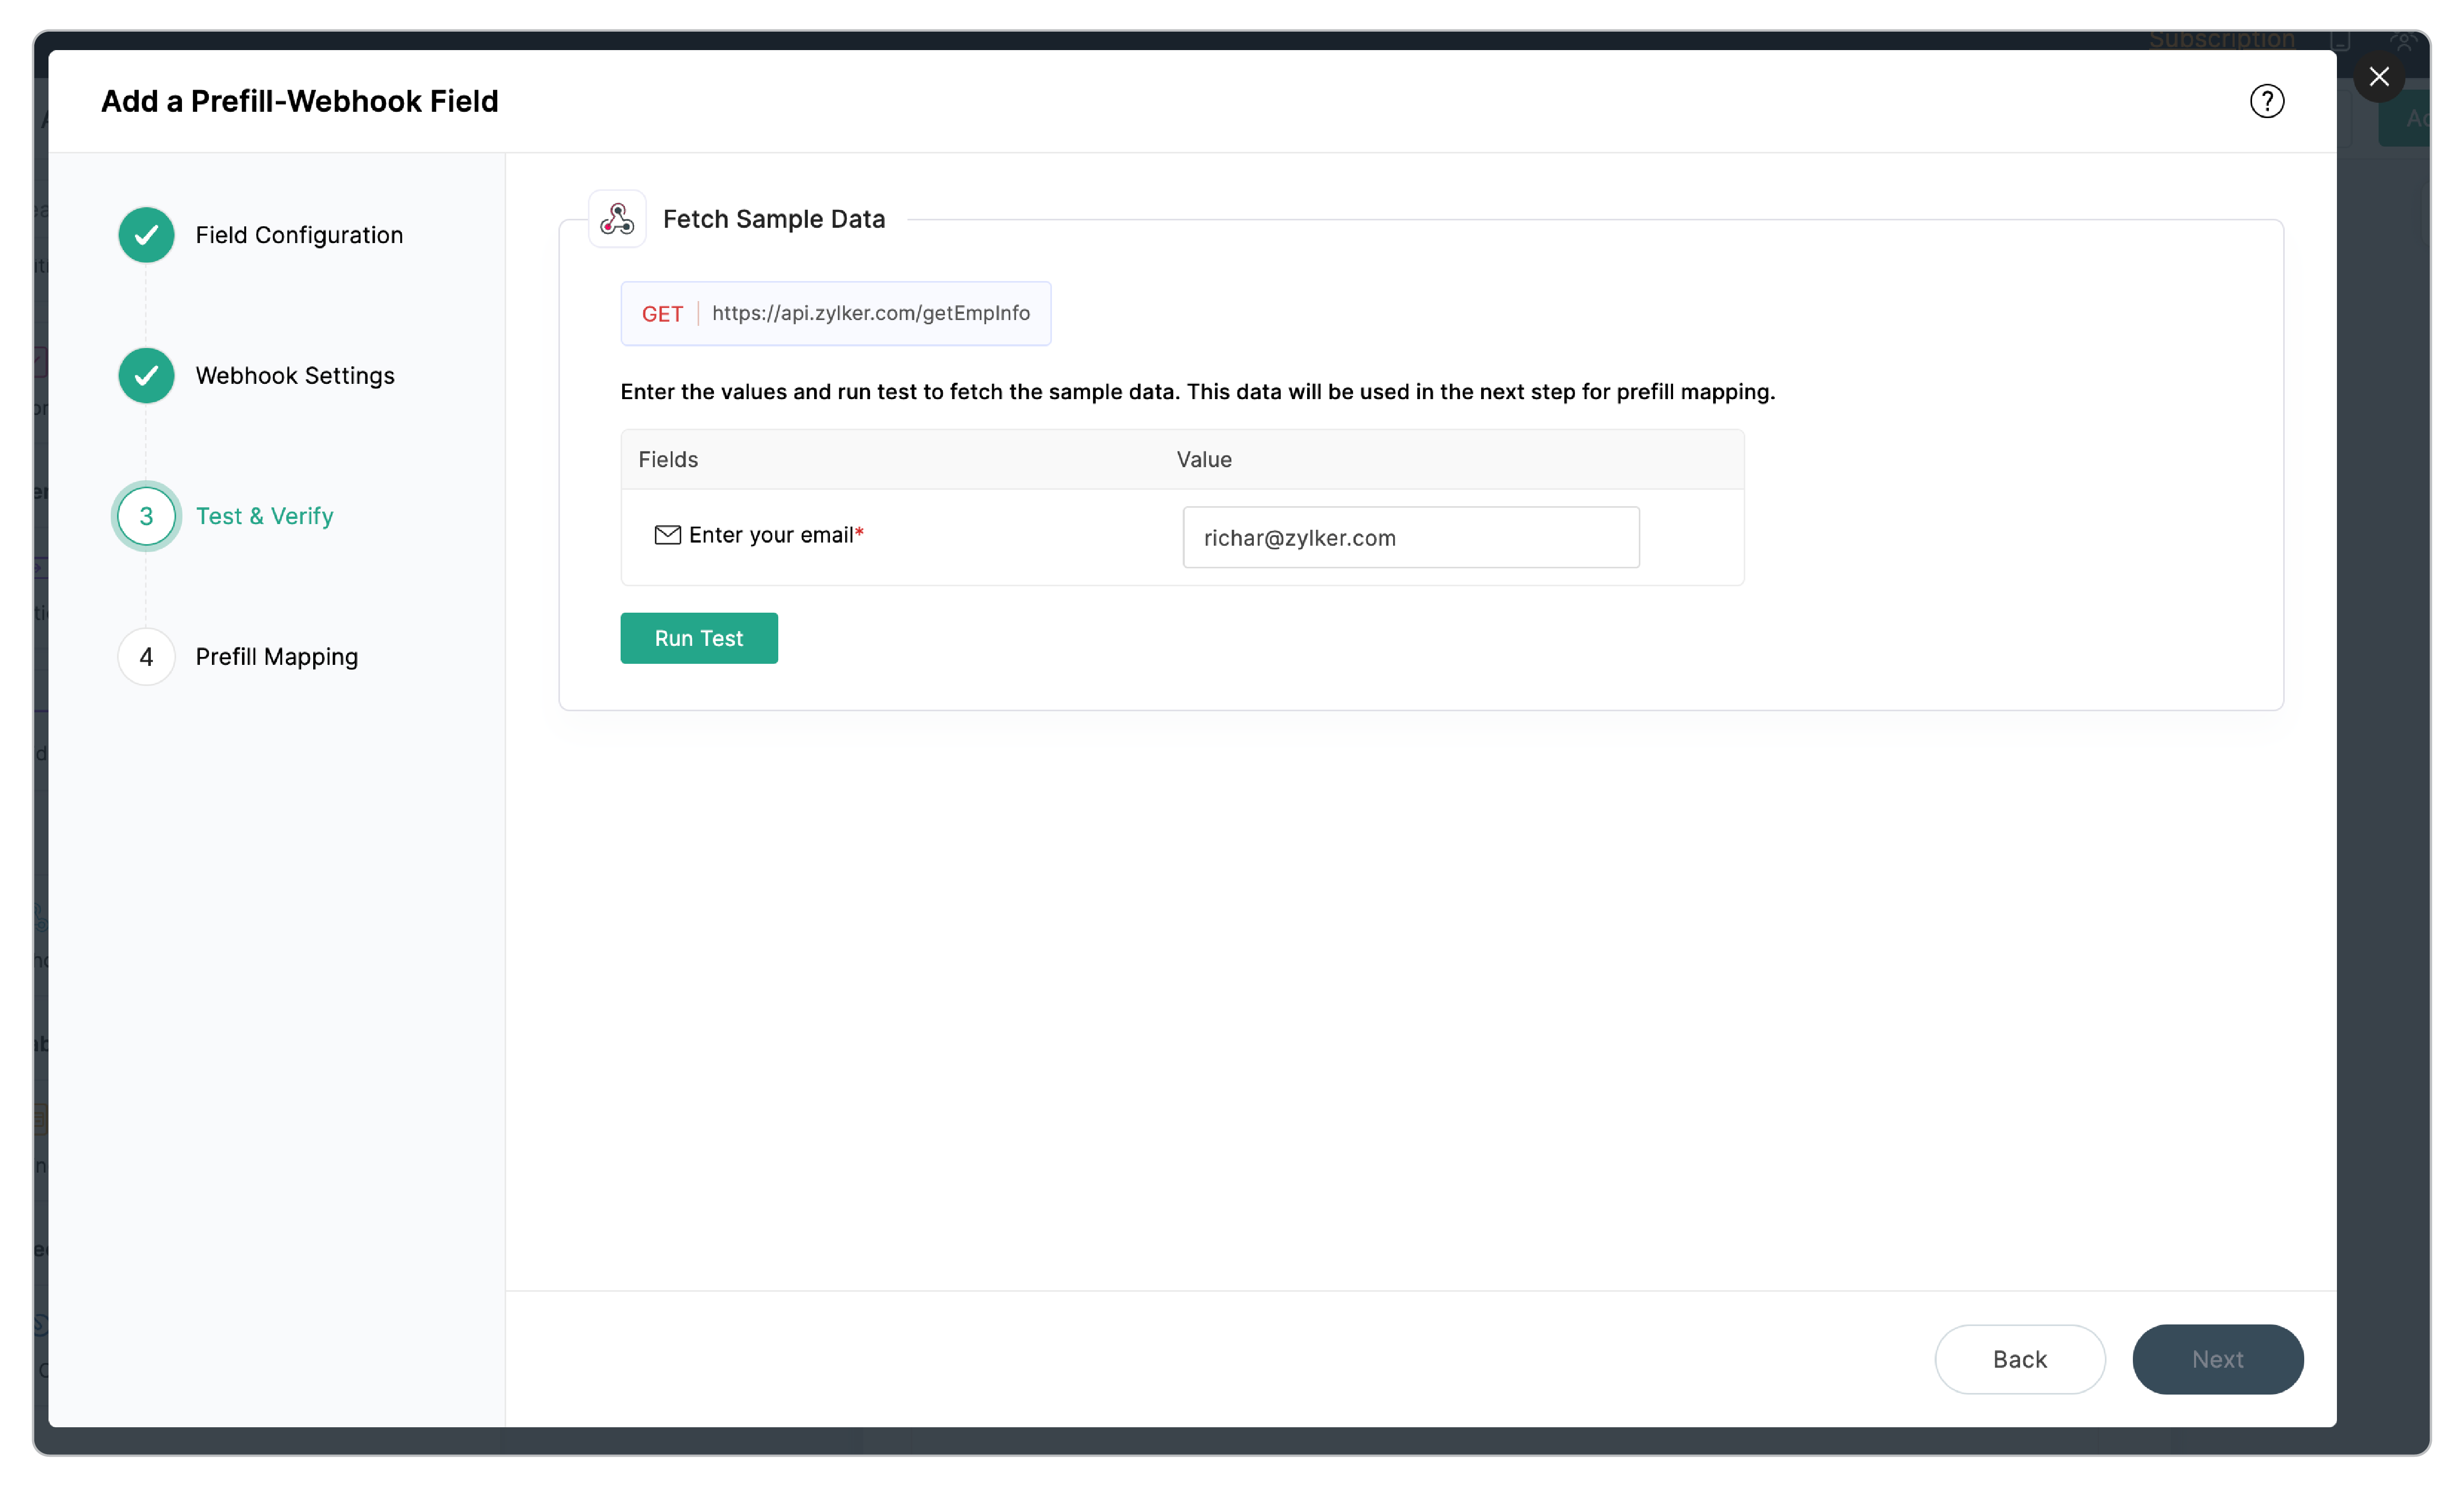
- Enter the test values in the Fields section.
- Click Run Test to execute the webhook.
- Review the received response to verify the data is correct.
4. Prefill Mapping
To map the form fields that you wish to prefill with data from the external service,
- Click Choose Field to add a form field.
- Click the input text box on the right corresponding to the added form field.
- A popup with the JSON response will open. Identify the keys in the JSON response that contain the data you need and select it for the mapping.
- Repeat this for all form fields you wish to prefill.
Click Save to complete the Prefill-Webhook field configuration.
- You can have a maximum of 50 field mappings in the Prefill Mapping section, including fields mapped within the Subform.
- When a form loads with a pre-filled value (via Field Alias) in the Prefill-Webhook field, it triggers the search automatically. Here, the mapped fields will get prefilled via the webhook without the respondent manually clicking the search icon.
Field Properties
Prefill Configuration
Prefill Configuration Summary
Click on the Summary button to view Prefill Configuration Summary. It displays a summary of your configured prefill, including the prefill data source (in this case, a webhook), Webhook URL, HTTP method used (GET/POST), URL Parameters/Headers and Prefill Mapping details. You can quickly view the configuration without reopening the full setup.
Edit Prefill Configuration
Click the Edit button to reopen the configuration screens and modify the Webhook Settings, Test & Verify section, and Prefill Mapping details if required.
Search Icon Style
You can choose how the search action is presented to respondents in the live form using the Search Icon Style property. The search icon can be customized in the following display styles:
Inline Icon
The search icon appears directly within the input field, on the right side.
Standalone Icon
The search icon appears as a separate clickable icon right next to the field.
Button
The search action appears as a dedicated button. On selecting this icon style, the Button Label property will appear. This lets you customize the text displayed on the button (for example, “Search”, “Lookup”, “Fetch Data”).
- After configuring the Prefill-Webhook field, clicking the search icon in the live form field triggers the webhook and automatically prefills the mapped fields.
- The button label cannot be left empty and the maximum length supported is 10 characters.

- For Response Formats and Pricing details that apply to all Prefill fields, refer to the Prefill Overview article.
- Learn more about whitelist IP addresses.