Time Logs
The Overview - Time Logs section displays all the time logs across all the projects in a portal. By default, users will view their own time logs. However, this can be changed using filters. The date selector allows users to select various dates to view time logs.
- Time Logs can be viewed chronologically by using the Group By Date option & or by users with the Group By User option.
- Time Logs can also be viewed as a List, Grid, or on a Calendar.

Use cases
Construction: When a worker is billed based on the number of hours spent on a task, the project manager needs to know the hours a worker has spent on a task. Time Logs helps with exactly that.
Marketing: When a freelancer is hired to develop a flyer for a product and is paid depending on the number of hours worked on the flyer, time logging is necessary. With Time Logs, the employer can view the logged hours and match the salary for the employee.
Software/ IT: Sometimes you may wonder how long it has taken to fix an issue in the product. With the help of the timer in Zoho Projects, you can know the exact time taken to resolve.
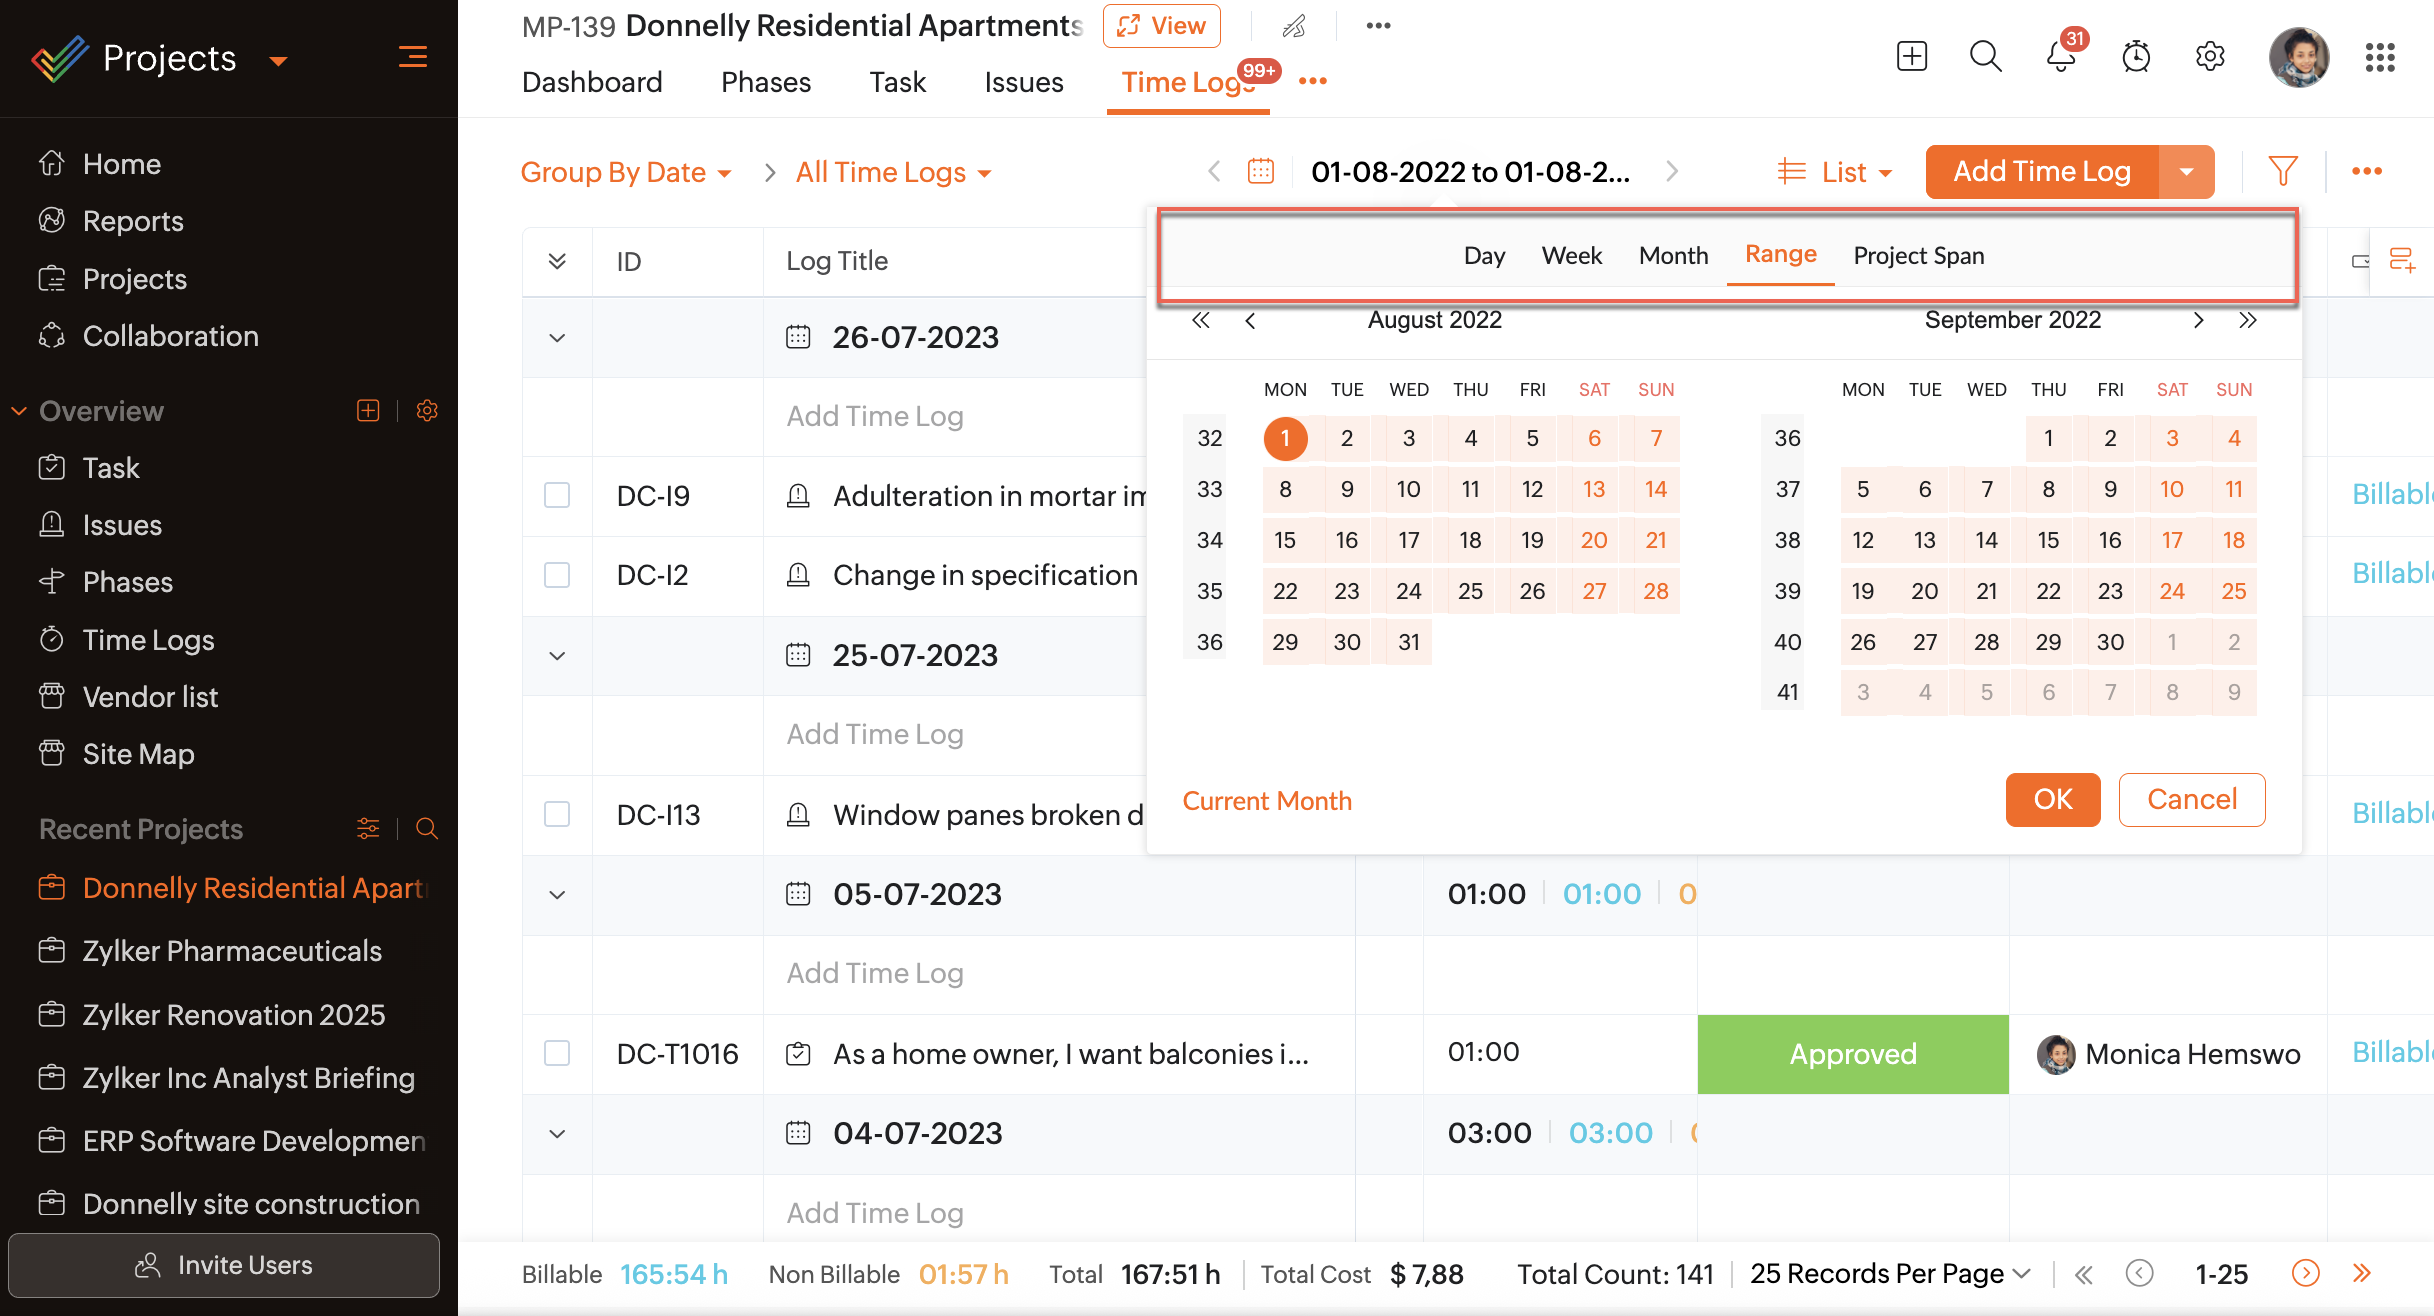
Date Selector
Users can select dates to view time logs with the date selector. Time logs can be viewed by day, week, month, any custom date range, or the entire project span.
Add Daily Time Log
- Navigate to Overview > Time Logs on the left navigation panel.
- Click on the Add Time Log button.
- Select a project.
- Select either a task or an issue.
Click Enter Other Log Entries for a general time log. - Select the date and a user.
- Enter the number of hours in the Daily Log field.
Users can also click on Set Start & End Time link to enter time. - Select a Billing Type.
- Enter Notes in required and click Add to save the time log entry.
Add Weekly Time Log
Users can also log time weekly.
- Navigate to Overview > Time Logs on the left navigation panel.
- Click on the drop-down right next to Add Time Log button.
- Click Weekly Time Log.
- Select the project, user, and task/issue.
Click + icon to enter a general time log.
Click Add Row to enter additional time logs. - Enter the log hours.
Click theicon that appears as you enter the weekly log, if you want to enter the daily log instead.
- Click Save to add time logs or Save and Add New to enter logs for another week.
Other Actions
- Click
in the upper-right corner to view more actions.
- The following actions are available:
- Export Time Logs - Export the time logs to and XLS or CSV file. Users can select project status, date range, file format, and the columns to be exported.
- Export to PDF - The time logs displayed on the screen are exported to a PDF file.
More Reads