Tips to build a powerful custom Widget using SalesIQ Scripts
Hi everyone! Great to see you.
In our earlier posts, we discussed SalesIQ's built-in widgets and how to build real-time custom widget for e-commerce businesses. Today, we are going to discuss tips for building an effective custom widgets. As we know, widgets are highly customizable and support various visual and textual elements to make the data more actionable. They are comprised of different sections and responses to meet countless requirements. Let's learn the best hacks and tips to build a powerful widget using SalesIQ Scripts.
Tip #1 - Select the appropriate sections:
The first step in building a custom widget is planning layouts by choosing the necessary sections to display the data/information. A section is a structure of widgets with data, titles, and buttons to perform different actions. There are totally six unique sections,
- Info - To display lengthy information like descriptions, etc.
- Listing - To display a list of records like listing the associated desk tickets with the visitor.
- Fieldset - To display short details like name, email, age, etc.
- Metric - To display statistics, up to 3 values are allowed.
- Profile - An layout to display the details of a company or a person
- Empty section - To indicate operators or use when there is no data to display.
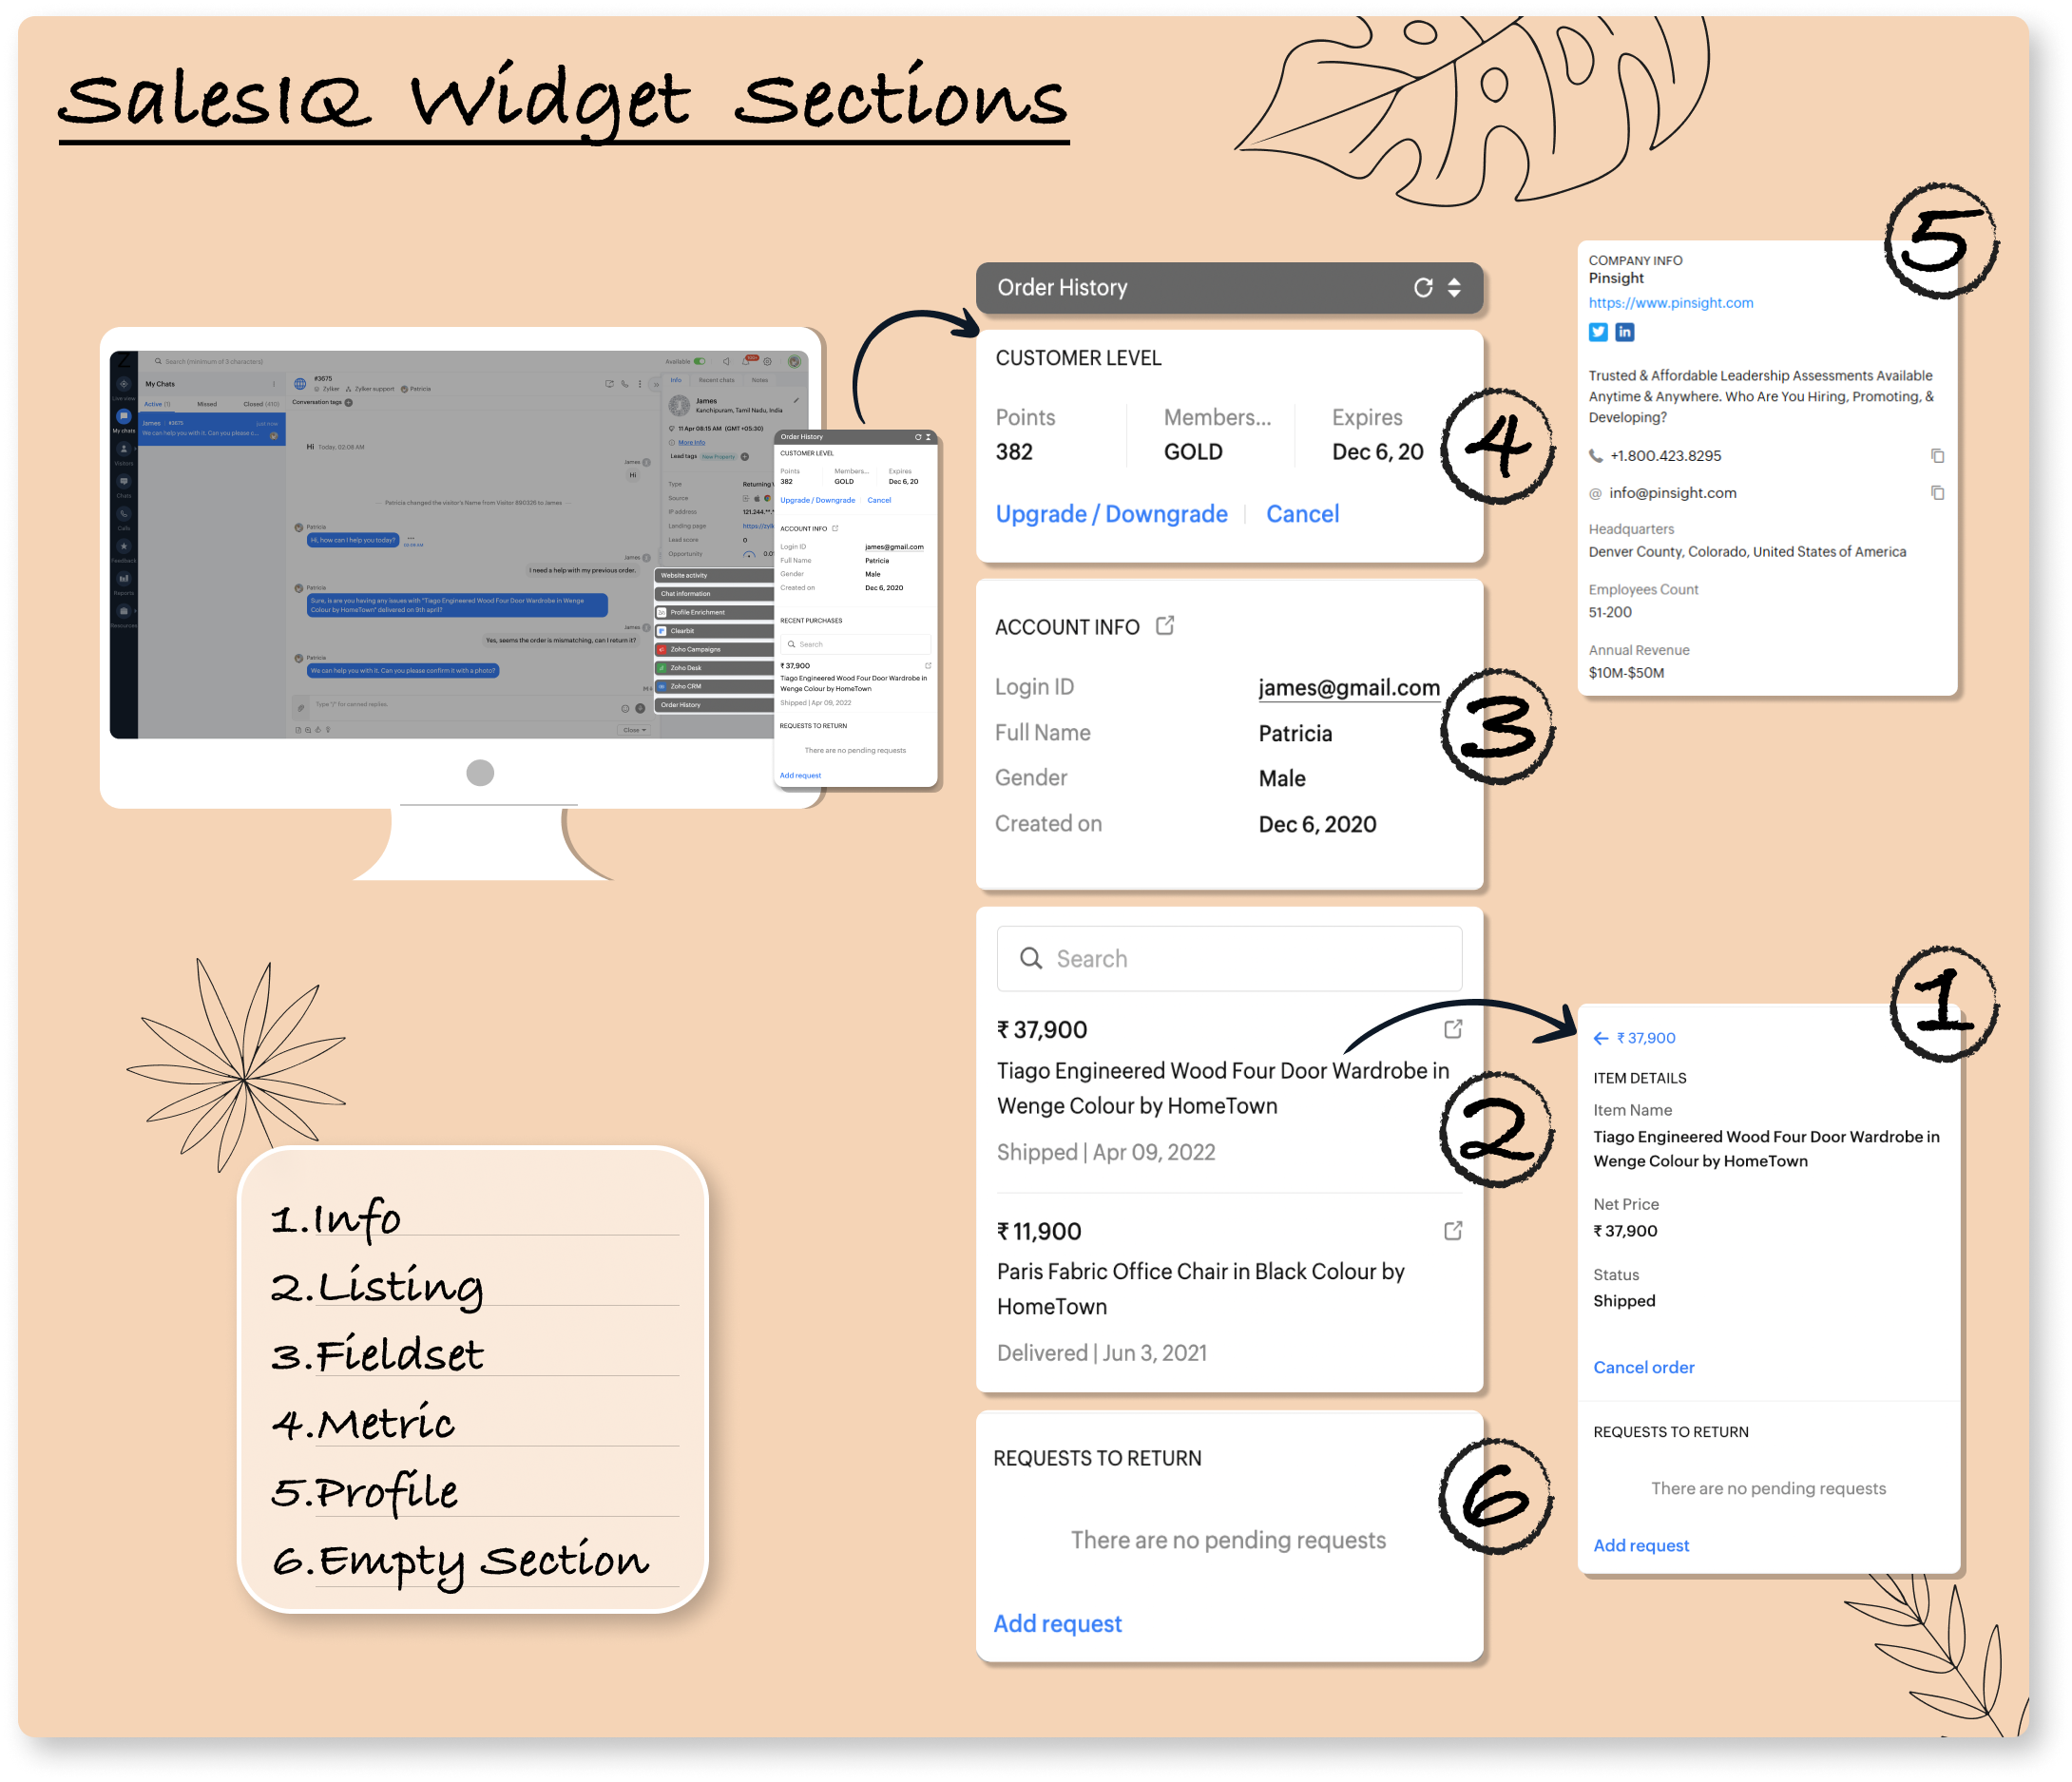
Using sections, you can create a layout for your own widget as per your requirements and needs.
Tip #2 - Third-Party integration:
The prime functionality of the custom widget is fetching data back and forth from other applications to view all the necessary information in one place. To achieve this, connect your widget to other applications using the Connection interface, eliminating the need to maintain the tokens.
- There are numerous pre-built connections available under default service,
- You can also create a custom connection for other applications.
Tip #3 - Equip the widget with the relevant response:
Generally, widgets help to fetch data from the external application and display it on the operator dashboard. However, widgets allow performing various actions using those data. For example, having a widget to display the customer's recent order history will be helpful in an E-commerce business. Instead of just displaying the order history, widgets can perform actions like cancelling an order, upgrading/downgrading the customer's membership, and more.
Therefore, whenever an operator performs an action such as clicking a button, a response is triggered. These responses include navigation, posting a message to the visitor, embedding forms, etc to make the data more actionable. There are seven different types of responses available.
1. Section_navigate - To navigate different sections in the widget to find get details.
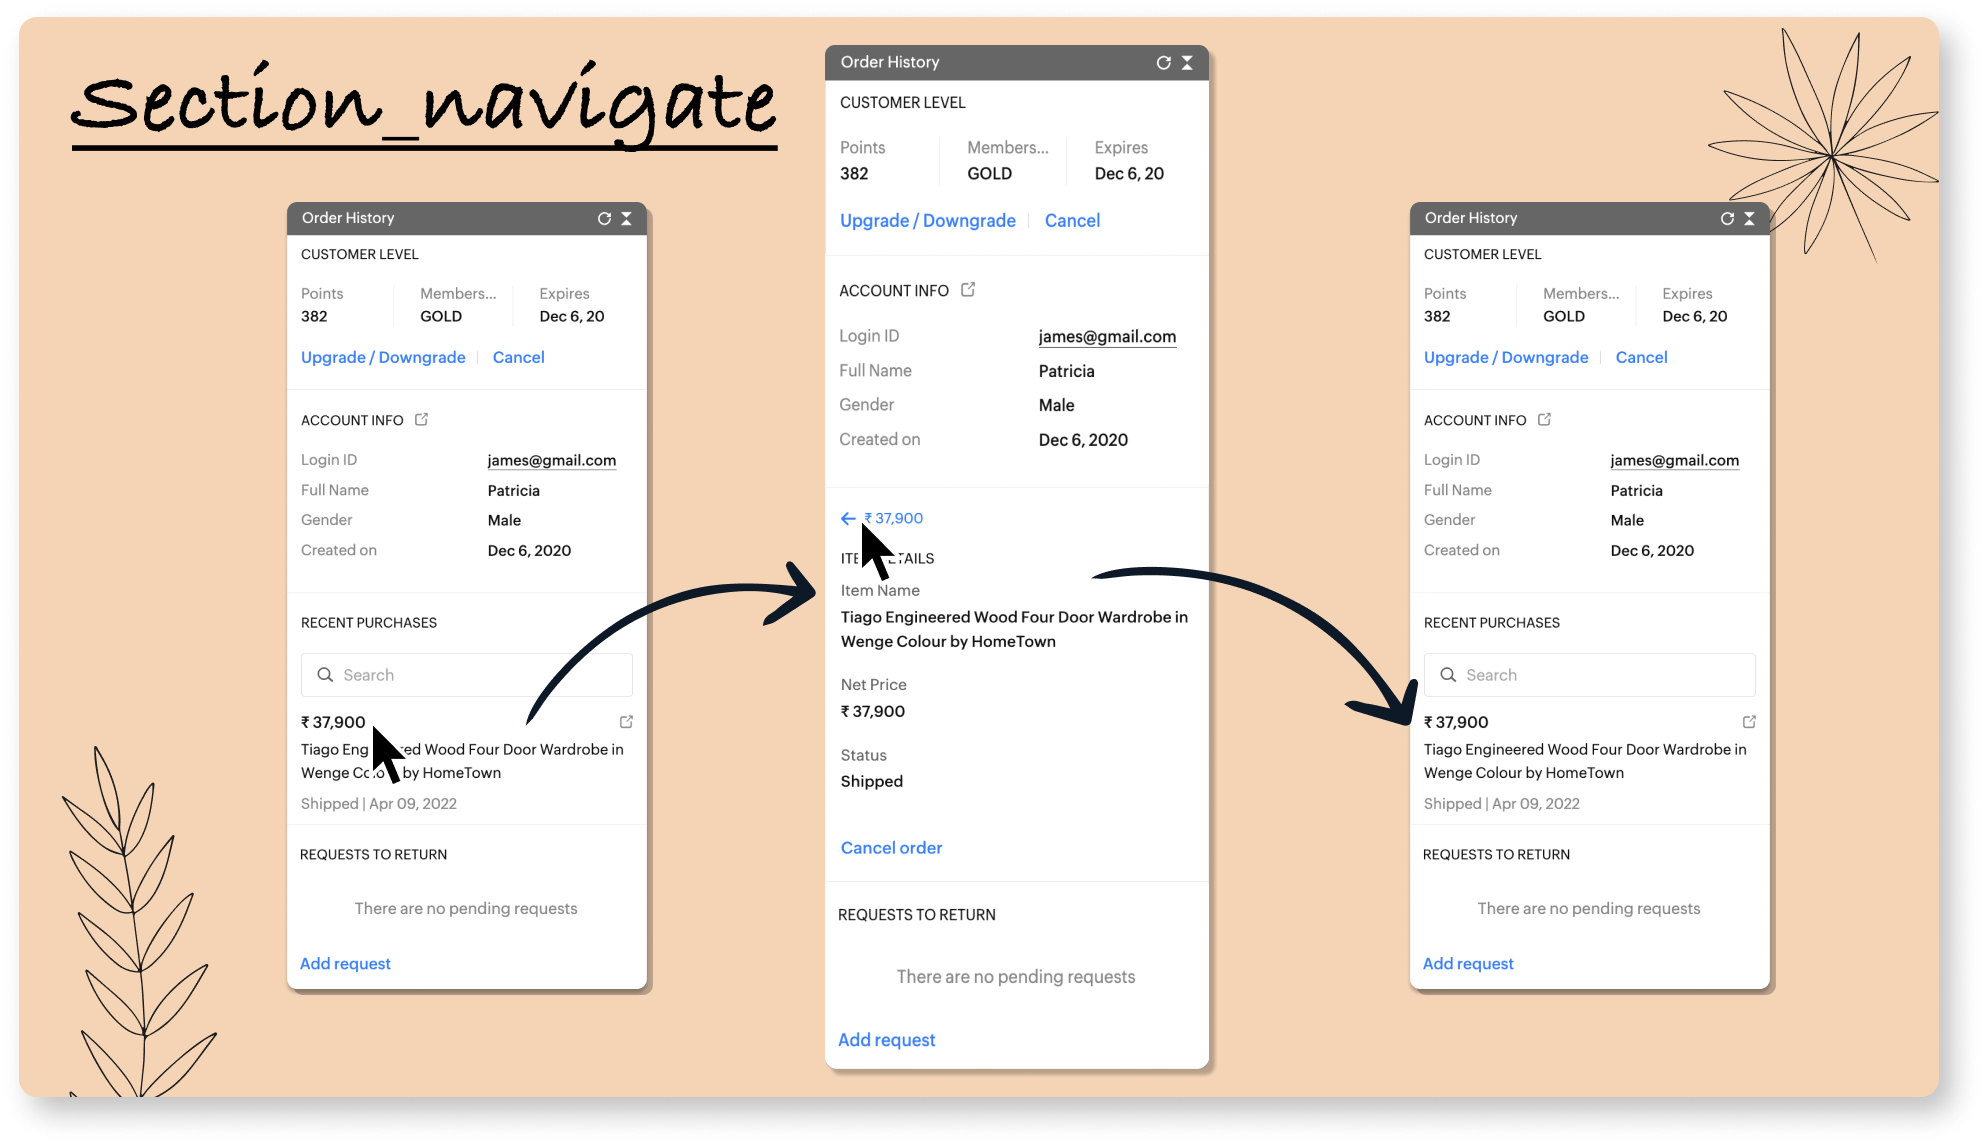
Here, the operator can click on the listed order item to get more information about it.
2. Sections_edit - To edit/update an existing section in the widget after performing an action.
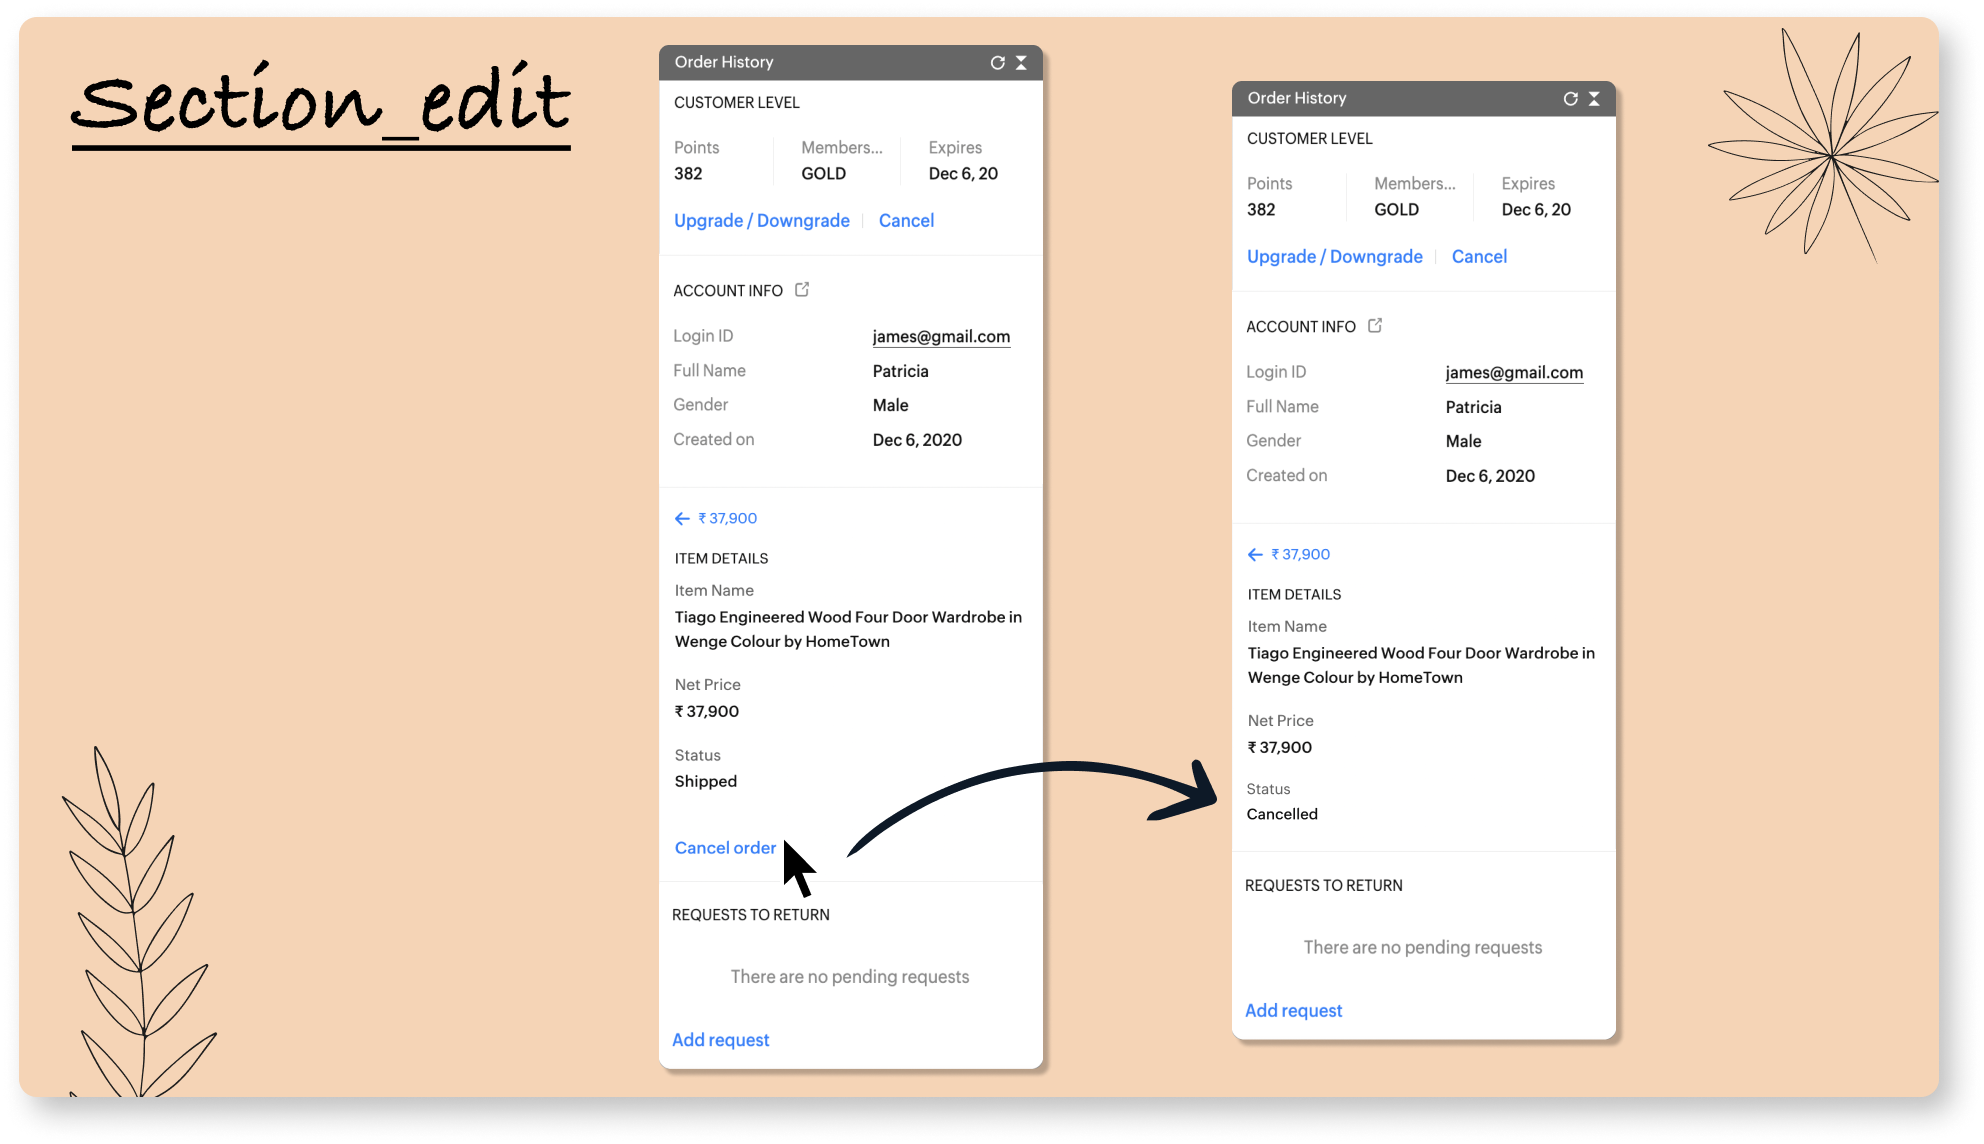
To cancel an order, click on the "Cancel order" button, and the status will change from "Shipped" to "Cancelled."
3. Banner - To display success or failure banner after performing an action to indicate the result to the operator.
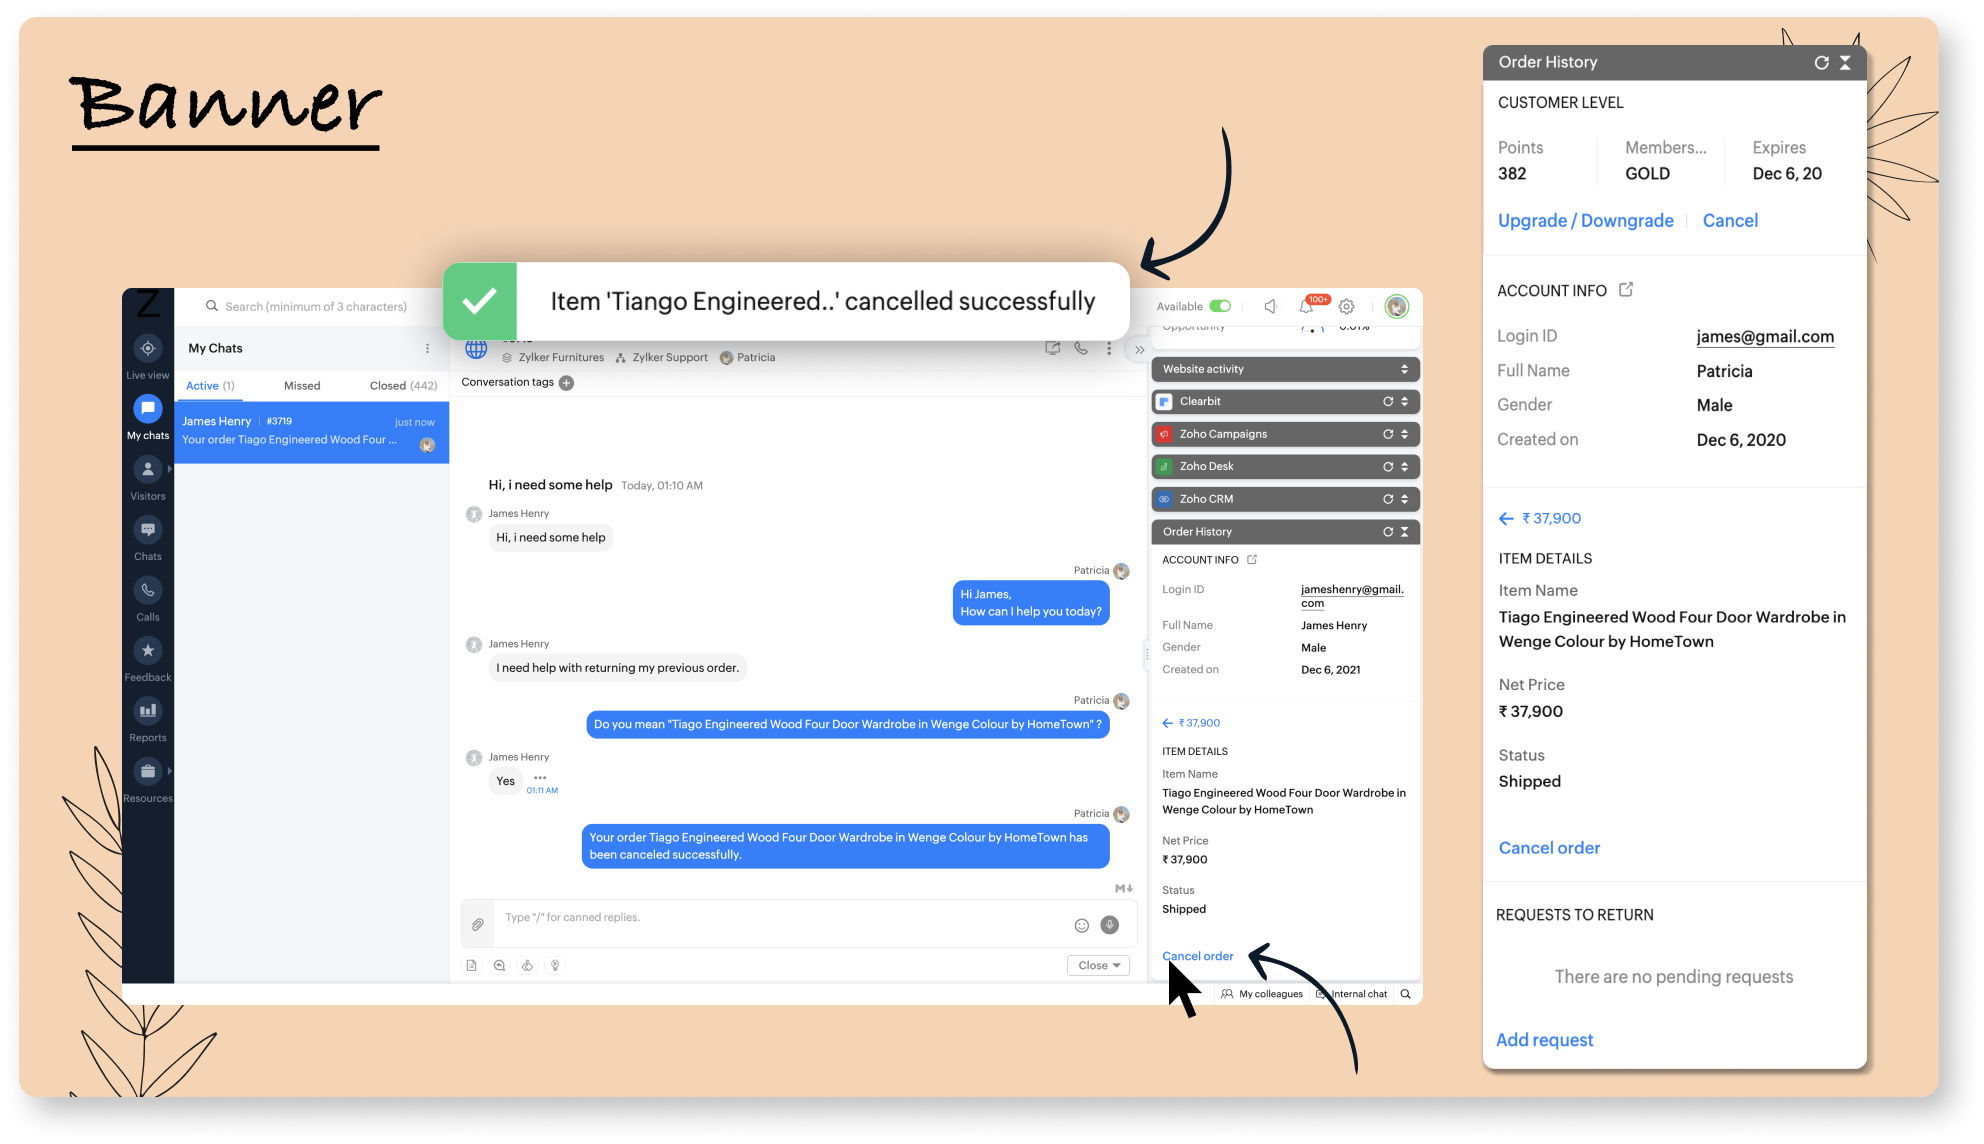
Here, the operator is performing an action to cancel the order by clicking on the "Cancel order" button. Then the widget displays a success banner to indicate the order has been cancelled.
4. Widget_detail - Align and sequence the whole layouts of the widget.
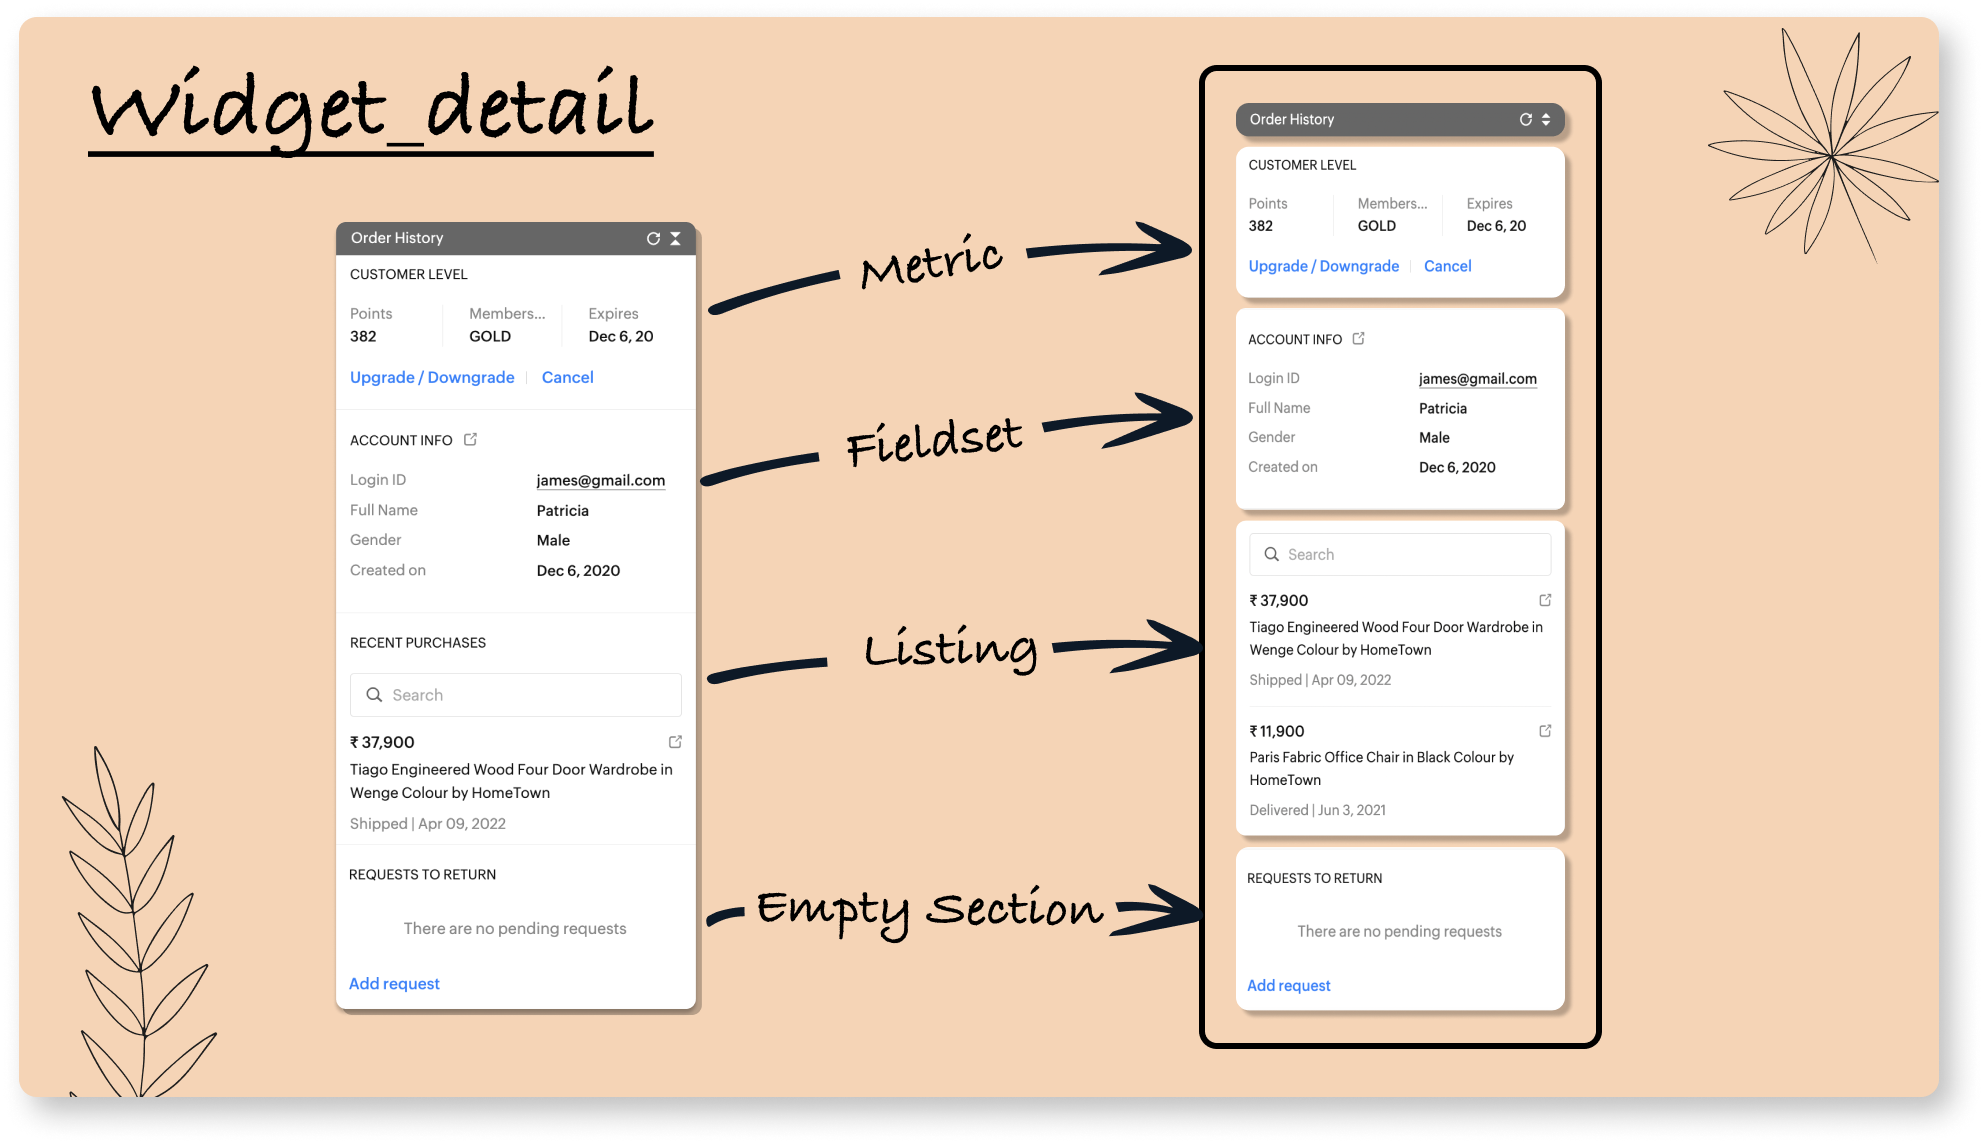
The widget's whole layout will be defined in the widget_detail. Here, the widget is comprised of four sections, metric, fieldset, listing, and empty section.
5. Form - To embed the form inside the widget to perform more additional actions based on the visitor's requirements.
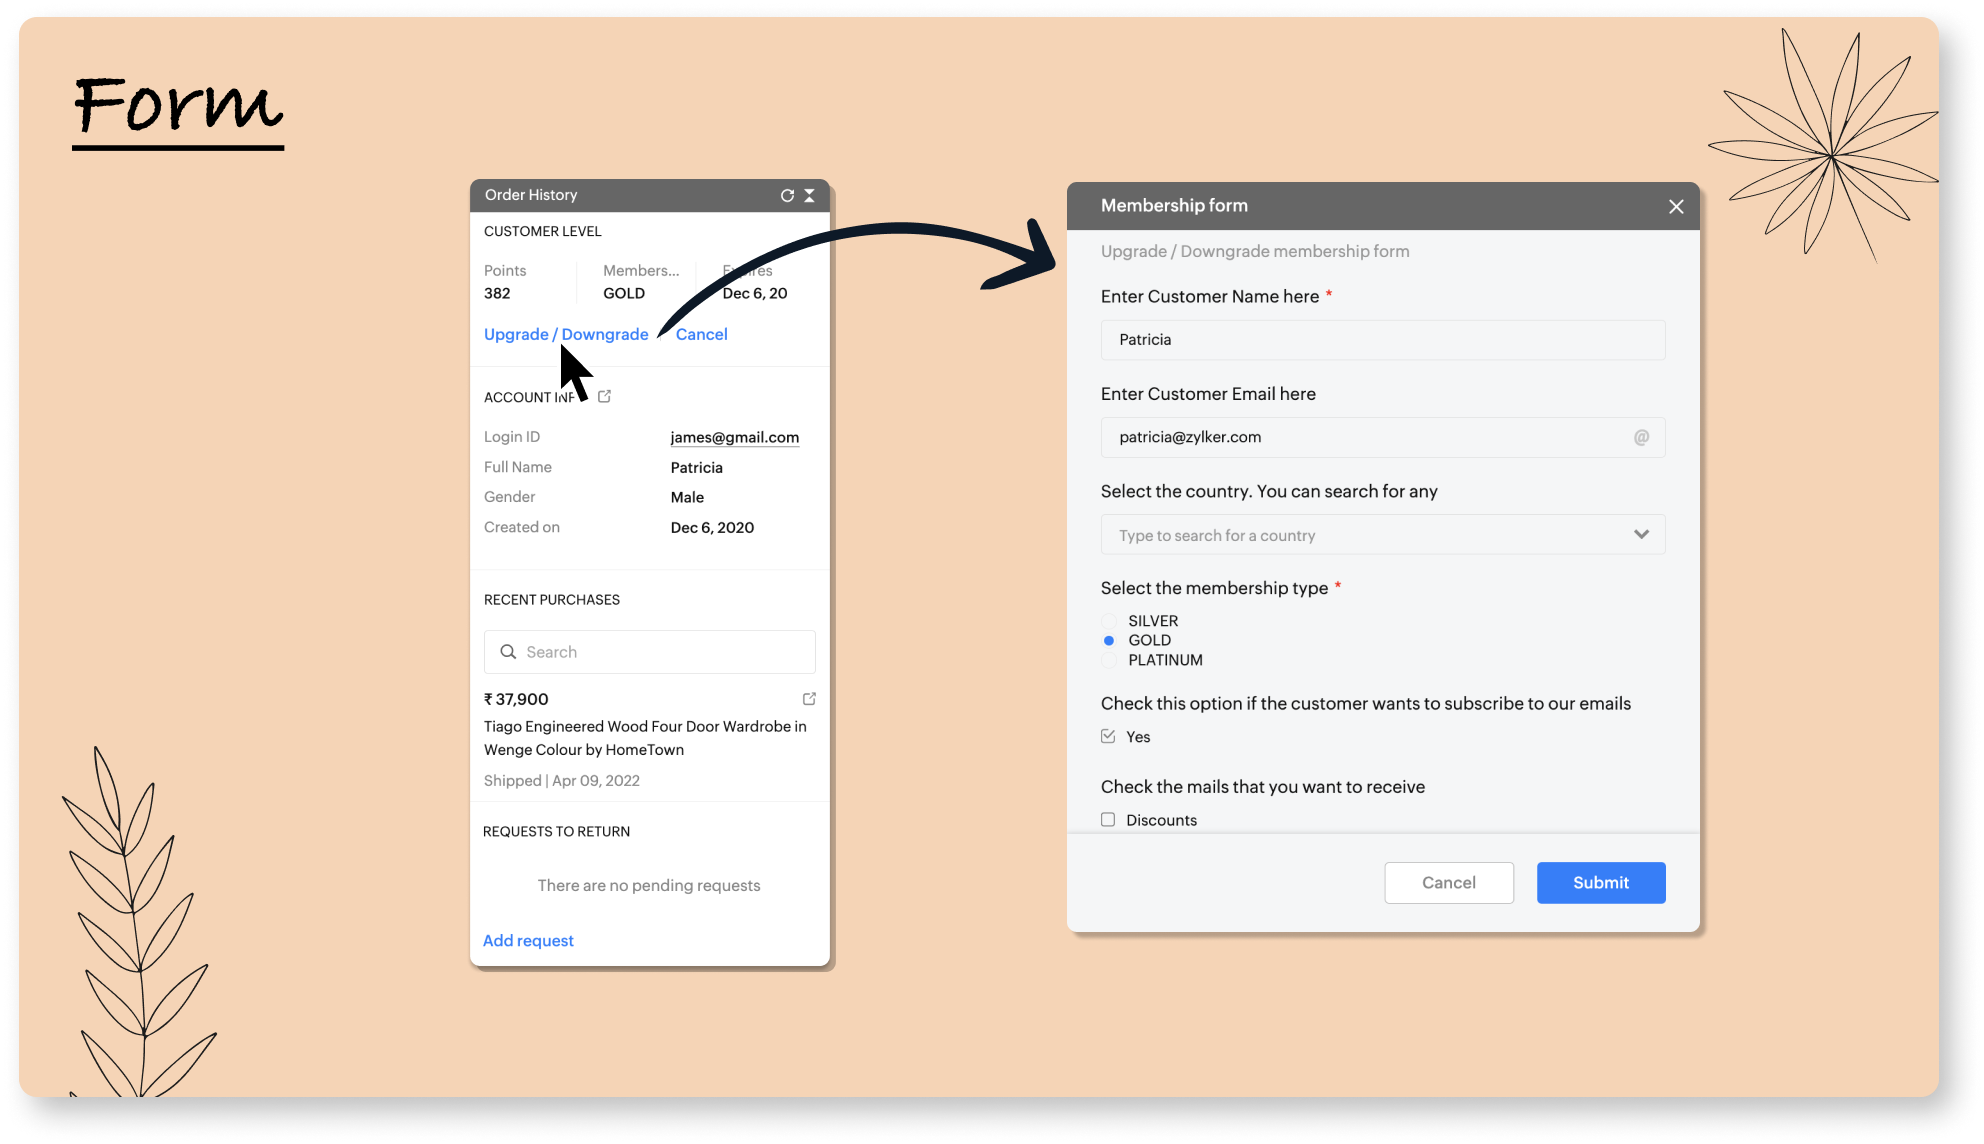
To enhance more actions, forms can be embedded in the widget. Here, to upgrade/downgrade visitors' membership, we have a form to update it.
6. Widget_modification - To edit/update the contents in multiple sections after performing.
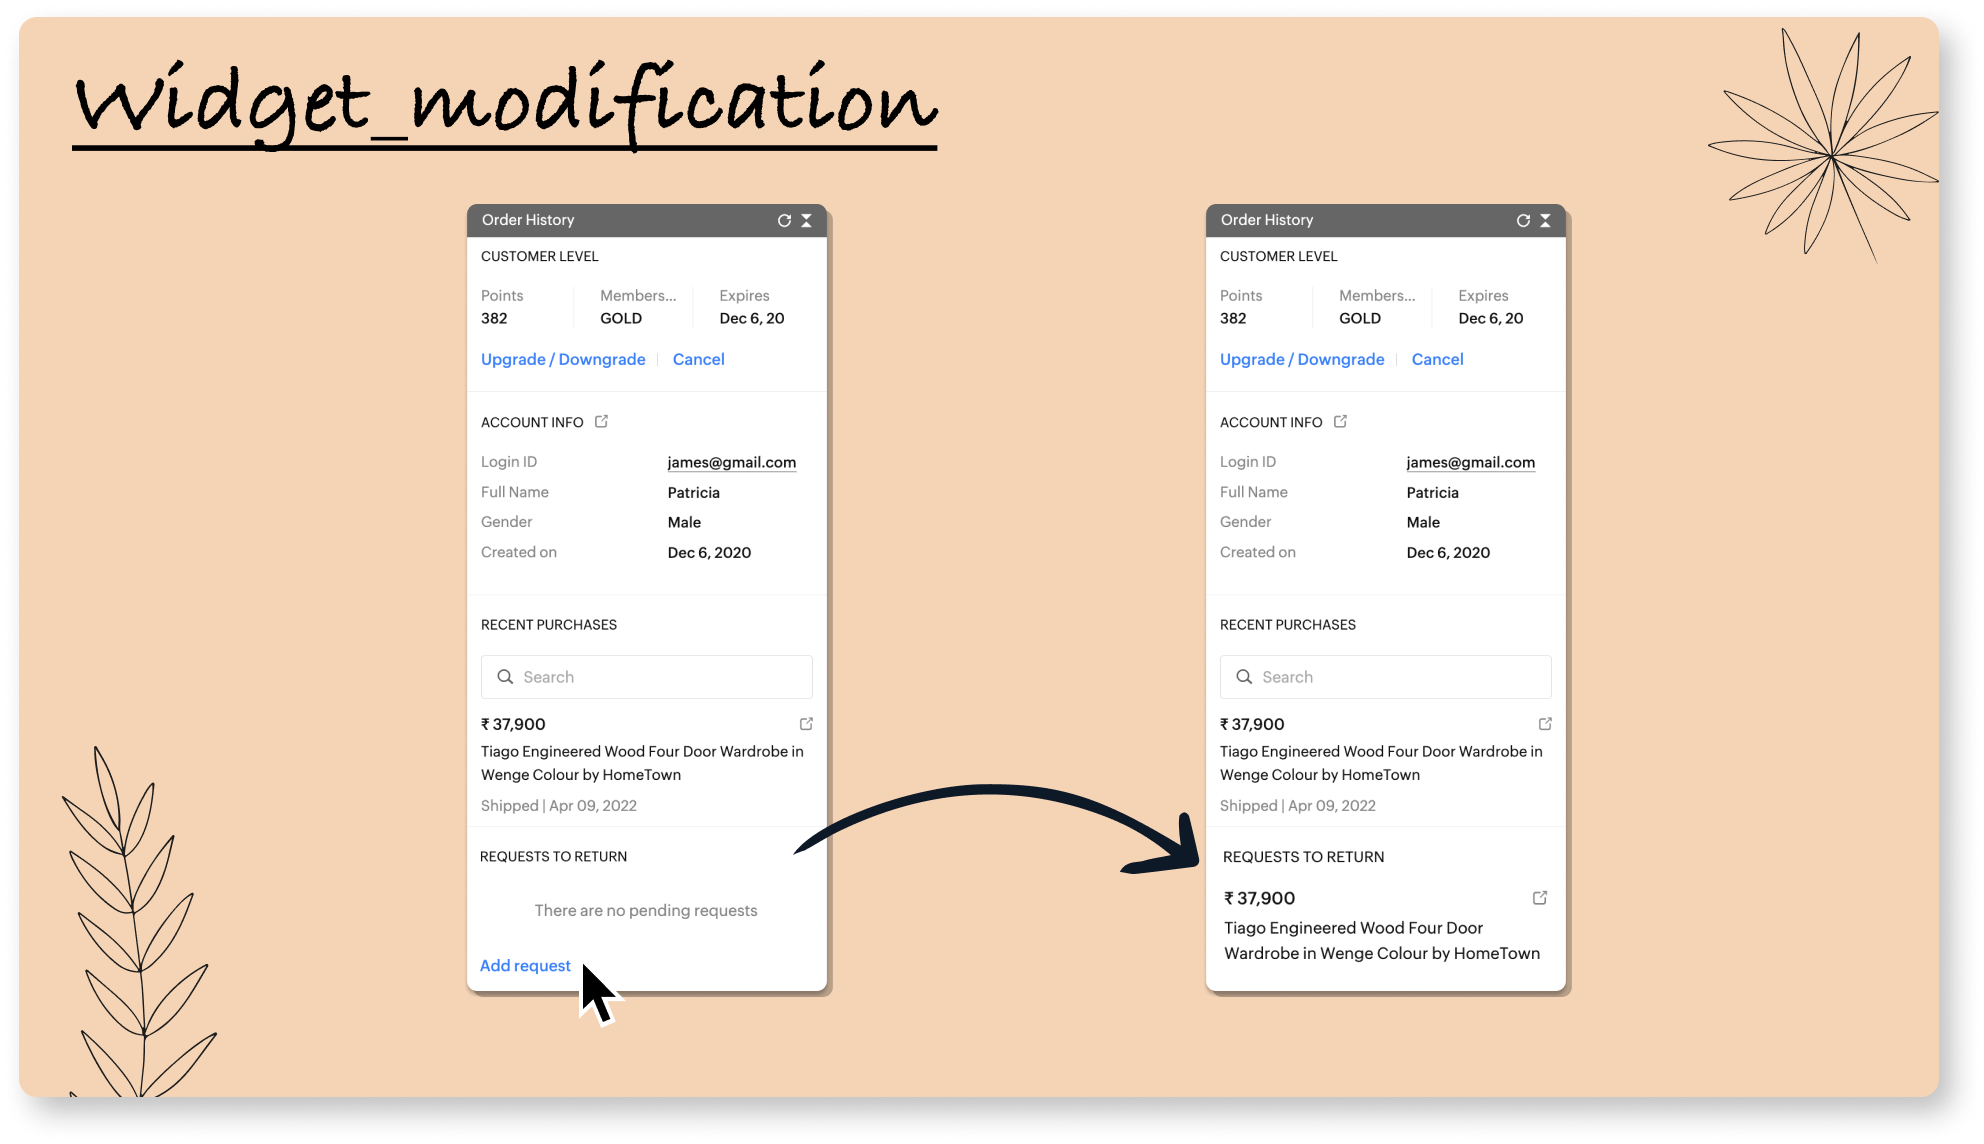
Here, when a return request is added by clicking on the "Add request" button (Empty Section), the widget will be modified and displays the returned order item (Listing Section).
7. Post_message - Post a custom message to the visitor while performing an action.
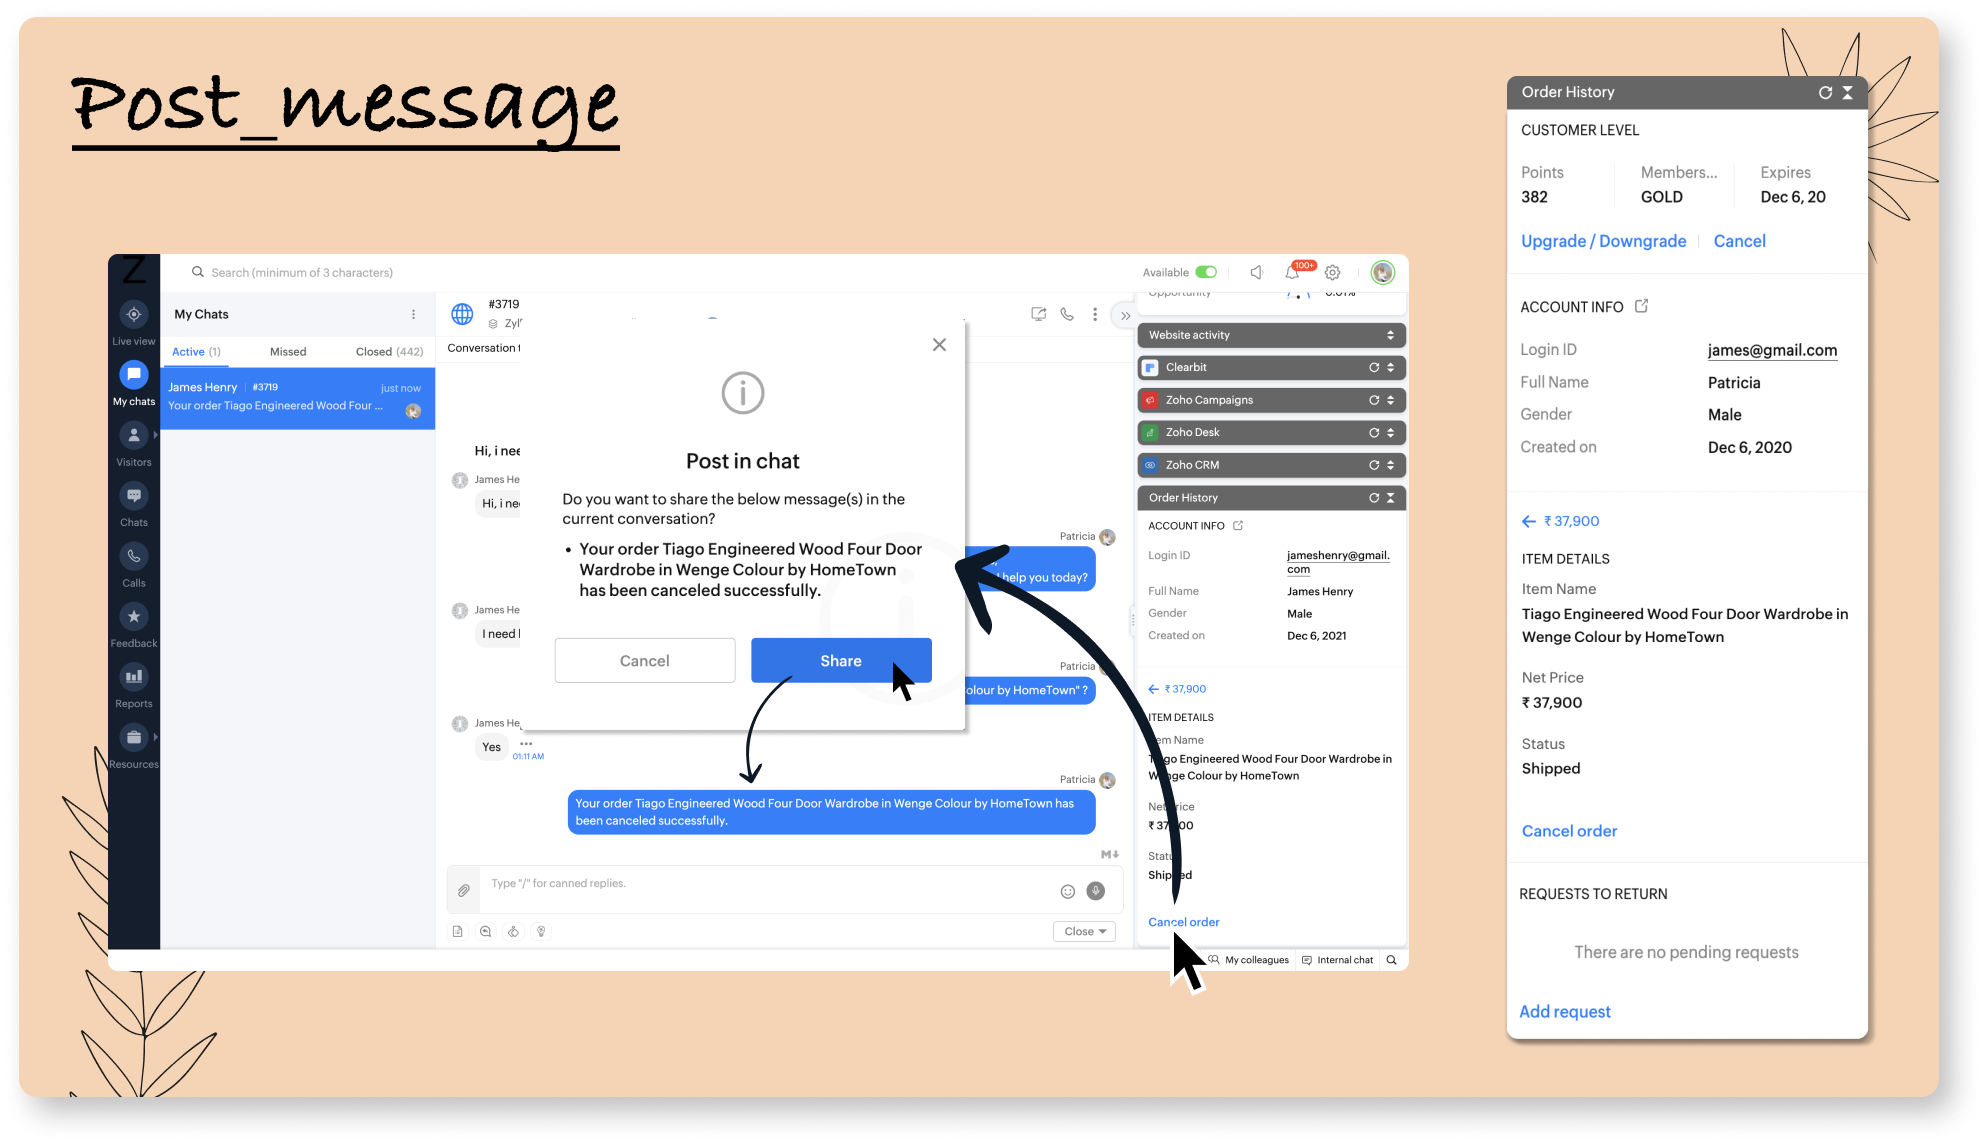
A custom message can be set up on a widget that can be used when required. Here, while cancelling an order as per the visitor's request, a custom message with the order item name is shared with the visitor instead of the operator manually typing it.
We hope these tips will help you build an effective widget and boost your operator's productivity. For additional information, visit our help guide. And let us know your favourite section and response type of widget in the comment section.
Related Links:
- Widgets help guide
- Widgets section help guide
- Widget response types help guide
- Sample widget using Zoho Commerce
- SalesIQ's built-in widgets
Regards,
Sasidar Thandapani
Topic Participants
Sasidar Thandapani
Sticky Posts
Plug Sample #4: Improve your customer interacting experience by letting Zobot remember your website visitor name!
Hi Everyone! In our Plug sample series, we have another simple yet efficient plug for your Codeless bot builder. Before that, I have a question. Let's say you go to the same coffee shop everyday for your morning coffee. Wouldn't you be happy if the waiter