Bidirectional sync between Zoho Bookings and Zoho CRM - Part 1
Hey, community members!
The default integration between Zoho CRM and Zoho Bookings is unidirectional, which means that any appointments booked, rescheduled, or deleted in Zoho Bookings will be reflected in Zoho CRM. However, any modifications made to events in Zoho CRM that originated from Zoho Bookings will not be reflected back in Zoho Bookings. Hence, as we're announcing in this community post, we've made the sync bidirectional.
This community post will cover the process of configuring appointment bookings from Zoho CRM in Zoho Bookings, as well as managing appointment statuses such as Canceled, No Show and Completed. We have addressed the rescheduling action in a separate post. To view it, please click on the following link: Reschedule Action
This community post will be beneficial for active Zoho CRM users who handle all their meetings within Zoho CRM. Additionally, you can use this community post as a reference to explore various automation possibilities tailored to your business requirements. For instance, with this post's guidance, when you update a booking's status field to "Completed" in Zoho CRM, it will automatically sync with Zoho Bookings and trigger an automated "Mark as completed" email to customers. This enhancement will improve your Zoho Bookings and Zoho CRM synchronization experience, making appointment management easier.
Prerequisites of bidirectional sync:
- Zoho Bookings Premium subscription
- Zoho CRM paid subscription
- Enable Zoho CRM integration within Zoho Bookings
The purpose of enabling the Zoho CRM integration within Zoho Bookings is to transfer booking details from Zoho Bookings to Zoho CRM. In this configuration, the mandatory field is the Booking ID, which is passed from Zoho Bookings to Zoho CRM through the integration. Whenever an appointment is booked, customer details will be sent to the designated CRM module, and a corresponding record will be created in the Meetings module within Zoho CRM, which will help in automating the workflow.
Here's the complete demo video that covers all the configurations discussed in the community post below:
Timestamps for your reference:
0:35 - Purpose of this community post
Here's the complete demo video that covers all the configurations discussed in the community post below:
Timestamps for your reference:
0:35 - Purpose of this community post
1:26 - Zoho CRM plugin installation
4:43 - Custom field creation
7:20 - Function creation
9:22 - Connection creation
10:24 - Configuring arguments
11:06 - Workflow creation
13:33 - Argument mapping
14:41 - Output verification
17:41 - Conclusion
How we're approaching this bidirectional sync
1. Booking an appointment from Zoho CRM
Install the Zoho Bookings for Zoho CRM plugin within your Zoho CRM application. This plugin enables the creation of a "New Appointment" button within the Zoho CRM Leads and Contacts module, which enables you to select the desired booking page you wish to open. You can choose from various workspace, service, or staff booking pages. After configuration, you can initiate the process of scheduling bookings directly from within your Zoho CRM account.
- Guide on Zoho Bookings and Zoho CRM plugin installation: Booking page selection for Zoho CRM plugin
2. Booking status: Completed or No Show
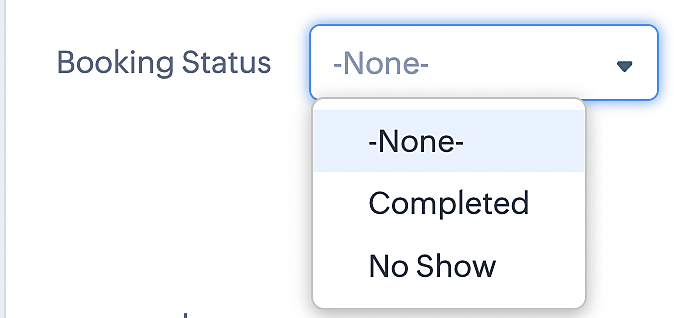
To update a booking's status (Completed or No Show), we've added a new picklist properties field named "Booking Status" in the Meetings module and configured it with two options: "completed" and "no show". Depending on the booking status chosen, the corresponding booking in Zoho Bookings will be updated.
- Details on how to add a custom field to the Meetings module : Customizing modules
- Here's a video that demonstrates how to add a field to a module in Zoho CRM: Adding fields
Reference:
3. Booking status: Canceled
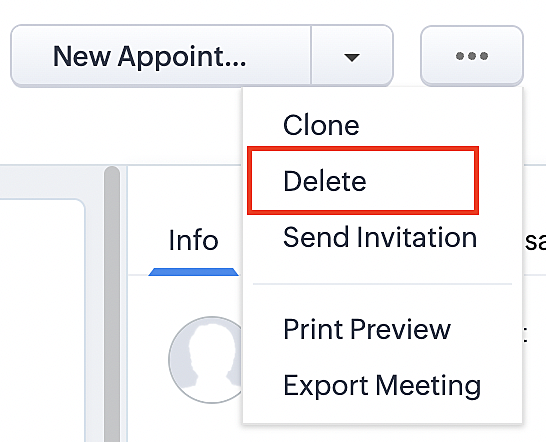
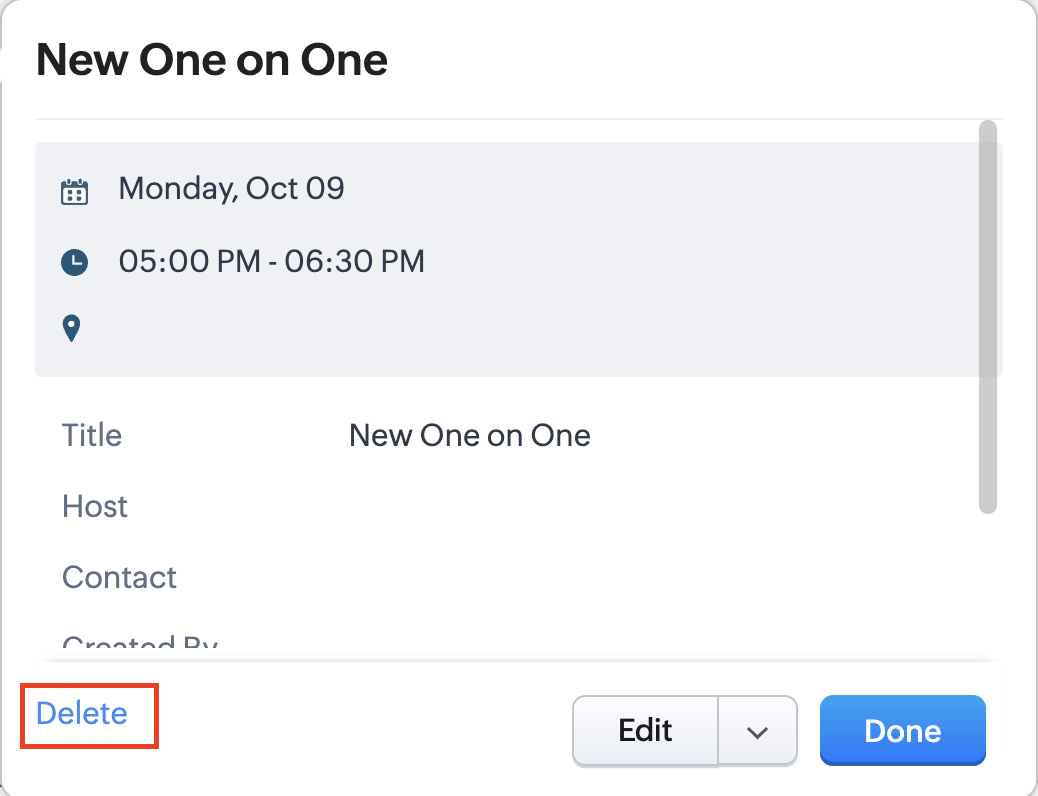
Whenever a meeting is deleted from the Meetings module, the corresponding booking in the Zoho Bookings app will also be canceled automatically. The meeting can be deleted either from the Meetings module or directly from the calendar.
To enable bidirectional sync between Zoho CRM and Zoho Bookings
Complete these steps in Zoho CRM.
Step 1: Creating connections
You first need to establish a connection between Zoho CRM and Zoho Bookings. Zoho Bookings is listed as one of the default connections in Zoho CRM, making it simple to set up. Select the Zoho Bookings connection, define the connection name and scope, and you'll be all set. This connection will enable you to link both applications and facilitate the seamless transfer of data.
Read here for more details on how to create connection in Zoho CRM: Connections
Step 2: Creating functions
In this context, we'll be creating three functions: one for marking appointments as completed, another for canceling appointments, a third for marking appointments as no shows, and a fourth for rescheduling appointments. For each function, we must also configure arguments, which pass values or data into a function when making a call. Here, we'll pass the booking ID to the function as an argument to update the necessary booking status.
i. To create a function for marking appointments as completed:
1. Go to Setup > Developer Space > Functions.
2. In the Functions page, click + Create New Function.

3. Configure the function name, display name, and description.
4. Set the category as automation.
This opens the Deluge script page.
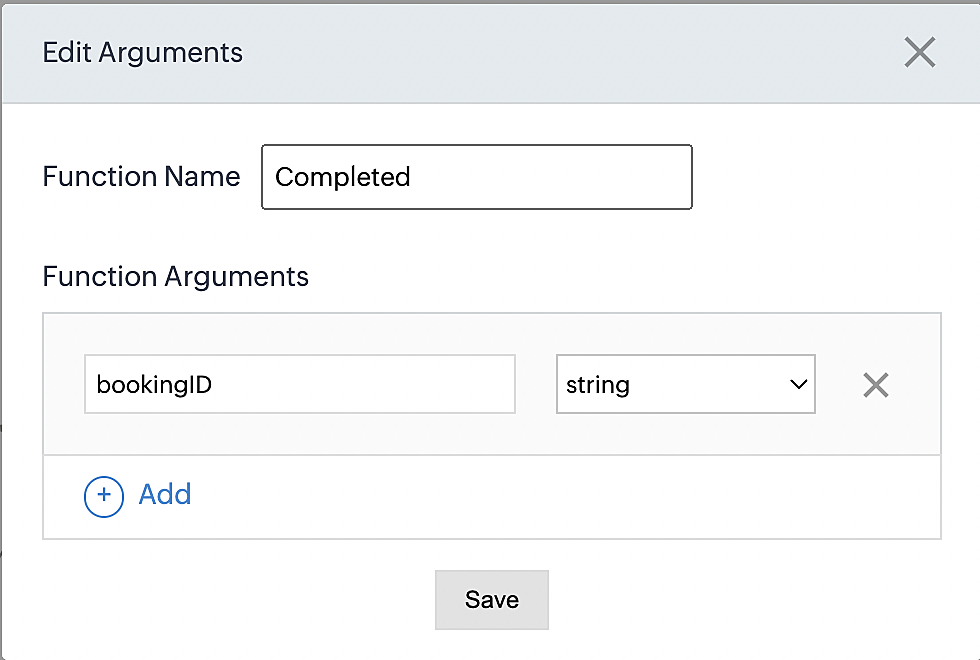
5. Next, configure the function's arguments:
A. Click on Edit Arguments on the Deluge script page.

B. Set the Parameter Name as bookingID. (Please note that the "bookingID" value is case sensitive and must match
the term used in the code).
C. Set the type as string.
Reference:
Please configure the below code in the Deluge script page.
By completing these steps, we've configured a function that will mark appointments as completed.
ii. To create a function for marking appointments as no shows
1. Go to Setup > Developer Space > Functions.
2. In the Functions page, click + Create New Function.

3. Configure the function name, display name, and description.
4. Set the category as automation.
This opens the Deluge script page.
5. Next, configure the function's arguments:
A. Click on Edit Arguments on the Deluge script page.

B. Set the Parameter Name as bookingID. (Please note that the "bookingID" value is case sensitive and must match
the term used in the code).
C. Set the type as string.
Reference:

Please configure the below code on the Deluge script page.
Code link: No show

By completing these steps, we've configured a function that marks appointments as no shows.
iii. To create a function for marking appointments as canceled
1. Go to Setup > Developer Space > Functions.
2. In the Functions page, click + Create New Function.

3. Configure the function name, display name, and description.
4. Set the category as automation.
This opens the Deluge script page.
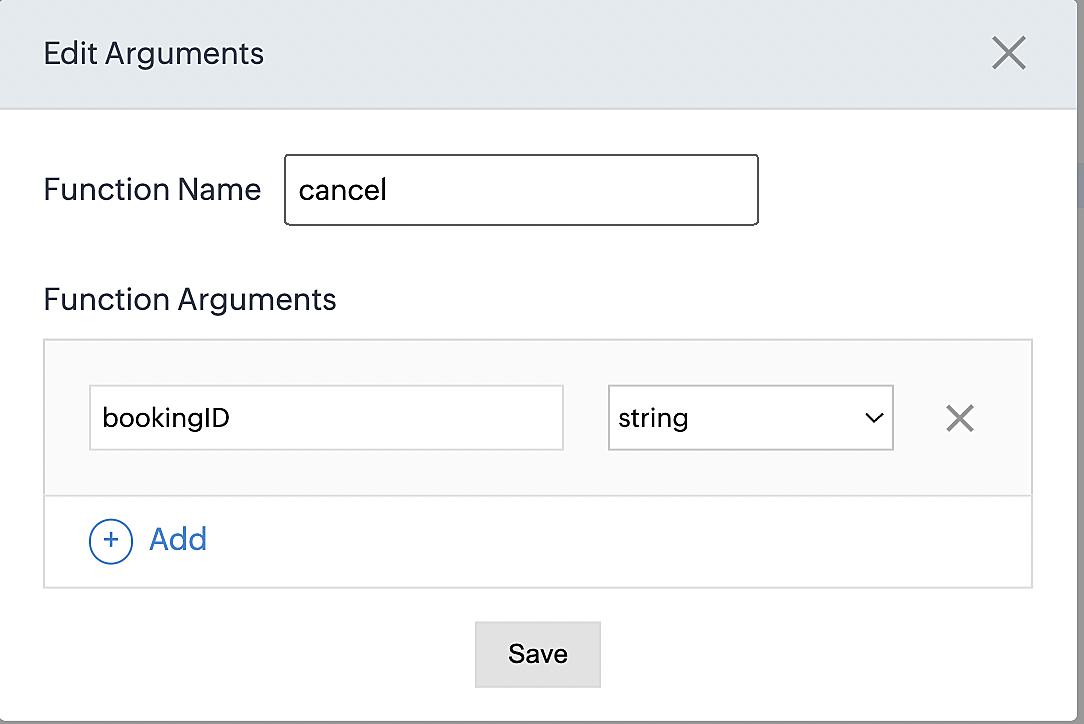
5. Next, configure the function's arguments:
A. Click on Edit Arguments on the Deluge script page.

B. Set the Parameter Name as bookingID. (Please note that the "bookingID" value is case sensitive and must match
the term used in the code).
C. Set the type as string.
Reference
Please configure the below code on the Deluge script page.
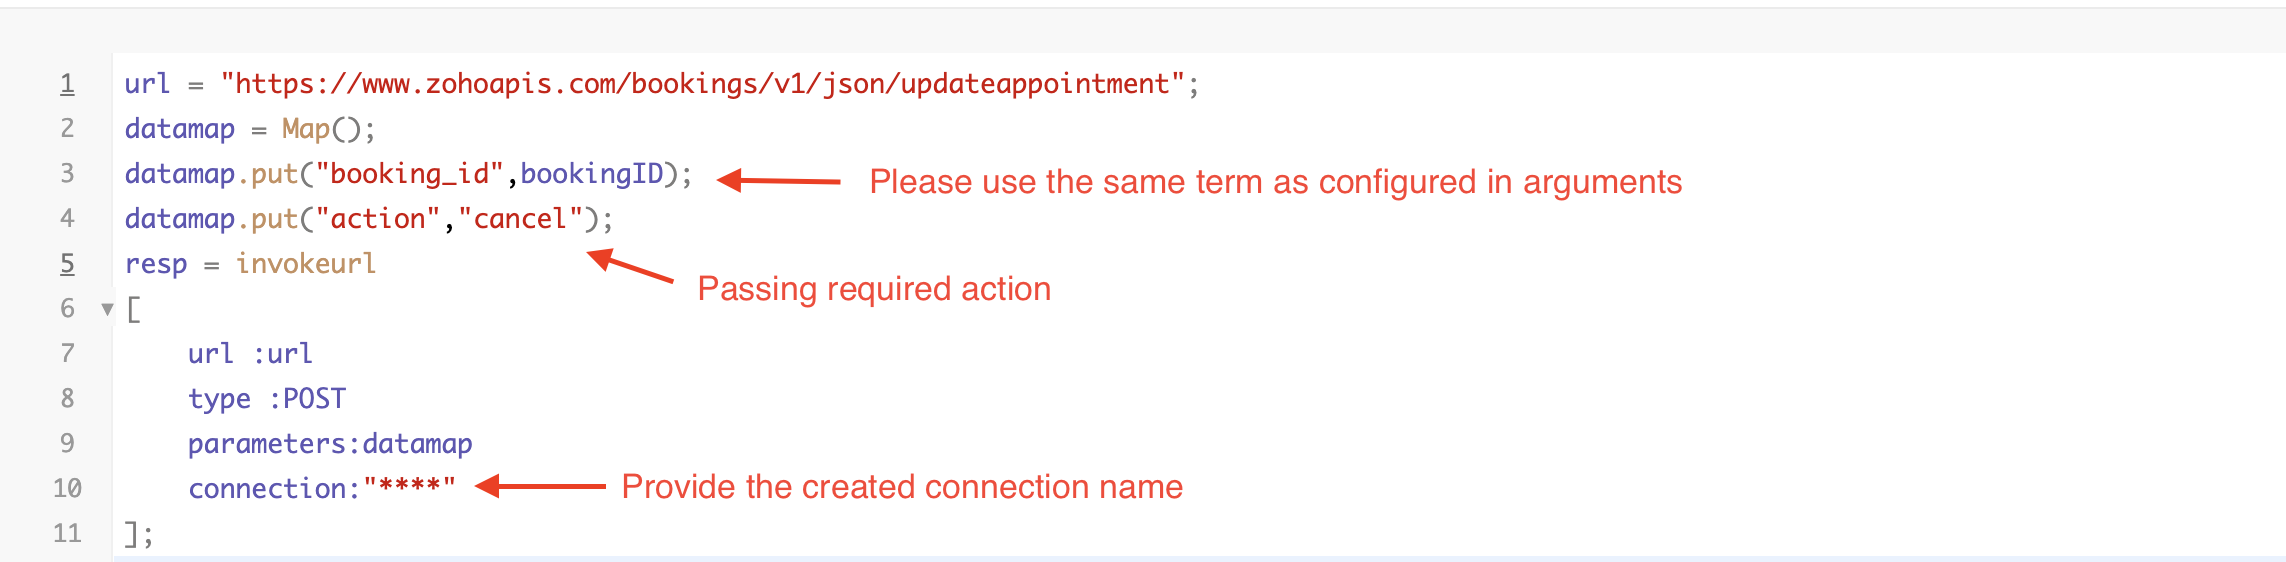
By completing these steps, we've configured a function that marks appointments as canceled.
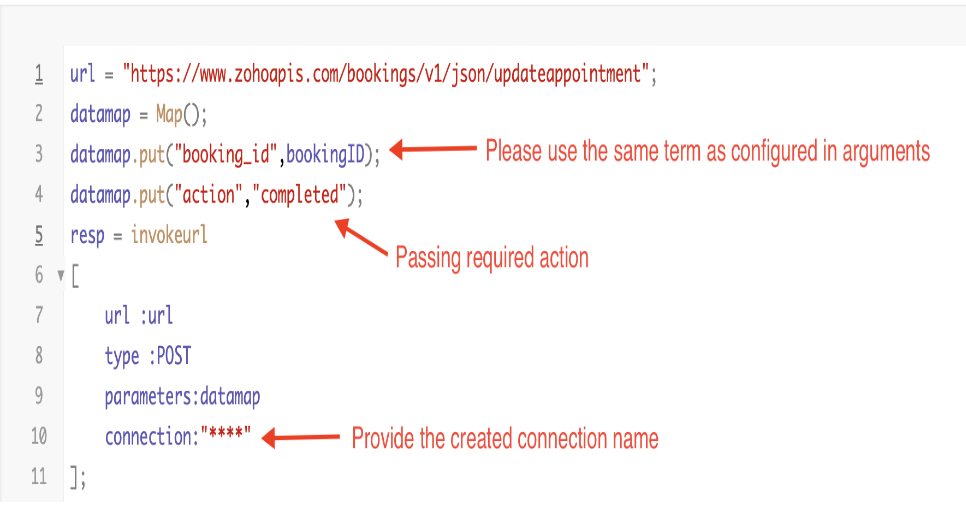
Code explanation
Below is an explanation of the code that covers all the configurations present in the three functions mentioned above (cancel, mark as completed, and mark as no show).
Line 1: Based on the Zoho Bookings account's data center, we're setting up the API endpoint URL configuration.
Lines 2 - 4: To update appointments, we utilize the Zoho Bookings API. Within the update appointment API, there are two mandatory fields that need to be included: BookingID and action (completed/cancel/noshow).
Lines 5 - 10: We use the invokeURL task for API calls. To learn more about the invokeURL task, please refer to the following document: InvokeURL task for API calls
Now, let's proceed and learn about the process of creating a workflow and linking the established functions to it. This will enable us to automate the entire appointment status updating process.
Step 3: Creating a workflow
Workflow rules are sets of actions (email notifications, tasks and field updates) that are executed when specified conditions are met. Here, we'll generate workflow rules for each action to activate the respective function, thereby automating the appointment status updating process.
i. Creating a workflow for "canceling" appointments in Zoho Bookings when a meeting is deleted in Zoho CRM
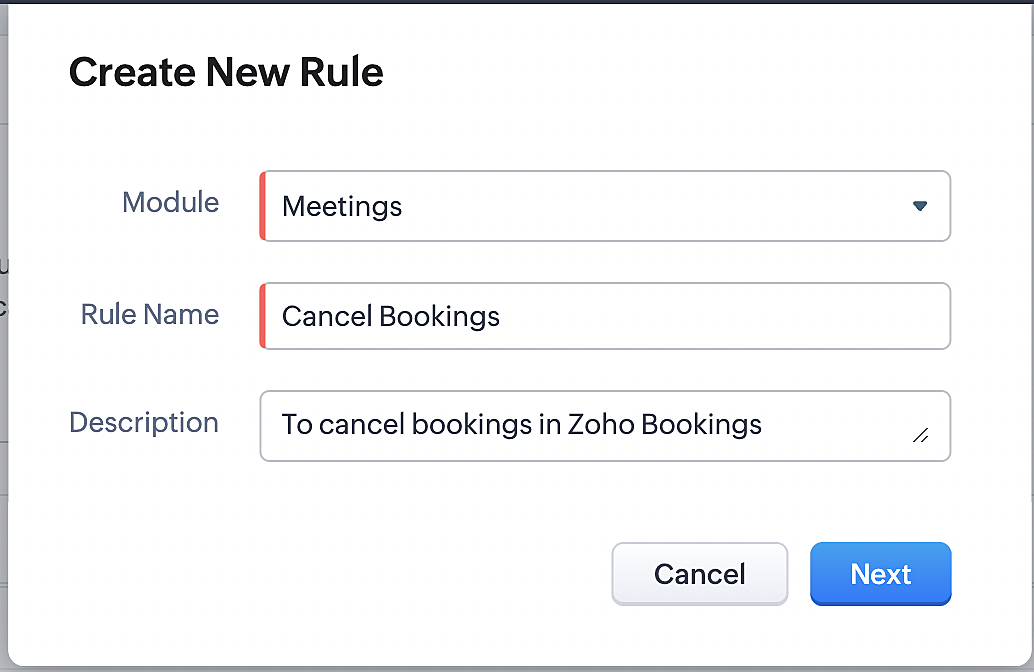
Part 1: Creating the rule
1. Go to Setup > Automation > Workflow Rules.
2. In the Workflow Rules page, click Create Rule.

3. Select "Meetings" under Module and configure rule name and description as required.
More details: Create Rule
Reference:
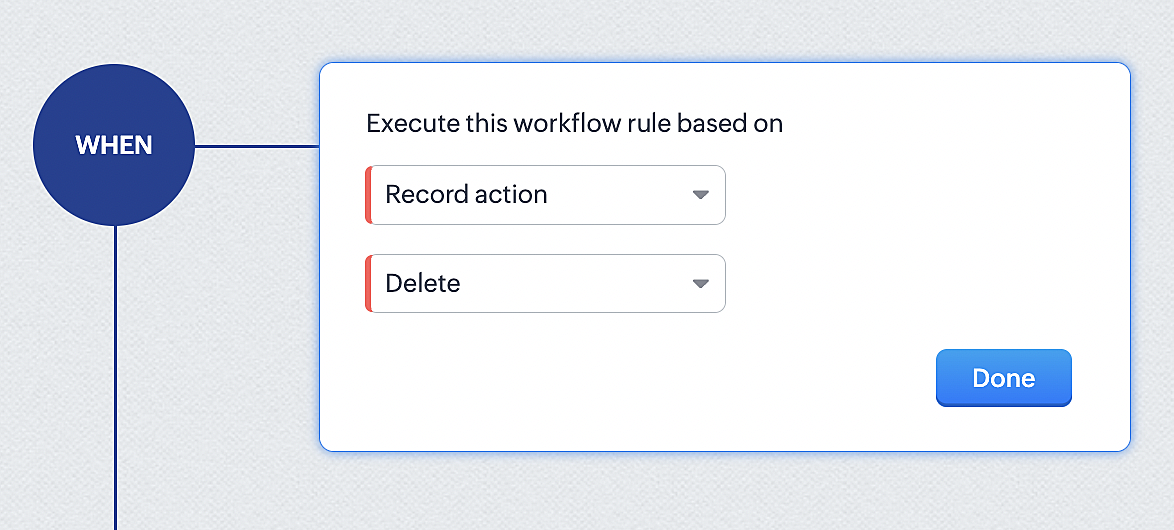
1. Select Record Action > Delete > Done to execute the rule when meetings are deleted.
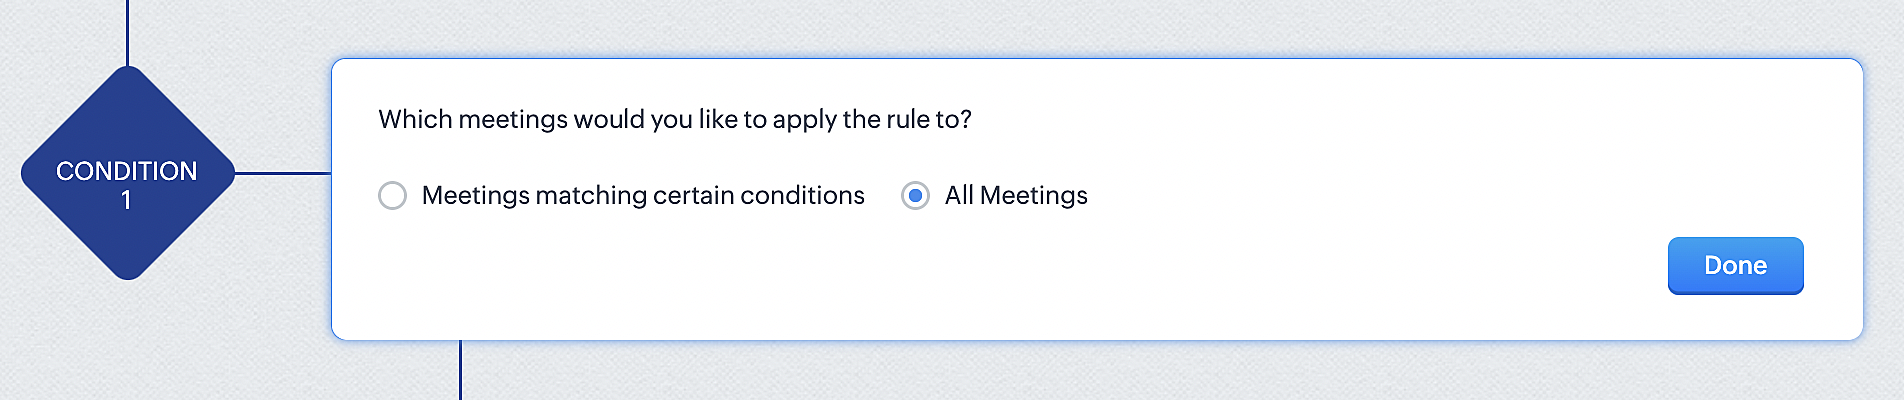
2. Configure condition > All Meetings.
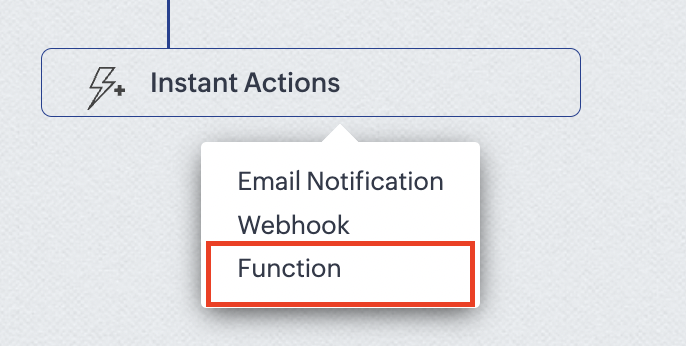
3. Instant Actions > Function.
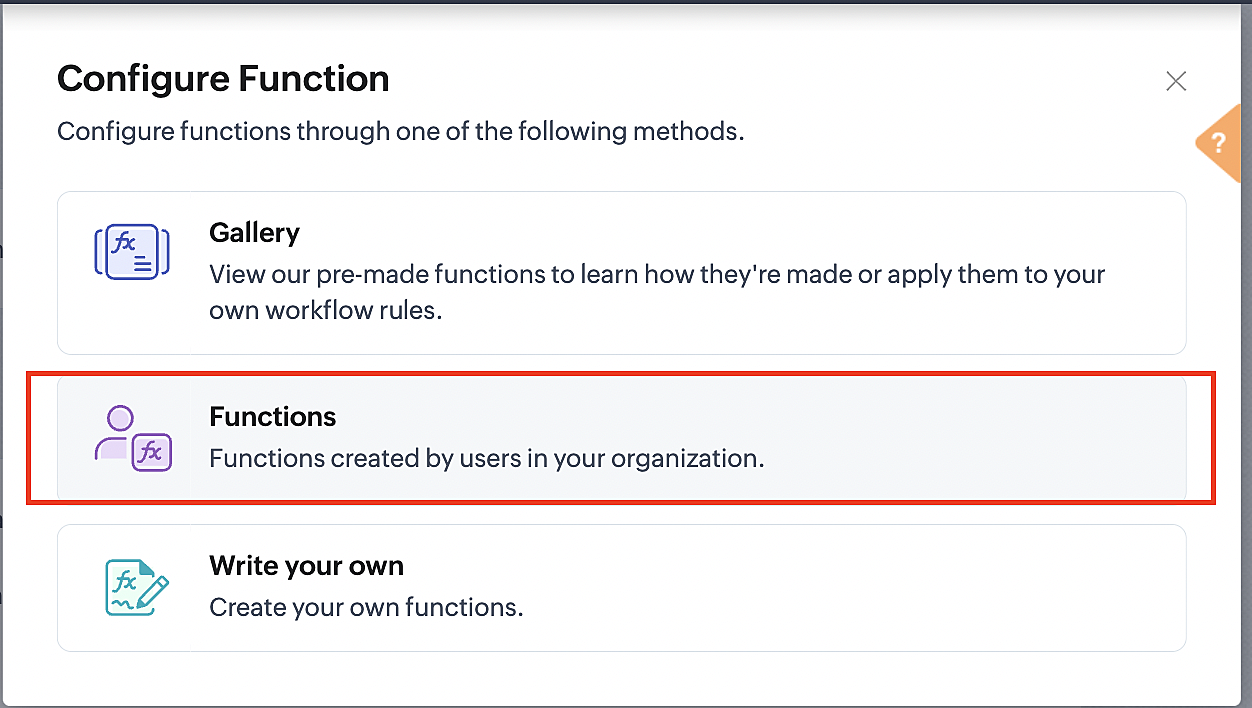
4. Click the New Function button.

5. In the Configure custom function page, select the "cancel" function you created from among the functions users in your organization have created.
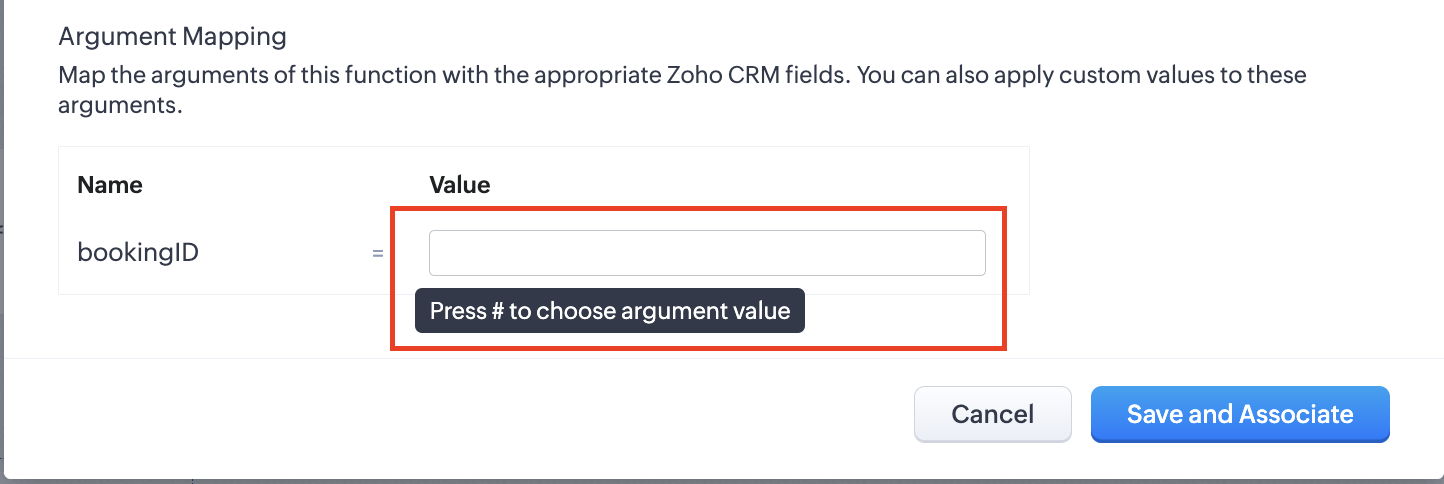
Part 3: Argument mapping
1. Press # to choose an argument value.
2. Select Meetings under Module and BookingId in the field.
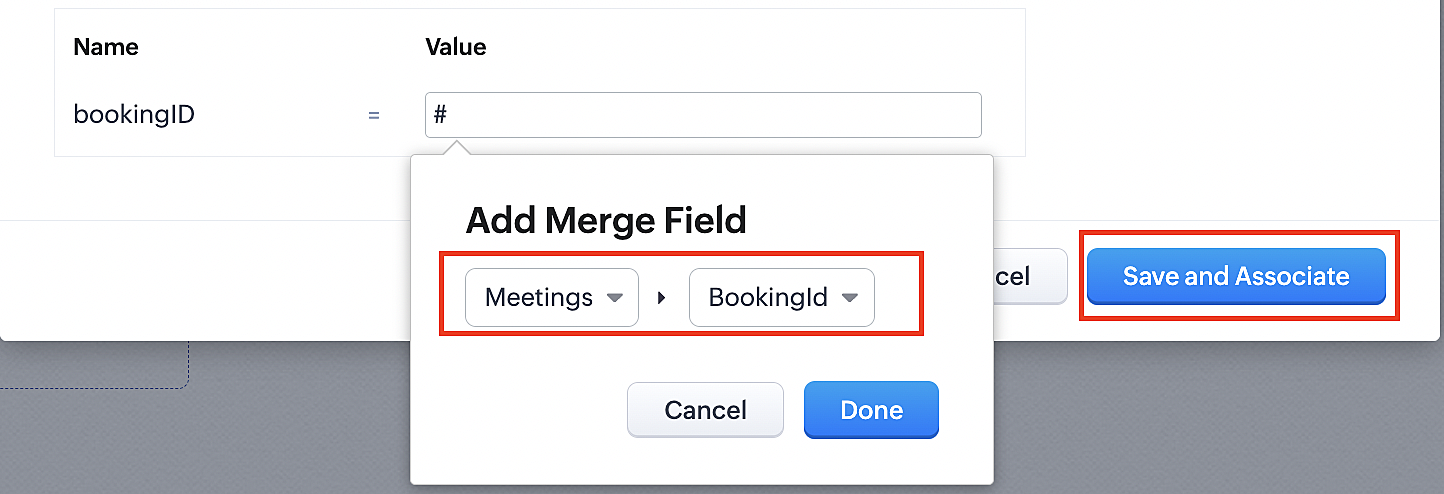
3. Click the Save and Associate button.
Reference:
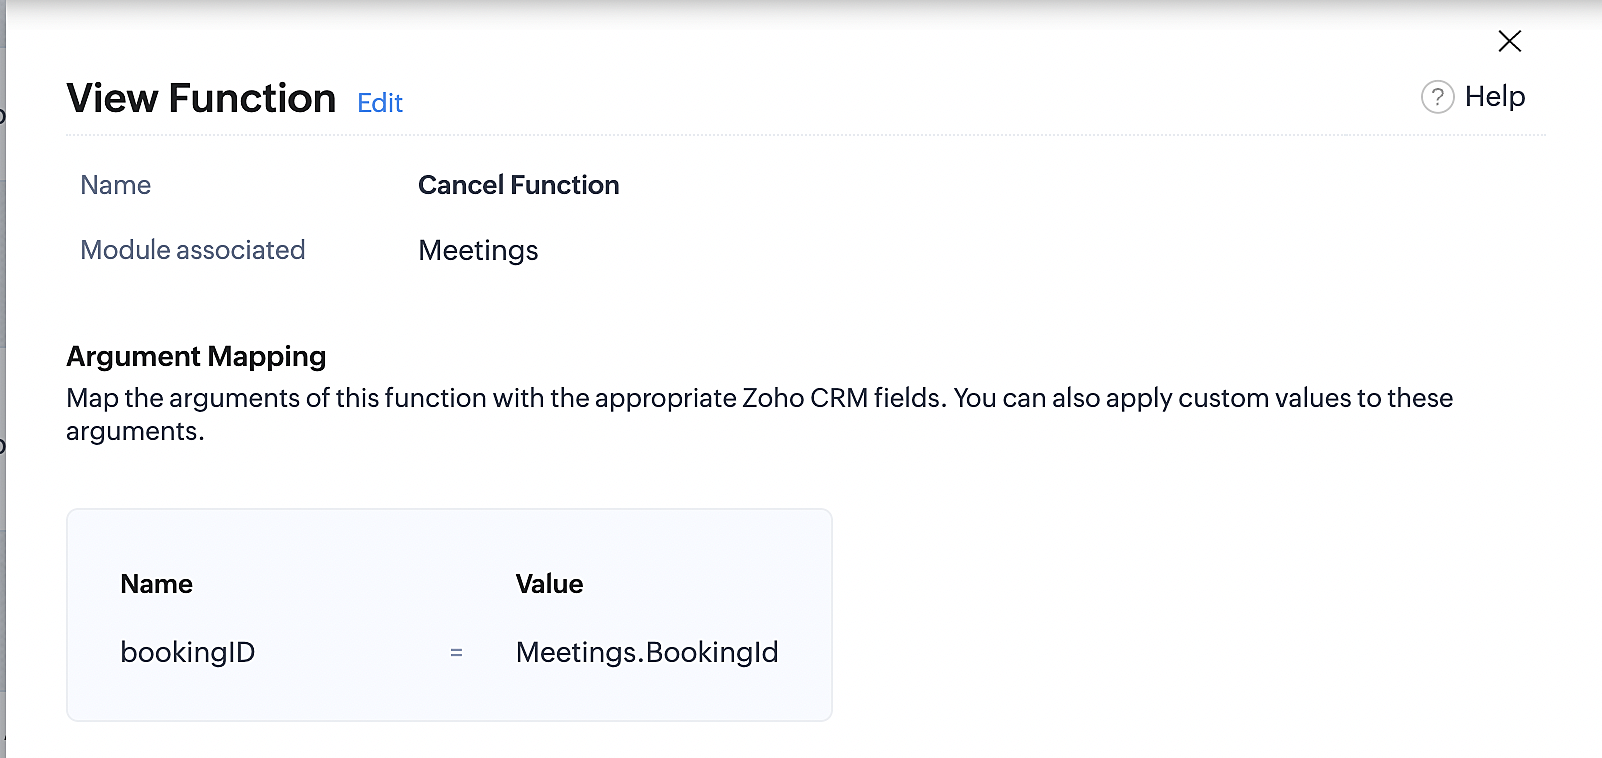
Below is the final flow of the cancel booking workflow:

At the end of Part 3, we will have created a workflow that will be executed automatically when meetings are deleted in Zoho CRM. Simultaneously, the bookings associated with the meeting will also be canceled in Zoho Booking.
ii. Creating workflow for updating an appointment's status as "no show" in Zoho Bookings when the meeting's booking status is marked as no show in Zoho CRM
Part 4: Creating the rule
1. Go to Setup > Automation > Workflow Rules.
2. In the Workflow Rules page, click Create Rule.

3. Select Meetings under Module and configure the rule name and description as required.
Reference:

Part 5: Specifying the rule trigger
If you encounter difficulties while navigating through the steps mentioned below, please refer to Part 2 above, where we have provided step-by-step screenshots for clarification.
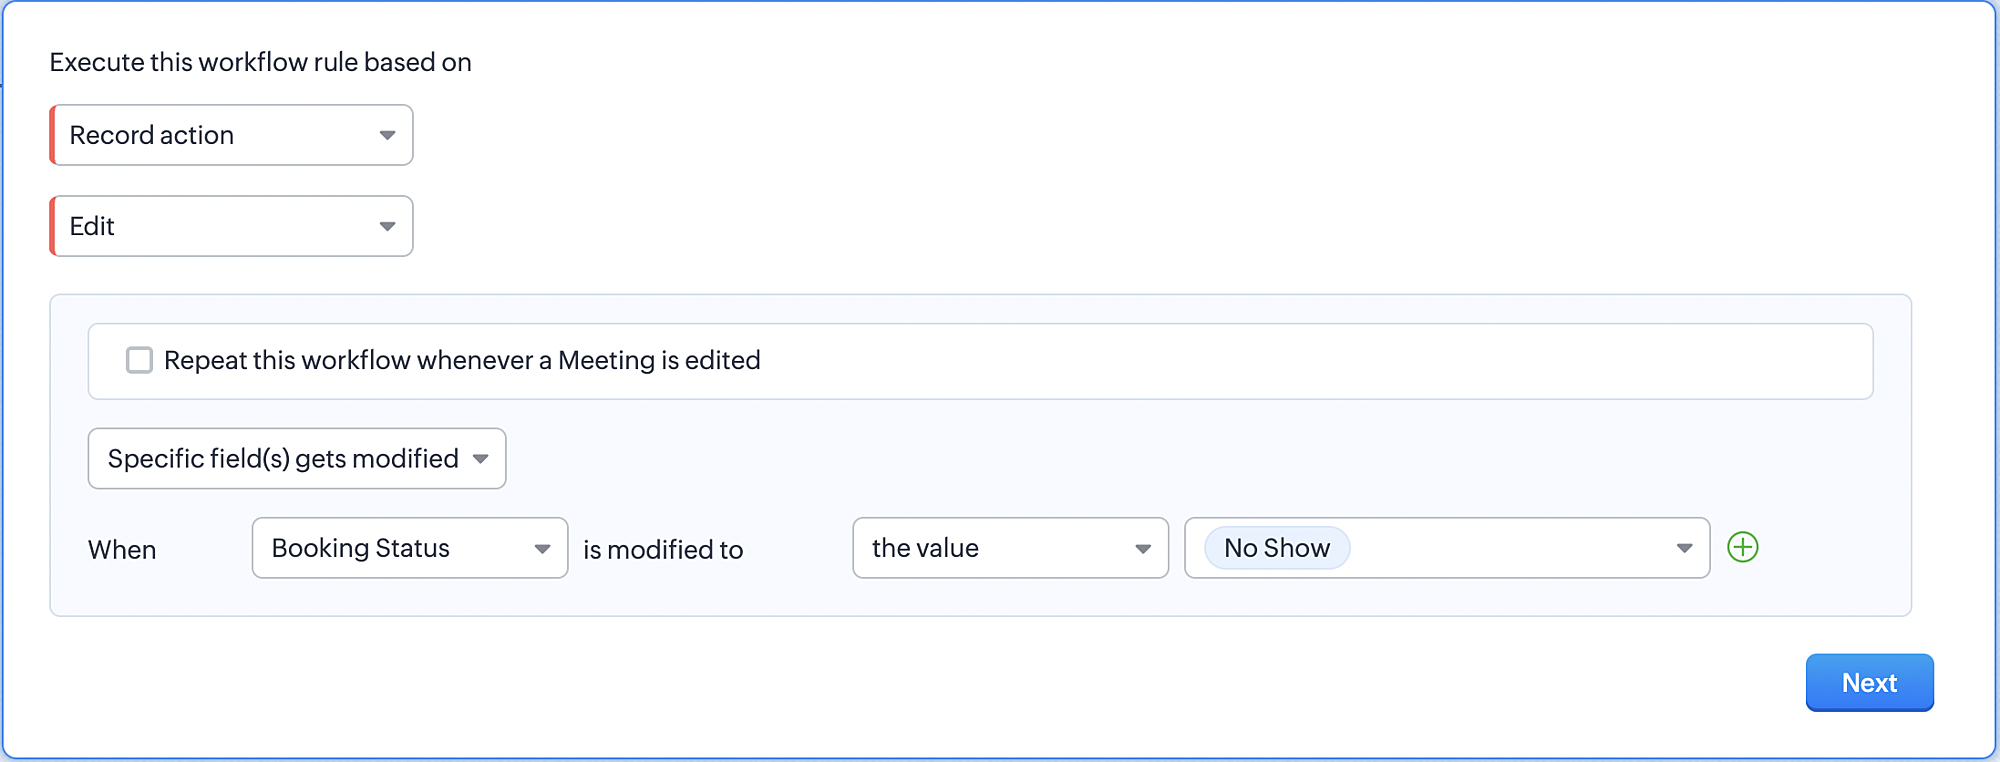
1. Record Action > Edit.

2. Enable the Specific field(s) gets modified and configure it per the screenshot below.
a. This is to ensure that the workflow is executed only when the booking status under the meeting module is
updated to "No Show".
updated to "No Show".
3. Configure condition > All Meetings.
4. Instant Actions > Function > New Function.
5. In the Configure custom function page, select the "no show" function you created from among the functions
users in your organization have created.
users in your organization have created.
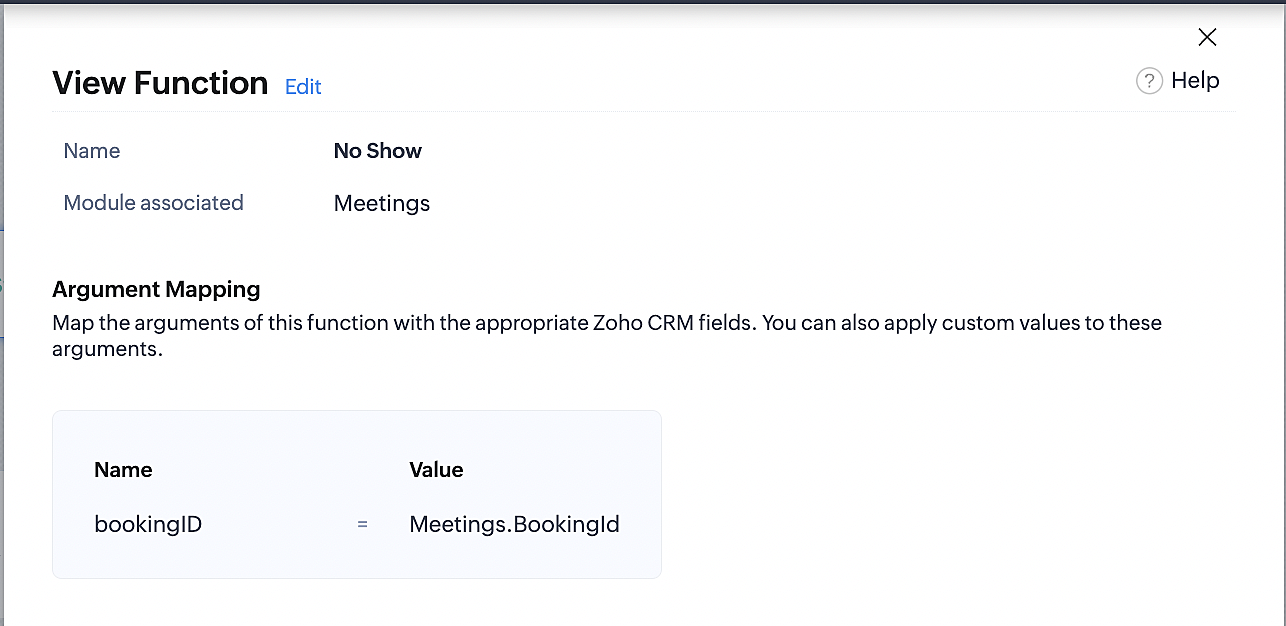
Part 6: Argument mapping:
If you encounter difficulties while navigating through the steps mentioned below, please refer to Part 3 above, where we have provided step-by-step screenshots for clarification.
1. Press # to choose an argument value.
2. Select Meetings under Module and configure the field as "BookingId".
3. Click Save and Associate button.
Reference:
Below is the final flow of the "No Show" booking status workflow:
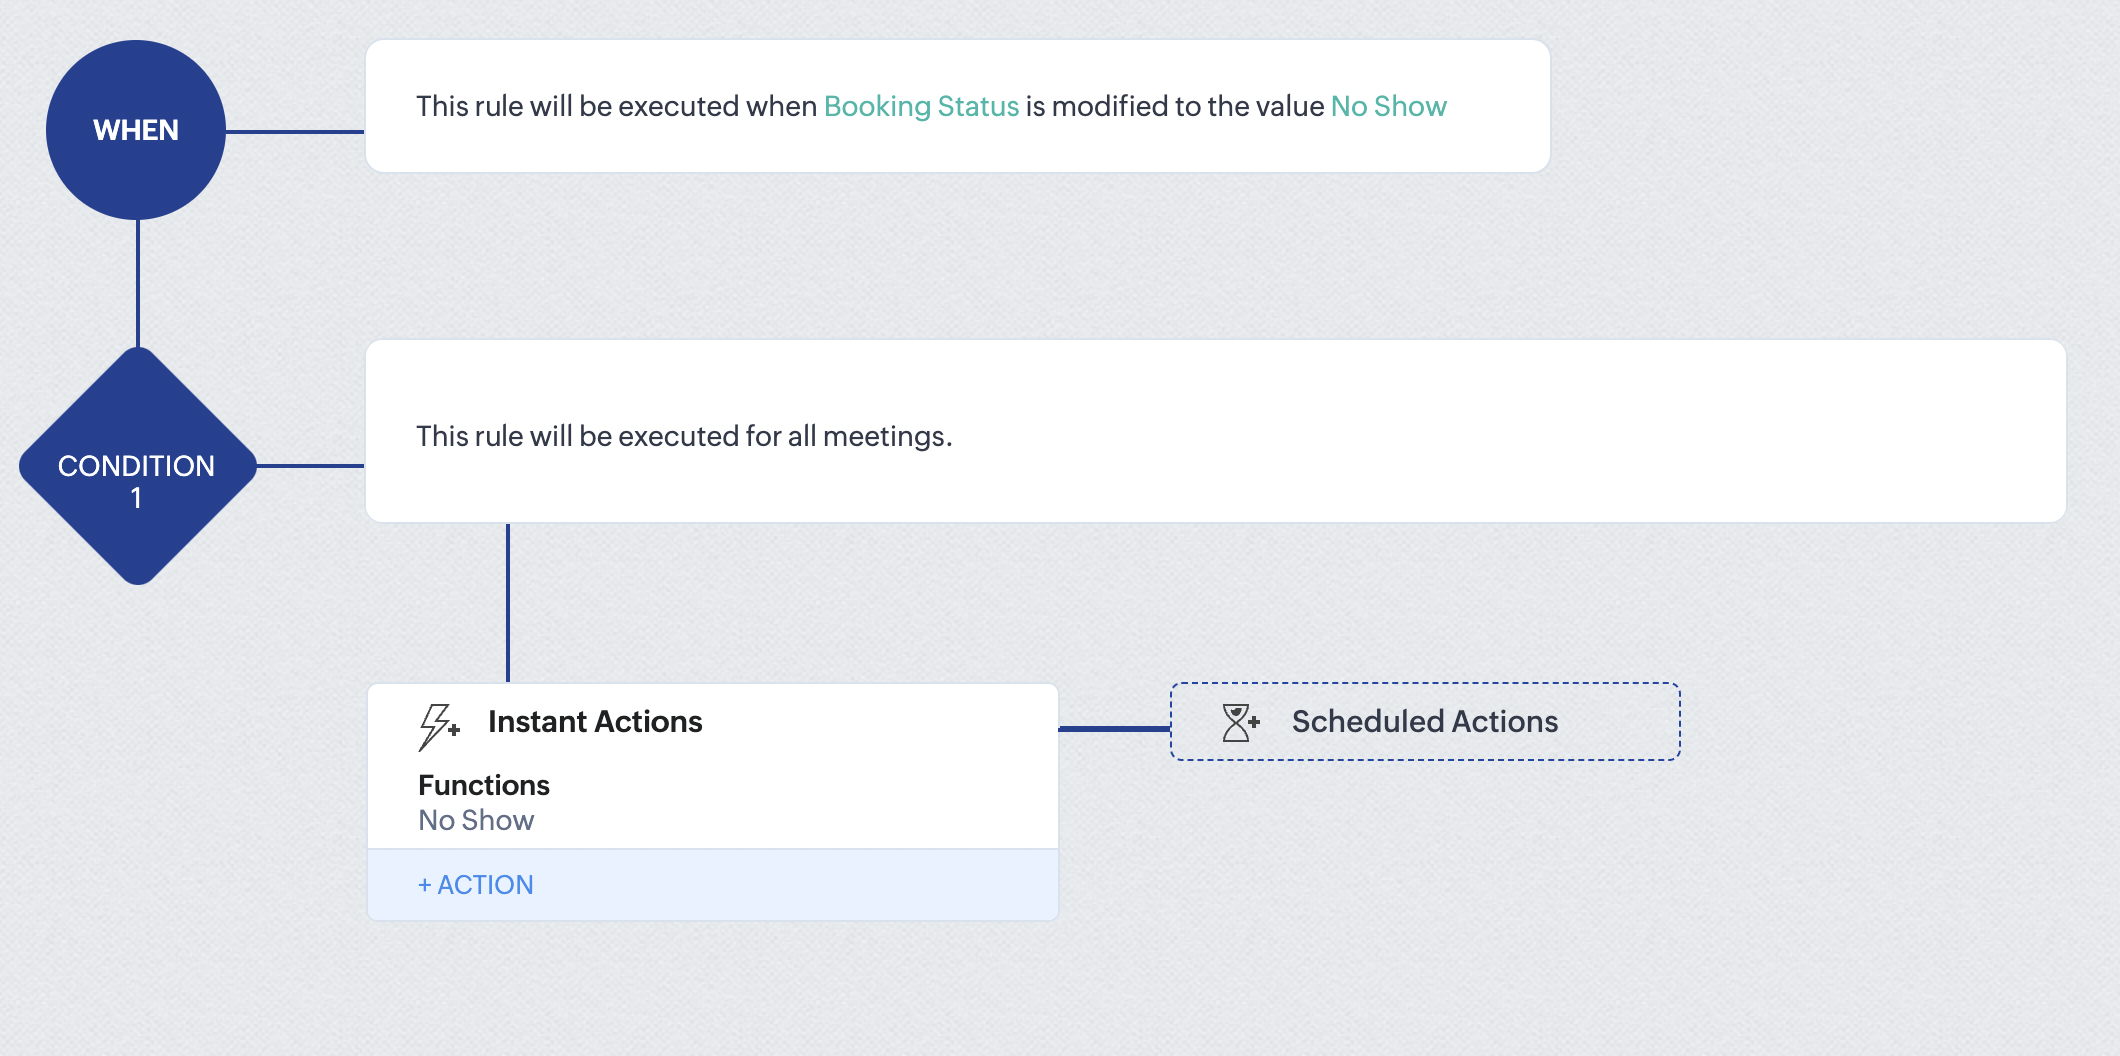
At the end of part 6, we will have created a workflow that automatically executes when the booking status field within the Zoho CRM Meetings module is updated to "No Show." This action will result in the associated bookings for that meeting also being marked as "No Show" in Zoho Bookings.
iii. Creating workflow for updating appointment status as "Completed" in Zoho Bookings when the booking status field of the meeting is marked as completed in Zoho CRM.
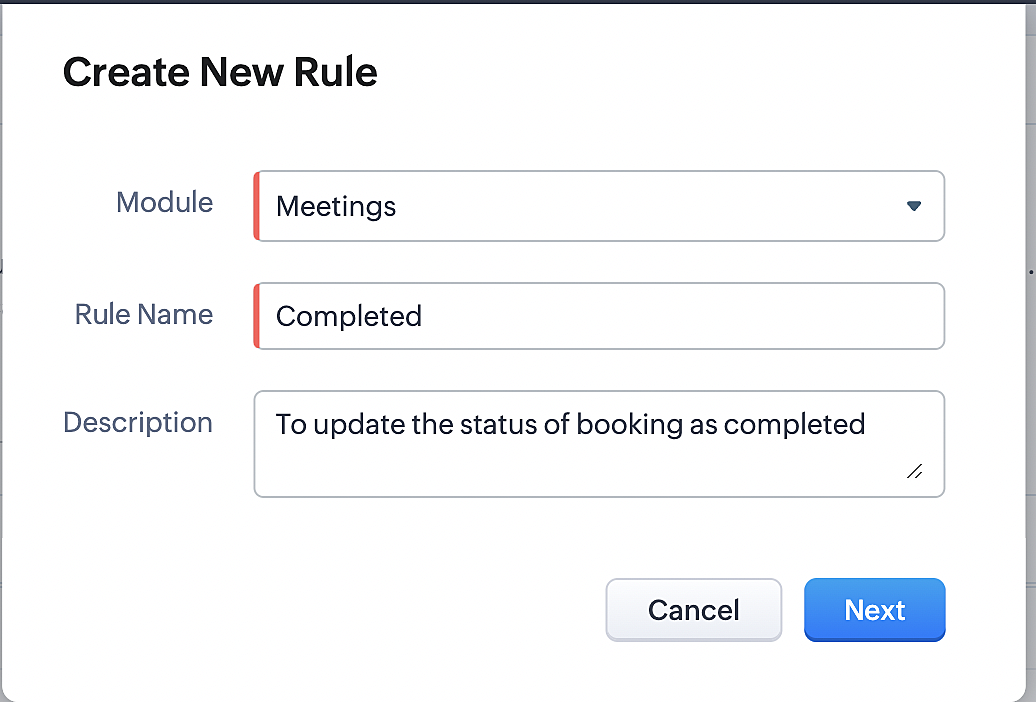
Part 7: Creating the rule
1. Go to Setup > Automation > Workflow Rules.
2. In the Workflow Rules page, click Create Rule.

3. Select Meetings under Module and configure rule name and description as required.
Reference:
Part 8: Specifying the rule trigger
If you encounter difficulties while navigating through the steps mentioned below, please refer to Part 2 above, where we have provided step-by-step screenshots for clarification.
1. Record Action > Edit.

2. Enable the Specific field(s) gets modified setting and configure it per the screenshot below.
a. This serves to ensure that the workflow is executed only when the booking status under the Meetings module is
updated to "Completed".
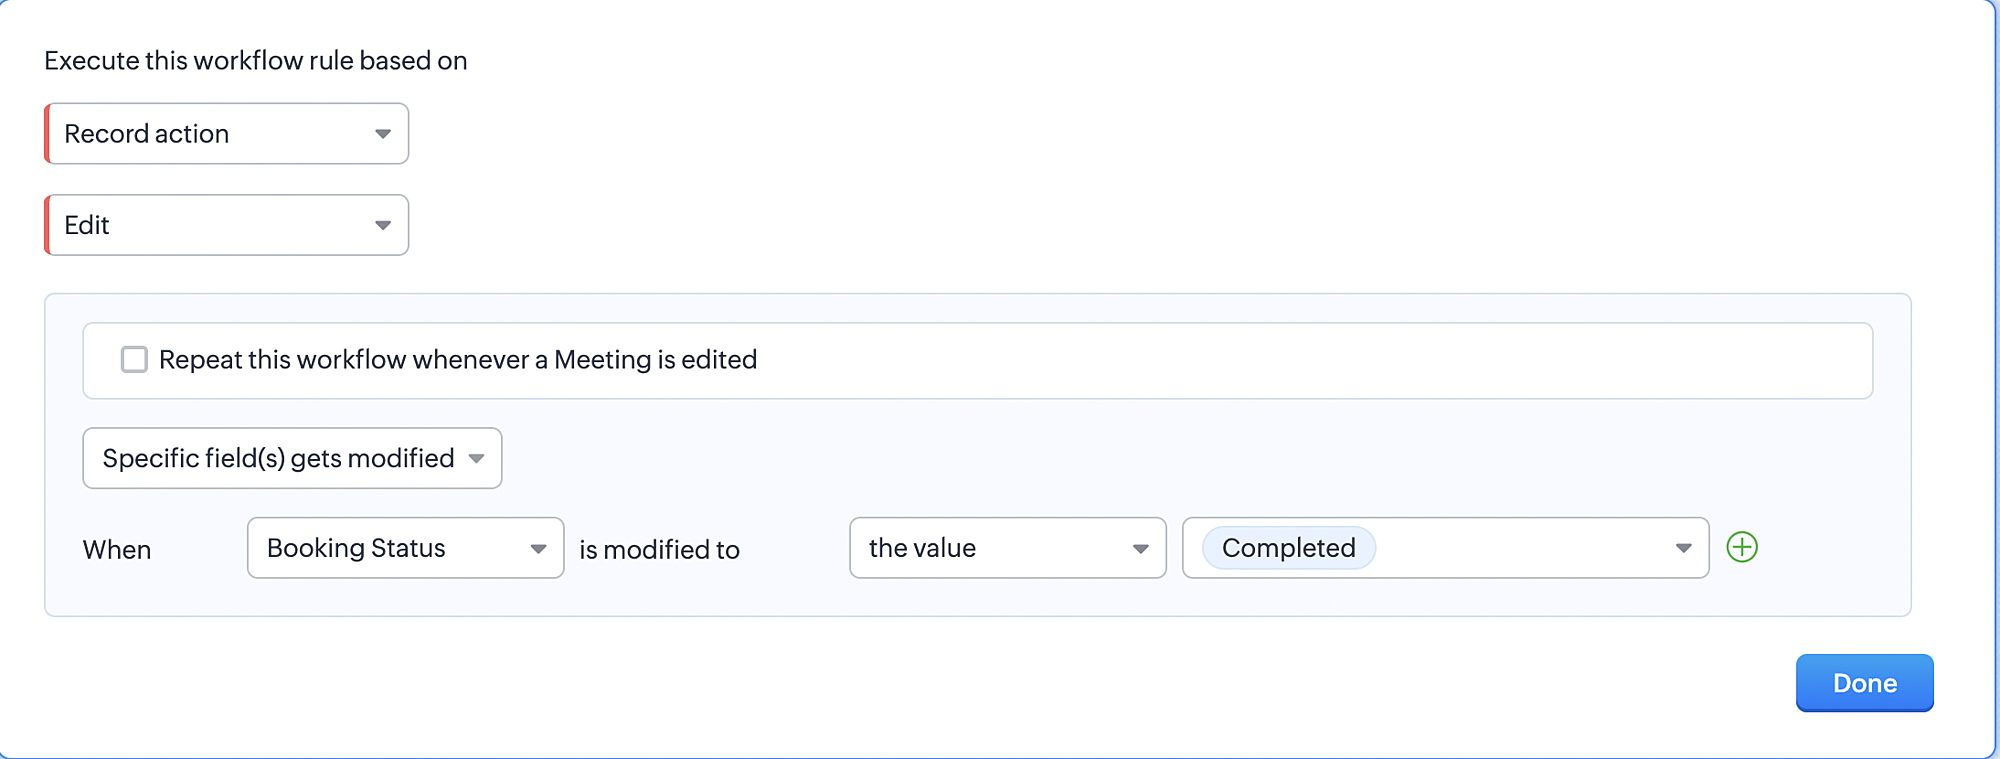
3. Configure condition > All Meetings.
4. Instant Actions > Function > New Function.
5. In the Configure custom function page, select the "completed" function you created from among the functions users
in your organization have created.
Part 9: Argument mapping:
If you encounter difficulties while navigating through the steps mentioned below, please refer to Part 3 above, where we have provided step-by-step screenshots for clarification.
1. Press # to choose an argument value.
2. Select Meetings under Module and configure the field as "BookingId".
3. Click Save and Associate button.
Reference:
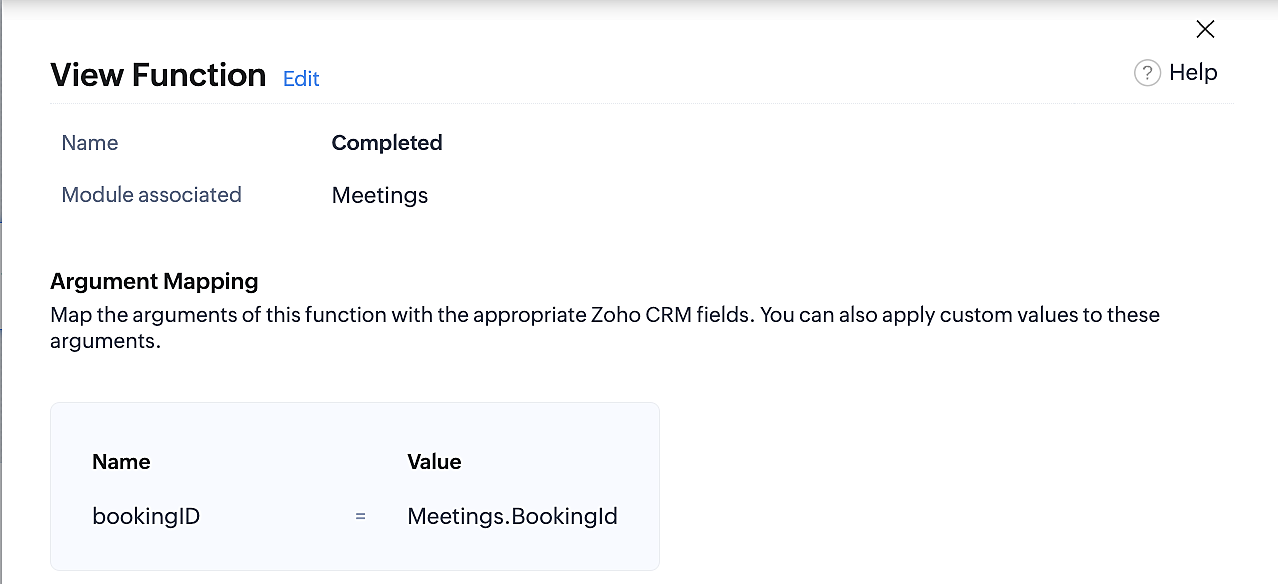
Below is the final flow of the "Completed" booking status workflow:
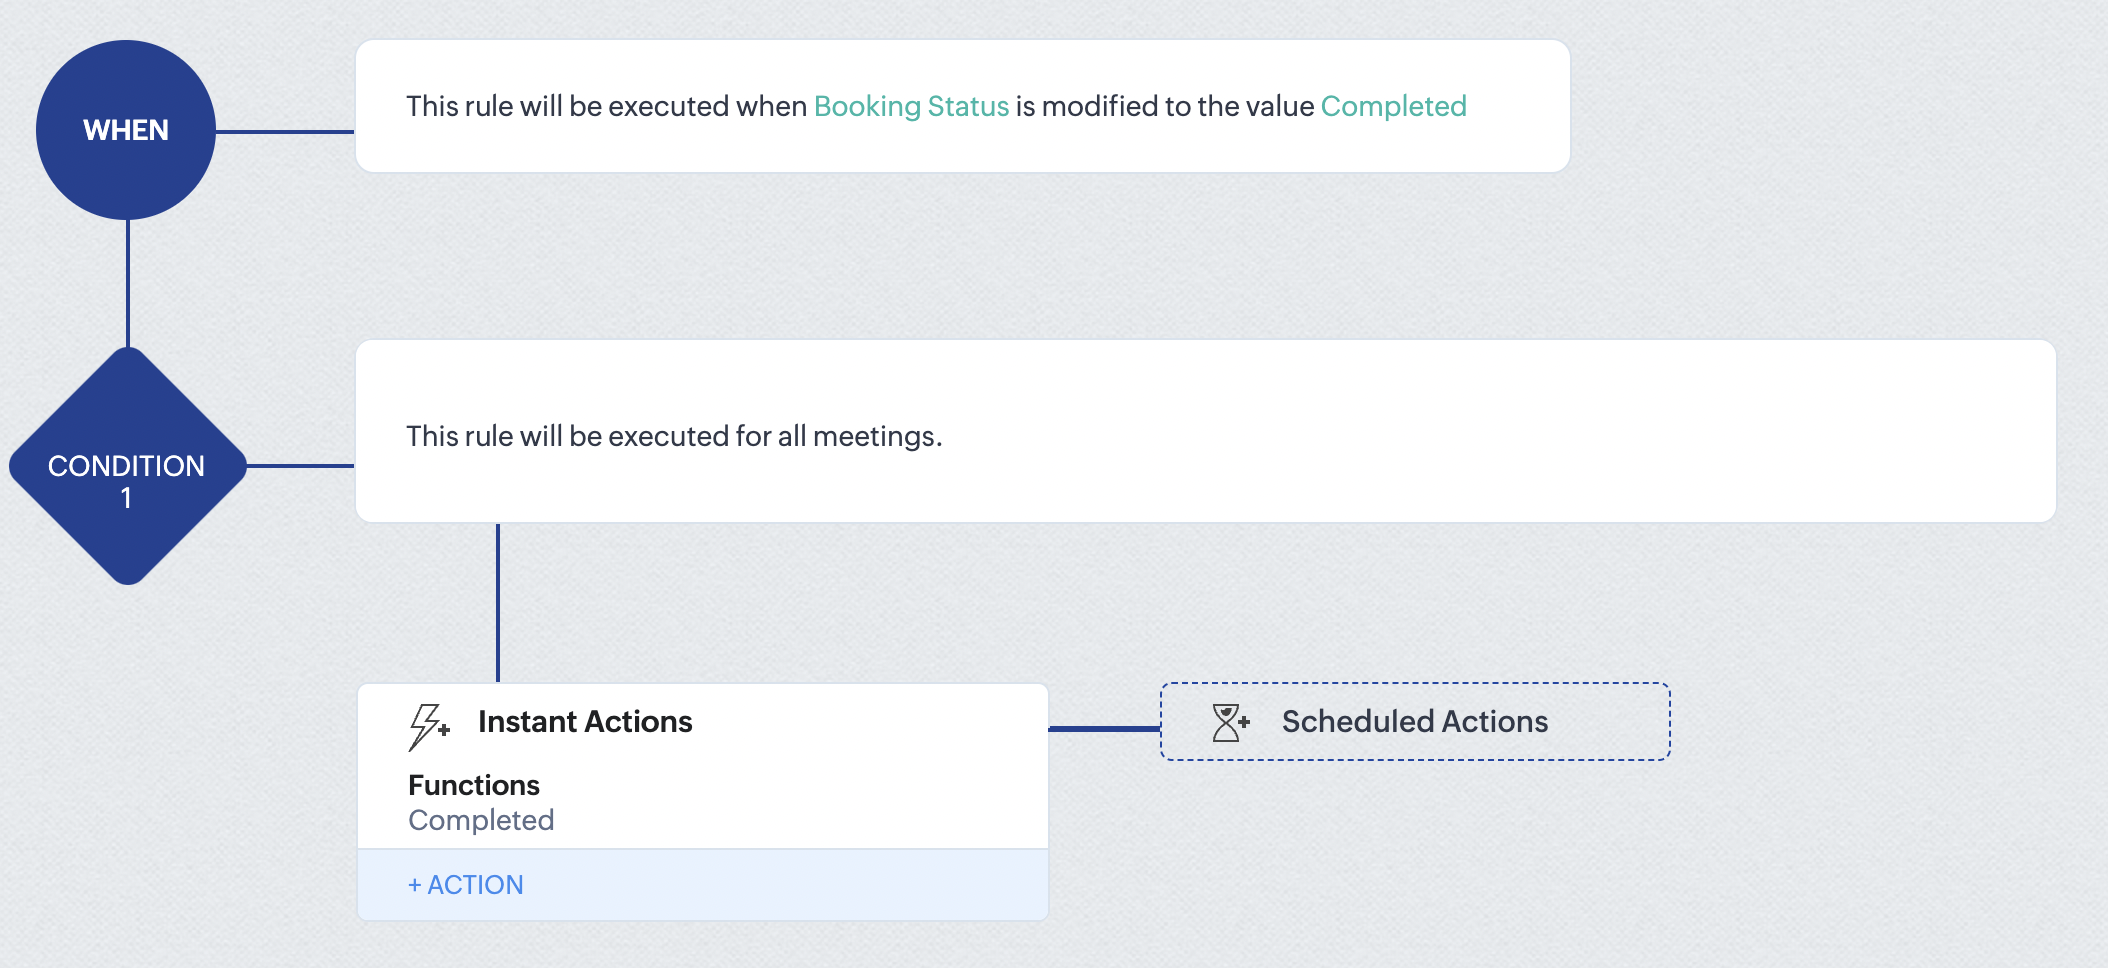
At the end of part 9, we will have created a workflow that is automatically executed when the booking status field within the Zoho CRM Meetings module is updated to "Completed." As a result, the associated bookings for that meeting will also be marked as "Completed" in Zoho Bookings.
Conclusion
We've reached the end of this community post. With the integration mentioned above in place, you'll be able to book, cancel, and update the status of appointments in Zoho Bookings directly from your Zoho CRM application. This will help you effectively manage your appointments in one place. As mentioned above, we've covered the rescheduling action in a separate post, which you can access by clicking on the following link: Reschedule Action
Furthermore, we've outlined a method for automating appointment statuses in detail. You can use this document as a reference to explore the various possibilities that suit your needs.
If you have any questions or need assistance with your configuration, please email us at hello@zohobookings.com or support@zohobookings.com.