Building extensions #8: Improve and enhance user experience with modal boxes
Modal box - What is it and where can you use it?
A modal box is a user interface pop-up window or dialog box that appears over the currently active UI screen. When prompted, the modal box deactivates all other page content until the user closes it. The modal box feature is commonly used to display information based on user input or to engage the user in some activity, such as an attachment picker, where they can proceed only after selecting an attachment.
Support offered in Zoho Projects for modal boxes
Zoho Projects provides support for modal boxes through extension development, which includes methods for opening and closing modal boxes, passing and receiving data to and from modal boxes, and so on. You can view the various methods offered by Zoho Projects to use modal boxes in this document.
In this post, we'll go over an example scenario for using a modal box in depth.
Scenario
A Zoho Desk ticket agent handles issue/feature request tickets in Zoho Projects to work on development-related requests. When the development in Zoho Projects is completed, the Desk agent provides a solution to the customer. In this case, it would be beneficial for the Desk agent to have all open Desk tickets associated with them displayed in a single, dedicated tab within Zoho Projects.
Goal
Improve, enhance, and simplify an agent's work in Zoho Projects by:
➤ Showcasing all open Desk tickets within a single tab.➤ Providing them with ticket-specific details, allowing them to view ticket details and prioritize the Zoho Projects task associated with that ticket accordingly.
Solution
To accomplish this goal, use the modal box feature as part of the widgets concept discussed earlier. A Project tab widget labeled "Desk open tickets" can be created to display all open Desk tickets associated with an agent. When a specific ticket is selected, the agent can access all relevant information about the ticket, such as its status, priority, and so on. This will allow them to prioritize and work on the appropriate task in Zoho Projects that is associated with that ticket.
Now, let's go ahead and see the components that would be required to achieve this use case solution as part of an extension.
Required components
- In order to establish a secure integration between Zoho Projects and Zoho Desk for a seamless data transfer, a connection between Zoho Projects and Zoho Desk has to be established.
- An extension configuration process includes:
- Creating an extension.
- Configuring the plugin manifest.
- Setting up the widget code.
- Display all open Zoho Desk tickets associated with an agent in a tab called "Desk open tickets."
- Incorporate the modal box feature to display ticket-specific details while the agent chooses a ticket from the list of open desk tickets.
We have already explored the steps to establish a connection, create an extension, and configure the plugin-manifest.json file as part of our earlier posts. You can refer to those resources for detailed guidance. In this case, we have already completed most of these steps (screenshots below).
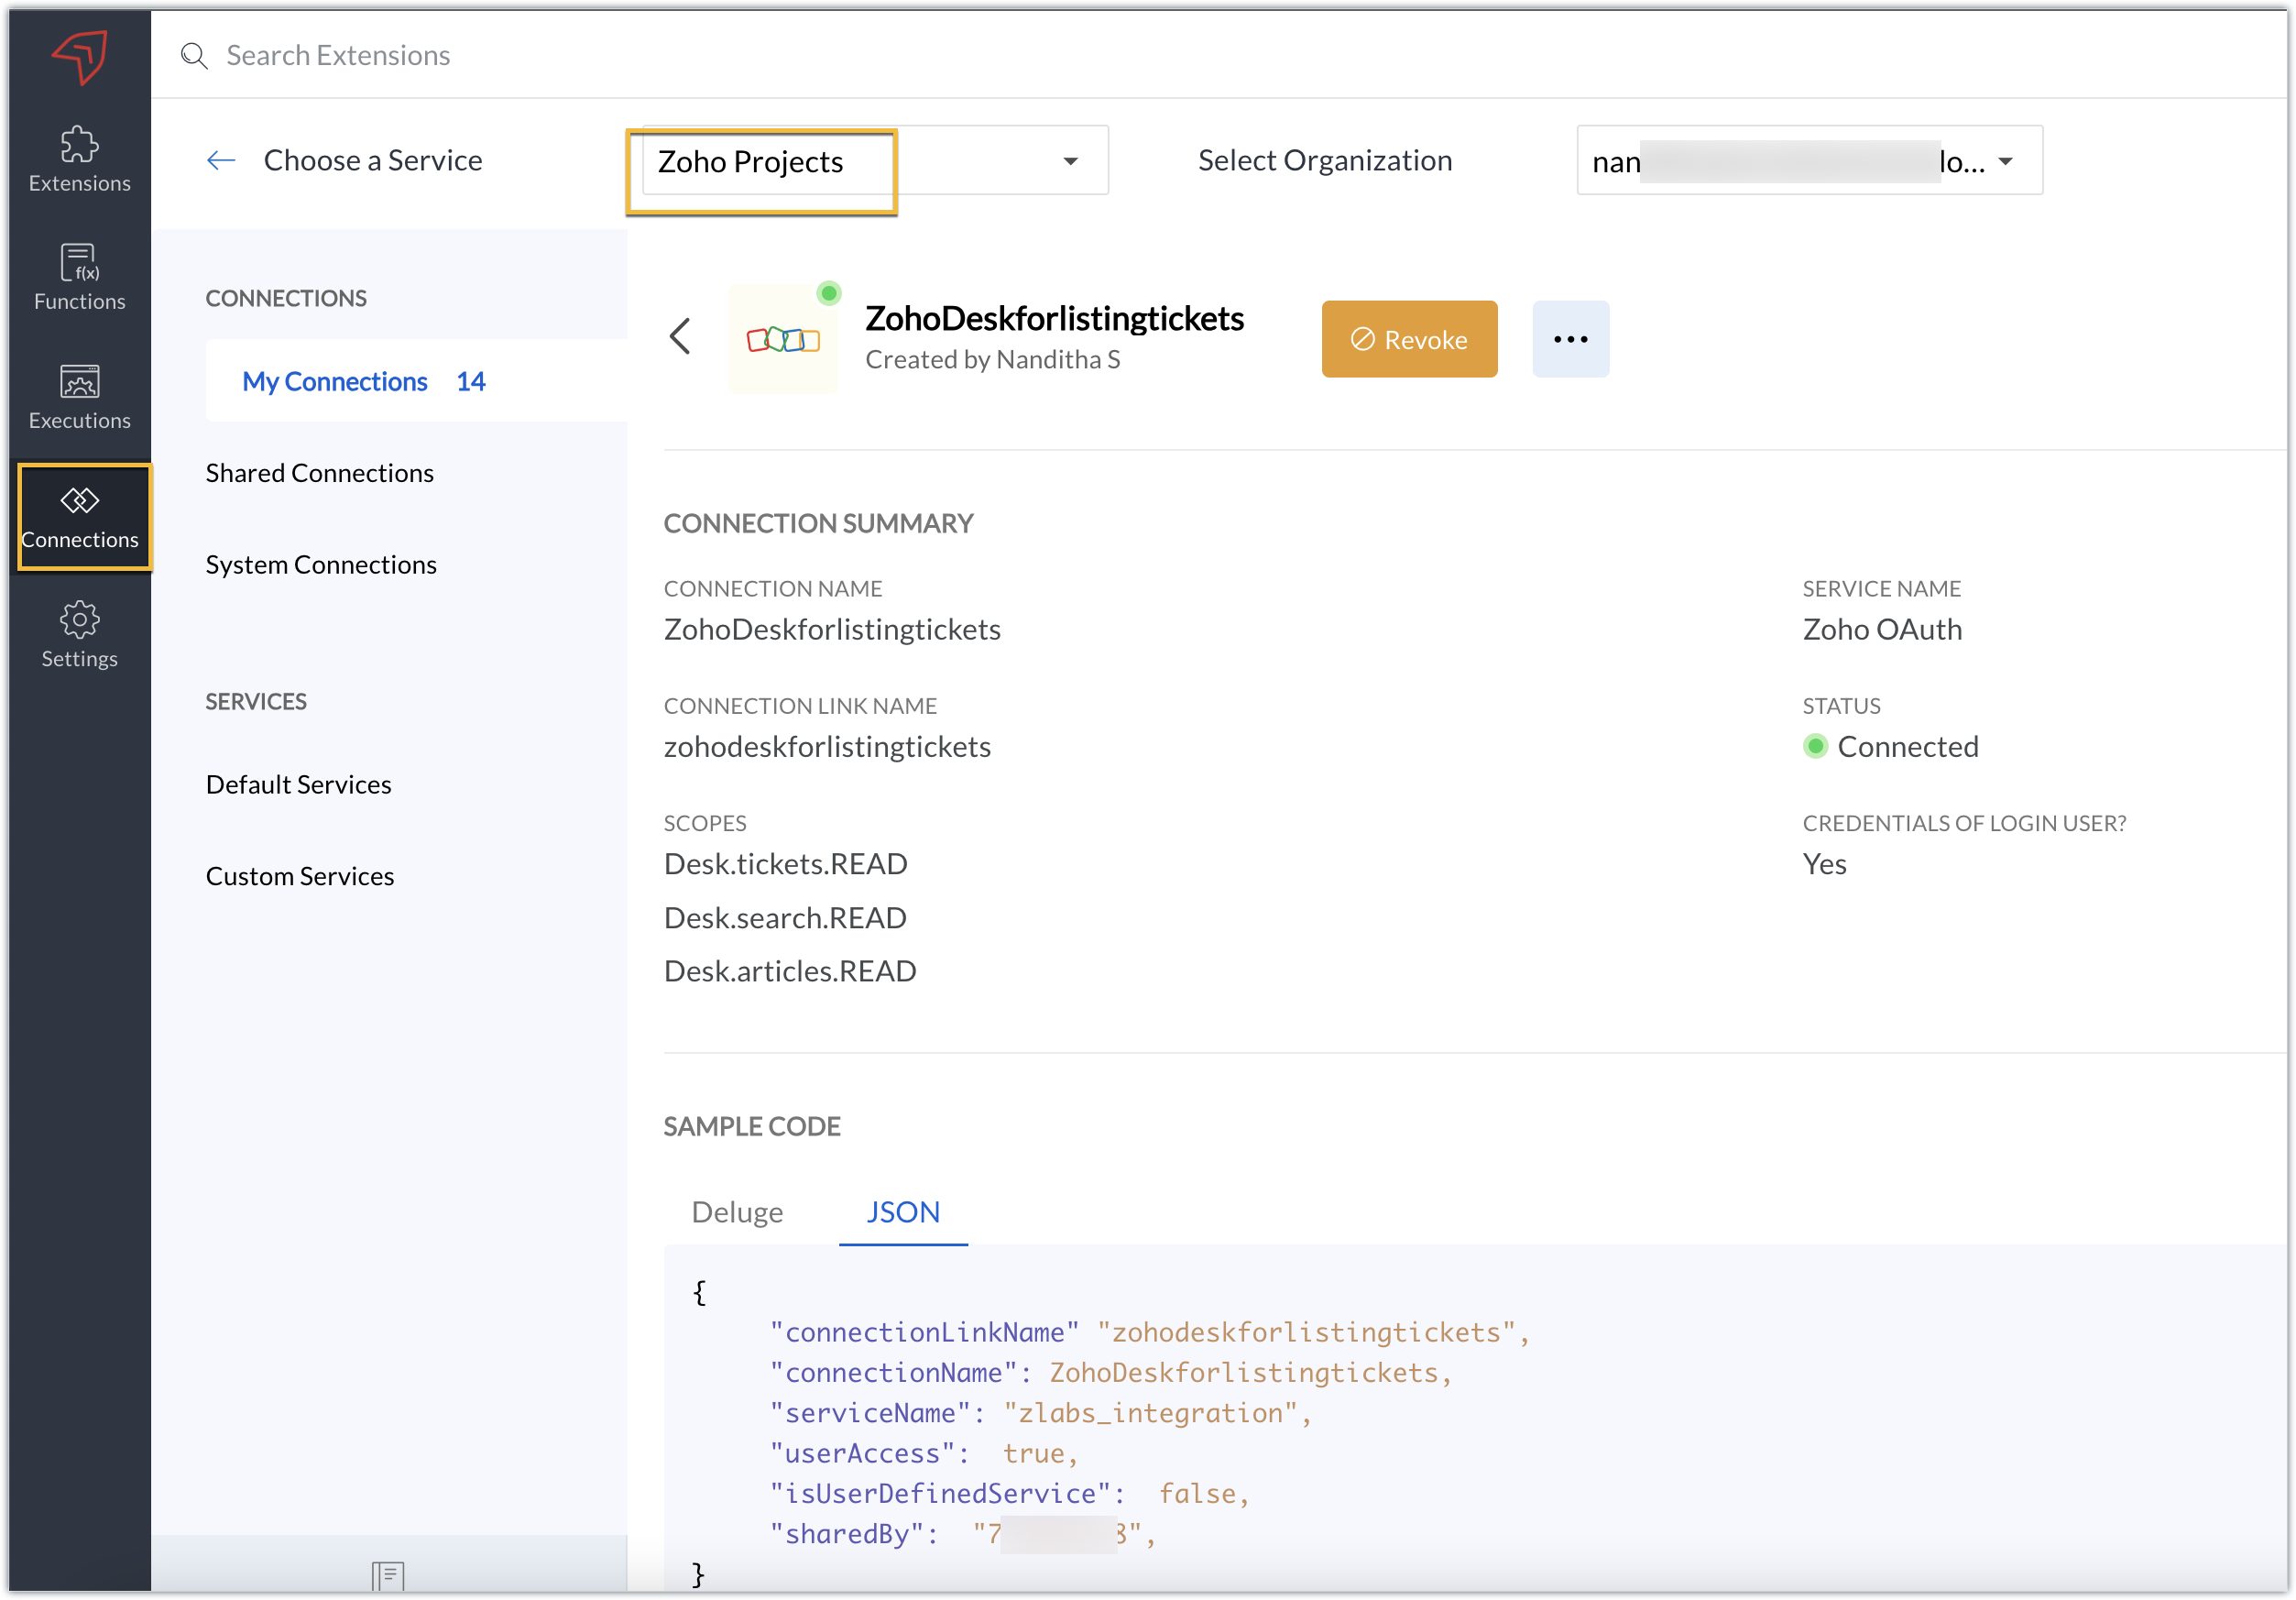
Connection
We have created a connection to establish a secure integration between Zoho Projects and Zoho Desk.
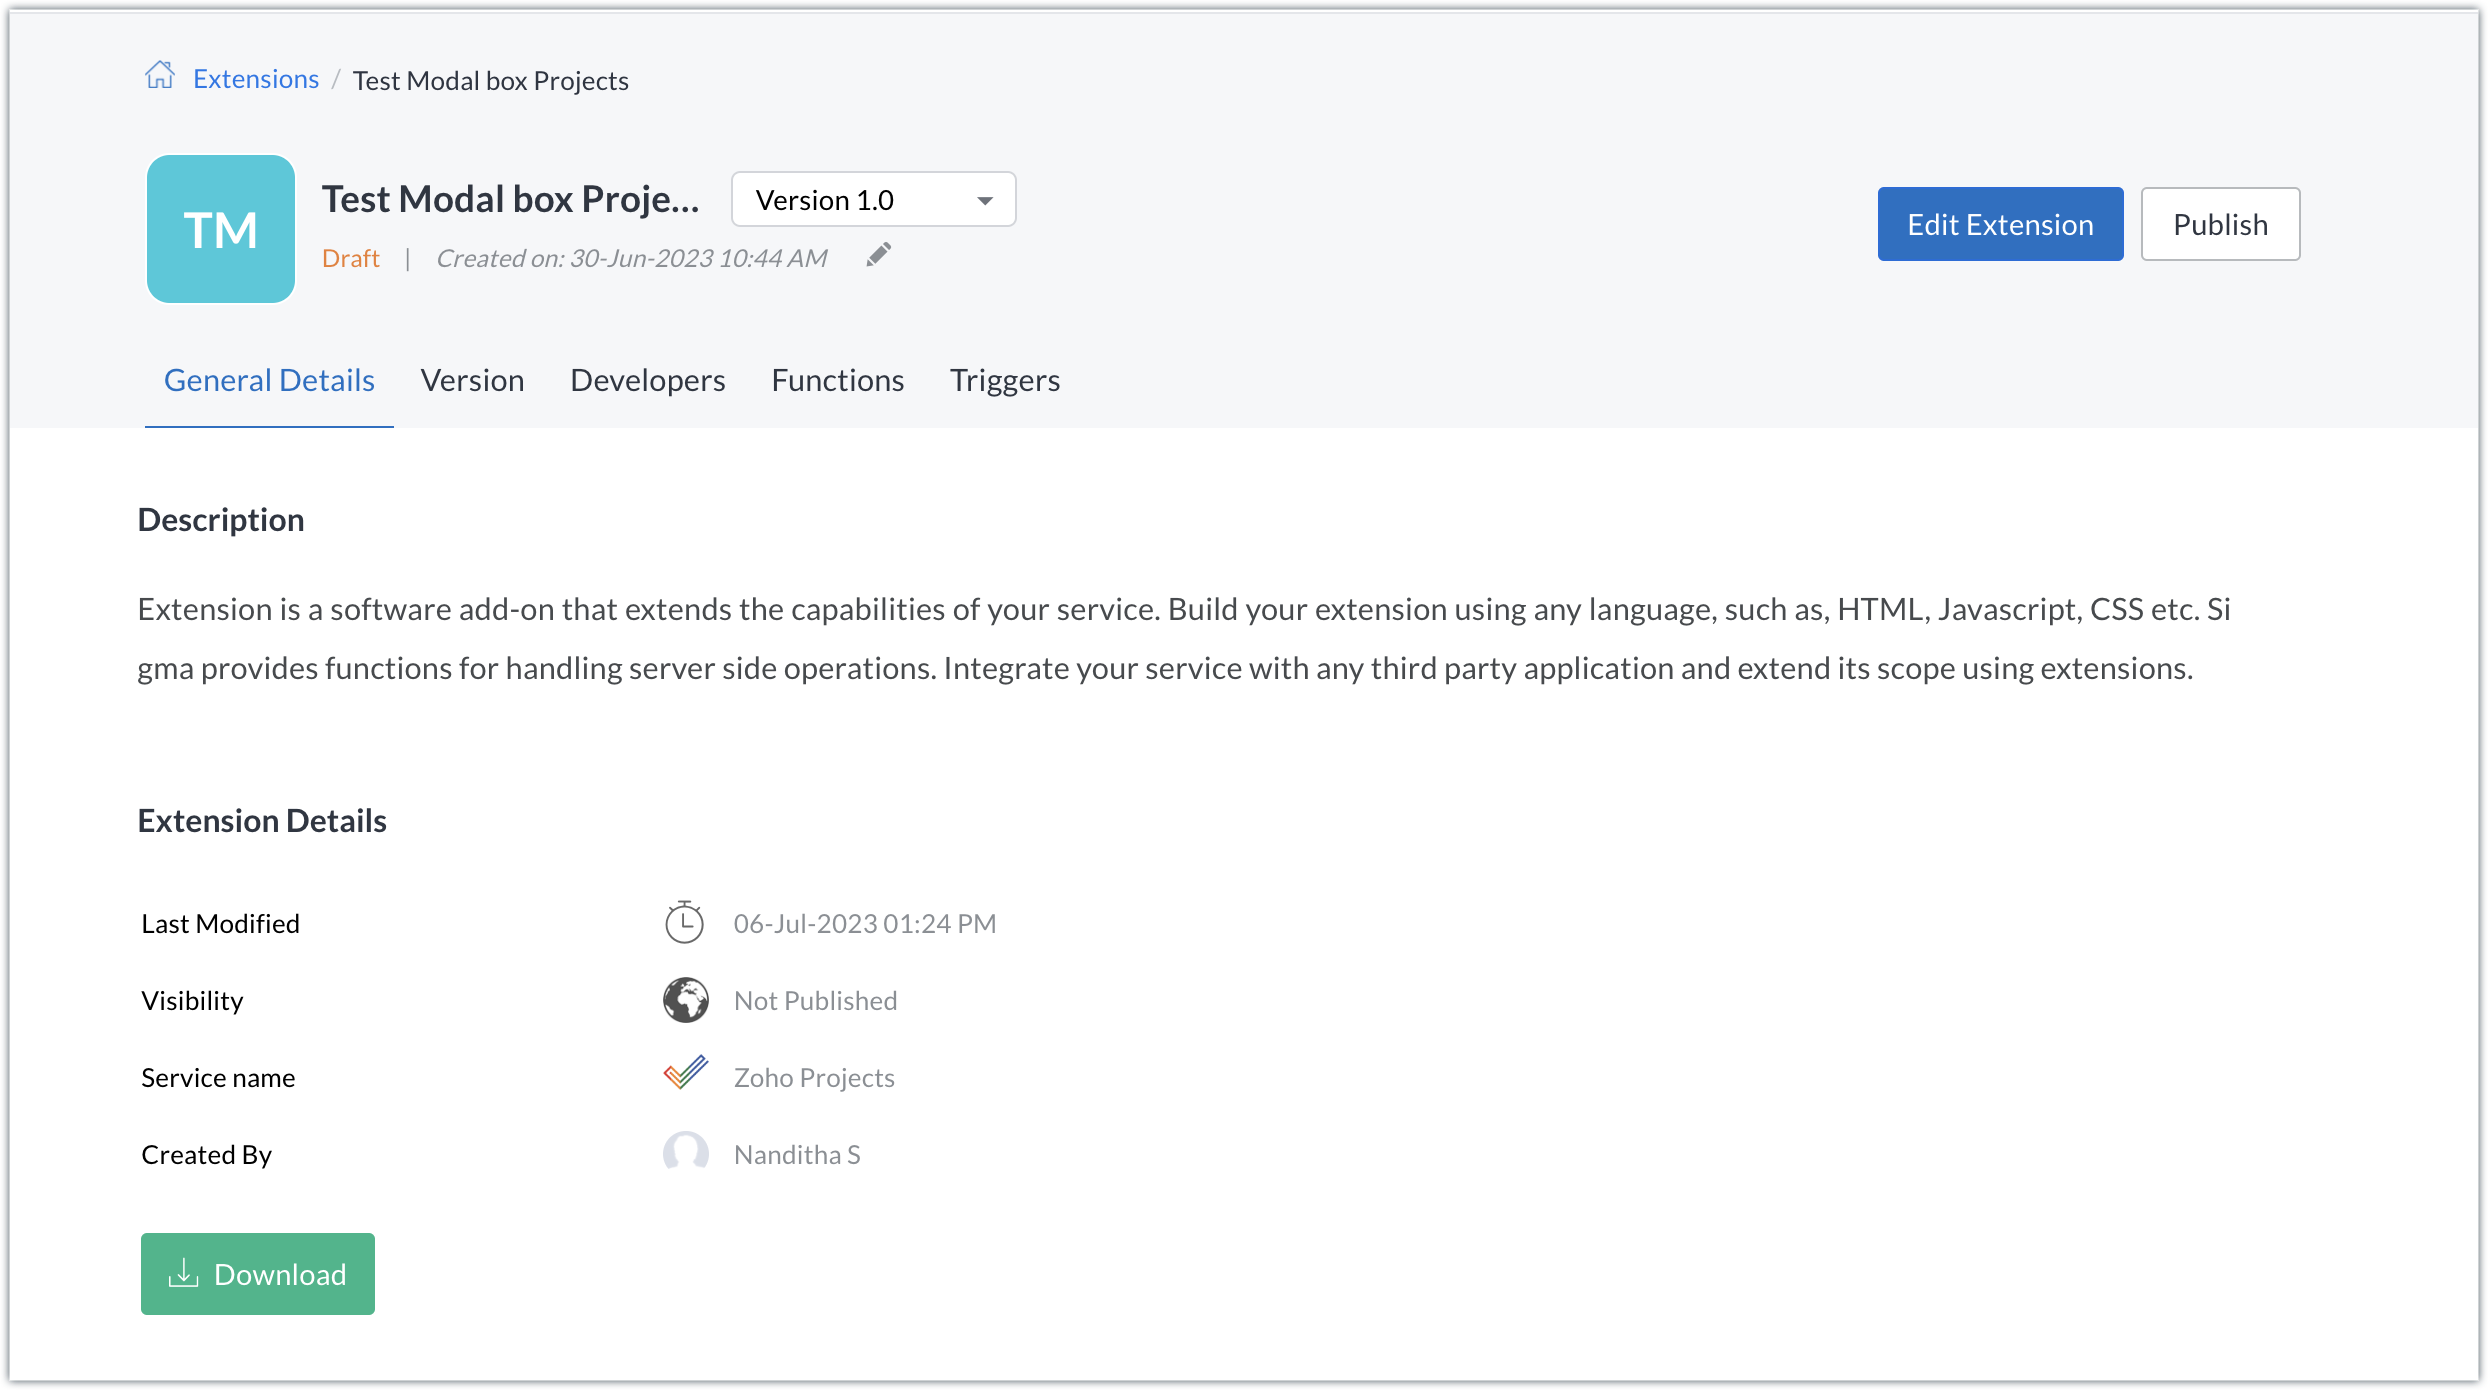
Extension configuration
Extension creation: We have created a new extension for Zoho Projects.
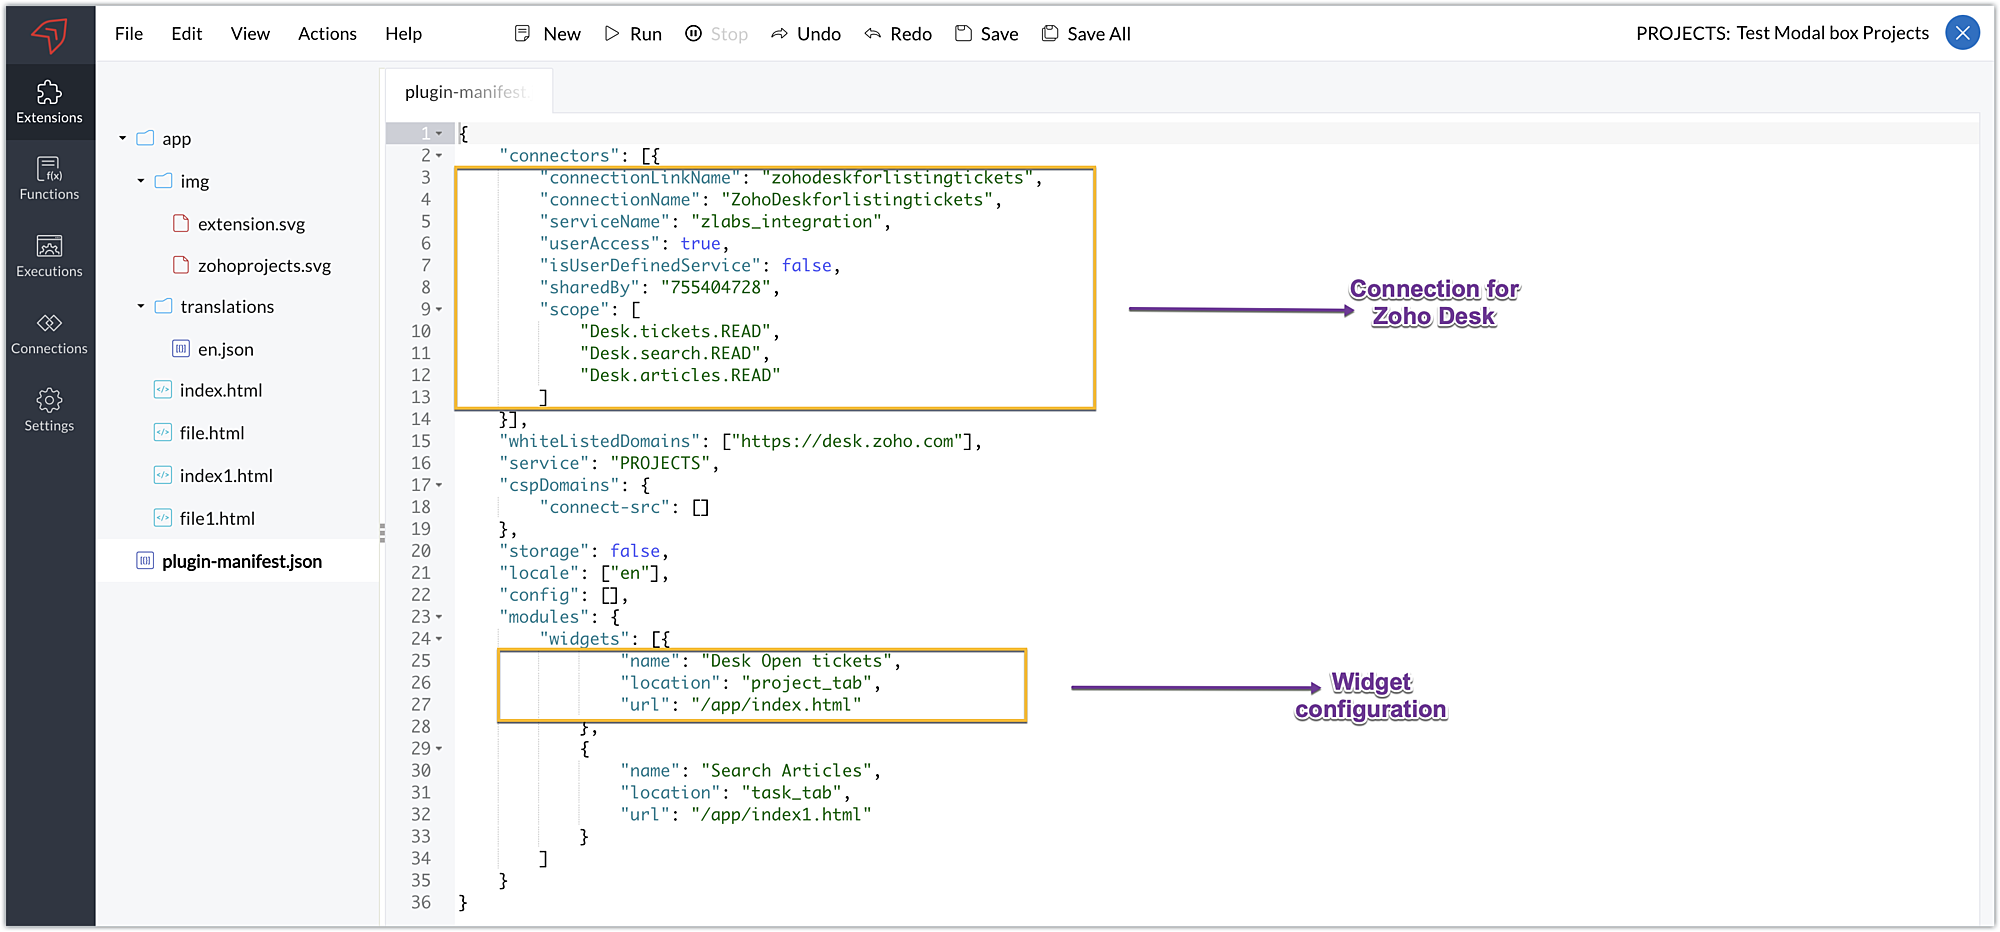
Plugin-manifest.json configuration: Once the extension was created, we configured the plugin-manifest.json file to include the created connection and a widget.
For our extension use case, the plugin-manifest.json file is configured as shown in the below screenshot.
Setting up the widget code
Now that we've set up the other components, let's move on to writing our widget code and incorporating the modal box feature.
Displaying open tickets in "Desk open Tickets" tab code snippet - index.html (find attachment in post)
- In the code snippet, the Zoho Desk API to list all associated tickets is invoked using the Zoho Projects request JS SDK method to get associated desk tickets.
- Certain mandatory parameters must be passed to the Zoho Projects Request Method, such as the third-party URL, data object, and connection. The details for the mentioned parameters in our use case are as follows:
➤ Data object - The data that must be constructed in order to invoke the third-party URL.➤ Connection - The name of the secure connection link created and configured in the plugin-mainfest.json file, as described in the previous section.
- A dropdown list displaying all open and associated desk tickets is created using the Zoho Desk API response.
- The dropdown list value selected by the end-user (i.e. the chosen ticket) is then fetched and stored in a variable called "selected ticket ID."
- Upon clicking Get Ticket Details, a modal box instance is created and opened using the modal.create and instance methods. The selected ticket ID value is emitted using the emit method with the keyword "stored-files" when the modal box is opened.
If you require further details on how the Zoho Projects Request method works, you can refer to our earlier post which explains the working and the required parameters for invoking this method in detail.
Modal box to display the details of the chosen ticket - file.html (find attachment in post)
- In the code snippet, the value emitted using the emit method for the keyword "stored-files" is received by the on method in the modal box UI. Using the received value, a hit is made to the Zoho Desk Get tickets API using the Zoho Projects Request Method again.
- From the ticket-specific details returned as the response of the Zoho Desk Get tickets API, the necessary details are fetched and then displayed to the agent for their reference. These details help them check on the status and prioritize the relevant Zoho Projects task related to that ticket.
Now, that we have completed the setup and have all the extension components ready, let's go ahead and see the output.
Sample output:
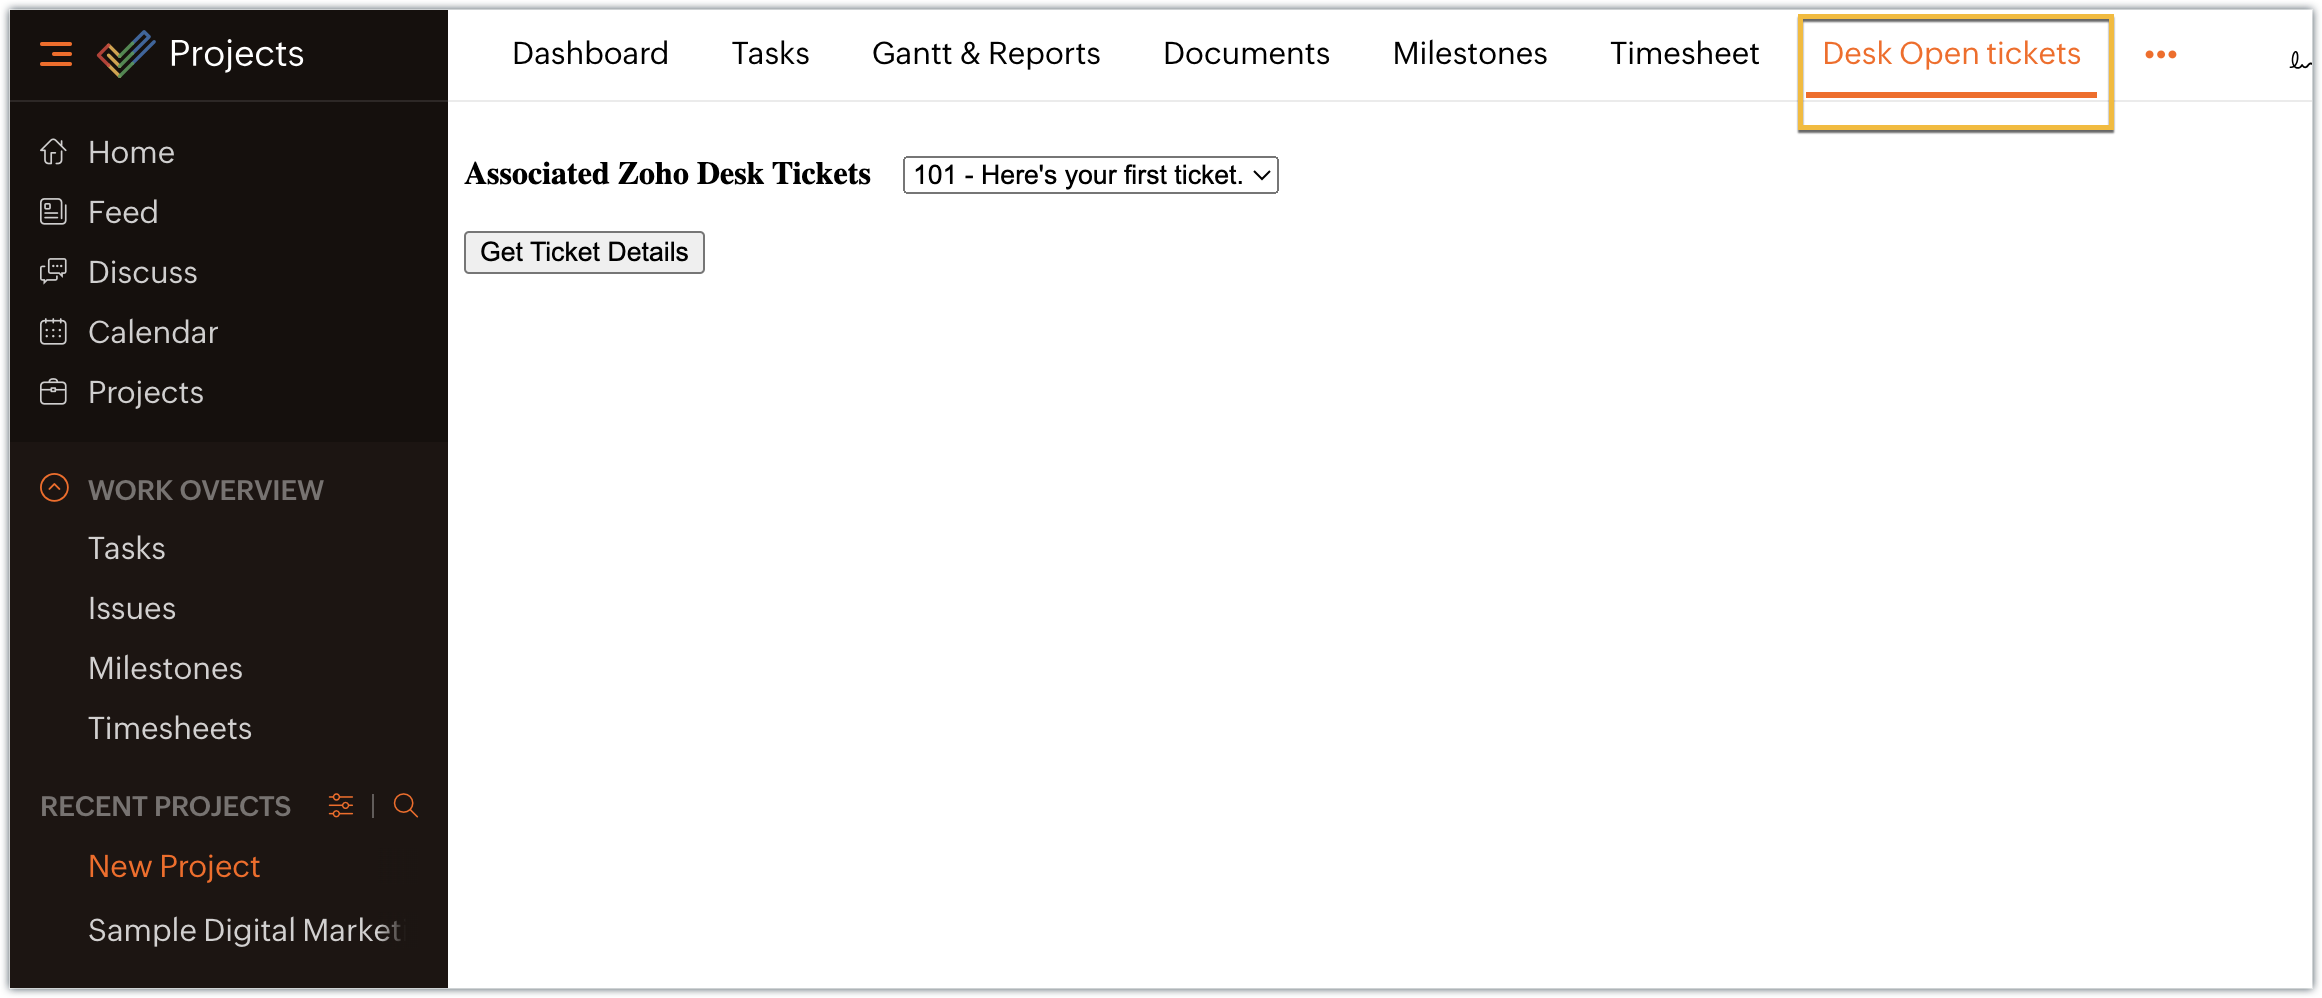
- Enter the Zoho Projects portal and select a project.
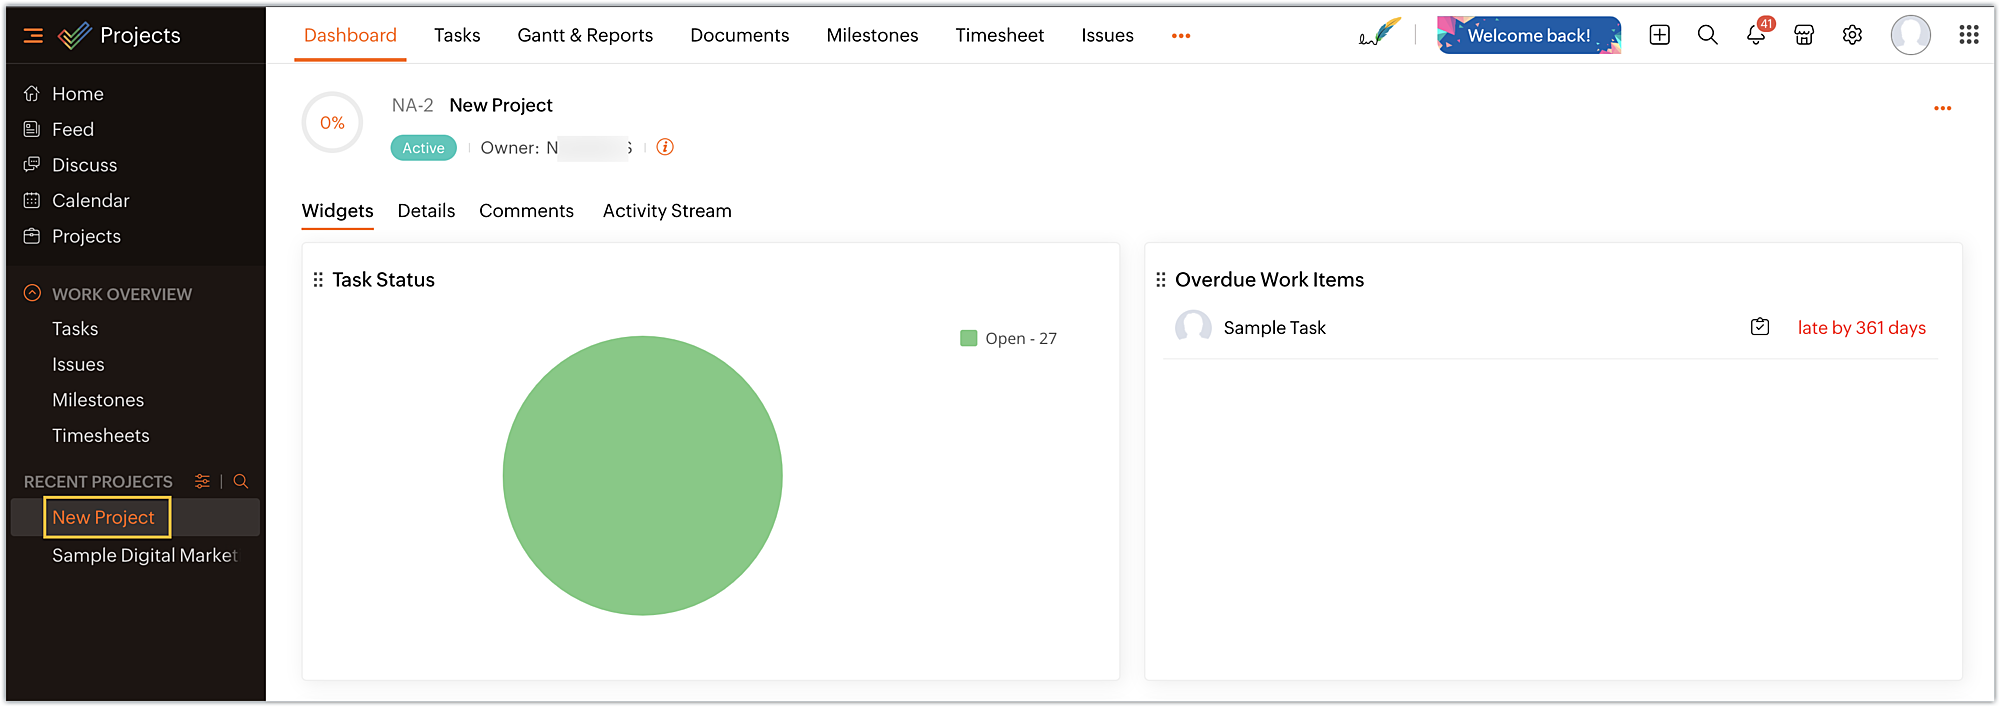
- Select the Desk open tickets option under the Projects tab. The dropdown menu appears, displaying a list of associated open tickets. Choose the ticket for which you want more details and click on Get Ticket Details.
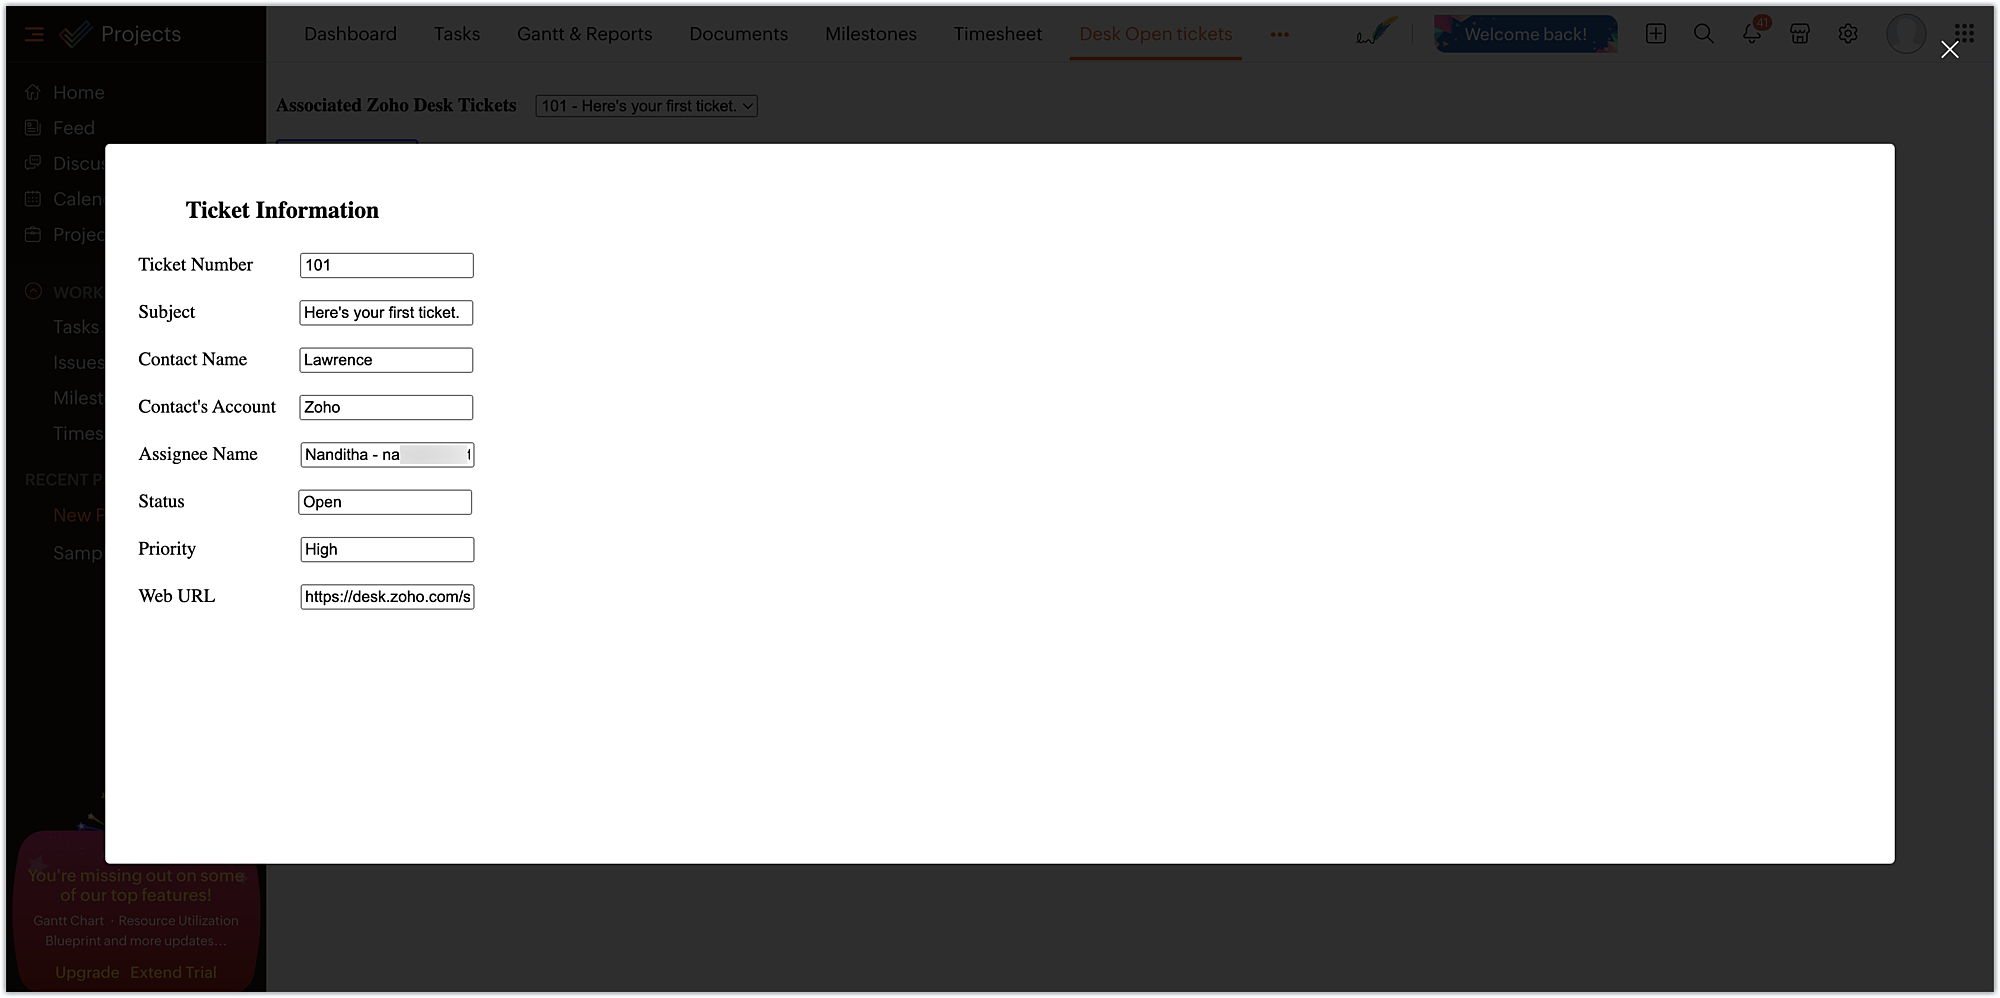
- The selected ticket details are displayed in the modal box.
In this example, we have used the modal box feature to display some information based on user input. Similarly, a modal box can also be used to engage the user in performing some activity, like an attachment picker, wherein they can proceed further only after choosing an attachment. We hope you found this information useful. Keep following this space for more insights!
 Sign up for a Zoho Developer account and start developing extensions for Zoho products using Sigma.
SEE ALSO
Topic Participants
Nanditha Somasundaram Somasundaram
Sticky Posts
Building extensions #10: Fetch customized user inputs, store them globally at the app level, and access them across entities
This data storage concept enables you to store data related to your extension for both entity properties and extension properties. In our previous piece, we looked at how to store data for entities using entity properties. In this post, we'll look atBuilding extensions #9: Store, retrieve, and access entity-specific data in widgets using data storage
Data storage - Overview Storing data related to the extension you are working on is essential. It can be saved as key-value pairs for an entity or extension, known as entity and extension properties, respectively. Data can be saved for the following entitiesBuilding extensions #7: Create custom widgets for a simplified end-user experience
Discover the benefits of using widgets! We explored the significance of widgets, prerequisites, and the availability of JS SDK methods as part of our previous post. In this post, let's go over a detailed example of using widgets along with certain ZohoBuilding extensions #6: Custom user interfaces with Widgets
Welcome to our post on Widgets for Zoho Projects! In our last post, we explored the significance of the connections feature, showed how to use it, and provided an example use case. In this article, we'll look at the importance of widgets, another featureBuilding extensions #5: Integrating applications with Zoho Projects through Connections
In our last post, we discussed the essential features that a Zoho Projects extension can provide. Starting with this post andin every subsequent post going forward, we'll go through each of those features in depth, one by one, with an example use case.
Recent Topics
Es posible cambiar el lenguaje de los modulos del ASAP?
Es posible cambiar el lenguaje de estos textos? Tengo Zoho configurado en español pero aun así me muestra estos textos en ingles:Auto-publish job openings on my Zoho Recruit Careers Website
I have developed a script using the Zoho Recruit API that successfully inserts new jobOpening records to my Zoho Recruit website, but my goal is to auto-publish to the Careers Website. The jobOpening field data shows two possible candidates to make this[Free webinar] Custom domains for portals in Zoho Creator - Creator Tech Connect
Hello everyone, We’re excited to invite you to another edition of the Creator Tech Connect webinar. About Creator Tech Connect The Creator Tech Connect series is a free monthly webinar featuring in-depth technical sessions designed for developers, administrators,Remove my video
Hi, How can I remove my video so that I don't have to see myself. It's weird so I always remove my own video from what I see but cannot find this feature here. Thanks!Marking a meeting 'done'.
I would like to somehow mark a meeting 'done' and placed under the contact's page rather than deleting it and having no record of it. Am I missing a button that does this?Add Lookup Field in Tasks Module
Hello, I have a need to add a Lookup field in addition to the ones that are already there in the Tasks module. I've seen this thread and so understand that the reason lookup fields may not be part of it is that there are already links to the tables (Super Admin Logging in as another User
How can a Super Admin login as another user. For example, I have a sales rep that is having issues with their Accounts and I want to view their Zoho Account with out having to do a GTM and sharing screens. Moderation Update (8th Aug 2025): We are workingCannot find zpuid for Zoho Projects user
I'm using the Zoho Projects v3 API to create a task. The task is created successfully, but in order to assign the task owner, the "Create a Task" API also requires the zpuid of the task owner. Unfortunately I cannot find any user-related API calls thatAllocating inventory to specific SO's
Is there a way that allocate inventory to a specific sales order? For example, let's say we have 90 items in stock. Customer 1 orders 100 items. This allocates all 90 items to their order, and they have a back order for the remaining 10 items which couldCan Zoho Marketing Automation send OTP codes via WhatsApp during user registration?
The flow I would like to implement is: A user signs up in the mobile app and enters their phone number. The system generates a one-time verification code (OTP). The OTP is sent to the user via WhatsApp message. The user enters the code in the app to confirmIncorrect Functioning of Time Logs API (Version 3)
We need to fetch the list of time logs for each task for our company internal usage. We are trying to achieve it by using the next endpoint: https://projects.zoho.com/api-docs#bulk-time-logs#get-all-project-time-logs Firstly, in the documentation thePartial payments for retainer invoices
When a customer does not pay the entire retainer invoice there is no way to apply a partial payment. PLEASE add this function.Can I export to PDF in Zoho Learn
I have seen help pages where export to pdf options are available but I do not see that option available from the application. I see that exprt is available in my free trial version but that is only to html pages. I need to be able to export my manualsService line items
Hello Latha, Could you please let me know the maximum number of service line items that can be added to a single work order? Thanks, Chethiya.Sending emails via Books
Anyone else getting similar problems recently ??..... Hi, Your message to the following recipient was not delivered. Please find the details below. Bounce Details: Bounced Address : someone@google.com Bounce Reason : other ; Status : 5.0.0 (undefined status) ; Daignostic-Code : smtp;542 someone@google.com Rejected ; Bounced Time : Sep 05, 2017 06:37 PM BST Regards, Zoho Team The email addresses were fine only a few days ago but are now being rejected ?PDF Generator Upgrade
Hi Team, What will happen if I don't make any changes for existing template. Zoho just ask us upgrade but haven't tell the benefit. Zoho CorporationSender Email Configuration Error.
Hello Team, Hope you are all doing well. We are in the process of creating the Zoho FSM environment in the UAE. When we try to add the sender email address “techsupportuae@stryker.com”, we receive the error message: “Error occurred while sending mailNo Need To Fix Something That Is Working
Zoho Books is a great financial tool which helps businesses to become more efficient and productive with day-to-day operations. As such, every change, upgrade, improvement needs to be carefully thought before implemented in the software and I'm sure ZohoTotal Cost in reports showing zero
The image below shows my issue. The column Total Cost should show the cost to our company based on hours logged and the employee's rate. For instance, if the person working on Subtask 1 is paid 20/hr, then Total Cost should display $160 ($20x8 loggedZoho Books (and other finance suite apps) - Retrospective Linking of Invoice and Sales Orders to Quotes.
In some cases, Quotes and Invoies may be created sperately instead of using the convert feature. In this feature request I am asking for the Finance Suite team to consider adding a lookup field to reference the quote on Invoices and Sales Orders, or someBring real app analytics into Zoho Creator apps with Zoho Apptics
We’re kicking off the year with a release we’ve been looking forward to for a long time. After being in the works for a while, Zoho Creator and Zoho Apptics are now officially integrated, bringing in-depth product analytics directly into the Zoho CreatorZohoMail's outbound webhook sends incorrect folderId and messageId
I used a webhook (outbound) from within ZohoMail to send message details when a new message arrives that meets specific criteria. I received this data correctly. Now I want to get the attachment from this email message. When I made an api call using folderUse URL field to populate Image in a Email Template
We have two records Record 1: Appointments (with a Lookup to Doctors module) Related Record 2: Doctors (with a URL field that is an image of the doctor) We would like to populate a CRM email template with the image of the URL field for the related doctorLooking for Guidance on Building a Zoho Website
I'm exploring the possibility of building a custom website with specific features using Zoho as an alternative platform. My goal is to create something similar to https://gtasandresapk.com , with the same kind of functionality and user experience. I'dAbility to add VAT to Retainer Invoices
Hello, I've had a telephone conversation a month ago with Dinesh on this topic and my request to allow for the addition of VAT on Retainer Invoices. It's currently not possible to add VAT to Retainer Invoices and it was mutually agreed that there is absolutely no reason why there shouldn't be, especially as TAX LAW makes VAT mandatory on each invoice in Europe! So basically, what i'm saying is that if you don't allow us to add VAT to Retainer Invoices, than the whole Retainer Invoices becomesZoho Bookings Forge: A hands-on workshop series
Hello all! We’re hosting a five-part, hands-on workshop series to help you optimize Zoho Bookings for your business. In these sessions, we’ll cover key features, practical use cases, and clear steps to get started or improve your current setup. Here areIntroducing parent-child ticketing in Zoho Desk [Early access]
Hello Zoho Desk users! We have introduced the parent-child ticketing system to help customer service teams ensure efficient resolution of issues involving multiple, related tickets. You can now combine repetitive and interconnected tickets into parent-childUpdate Existing Records greyed out in Free Version
Trying to update records from an Excel sheet, and not getting the option to update. Only option is to add as new accounts. All documentation I can see says update should be an option! Accounts, Leads, Contacts, all the same.Help with deluge script
Hi Community, this is my first Deluge script. I've pieced it together from reading various articles I want to use it in a workflow to 1 Convert a lead to a contact 2. Create a record in a custom module Below is what I have got so far but it does not fireIntroducing Workqueue: your all-in-one view to manage daily work
Hello all, We’re excited to introduce a major productivity boost to your CRM experience: Workqueue, a dynamic, all-in-one workspace that brings every important sales activity, approval, and follow-up right to your fingertips. What is Workqueue? SalesDelete button
Hi, The delete button were hide into the three dot button. Can I display outside? why Zoho make this update?Zoho Vault CLI for Developers and Automations
Hi everyone, If you're managing credentials in scripts, CI/CD pipelines, or automation workflows, Zoho Vault's Command Line Interface (CLI) can help you securely access and manage secrets directly from your terminal. Zoho Vault was launched in 2013 asOn Edit Validation Blueprint
Hello, I have a notes field and a signature field. When the Approve button is clicked, the Signature field will appear and must be filled in. When the Reject button is clicked, the Notes field will appear and must be filled in. Question: Blueprint willServer-based Appication API access for Social, Sites, Flow, Pages.
Hello, I am trying to hook up API access for a number of apps and I have hit a wall trying to add these scopes to the API feed. We cannot find the correct way to list the scope for these Zoho apps; Social, Sites, Flow, Pages. Error on web-page comes backZoho Subscriptions -- Zoho Commerce integration
Is there integration between Zoho Subscriptions and Zoho Commerce? I would like to create subscription plans in Zoho Subscritpions and list them for on my Zoho Commerce store.Synching changes to Stripe when changes are made in Zoho Billing
We have a situation where we have merged customers in Zoho BIlling and then found out later that the payment in Stripe was not updated and still associated with the old customer record. The card gets updated and billed, but that payment is still associatedHow can I link Products in a Deal Subform to the Products Module
Hello, I have a pricing subform on our Deals page and use a lookup field to associate a product with each line. I want to be able to look at a product page within the Products module and see a list of the deals connected to that product. I have this workingHelp Center and SEO: Any Benefit to My Domain-Mapped Website Ranking?
First of, I love the Help Center which I've just decided to integrate into my website to replace its old-fashioned FAQs. So much more to achieve there now! Lots of new benefits to the site visitors and to me in terms of organizing and delivering all theBusiness Hours with lunch break
Our business hours are: mon - fri 08:30 - 13:00, 15:00 - 18:30. How can I handle the lunch break? If I use 8:30 - 18:30 it obviously breaks SLA. ThanksAutomatically Update Ticket Status in Zoho Desk Based on Actions in Zoho Projects
Hi Zoho Desk Team, Hope you’re doing well. We’re using the Zoho Desk–Zoho Projects integration to manage tasks related to customer tickets, and it works well for linking and tracking progress. However, there are a few important automation capabilitiesNext Page