Resolve booking page availability issues
1. Purpose of this guide
This guide explains why your booking page may not accept appointments, commonly due to the associated workspace, event type, user, or resource being marked as inactive. It also outlines the steps to resolve these issues.
2. Possible causes and solutions
2.1 Workspace is marked inactive
If the workspace that houses the event type is inactive, the respective booking page will not accept appointments.
To resolve this:
Navigate to the Admin Center
Solution:
- Click the Options icon
on the workspace card, then select the Mark As Active option.
- Confirm by clicking Proceed in the popup.This will make the workspace active.
 Note: Event types inside the workspace remain inactive. You must activate them individually.
- Go to the workspace > select the event type > click Edit > toggle Status to Active > click Save.
2.2 Event type is marked inactive
To resolve this:
Switch to the respective workspace and open the event type details.
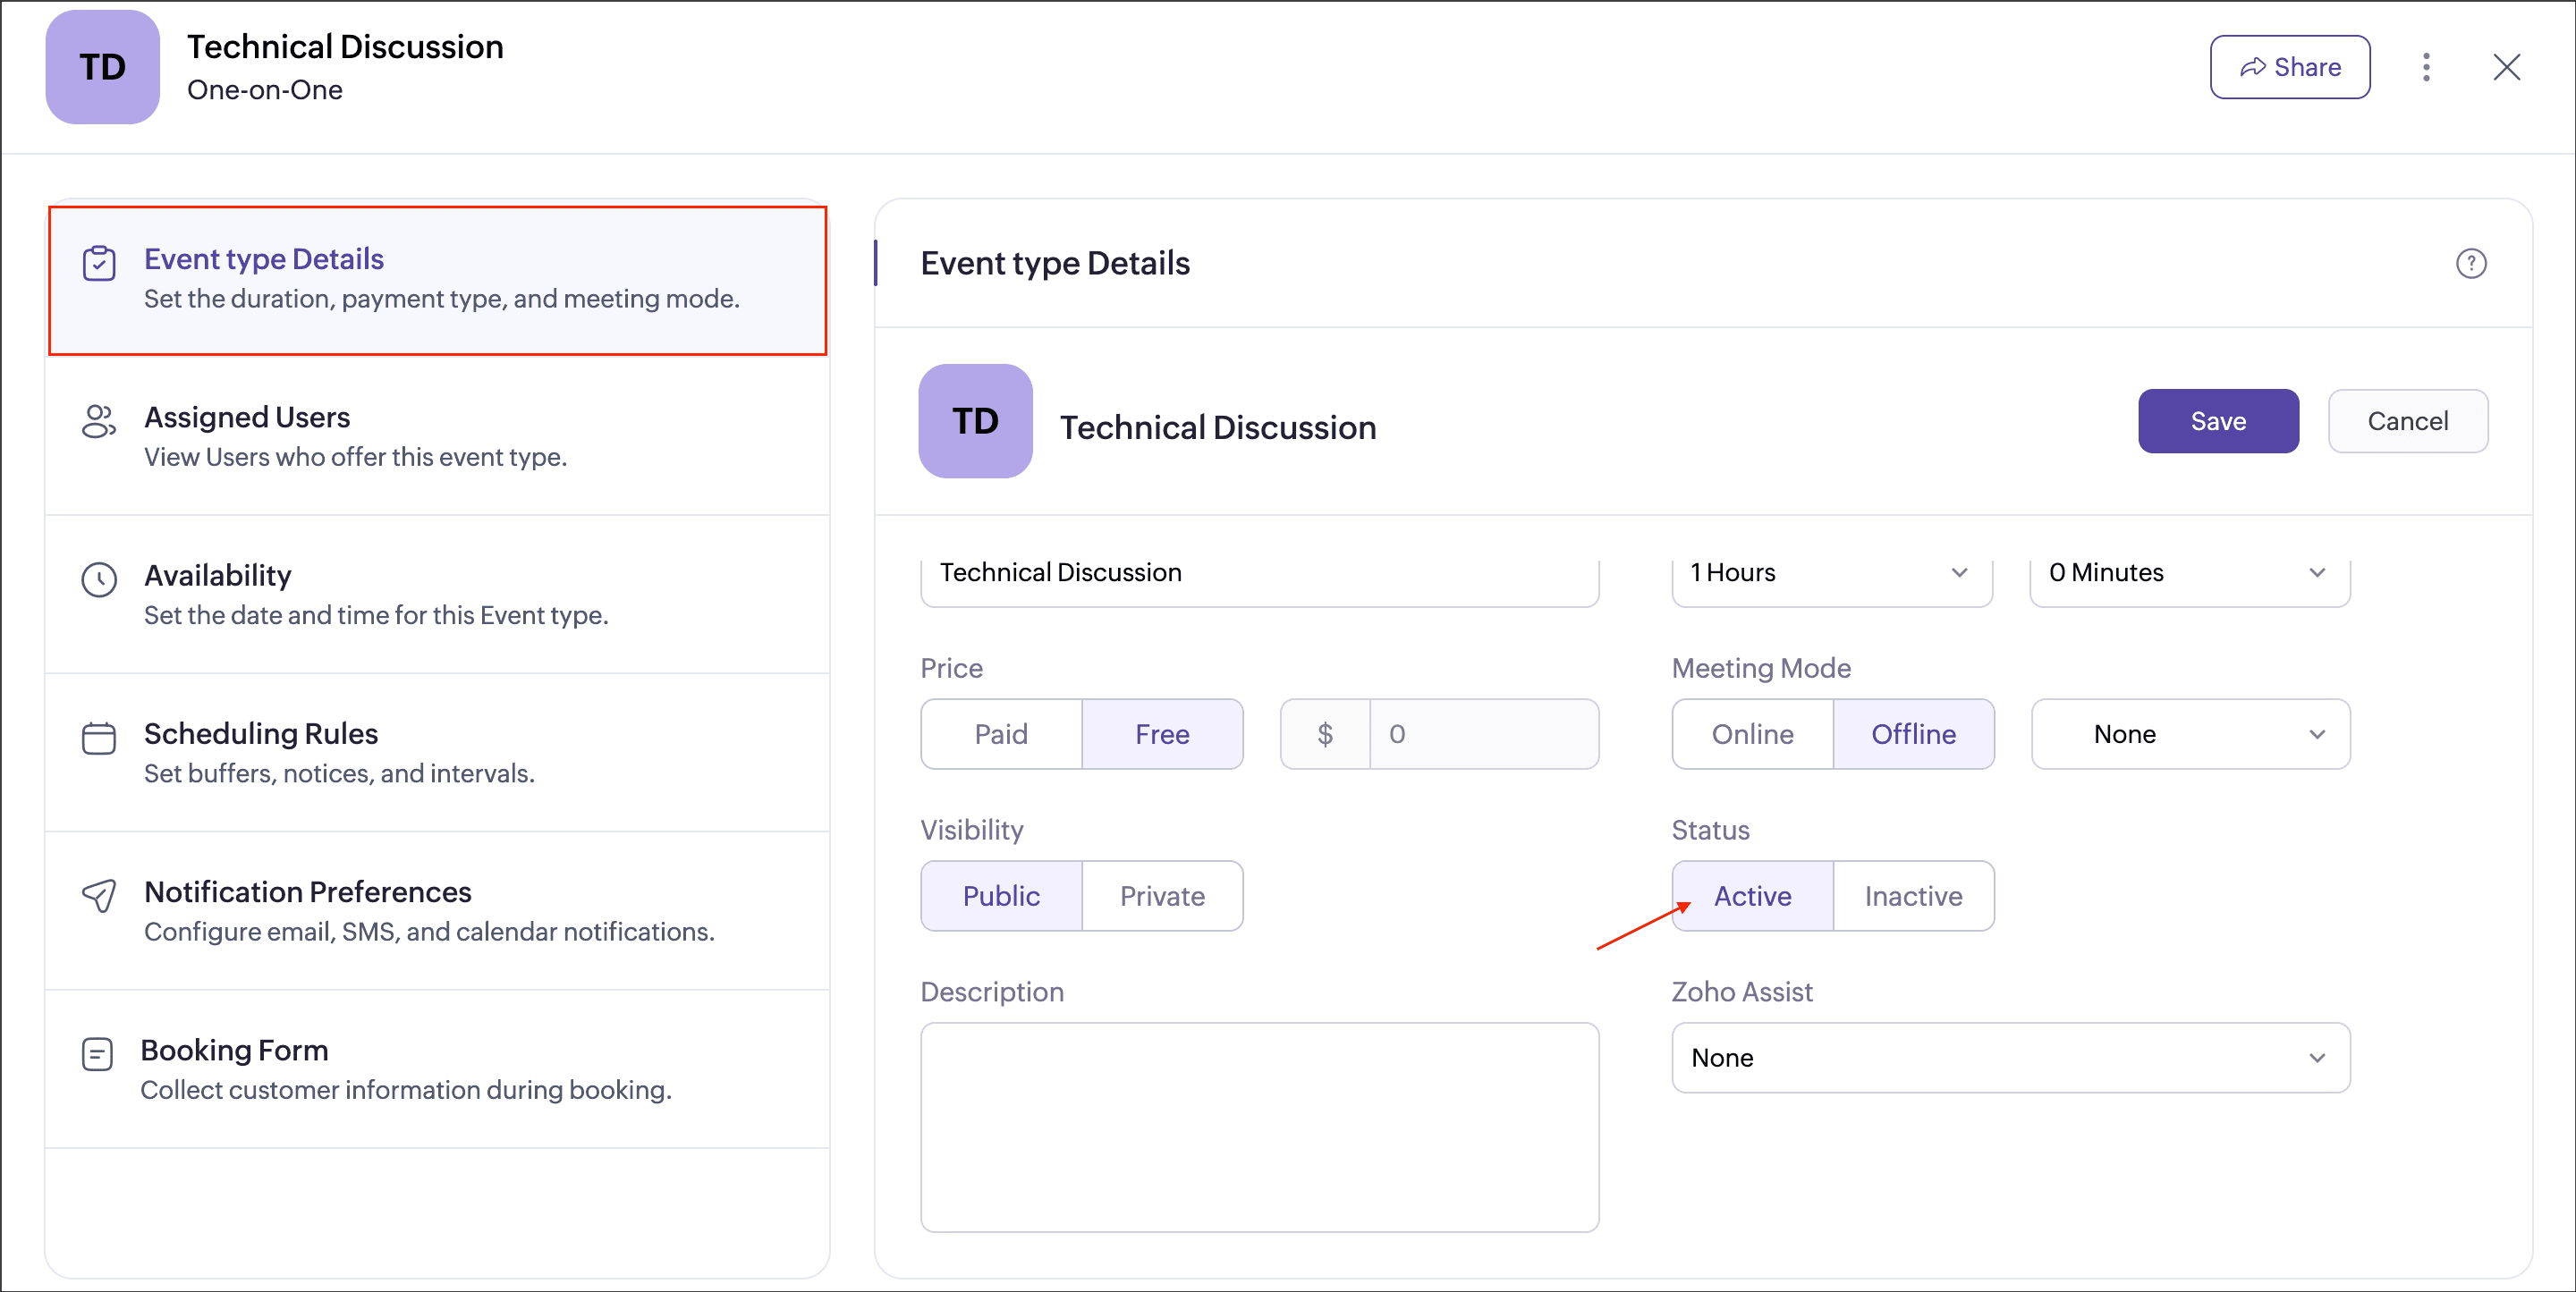
Switch to the respective workspace and open the event type details.
Solution:
- Click Edit on the Event type details.
- Toggle Status to Active.
- Click Save. This makes the event type active.
2.3 User is inactive or removed
If the user assigned to an event type is marked inactive or deleted from the org, the booking page may become inaccessible.
To resolve this:
Go to Admin Center
Solution:
- To reactivate a user:
Click the Options iconon the user card.
Select Mark As Active. This makes the user active.
- If the user was removed:
- Remove their booking page from any embedded website.
- Use the event type booking page instead of the user booking page.
- If the event type has only that user, assign a new user:
- Go to the workspace > event type > Assigned Users > click + Assign Users.
2.4 Resource is marked inactive
If the resource assigned to the event type is inactive, its booking page will not accept appointments.
To resolve this:
Go to Admin Center > Modules > Resources
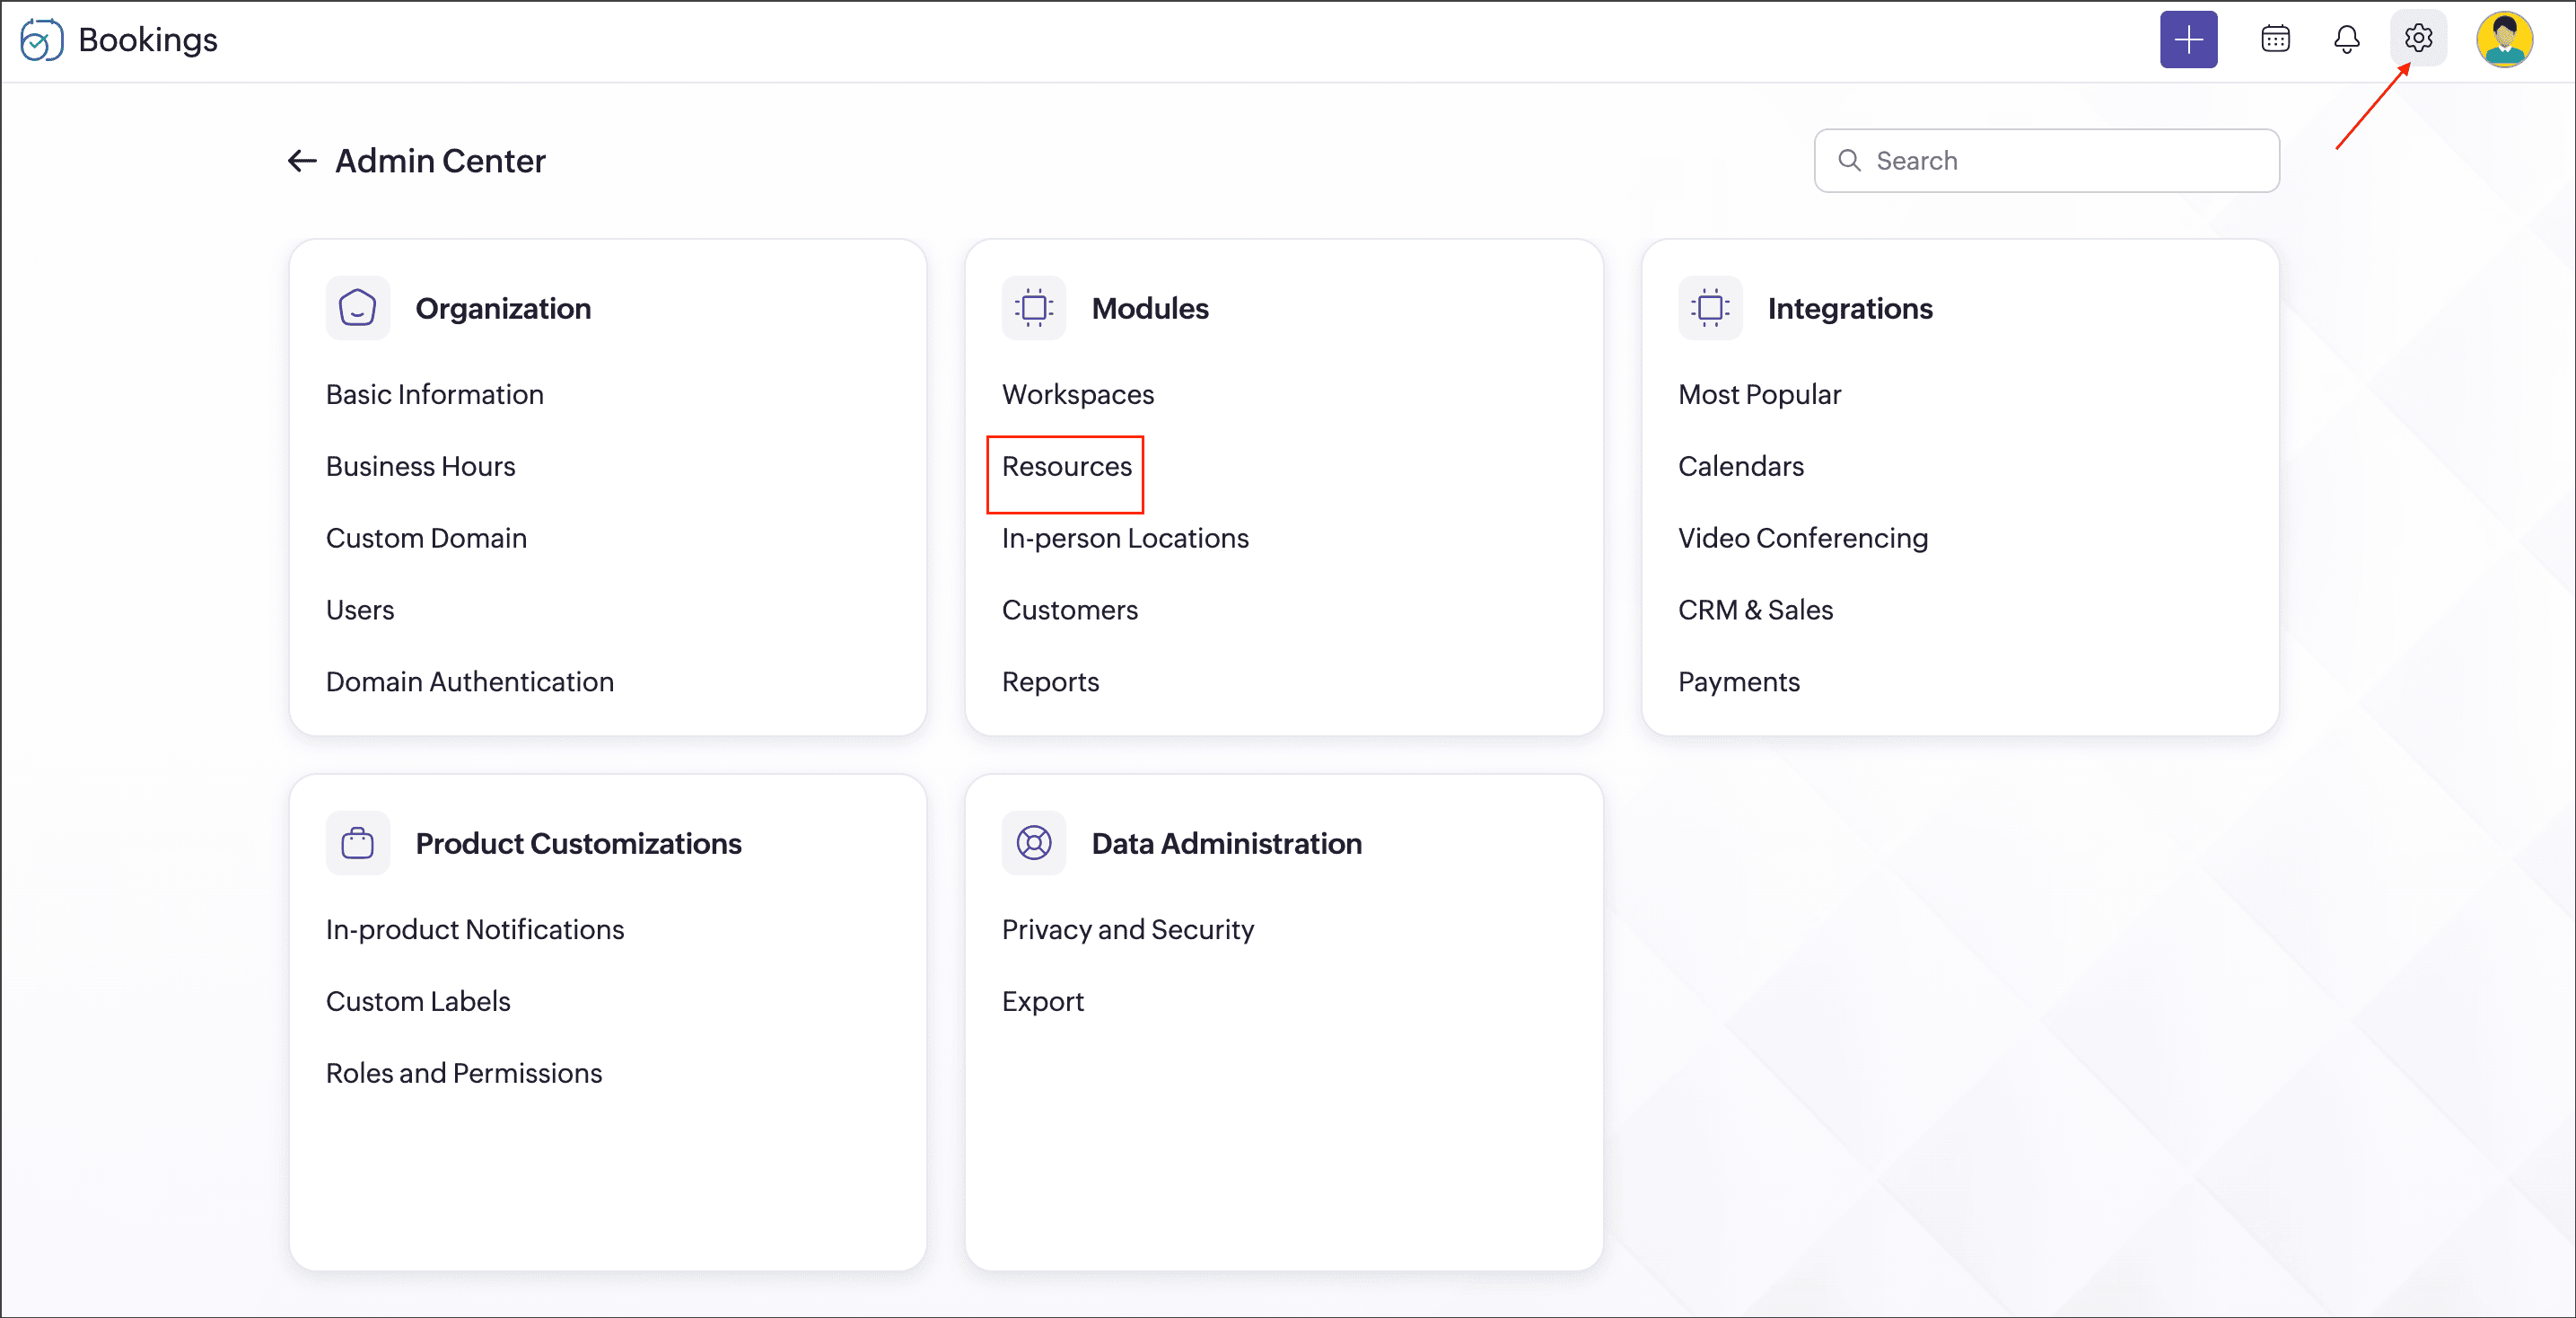
Go to Admin Center
Solution:
- Select the resource and click Edit on the Basic Information tab.
- Toggle Status to Active.This makes the resource active.
3. Additional tips
- Always verify that the workspaces, event types, users, and resources are all active.
- If you are a super admin or admin, follow the above steps.
- If you are a manager, workspace admin, or user, reach out to your admins to get this corrected.