Add users

This page is applicable for Bookings 2.0 version only. To view the equivalent Bookings 1.0 version, please check this page.
1. In a nutshell
In Bookings, users can access the Bookings product to add their availability and manage their appointments. Customers (clients) book an appointment with users through a booking page. A user can be assigned to multiple workspaces, and will only have access to the appointments within those specific workspaces, similar to being assigned to different departments.
2. Feature availability

3. Overview
Employees or staff of your organization can be added as users in your Bookings account. This lets them sign in to Bookings with their own login. They can add their calendars, define their available times, and offer their meetings or services in a booking page that lets clients book with them.
Users can be assigned different roles which have a predefined set of permissions. There are five types of roles in Bookings:
- Super admin - Users who have full access to all the features. (An organization can have only one super admin)
- Admin - Users that have full access to all the features.
- Workspace admin - Users with access to all the features of a particular workspace, except integrations.
- Manager - Users who have edit access to appointments, event types, and users of the assigned workspaces. They will have view access to all other features except integrations.
- Staff - They only have access to the appointments and customers of their assigned workspaces.
The above permissions can be tweaked for Staff role through our Roles and Permissions feature.
4. Use case
Let's consider an organization that uses Zoho Bookings for their appointment scheduling purposes with customers.
- In this organization, the IT Head (the head of operations) signs up and becomes a super admin. They then delegate the responsibility of managing Zoho Bookings to the senior manager and assigns them the role of admin, who can manage all workspaces.
- The admin assigns the role of workspace admin to various department heads, who can manage all appointments and users under their specific workspaces alone.
- Department heads assign the Manager role to each team manager. They can view all appointments and users of their workspace.
- Team members are assigned a Staff role who can only view and manage their own appointments.
Having this hierarchy by using user roles lets you manage appointments efficiently while maintaining privacy and security.
5. Steps to add new users
To add users to Bookings, super admin/admins can send an invite by entering their email addresses. Upon accepting the invitation, users can login and access Bookings.
It involves the below two steps:
5.1 Invite users
- Switch to the required workspace by clicking the workspace name under the Bookings iconin the top-left corner and select Users on the left sidebar of Bookings.
 Note: If you see a different option instead of Users, then a custom label is set in your account. Please check your Custom Label settings and follow the term.
 - Click the + New User button in the top-right corner.
- Enter the email addresses of the users in the Invite Users pop-up to send an invite. You can invite multiple users at a time by entering multiple email addresses.
- Workspaces dropdown allows you to assign multiple workspaces for the users. In other words, users can access the data belonging to all the assigned workspaces.
- Under Role, choose the role that you want to assign the user to.
- Click Invite.
Note: You can enter a maximum of 50 email addresses at once, and all users can be assigned to the same role at a time.
5.2 User verifies the account
Users can accept the invitation sent to their email by clicking the Confirm Your Account link. They will be redirected to Bookings, in which they can enter their basic details like name, contact number, gender, and upload their profile picture.
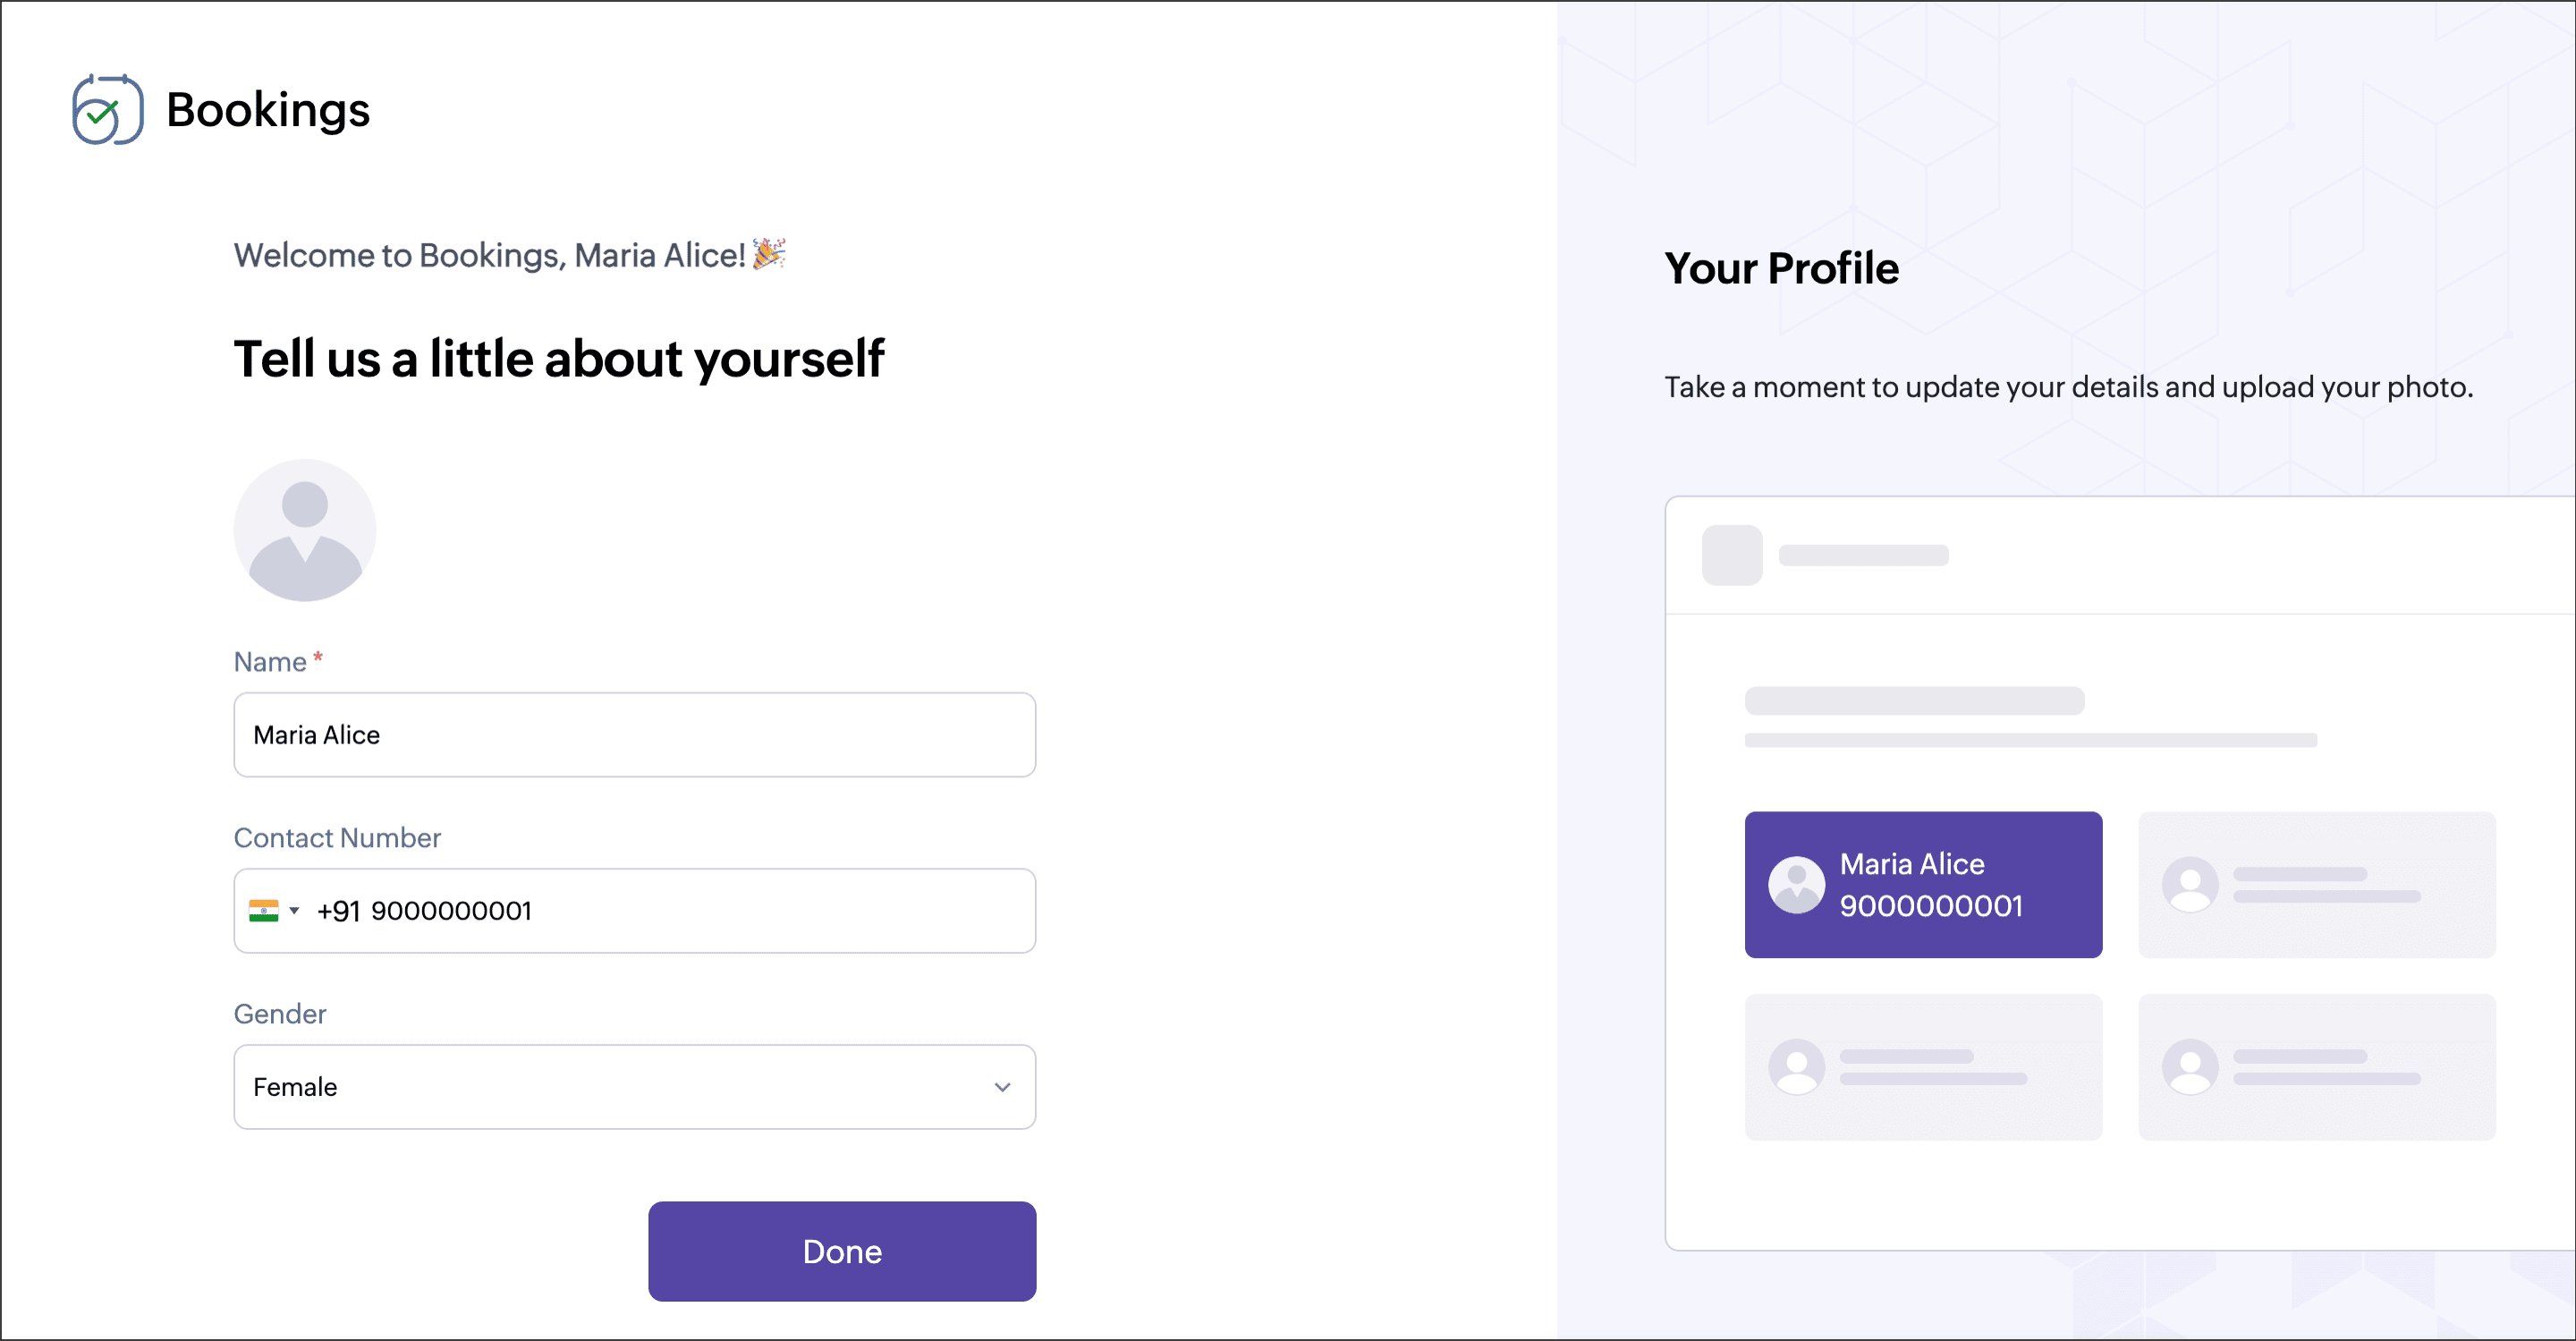
Once users are added, they will be listed under the Users tab in the workspace they have been assigned to. Here, you can edit their profile, assign event types, manage their availability, view their integrations, get booking links, and customize a unique price for the events they are offering. Learn more about options to manage users.
6. Manage users
6.1 Edit user's profile
- Navigate to Users and select the required user.
- Click the Profile tab, then select Edit on the right.
Here, you can update the user's details This allows you to edit and perform the below functions - Change role
- Set the user as active/inactive
- Upload profile picture of user
- Update designation, contact number, name, and date of birth.
- Add a description about the user as this will be shown on the respective user's booking page.
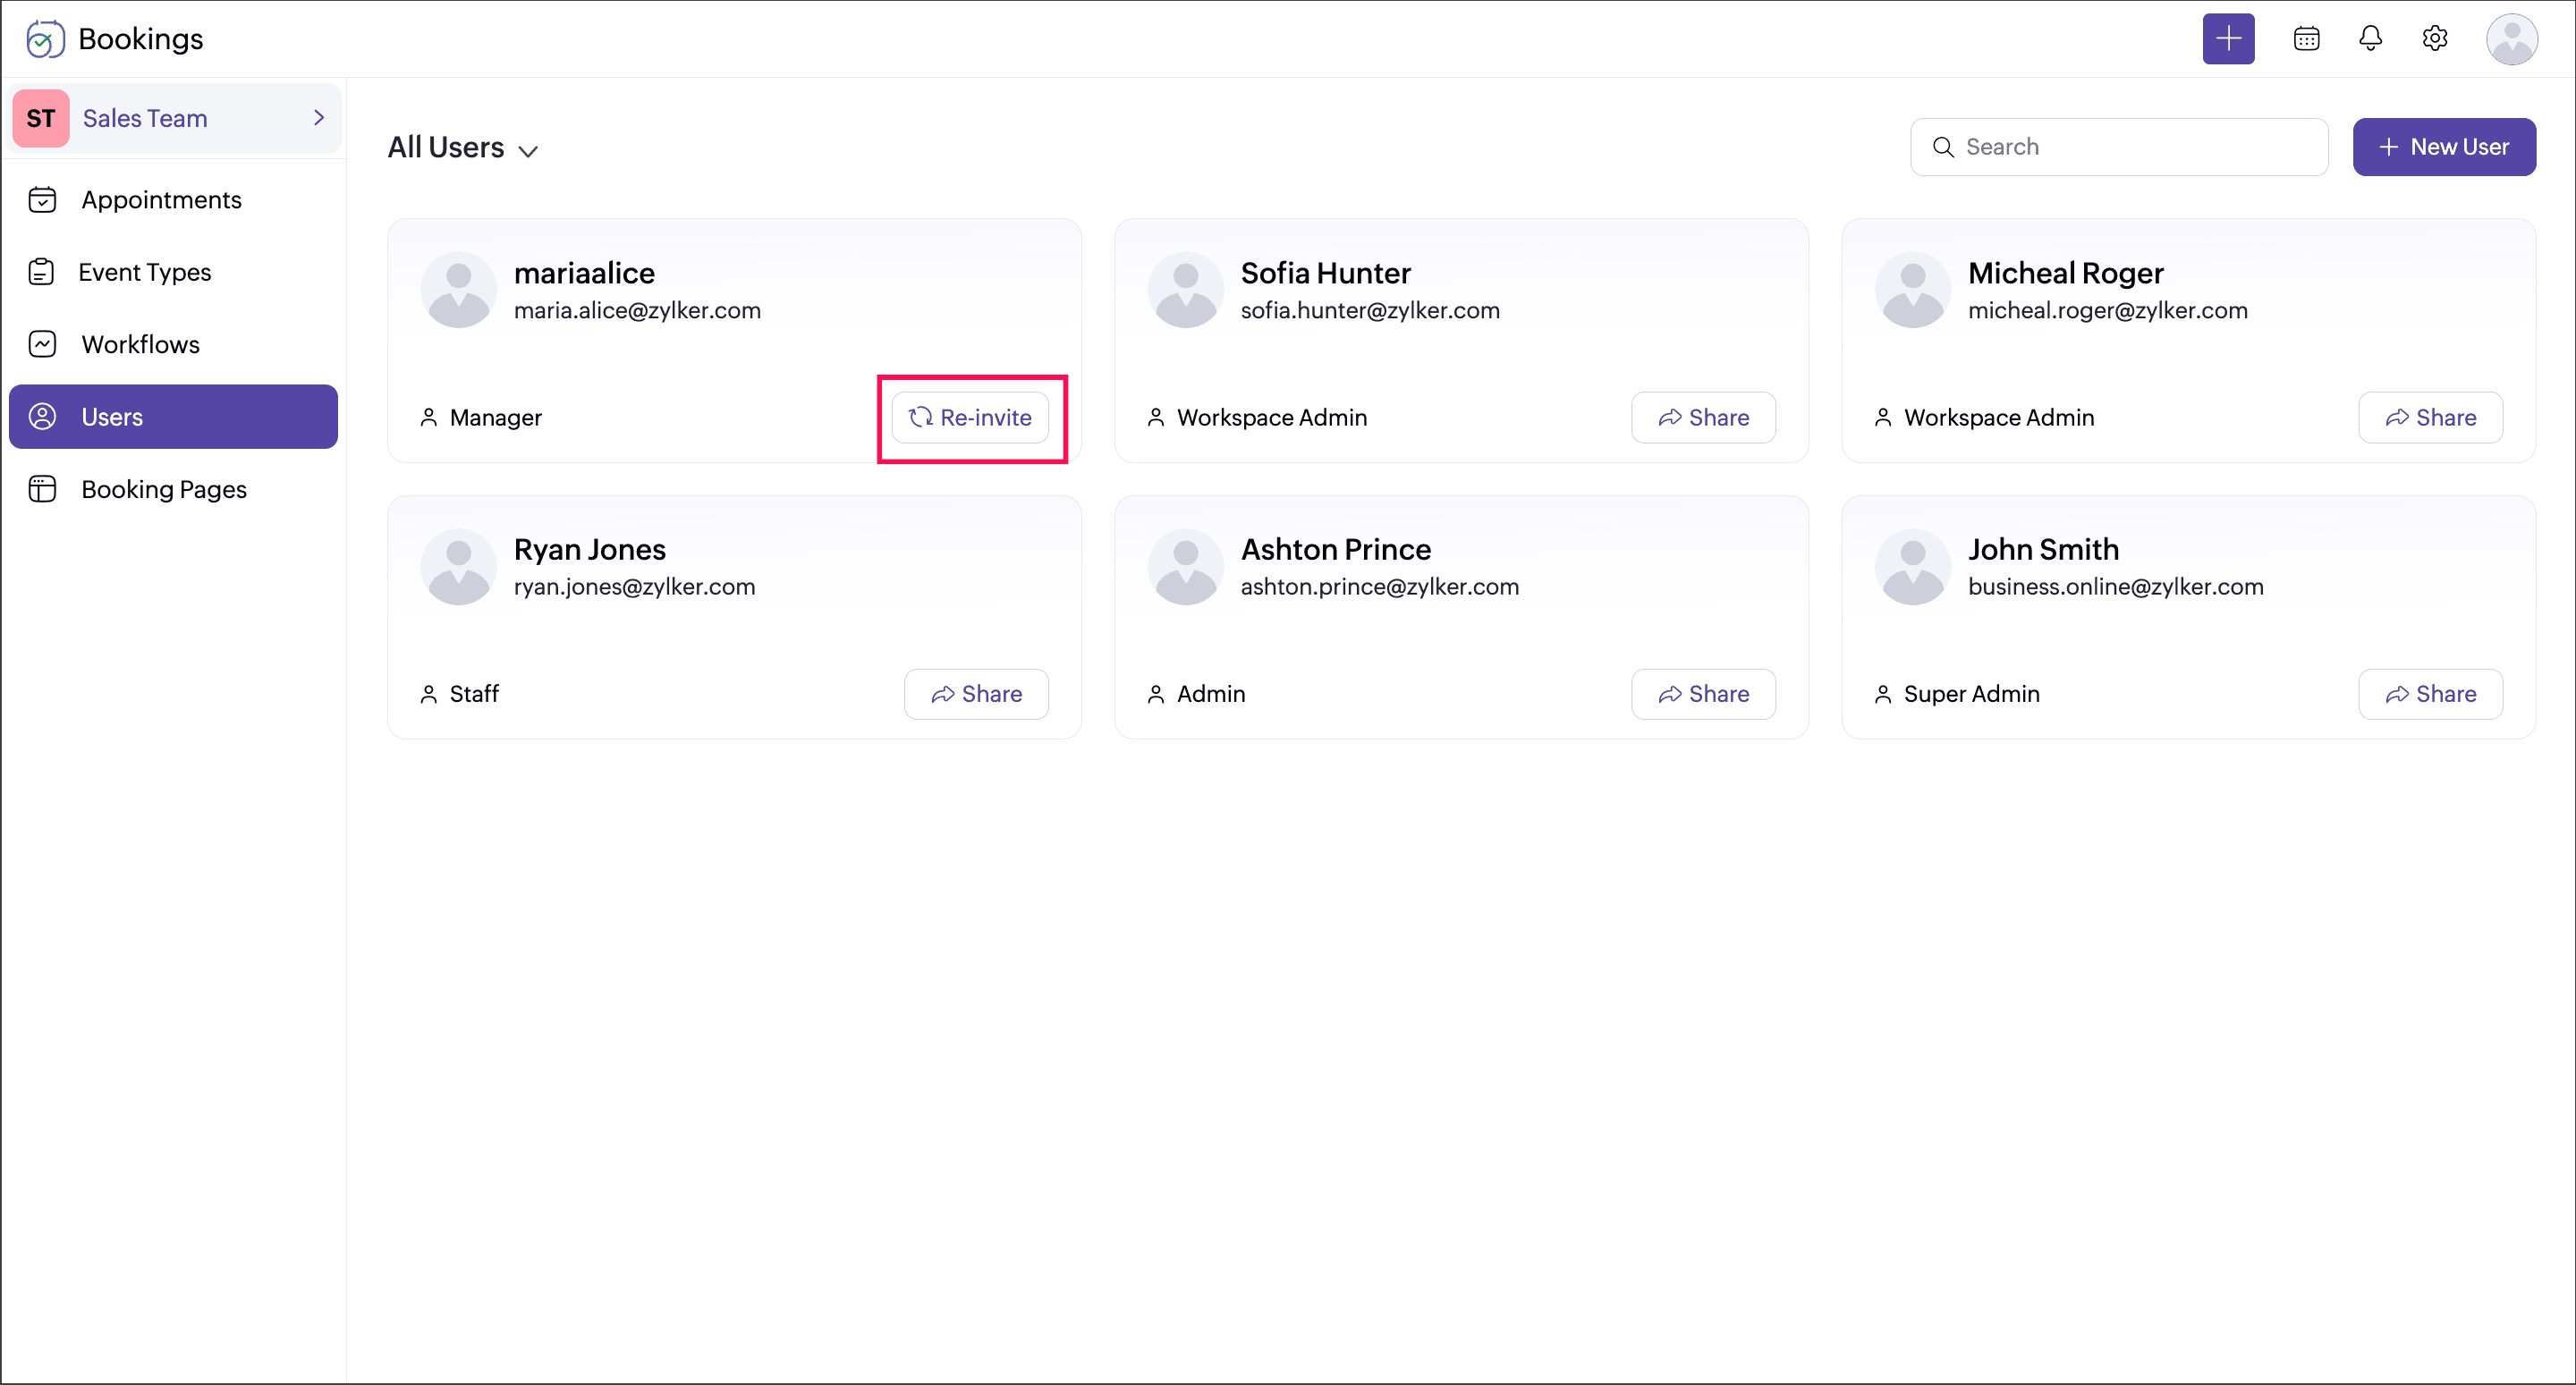
6.2 Re-invite users
If the user didn't join the org, the user will be marked as Pending. You can also resend the invitation by navigating to Users and selecting the Re-invite button in the respective user's card.
7. Points to note
- The super admin will be added as a user by default. The super admin cannot be removed from the account.
- For API, Staff ID can be retrieved from the URL when you click the required user profile, which can be used for API calls. Refer to the highlighted staff ID in the followimg URL: https://bookings.zoho.com/#/app/staffs/summary/4050029000000026099/staff-info
- If the user is unable to join your organization, admins can re-invite them or request that user to access Bookings (https://bookings.zoho.com) directly to join their organization.