View and manage audit trail
What does this page cover
Learn how to access different types of audit data, such as change audits and data transfer audits. You can also apply filters to locate specific audited data and export audit reports for further review or compliance purposes.
Before proceeding to track user and administrative actions through audit trail, refer this page to learn more about the audit trail feature.
Availability
- Audit trail is available for both free and paid paid plans of Creator.
- For free plans, the audit data for both Change Audits and Data Transfer Audits is retained for 3 months. For paid plans, Change Audit data is retained for 3 years, while Data Transfer Audit data is retained for 3 months.
- Only the super admin and admins can access and manage the audit trail for all the applications in a Creator account.
1. Viewing Audit Trail data
The Audit Trail feature allows you to comprehensively track and monitor user and system activities within your live application, ensuring data security, accountability, and compliance. You can choose to view the different types of audits captured across dedicated tabs such as:
- Change audits
- Data transfer audits
You can also enhance your audit trail data by enabling options like IP address capture, which records the source of each action for improved traceability and security monitoring. With flexible configuration settings, you can tailor what gets recorded and how it’s tracked, giving you complete visibility into overall application activity.
1.1 See how to view Audit Trail data
1.2 Steps to view audit data
- Click Operations under the MANAGE module on the left pane of your Creator homepage, then click Audit Trail within the Applications card.
- Click the Select Application button in the center. A popup will appear.
- Select the Application and choose the Form for which the audit trail needs to be viewed, then click View.
- The audit history of the selected form will be displayed under two tabs: Change Audits and Data Transfer Audits. By default, users will be taken to the Change Audits tab.
- Change Audits: Captures actions (both user and system) in records like create, edit, delete, and restore while also logging before-and-after edit values
- Data Transfer Audits: Captures export, print, and import report activities by users, offering a comprehensive log of these actions for oversight.
- Learn more about the different audit tabs.
- Click an entry in the list to view the detailed record log.
- The image below shows the detailed log for an created record in the Change Audits tab.
- When you click the detailed log for edited records, you can view the before-and-after values.
- The image below shows the detailed log for a printed report in the Data Transfer Audits tab.
- The audit history can be filtered using the Filters section on the right side of the page. All the applied filters and the filtered audit data shown will be retained in the respective tab when switching between audit tabs.
- You can also type a specific user's email address or search and filter using the record ID.
- To switch the view and see the record edit history of a different form from the same app or from a different app, click the Switch Application button at the top right corner. Next, select the Application and Form for which the audit trail needs to be viewed and click View.

Note:
- The specific date and date range picker allows you to select an option from the past 3 months for every change that is audited in the Change Audits tab and from the past 3 months for every audited change in the Data Transfer audits.
- To view the audit data older than 3 months and upto 3 years in the Change Audits tab, you must generate the respective Audit Report and then export it from the Audit Reports tab.
2. Restore action in detailed logs
When a record is deleted, the action is logged under the Change Audits tab. In their detailed log, deleted records can be restored directly and each restore action is further recorded with details of who performed it and when.
Note: You can restore a record within three days of deleting it.
To restore a deleted record:
- Click the required deleted record's entry in the Change Audits tab.
- In the Detailed Log window that appears, click the Restore button at the top-right to restore the deleted record.
- Click Restore in the popup that appears. You can view your report to view the restored record. For each restore action, the following key details are captured.
- Restored by - The user who performed the restore action
- Date & time - When the record was restored
- Record ID - The identifier of the restored record
- Click a restored entry to view its detailed log, that provides full visibility into the record details and the device type on which the record changes were done.
Each Detailed Log for a restored record entry has the following two sections apart from displaying the user details and the component type.
- Overview: App and component names along with the component type, and source of the action (live mode).
- Record Details: Field name, type, value, and file attachment names for restored records.
If the respective form's structure (such as fields or form properties) has changed since deletion of that record, you cannot restore that record.
3. Create and manage Audit Reports
To export audit data, you need to generate audit reports for your requested timeline in both the audit tabs. To generate an audit report:
1. Apply the required date range filter in the required audit tab.
2. Click the Generate Report button at the bottom-right of your page. The Apply Filter button will be disabled in this case.
Note: You might receive an error if the data in the chosen period exceeds 1 GB.
3. Click Generate in the popup that appears.
Your report generation will begin shortly. You can track its progress in the Audit Reports tab, which displays details such as application name, component type, generated by, generated date, export status, and expiry date.
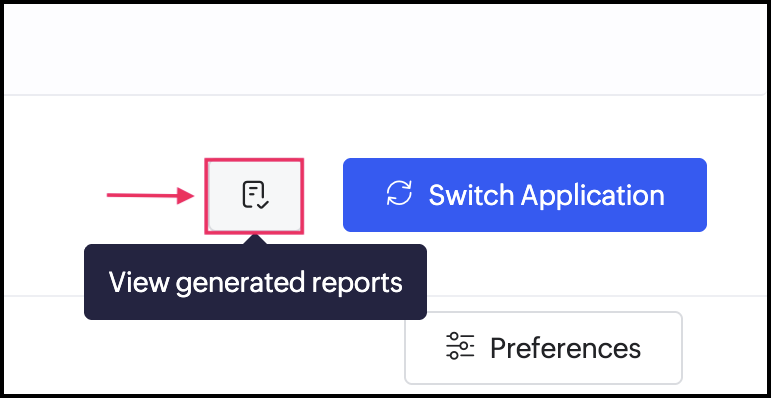
4. Click the View generated reports button at the top-right corner of the Audit Trail page.
5. Choose from the following options.
- Export - The audit report data will be downloaded as a .zip file consisting of CSV files.
- Delete - The audit report entry will be deleted. The data will still be retained in the respective audit tab.
Note: The data will be exported from zohocreator.com on timestamp as per Audit Trail terms.
4. Setting audit preferences
The Audit Preferences section allows you to configure the level of audit tracking for individual components within your application. Basic Audit Trail will be enabled by default, and you can enable Advanced Audit Trail for your application components based on the level of detail required.
Note: Audit preferences can be configured only for data captured in Change Audits tab.
To set your preferences:
- Click Operations under the MANAGE module on the left pane of your Creator homepage, then click Audit Trail within the Applications card.
- On the Audit Trail page, click the Preferences button at the right.
A slider will appear from the right.
- The Basic Audit Trail will be enabled for all components by default. Tick the checkboxes beside the required components under Advanced Audit Trail.
- Basic Audit Trail - Captures user activities performed directly in the live mode, such as record creation, updates, deletions, as well as import, export, and print actions.
- Advanced Audit Trail - Captures additional system-level record activities, including actions triggered through Deluge script executions, API calls, form emails, and data access actions in workflows, providing deeper visibility into background operations.
- Click the Admin Activity button to view all administrative actions captured within Audit Trail tab alone.
4.1 What does Admin Activity tab capture
The Admin Activity section provides a record of administrative changes made to audit settings within your application. It helps track when audit-related preferences are enabled or disabled, along with details of who performed the action and when it occurred, as well as who exported the generated audit reports.
Each log entry includes:
- Timestamp: When the configuration change was made
- Action: The action performed (for example, enabling or disabling Advanced Audit Trail for a specific component)
- Performed by: The user who made the change.
This help maintain accountability and provide visibility into administrative actions, making it easier to review changes, troubleshoot issues, and ensure compliance with internal policies.
5. Points to note
- The Audit Trail feature is application-specific and lets you view the history of the action types performed in your application categorized by two tabs - Basic and Advanced Audit Trail.
- By default, the Basic Audit Trail actions will be captured. API-related audit actions, which were previously included in the Basic Audit Trail, are now available under the Advanced Audit Trail. You can choose to capture Advance Audit Trail actions by ticking the checkboxes beside the required applications.
- The fields that are marked as containing ePHI (Electronic protected health information) and PII (personally identifiable information) data are captured in the detailed logs of audit trail.
- Export and print actions from pivot reports (pivot charts and pivot tables) will not be captured in audit trail.
- Advanced Audit Trail stops capturing data when the storage limit is reached, Basic Audit Trail continues to capture data even after the storage limit is reached.
- While exporting audit data after applying filters:
- Each export file can include data from a maximum duration of 6 months or up to 1 GB in size, whichever limit is reached first.
- The generated audit reports will remain available for download for 7 days from the date of generation.
- Admins can generate export of multiple audit reports, but only one export can be processed at a time.
- The maximum size allowed per audit entry is 512 KB. Once this limit is exceeded, only the field names are captured in the detailed log, while the corresponding field data is omitted.
- Change audits:
- Only record IDs will be captured in the detailed log for created or duplicated records.
- When records are deleted through user actions or API, the audit trail captures all field values, record comments, and associated record details. However, for records deleted via delete records Deluge task, only the Record ID is audited.
- Restore record:
- Only field values are restored; record comments are not restored.
- Only records deleted within the last three days are eligible for restoration.
- Record restoration may fail if the associated form or its fields have undergone metadata changes after deletion. This includes adding, removing, renaming, or modifying fields, changing field types or relationships, or making other structural changes to the form. In such cases, the deleted record may no longer be compatible with the current form structure, preventing successful restoration.
- Restoration of a main form record will fail if its linked subform records have been deleted.
- Restore functionality is not supported for audit entries created before the feature release date i.e., Sep 29, 2026.
- In the case of bulk actions, record IDs are displayed in batches in the detailed logs of audit entries. You can click Show more to view additional IDs.
- Bulk actions:
- For bulk edit, duplicate, and delete actions performed by users or via APIs, a separate audit entry is created for each record.
- Records added through import are captured under a single audit entry containing all imported record IDs.
- For records updated through import, a separate audit entry is generated for each modified record.
- The following mobile apps will log export and print actions once the source code is updated from our side in the server.
- For code-signed apps (Android and iOS), the export and print actions will be logged only after a new build is taken from our server.
- For SDK apps, the export and print actions will be logged only after the framework is updated to the latest version.
- In billing, the audit trail storage is calculated based only on Change Audits data.
6. Related topics
See previous
What's next
See previous
Before proceeding, learn the fundamentals of Audit Trail, including its types and how it captures user and system activities.
What's next
Learn how to configure sender email and domain authentication to ensure secure and reliable email communication from your application.