Clicking on a contact card will open a page that has detailed insights on the contact.
We can divide this page into two halves.
The top half of this page comprises the following details:
At the extreme top-left, you can see the type of contact based on their Lead Score and Lead Classification.
There are three types – Cold, Warm, and Hot – depending on the score range in which the lead score of a contact falls under. In the above image, the contact is classified as a Hot contact. Cold is colored Blue, Warm is colored Yellow, and Hot is colored Red.
This section shows the important details of a contact along with a profile card.
Beside the contact name is the subscription type of the contact. Subscription type can be Marketing, Non-marketing, or Unsubscribed.
Below the contact name is the email address of the contact.
Added via & on: Added via displays how the contact was added. You can see Manual, Import, and Integration as the values. Added on displays the date and time on which the contact was added.

Next, we have the Phone, Company, and Country icons, respectively. If data is specified for a contact in these fields under the Contact Properties tab, it will be displayed beside these icons.
Below these icons, we have the Lead Stage progress timeline of the contact.

This shows the progress that a contact has made across different lead stages along with the date on which the lead stage changed.
Finally, we have the Associated Tags section, which shows the tags (if any) associated to a contact.
It is possible to delete a single contact from its detail page. To delete a particular contact from the contact details page:
Click on Contacts from the Navigation Toolbar to the left. Select View Contacts.
Click on a particular contact to view its details.
Click on the More Actions button at the top-right of the contact's profile picture.
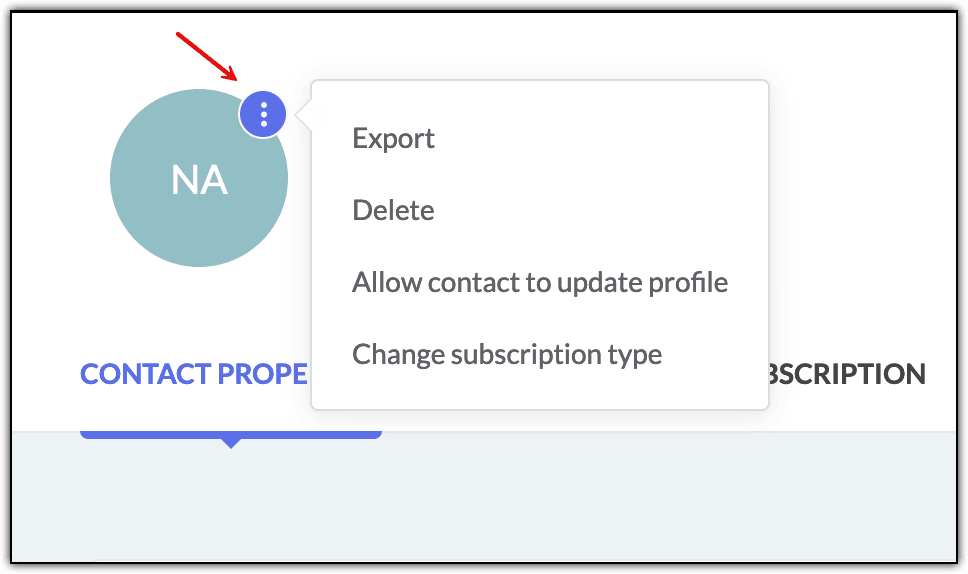
Choose Delete.
In the pop-up that appears, you can click on Delete Contact.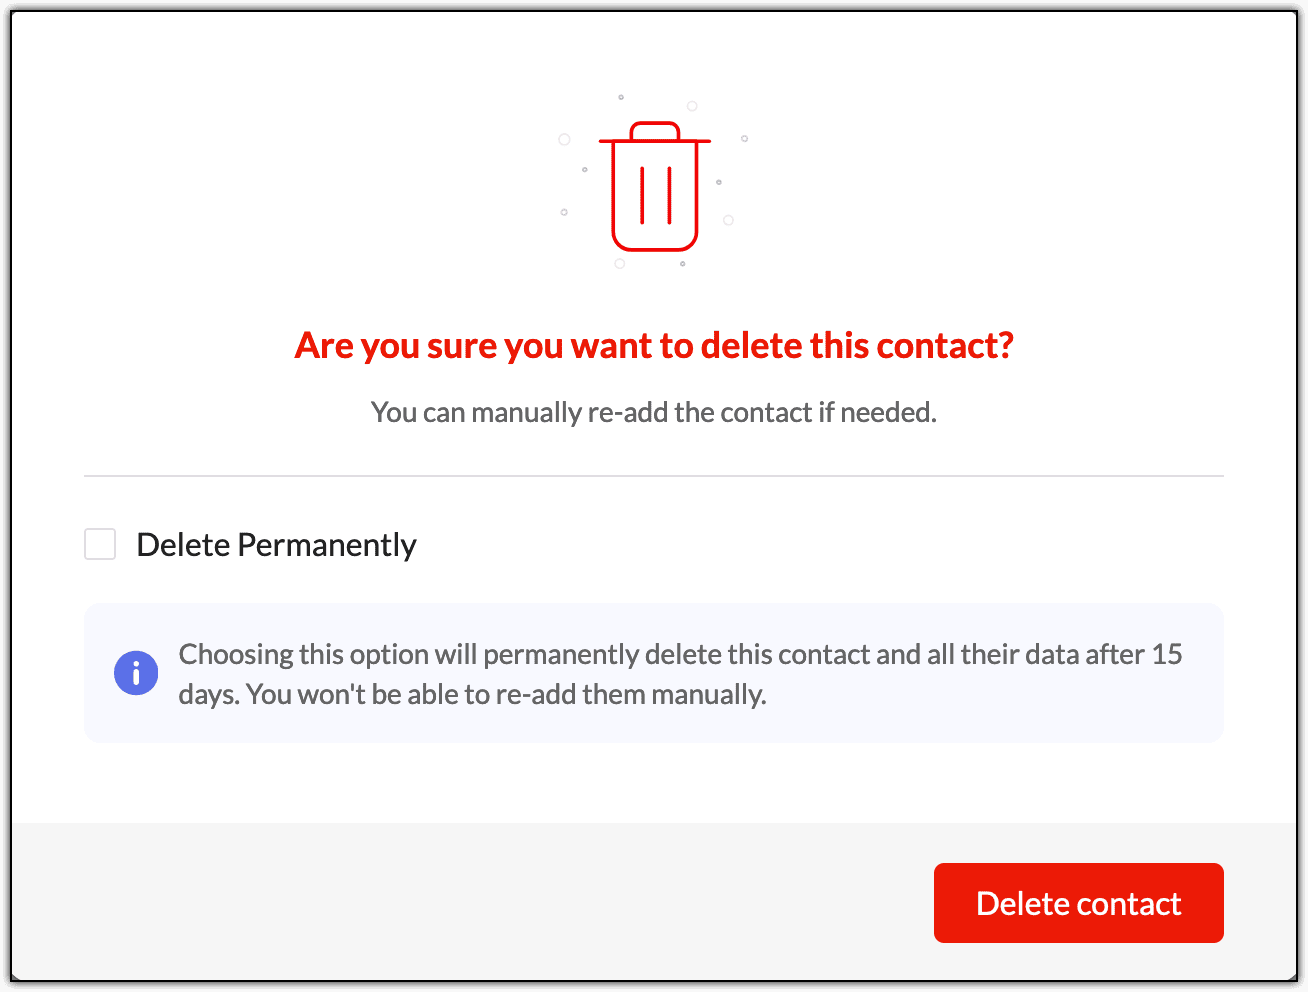
In this pop-up, you'll see that you can still manually re-add the contacts. Here's how it works:
If you are deleting a contact without enabling the Delete Permanently checkbox, it will get deleted from your Zoho Marketing Automation account. But it won't be permanently deleted. Data related to this deleted contact will still be available from our end. So, if you manually re-add this contact either individually or via import, as soon as it gets added to Zoho Marketing Automation, its data will be automatically populated.
For example, say you've deleted a contact for whom the First Name and Date of Birth were filled. If you manually re-add this contact without filling data in these two fields, those fields will get auto populated with data that was present at the time of deletion.
If you wish to delete a contact permanently and its associated data from your Zoho Marketing Automation organization, enable the Delete Permanently checkbox and click on the Delete Permanently button. 
Once a contact is permanently deleted, you can't manually re-add it from your end. If you still wish to re-add that particular contact, they have to add their details via a signup form, a pop-up, etc.

Note: Under the More Actions button, in addition to deleting an individual contact, you can also export this contact and change its subscription type.
In the bottom half of this page, you'll see seven tabs which can be used to add, edit, and view details for the contact. They are:
Contact Properties
Membership
Subscription
Engagement
Timeline
Account Properties
Deals
Coming to the bottom half of the contact profile page, we have the Contact Properties tab.
When you click on a contact, this is the first tab that you'll see. This tab shows all the field information of the contact, including custom fields.

You may have noticed that when you're creating a contact manually using the Add Contact button, only limited information can be provided for the contact. For example, if you want to specify the Date of Birth of the contact, you can't do so when adding a contact manually. Instead, you need to do that after saving the contact and inside the Contact Properties tab.
Similarly, you can also edit existing data in the fields or remove the data as well.
Membership
This tab displays all the membership details of the contact, such as the associated lists, segments, journeys, planners, and any notes that have been added.
By clicking on the + icon beside the Associated Lists and Notes sections, you can associate lists and create new notes for the contact.
When you're associating a list, you can also create a new list and associate it to the contact. If you'd like to edit or delete the notes, at the bottom right of each note, you can use the edit and delete buttons.
Clicking on a list, segment, journey, or planner will take you to that particular membership.
Subscription
This tab comprises of three sections.
Manage Channel Subscription: You can toggle on/off the Email and/or SMS communication.
Topics: Here, you can view and edit the topic subscription for the contact.
Subscription History: You can see the entire history of change in subscription type, topics, or communications for this contact here along with the date on which each change occurred.
Engagement
Engagement activities of the contact are captured in this tab.
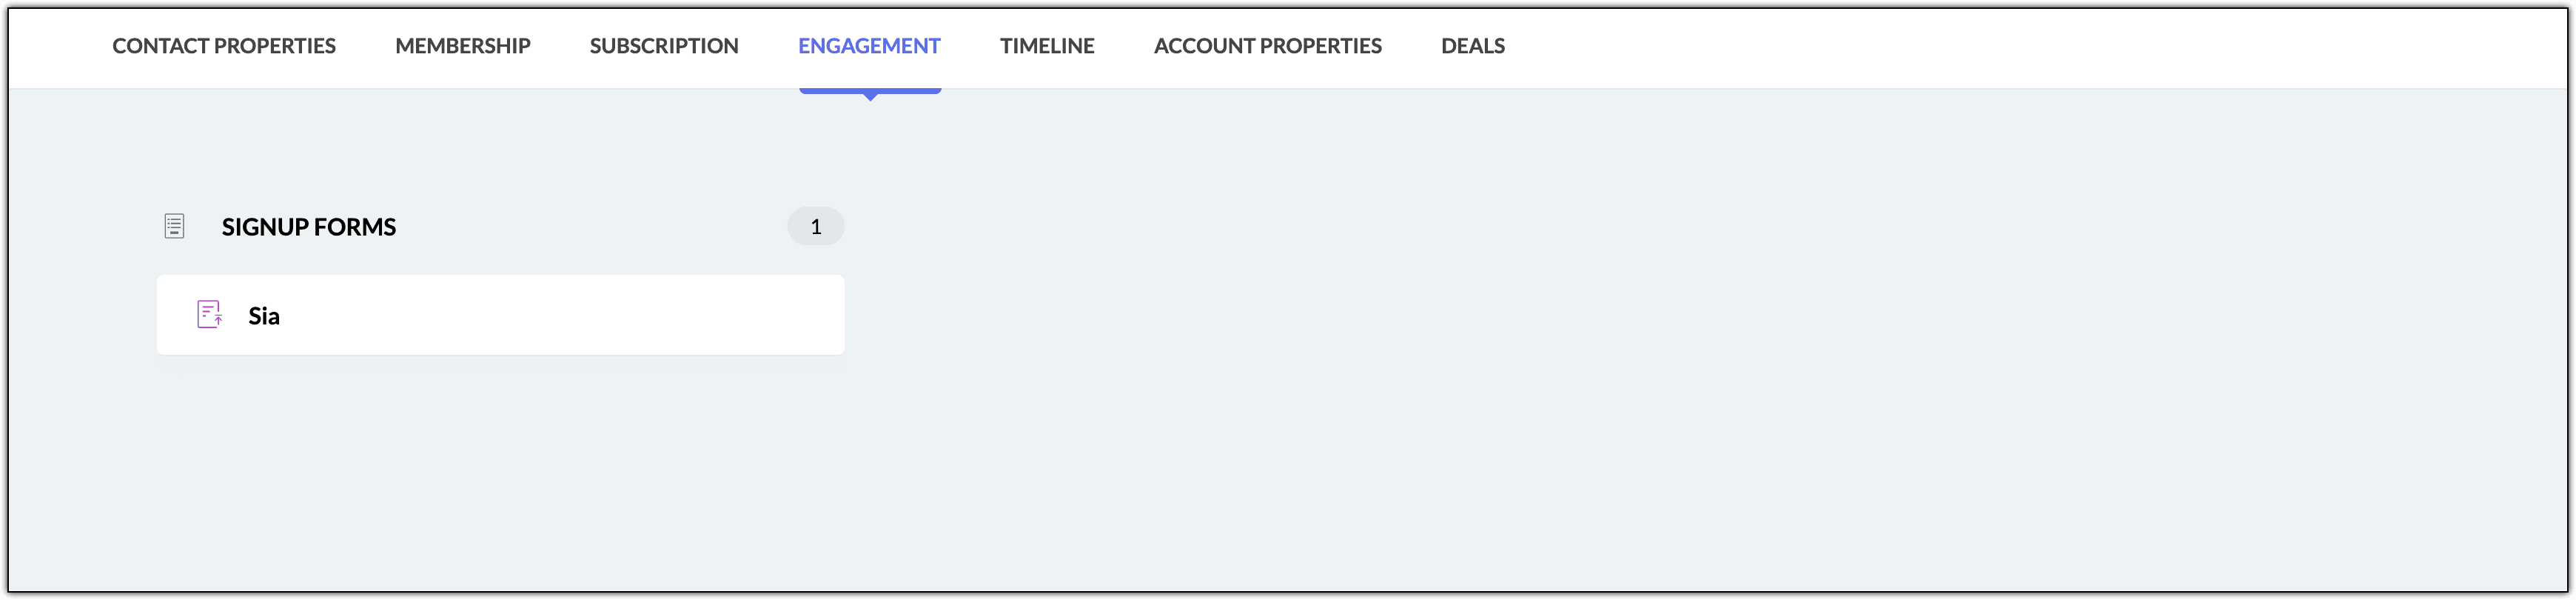
If they have interacted with any campaigns or forms sent to them, those campaigns and forms will be listed here.
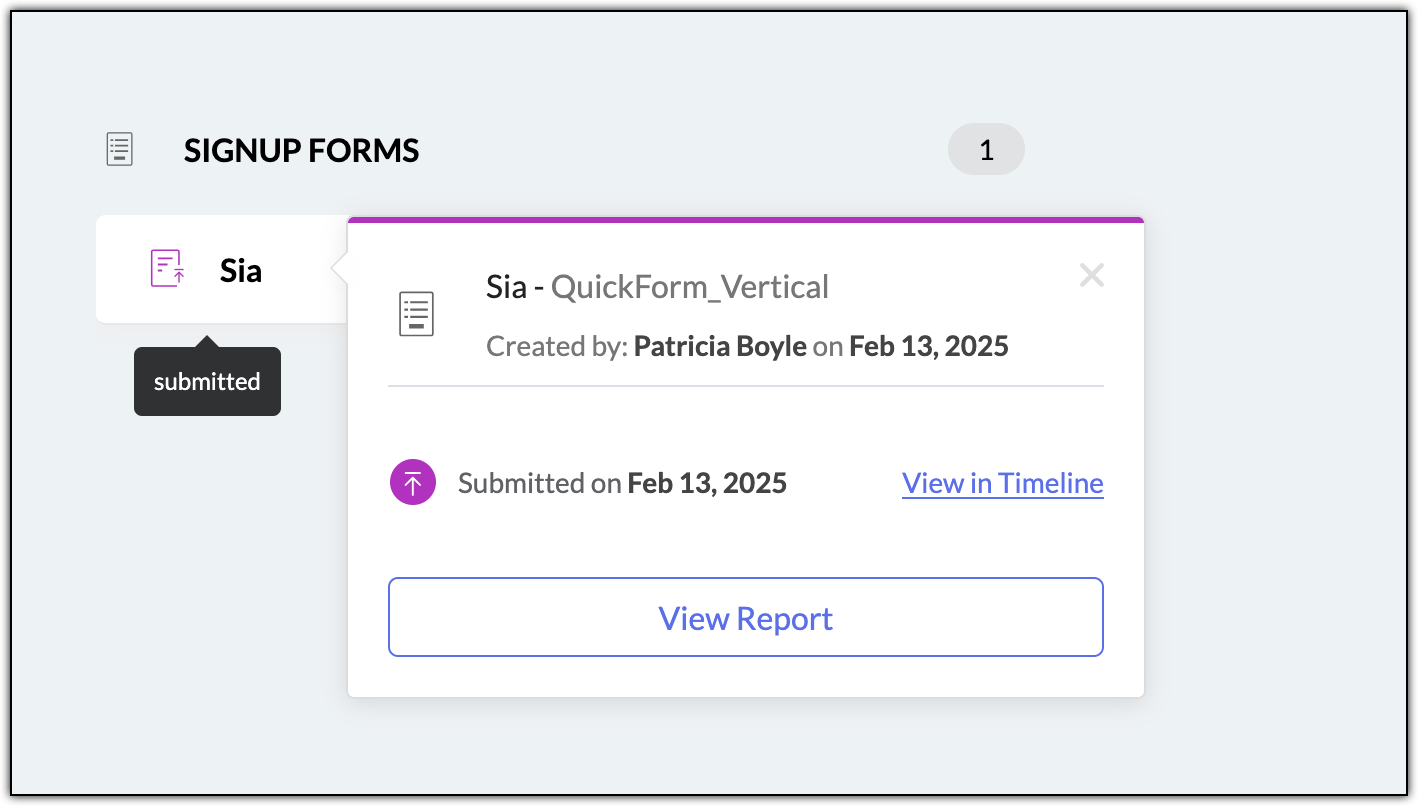
If you click on a form or a campaign, you'll be able to view additional details. You can also view this activity in the Timeline tab by clicking View in Timeline option. Clicking the View Report option will take you to the Reports tab of that particular form or campaign.
Timeline
All the details about the contact ever since they subscribed to your organization will be recorded along with the timeline and displayed here.
This also shows the campaigns sent to them, fields updated, when they are added to journeys or removed from them, and the changes in their lead stage.
In the far right of the Timeline tab, you can change the date range to view the activities of the contact for a particular period. You can use the Custom range option to view the activity for a particular date range other than the pre-defined options available. You can use the Entire duration option to view the activity of the contact right from when they were added to your organization till the present date.
The Activity Filter option present beside the date filter allows you to filter for a particular type of activity. For example, if you would like to view only the updates made to the fields of the contact over the past three months, you can click on Activity Filter and select Field Update; choose Last 3 months option in the date filter.
Account Properties
This tab comes into play when you've integrated Zoho CRM with Zoho Marketing Automation. The Contacts or Accounts data from Zoho CRM can be viewed in this tab.
Deals
Similar to the Account Properties tab, the details of the Deals that you've created in Zoho CRM for a contact can be viewed in the Deals tab.


