Event Management System using ZDK CLI

Hello Everyone,
Welcome back to yet another post in the Kaizen Series!
As you already may know, for the Kaizen #200 milestone, we asked for your feedback and many of you suggested topics for us to discuss. We have been writing on these topics over the past few weeks. One of the feedbacks asked us to cover "more on ZDK CLI". In this post, we will discuss building an Event Management System in Zoho CRM Using ZDK CLI.
Consider the case of Zenith, a Zoho CRM partner who is also partner for Zoho's competing products. Zenith is hosting a conference in which their representatives are inviting speakers from Zoho and also other competing products. The attendees of the conference will be either external attendees or leads or contacts of Zenith. For this purpose existing meetings module of Zoho CRM (previously called Events) can not be used as it is not a good fit for this case. Custom modules and fields are required for this. In this post, we’ll discuss how to create a Event Management System that is complimentary to Zoho CRM using ZDK CLI.
Why Use ZDK CLI?
ZDK CLI allows developers to:
- Create and edit CRM metadata (modules, fields, roles, profiles, and widgets)
- Define relationships between modules (lookups, multi-select lookups)
- Push and sync metadata changes to sandbox.
- Resolve conflicts when multiple users work on the same metadata.
This makes it ideal for building reusable CRM systems such as event management.
Initial Setup
As the initial setup, initialize the ZDK CLI project directory using zdk init command and create a new ZDK Project folder "Zenith".
zdk init |

Then, login to the sandbox environment for Zenith using zdk auth:login command.
| zdk auth:login |

When you execute zdk auth:login, you can either select any org that is already signed in or select NEW LOGIN to visit the login page and select the sandbox org you will be working on.

After logging in to Zoho select the sandbox environment and give required permissions.

For the current beta release, ZDK CLI is exclusively available for Sandbox environment and is not operational in Production environments.

You will be redirected to the terminal after successful login and you can start working on ZDK CLI.

Change the api_version to 8 in zdk-project.json file.
Step 1: Define the Modules
For an event management use case, we will need the following custom modules:
- Conference – Stores details of each event.
- Attendees – Tracks participants, whether leads, contacts, or external.
- ConferenceAttendees (Linking Module, not created) – Connects conferences and attendees with registration status.
- Venues – Captures details of event locations.
- Speakers – Stores details of invited speakers.
This has been visualized in the data model below.

To create a module, use the command
| zdk meta:create modules |

This creates the json file for module metadata : Conference.modules-meta.json in the path Zenith/crm/meta/modules/Conference
Conference.modules-meta.json content
{ "singular_label": "Conference", "plural_label": "Conferences", "api_name": "Conference", "profiles": [ { "api_name": "Administrator" } ], "display_field": { "api_name": "Conferences" }, "show_as_tab": true } |
Similarly create modules Attendees , Venues, and Speakers modules
Step 2: Customize Fields
To create a field, use the command
| zdk meta:create fields |
Conference module:
Conference modules's fields are:
- Attendees (multiselectlookup to Attendee module)
- Speakers (multiselectlookup to Speakers module)
- Venue (lookup to Venue module)
- Date (datetime)
- Duration(double)
- Description (textarea)
- Status (picklist: Planned, Ongoing, Completed)
Attendees field
Let us check how to create the field attendees of type multi-select lookup (to Attendee module)

The json file Attendees.fields-meta.json created in the path Zenith/crm/meta/modules/Conference/fields will look like this

To provide dependent details for the multi select lookup, add the multiselectlookup json object to the Attendees.fields-meta.json file as below:
{ "field_label": "Attendees", "display_name": "Attendees", "api_name": "Attendees", "type": "used", "data_type": "multiselectlookup", "multiselectlookup": { "connected_details": { "module": { "api_name": "Attendee" }, "field": { "field_label": "AttendingConference" } }, "linking_details": { "module": { "plural_label": "Conferences_X_attendees" } } } } |
Speakers (multi-select lookup to Speakers module)
Similar to Attendees field, create Speakers field and modify the json file Speaker.fields-meta.json created in the path Zenith/crm/meta/modules/Conference/fields:
{ "field_label": "Speaker", "display_name": "Speakers", "api_name": "Speakers", "type": "used", "data_type": "multiselectlookup", "multiselectlookup": { "connected_details": { "module": { "api_name": "Speaker" }, "field": { "field_label": "AttendingConference" } }, "linking_details": { "module": { "plural_label": "Speakers_X_attendees" } } } } |
Venue (lookup field to Venue module)
Similarly, create the Venue field with type as "lookup" The json file Venue.fields-meta.json created in the path Zenith/crm/meta/modules/Conference/fields will look like this

To provide dependent details for the lookup, add the lookup json object to the json as below.
{ "field_label": "Venue", "display_name": "Venue", "api_name": "Venue", "type": "used", "data_type": "lookup" "lookup": { "display_label": "Venue", "api_name": "Venue", "module": { "api_name": "Venue" } } } |
Description (textarea)
After create a textarea field Description using zdk meta:create fields command, add textarea json object to the field meta json file as below :
{ "field_label": "Description", "display_name": "Description", "api_name": "Description", "type": "used", "data_type": "textarea", "textarea": { "type": "rich_text" } } |
The possible values for text area are small, large and rich_text.
Status (picklist)
After create a picklist field Status using zdk meta:create fields command, add pick_list_values json array to the field meta json file as below:
After create a picklist field Status using zdk meta:create fields command, add pick_list_values json array to the field meta json file as below:
{ "field_label": "Status", "display_name": "Status", "api_name": "Status", "type": "used", "data_type": "picklist", "pick_list_values": [ { "display_value": "Planned", "actual_value": "Planned" }, { "display_value": "Ongoing", "actual_value": "Ongoing" }, { "display_value": "Completed", "actual_value": "Completed" } ] } |
Date and duration fields of type datetime and double does not require any edits to the created meta.json file.

Attendees Module
Similarly, add fields for attendees modules
- Phone (phone)
- Company (text)
- EventsAttended (multi-select lookup to Conference module)
- Attendee Type (picklist with options Lead, Contact, External)
- Leads (lookup to Lead module)
- Contacts (lookup to Contact module
Venue Module
- Location (text)
- Capacity (integer)
- Contact erson (text)
- ContactNumber(phone)
- Description(textarea)
Speakers Module
- Phone (phone)
- Company (text)
- SpeakerStatus (picklist with options Confirmed, Pending, Canceled)
Step 3: Create a Custom Role
To create a field, use the command
| zdk meta:create roles |

This ensures event managers have the right access without interfering with other CRM operations.
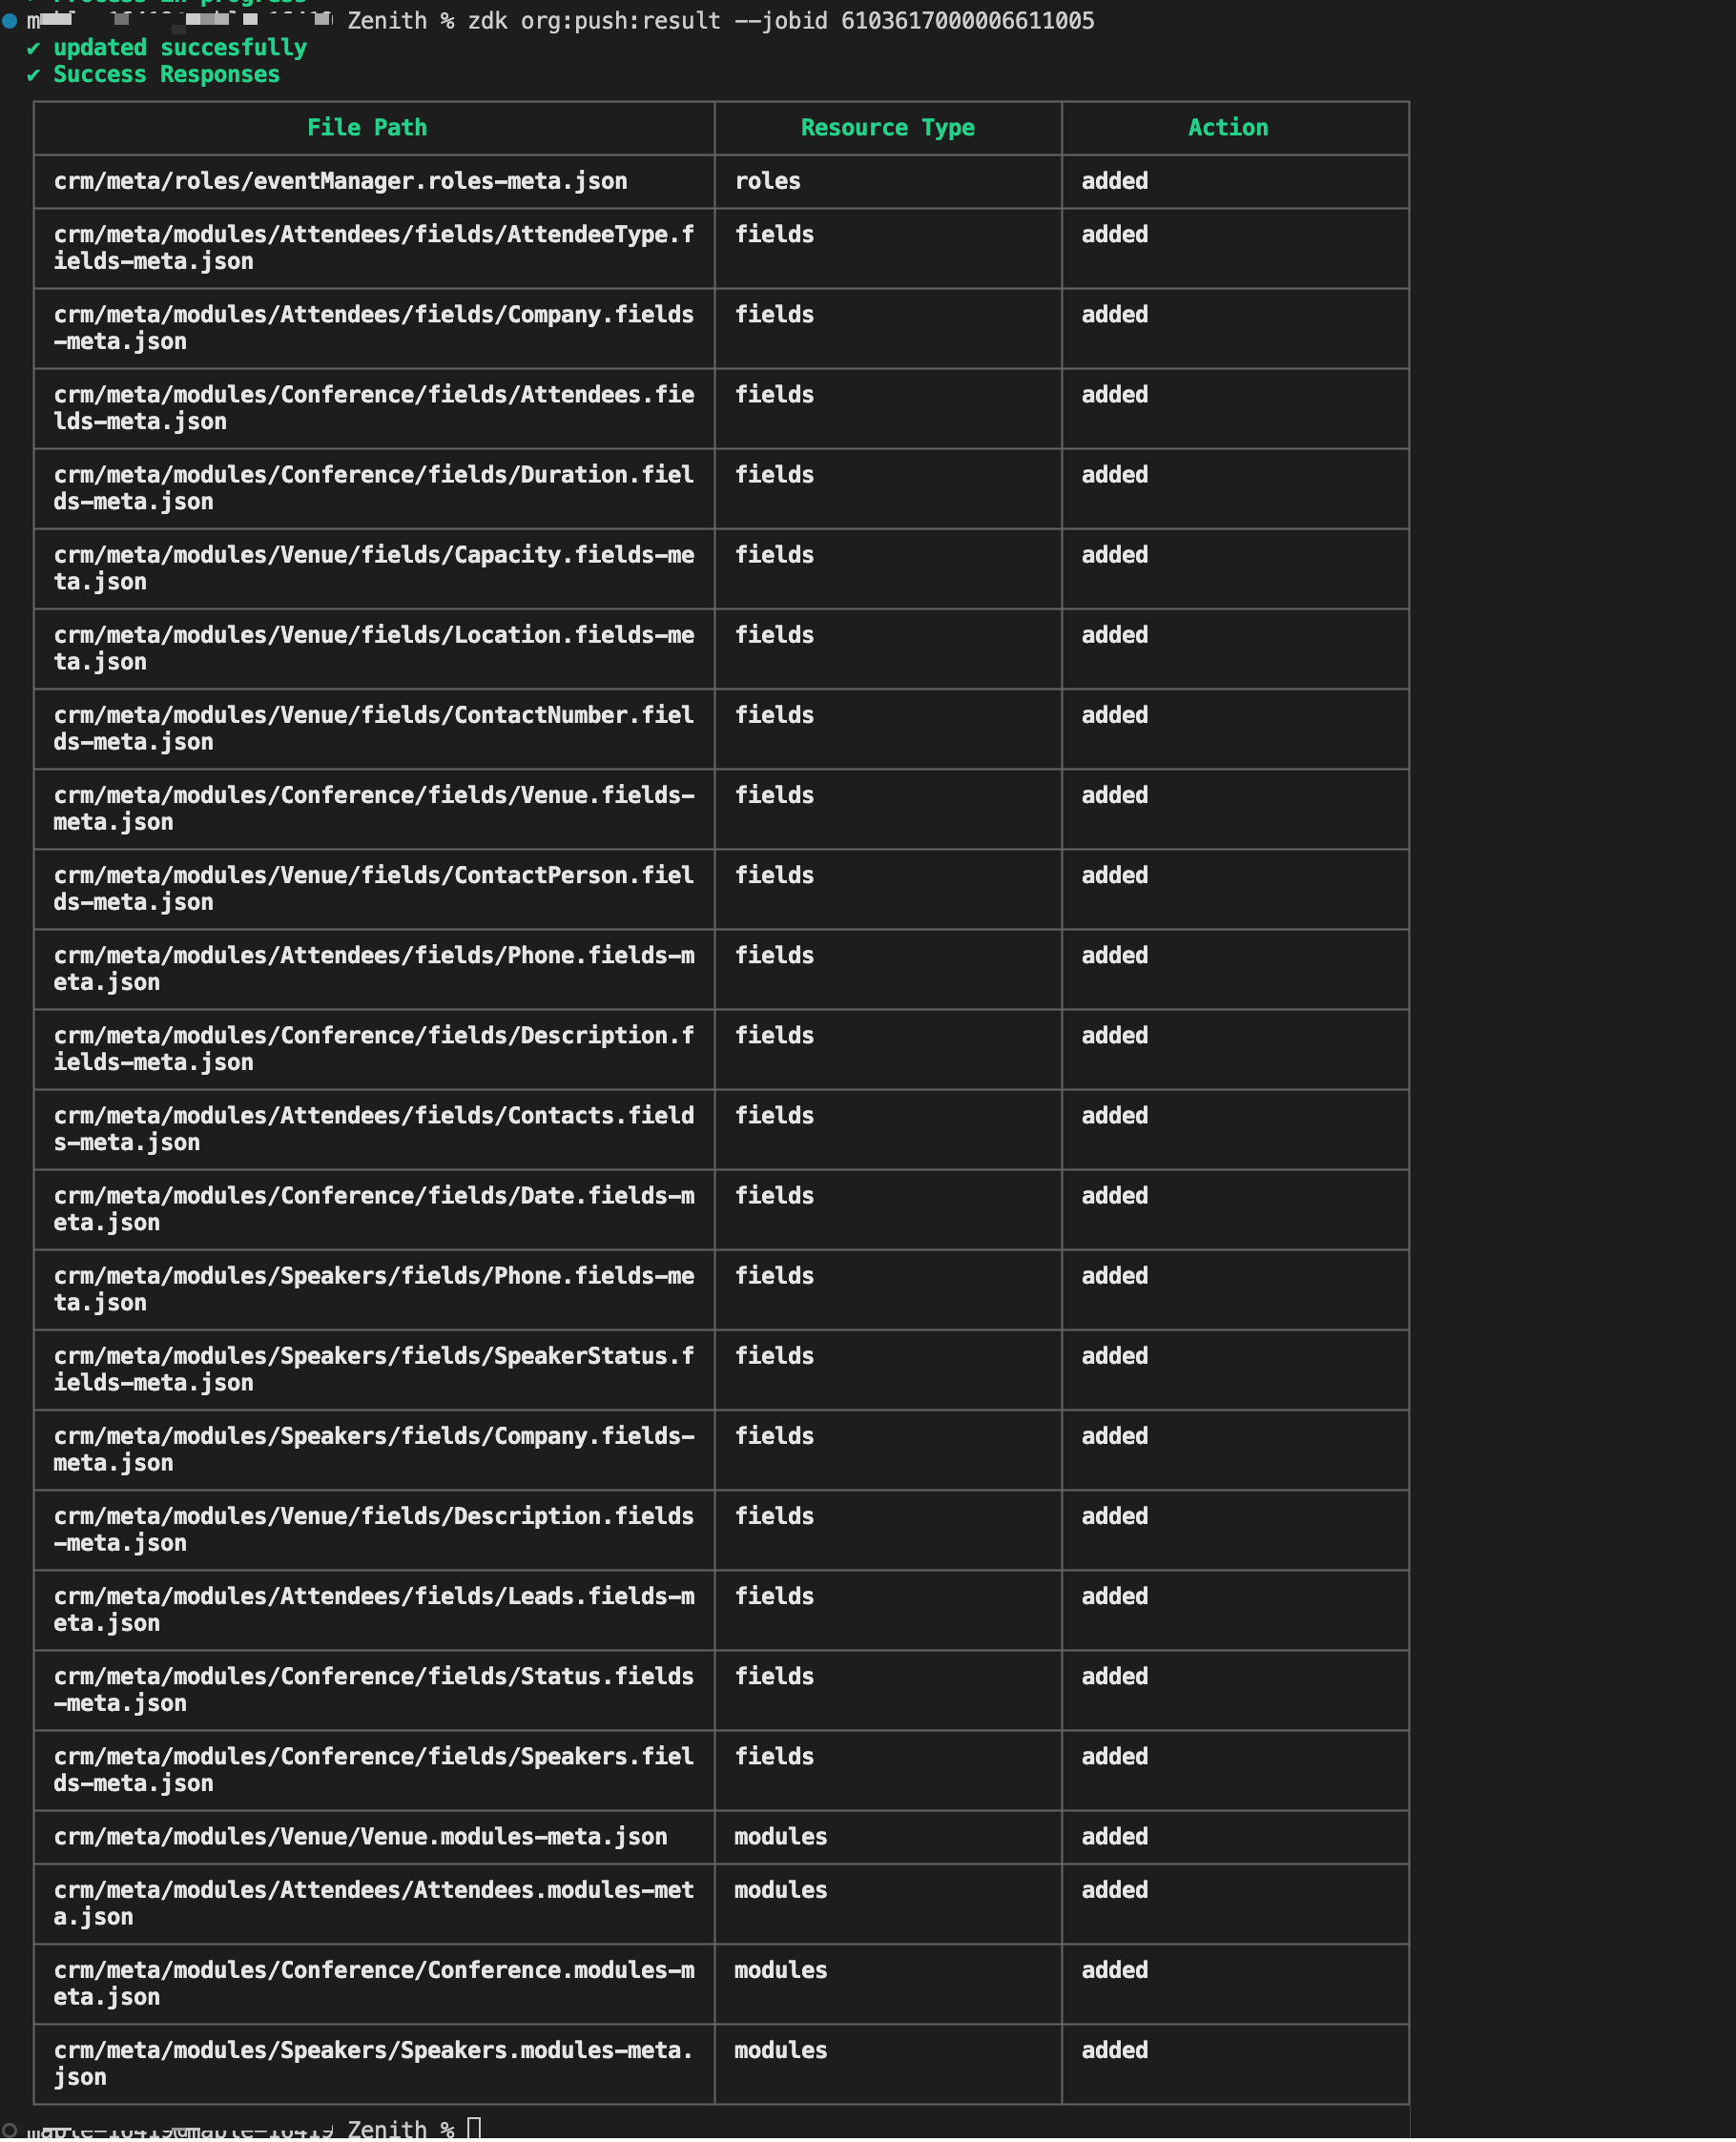
Pushing changes to the sandbox environment
Once all changes are done execute zdk org:push and zdk org:push result --{jobId} command to deploy the changes to the sandbox environment. Once the changes are verified in your sandbox environment you can deploy it to the production environment.

You can extract this metadata zip file, that is created using zdk org:export command to your own ZDK project directory and try pushing the changes to your sandbox environment.
Building the Event Management System for "Zenith" illustrates the core strength of ZDK CLI. It brings software engineering best practices to Zoho CRM customization. By defining modules/fields/roles as json files directly or creating them using the command, the source truth of the metadata is available in local system. The same can be tracked via version control systems like GIT for better collaboration among the team.
