Customizing Module View Using the all-new Canvas design suite
Businesses and data are cohesive entities that exist and grow together. The more people you meet and transactions you make, the more information you're going to accumulate in your database—so it's important to keep your growing database clean and accessible.
Zoho CRM offers three types of module views so you can organize data based on your requirements: list view, Kanban view, and canvas view. Read this article to learn more about module views.
- The list view is a systematic tabulation of your data sorted based on specific criteria. It displays records as line items and enables you to manage, freeze, and navigate across columns in a module. Click here to learn more about list view.
- The Kanban view is a productivity-based view that enables you to classify your records based on different fields, like lead source, status, industry, and so on. It's especially beneficial if you want to monitor progress or index records based on a particular attribute. Click here to learn more about the Kanban view.
- The Canvas view is a dynamic orientation of your records created using our bespoke Canvas builder. You can incorporate different graphic and design elements to your records in module view to suit your brand guidelines and ad hoc accessibility. It offers customization in three layouts—custom list view, tile view, and table view—to sculpt your view according to your data type.
- Query: Allows you to display data fetched from CRM or external systems using Zoho CRM’s Queries feature. Queries let you pull in data for either individual records (in the Record Detail Canvas) or batches of records (in the List View Canvas). This component can dynamically display related data based on your configuration.
- In the List View Canvas, queries help fetch and map data for multiple records at once, enhancing the usability of module views. For example, in a Contacts list view, you can fetch related Account details for all displayed contacts simultaneously.
To learn how to configure and associate Queries in Canvas, refer to the detailed guide here.
|
In this article: |
Types of Canvas views
Canvas offers three types of module view orientations to accommodate data of different types.
Custom list view
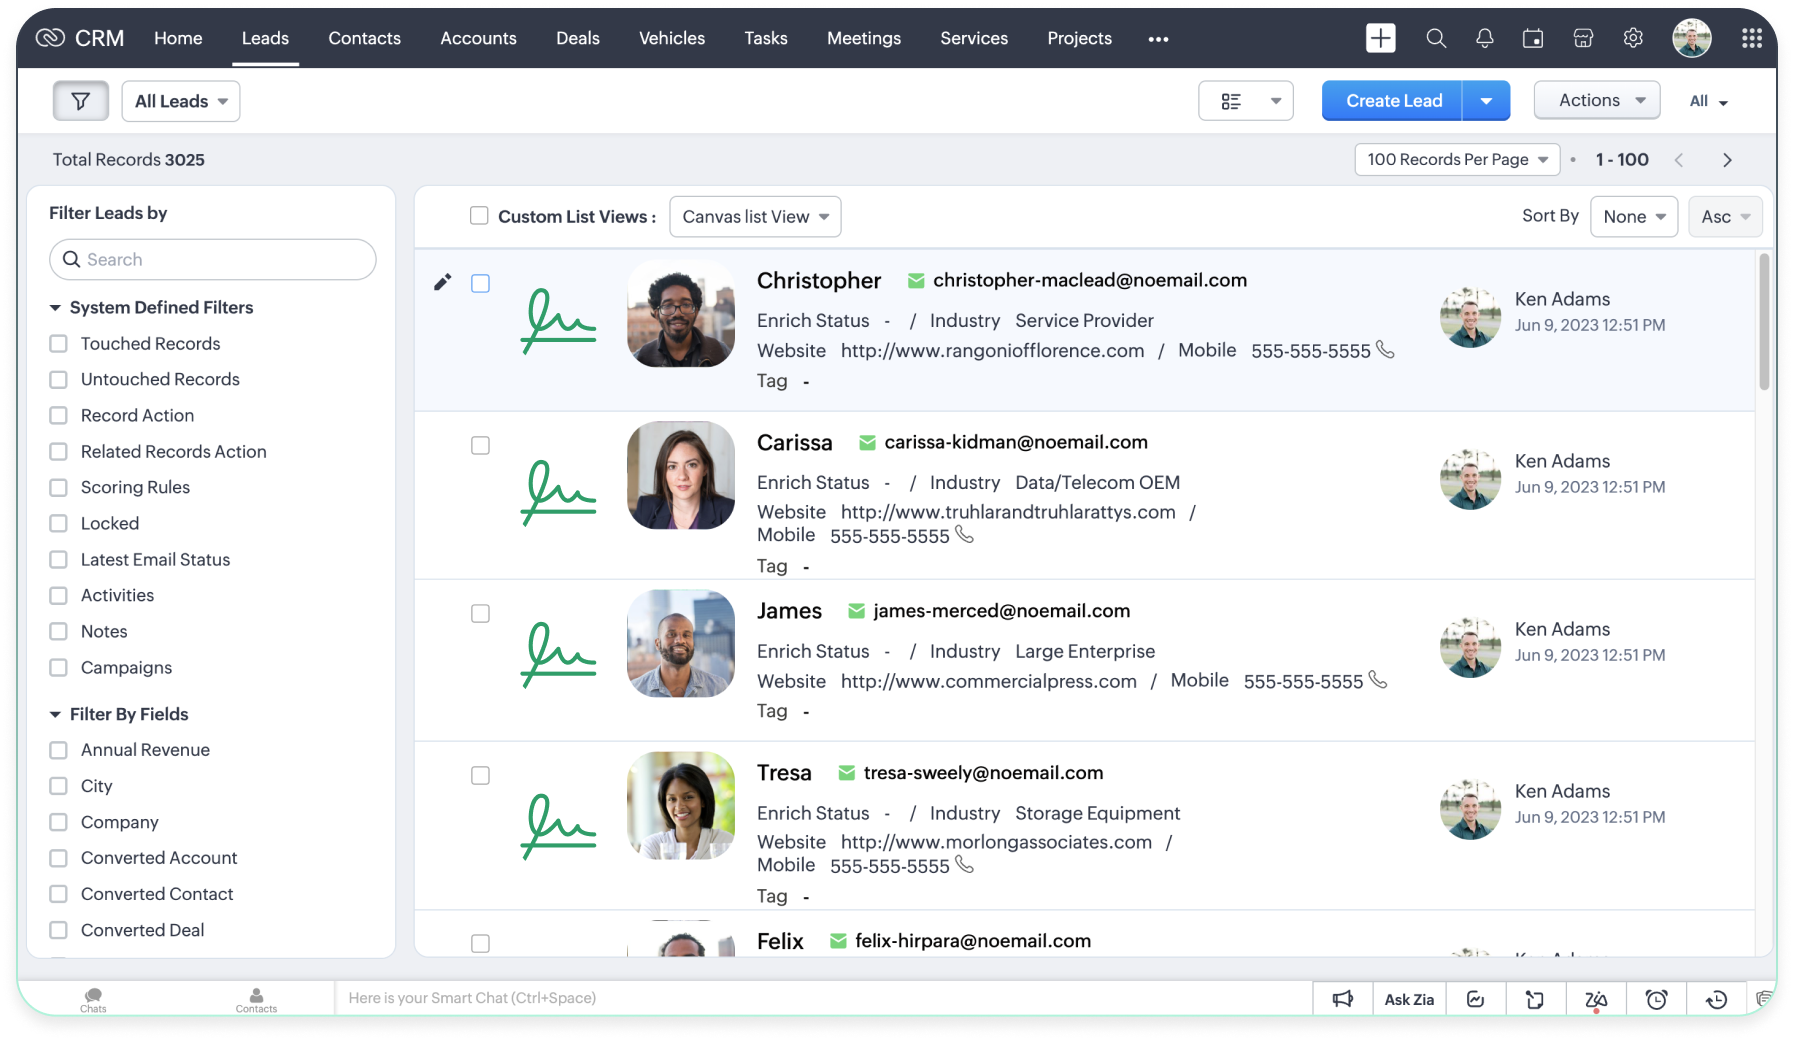
The custom list view enables you to stack records horizontally, one above the other. The space each row provides can comfortably and prominently display your business logo, lead images, lead information, buttons, and more. This view is clutter-free and suitable for storing information about your customers and CRM users in tandem.
Tile view
As its name suggests, the tile view displays records as tiles. With its finite span, modules like accounts, products, or contacts that require a showcase of records become befitting. These tiles are closely knit, that looks like a product line up, by itself. You can adjust the shape of the tile to be a square or a rectangle.
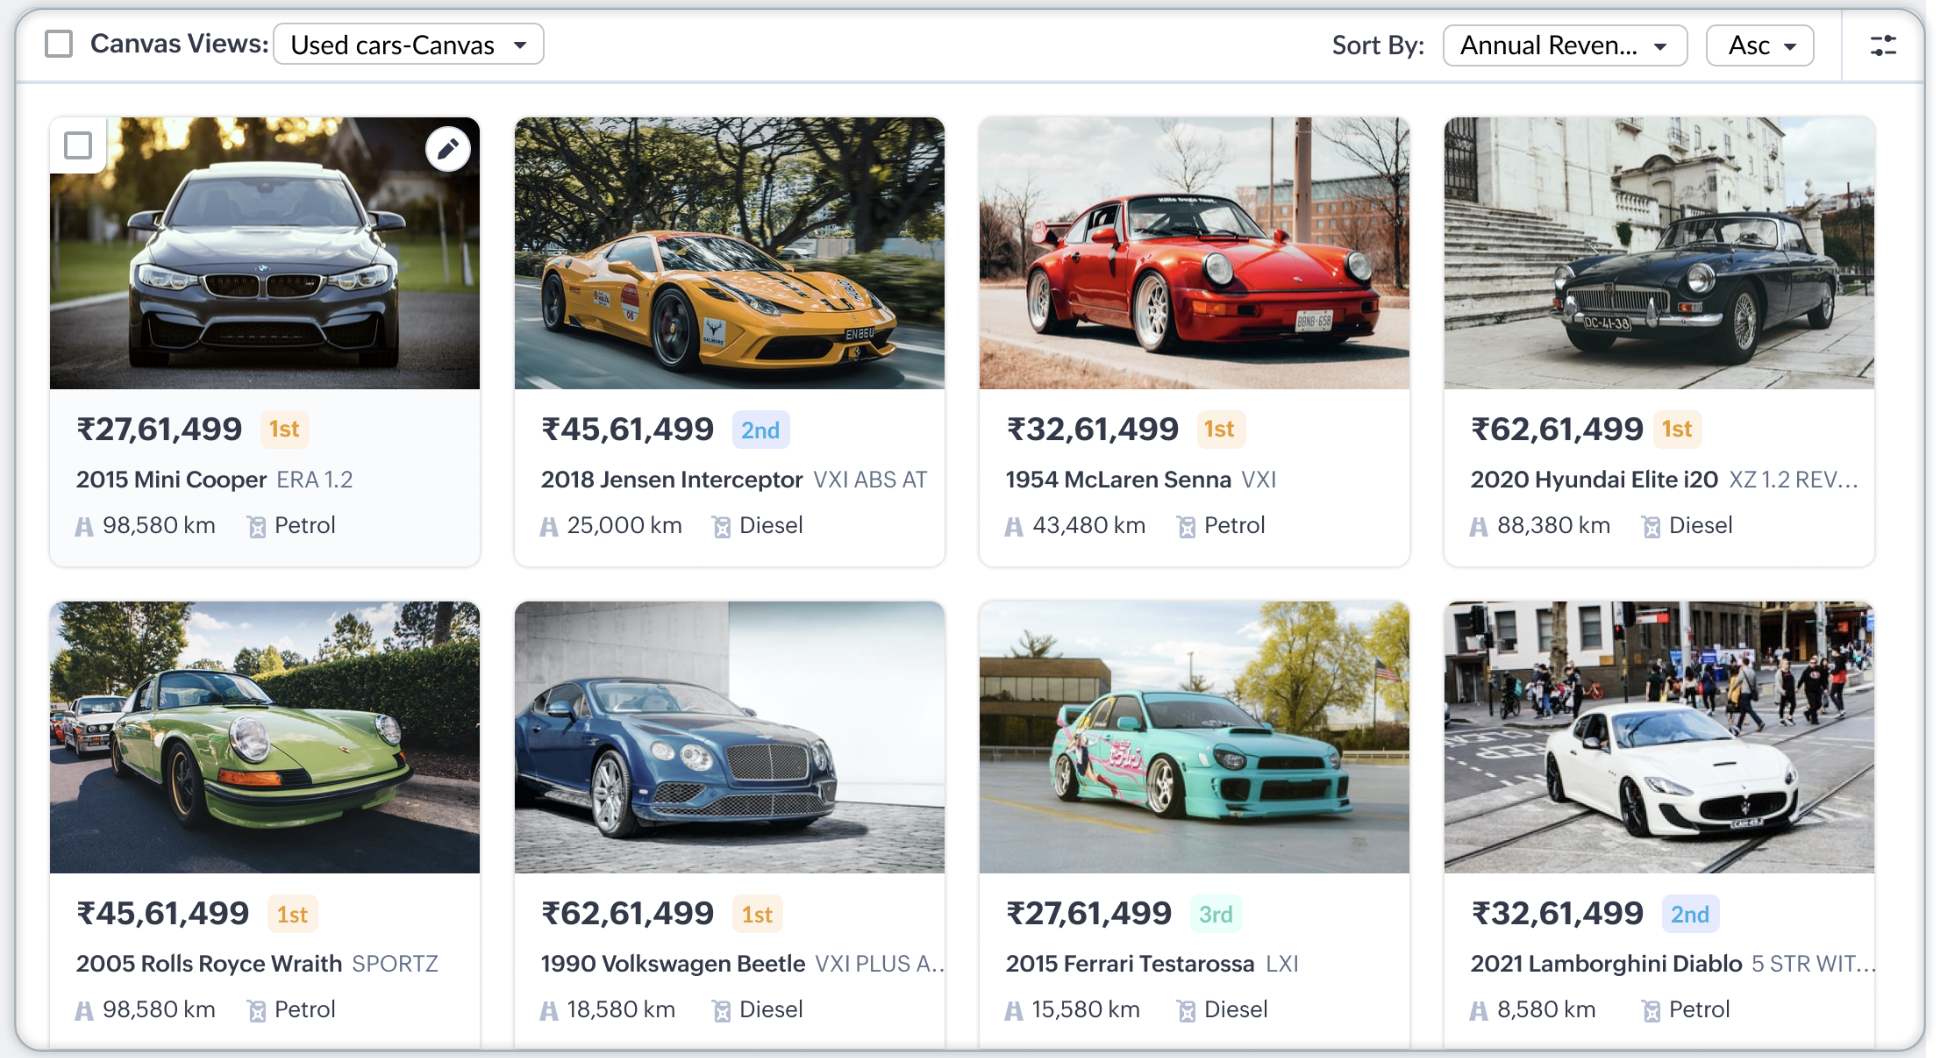
Table view
Like the list view, the table view is a tabulation of records, except it provides users with the ability to add colors to the rows. You can add one color to all rows or alternate between rows.
Business scenarios
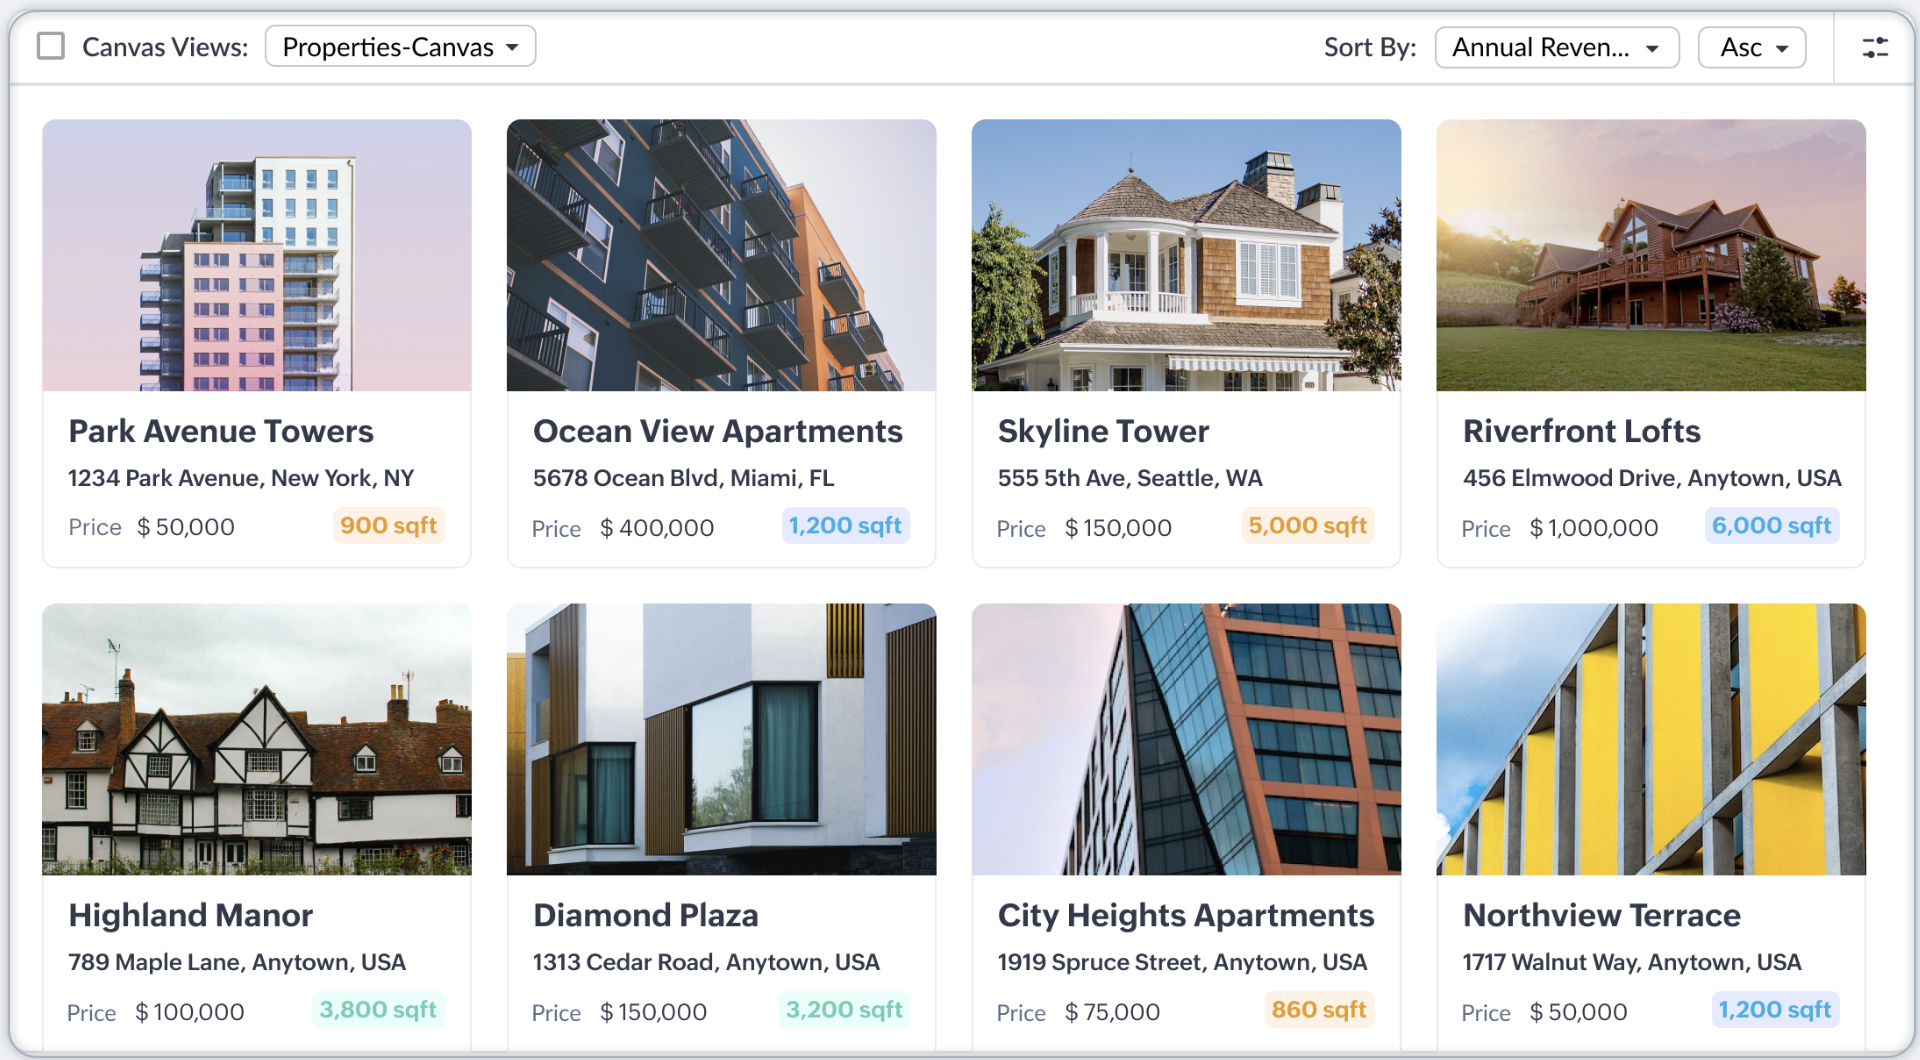
Schools and real estate firms: One important asset that educational institutions have is their student databases. These institutions need to be able to see the information of all students listed systematically, and one viable option is to use the tile view, which enables users to view records in a way that makes them easy to distinguish and access.
The same view is also useful for showcasing real estate properties, whereby customers can view a neatly organized array of properties, each with an image and other important details. Click here to learn more about portals in Zoho CRM.
Lead information: One of the main activities one does in a CRM system is lead management. It's important to understand your leads' requirements, personas, and so on. Using the custom list view, you can orient your leads in such a way that you get useful information about your leads at a glance. With the custom list view, you can add the lead's image, as well as basic information like their name, email address, mobile number, lead source, tags, scores, lead status, activities, visit score, record owner, and so on—all in a view that minimizes clutter.
Inventory management: Businesses can only run smoothly if they manage their inventories effectively. Inventory management means continually assessing demand and managing stock so that you never run out of a hot-selling product. But that means inventory managers need to know what they have in stock and how much—with a high degree of accuracy. Thanks to its spreadsheet-like structure, the table Canvas view is a perfect fit for this kind of data, as it fits the screen and can display large quantities of data.
Availability
Permission required
Administrators and users with Manage Custom View permission can create/edit a Canvas.

Canvas module view builder: a quick look
Canvas is Zoho CRM's cutting-edge design studio that enables you to create and present your data in a more organized way. It's loaded with sophisticated design elements that are simple to view and straightforward to use.
While you can customize both the record details page and module views using the Canvas builder, this article is about customizing module views using Canvas.
The list view builder is made up of the following building blocks:
- Data: Contains CRM fields (including lookup module fields), related lists, buttons, and actions available in the selected module. With a simple drag and drop, you can place fields in wherever you want on the canvas.
- Elements: Includes sections, text boxes, tabs, tables, images, icons, lines, and buttons with which you can compartmentalize your data in your canvas.
- Style: Adds aesthetic value to your data and elements. Set background colors and borders, tweak radius, add shadows, and adjust padding and margins. You also have the option to customize the font type and color for both static and on-hover text.
Note
You can add fields from a maximum of three lookup modules in a Canvas list view page.
How to work with Canvas
As discussed before, the canvas builder is a straightforward design tool with the following components: data, elements, and style. You can create canvases from scratch or build upon pre-designed canvases from our gallery. Upon opening a canvas, you can add components to a canvas via a simple drag-and-drop interface, and apply styles by selecting the placeholder data in the canvas.
Let's look at how you can create a canvas:
Create canvases as an admin
- Log into your CRM organization with your administrator credentials.
- Go to Setup ⚙ > Customization > Canvas > List View.
- Select the Create New List Page button on the right.
- In the Create your own customized list page pop-up, select a module and the type of canvas view you'd like to create.
Take a quick peek at the view by clicking the preview link. - Click Create.
- On the Select Canvas page, you can either select a pre-defined design from the gallery or create a blank canvas.
- For pre-defined canvases, you can choose the desired design from the list, preview it, and click Select.
- To create a new canvas from scratch, click Create Blank Canvas button.
- Additionally, if your organization has saved canvases already, you can select them from My Organization Canvas and repurpose them.
- Upon entering the canvas page, do the following:
- Enter a name for your canvas creation. Example: Lead list - custom list view.
- Based on the canvas type, a white/blank canvas will appear. You can add colors, gradients, or an image as your background, per your desire.
- Go to the Style option in the Edit console.
- Under Normal, select a background color from the palette. You can also choose from advanced colors in the palette.
This will become the background of the canvas. Especially for custom list views and tile views, the chosen background will be applied for all records in the module view. - To set an image as the background:
- Select the Image check box and upload a new image from your desktop, choose from the library, or add an image URL.
- The image you selected as the background will be added to the canvas in the contain style. You can also keep it at its original size, or cover the entire canvas background.
- You can also choose the direction in which the image repeats on the canvas, if at all: horizontally, vertically, or both.
- To apply a gradient, select the Gradient checkbox.
- Select the gradient direction by rotating the gradient roller.
- Click on the gradient nodes present on the either side of the gradient bar to select the desired color for your gradient.
- Drag the nodes left and right to adjust the strength of the gradient.
- Select the Padding and enter values to adjust the cushion space.
- Also, you can adjust the scale of the canvas by setting its height and width.
- Similar settings can be configured for the canvas background when on mouse hover.
- To compartmentalize your canvas space using elements:
- Click Elements from the edit console.
- Drag and drop the desired elements like sections, text boxes, images, icons, and lines from the tray into the canvas.
- Furthermore, you can select and apply styling over an element to customize it as desired.
- To add data to your canvas:
- Click Data from the edit console.
- Drag and drop the desired fields and actions present in that module where you want them on the canvas.
- You can also apply styling elements like font type, size, color, orientation, type case, prominence, label alignment, text background, and more to each piece of data by clicking on it.
- To add and associate Query in Canvas, refer to the detailed guide here.
- Upon completion, click Save to save the canvas.
Using the methods above, you can create canvas creations for other views, as well.
Note:
- A module can have only one canvas created for each canvas view.
- Canvas names must be unique within a module, regardless of whether they are used for list view, detail view, or form view canvases.
Generate canvases with Zia

Currently available for all paid editions of Zoho CRM in the US, EU, IN, JP & CN DCs.
You can also generate Canvas list view canvases directly from an image using Zia, Zoho CRM’s AI assistant. This helps save time and effort while delivering a polished, professional layout. Whether it’s a mock-up, a screenshot from another system, or even a photo of a printed layout, Zia can identify the structure and recreate it as a CRM-ready canvas.
To get started, upload an image that visually represents a list view layout. You can resize the image using the slider in the top bar to adjust the dimensions as needed.
Once uploaded, a new Canvas view will appear in your list, marked as Processing. You’ll receive a notification when it’s ready for review.
Zia’s image recognition engine detects design elements—such as boxes, text blocks, and visual groupings—and automatically generates a layout that mirrors the original. You can then edit, re-arrange, and style it like any other Canvas view.
Zia also extracts text from the image and presents field mapping suggestions. You can manually map each element or select the checkbox to automatically associate all detected fields with those available in the module. You also have the option to display all field labels or filter for unassociated fields to refine your mapping.
If your image includes multiple related text snippets, you can combine them—for example, one line as a field name and another as its value—to structure the data the way you want.
Managing canvases as an admin
All the canvases created for an organization will be displayed as line items on the canvas page. The page's list view tab contains module views, and the details page contains canvases created for record detail pages.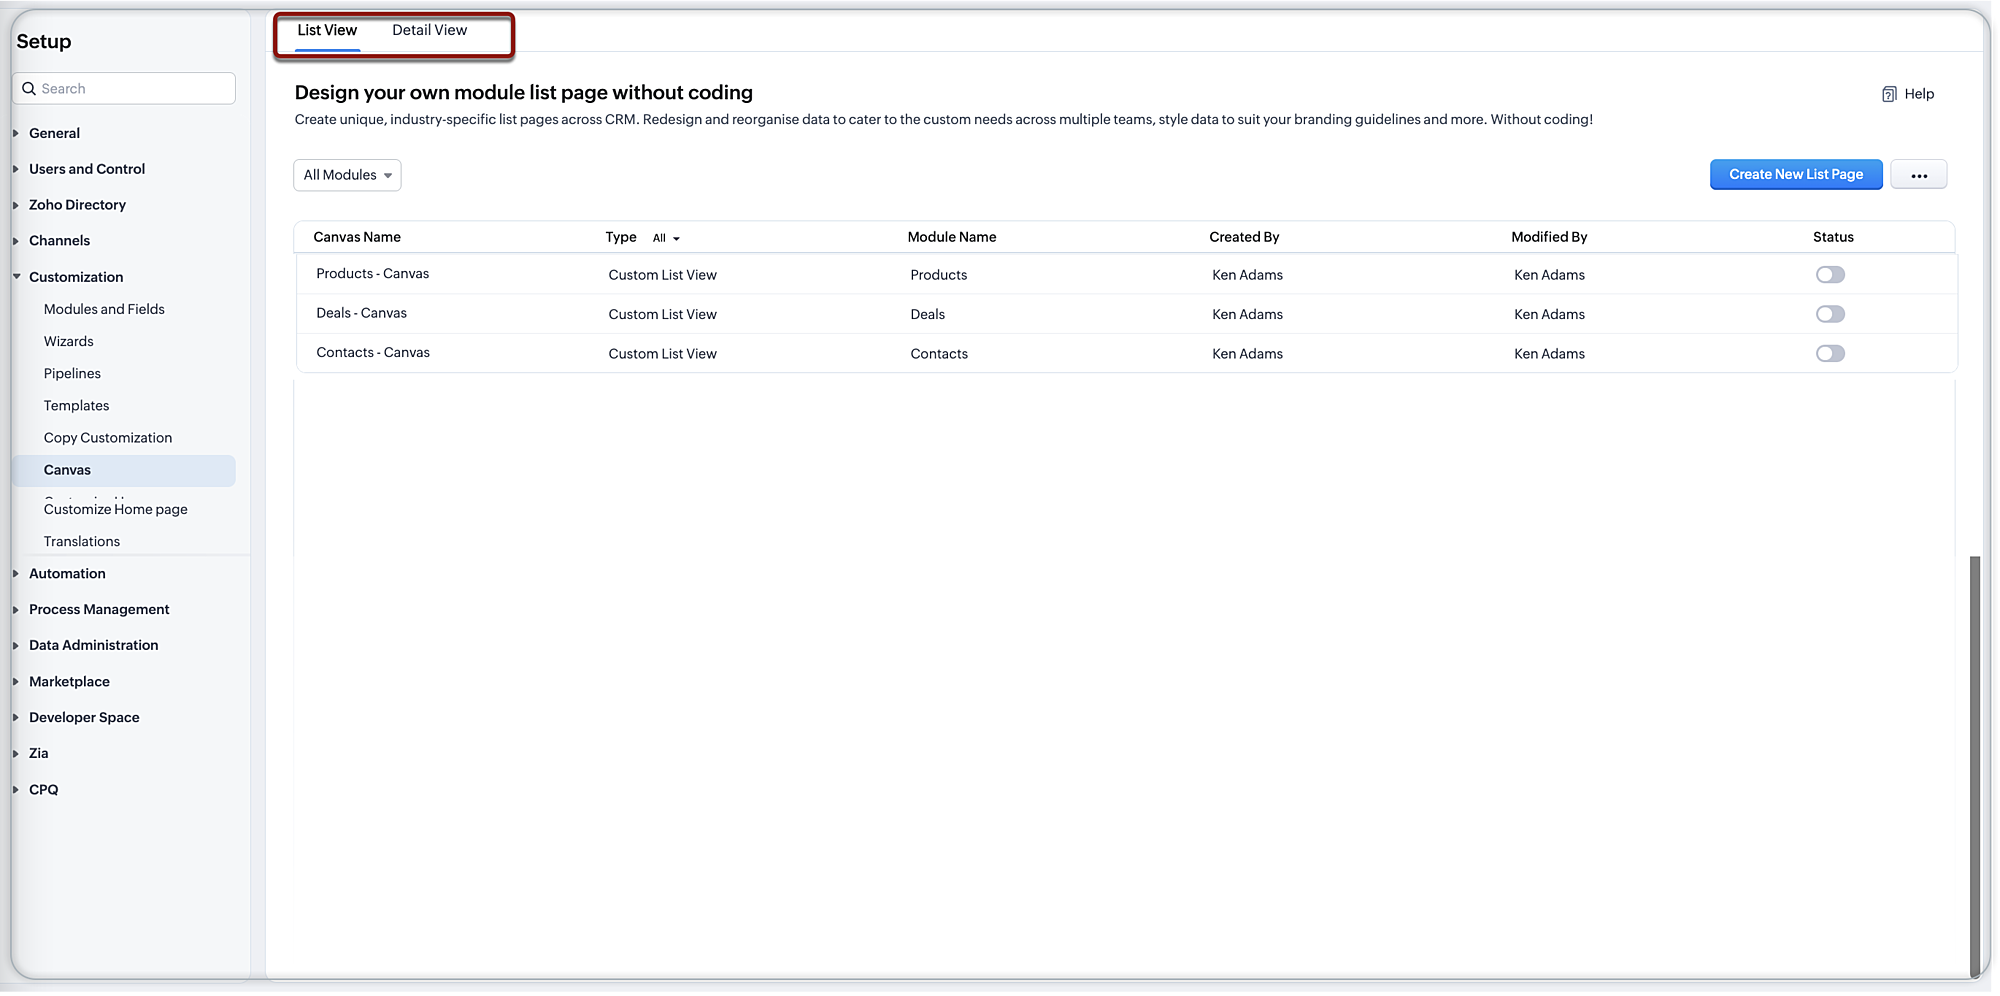
In the list view tab, an admin can perform the following actions:
- Create new list view page canvases.
- Sort canvases based on modules and views
- Manage canvas rules
- Clone, preview, edit, or delete canvases
- Activate or deactivate canvases
Switch between different module views
Users can choose from the following module views according to their preferences: list view, Kanban view, and canvas view.
To switch between module views:
- Go to the desired module and click on the module views icon
at the top-right corner of the page.
- From the dropdown menu, select a desired view for your records. The options are list view, Kanban view, canvas custom list view, tile view, and table view.
Quick hacks to work with Canvas easily
By now, you've probably realized how simple it is to work with Canvas. However, you can still make it easier via the following pointers:
Create canvases quickly: If you haven't created a particular view for a module yet, you can create one directly from the module itself. To do so, follow these steps:
- Click the module view button at the top-right corner of the page.
- Select the desired canvas view for which you haven't yet created a view.
- On the following page, click Create view. This will directly take you to the Canvas builder.
- Add data quickly: Instead of searching and dragging desired fields from the data component, you can simply right click on the canvas, go to insert, and then click field or action.
- Create conditional styling: You can determine the criteria and change the styling of a particular component, such as a font size change, color change, and so on.
- Mark a component fixed/fluid: If you mark a component to be fluid, the component will render the entire span of the text in the output. If you mark it fixed, irrespective of the character count, the text will be constricted to the defined length, sometimes clipping the tail end of the text.
- Copy/paste style: Instead of formatting a particular style repeatedly, you can copy the style and apply it to the component(s) you want to format. Right-click on the style you want to copy and click copy style. Then select the component you want to replicate the styling for, right-click on the component, and click paste style.
- Lock a component: Locking a component will make it easier to edit the canvas by keeping the component in place while you make adjustments.
- Hide/show label: A label is a field's name. You can choose to display a field's name or just its values while. This is a great way to maximize space in your canvas.
- Format label alignment: You can choose the text alignment for text boxes, namely left, center, or right.
More assets on Canvas in Zoho CRM:
Help document: Customizing record details page using Canvas
Contextual video: Purpose and Benefits of Canvas
Handbook: Get hands-on with Canvas
Browse through a list of certified canvas designers available in your country here.