Event type booking page settings

This page is applicable for Bookings 2.0 version only. To view the equivalent Bookings 1.0 version, please check this page.
1. In a nutshell
An event type booking page allows to book appointments for a single event type. In the event type booking page settings, you can do setup for staff/user selection, timezone, and the confirmation page.

- Business booking page - Allows you to book across multiple workspaces by displaying all available workspaces in a single view.
- User booking page allows you to book with a single user that lists all the events offered by that user.
- Workspace booking page allows you to book all the events under a single workspace.
2. Feature availability

- Available for paid plans
- Roles
- Super admins and admins can configure these settings for all workspaces
- Workspace admins can do this setting of their assigned workspaces
- Managers and staff will not have access to it.
3. Overview
An event type booking page lets customers schedule appointments for a specific event type. It is particularly useful when you know exactly which event the customer wants, enabling you to share the link of that specific event type booking page. In this event type booking page, you can setup the following
- Set user selection - Allows you to set whether customers can choose a user on the booking page and whether the auto-assign option should be included.
- Set timezone selection - Choose whether to display the time zone selection, pick only the selected time zone, and set which time zone option should be shown on the booking page.
- Set confirmation page - Choose whether the customer has to be redirected to your own confirmation page or the default Bookings confirmation page.
4. Steps to access event booking page settings
- Switch to the required workspace on the top left side, then click Booking Pages. This will show all the booking pages under the selected workspace.
- Click the Settings icon
near the required Event type booking page. A panel will slide in from the right, showing various options, as explained below. You can perform the below settings for the event type booking page.
4.1 Set user selection
By default, customers have the option to choose who they'd like to book with. You can change this according to your requirement, whether to allow the customer to decide the user or remove the user selection dropdown on the booking page.
- Enable the eye icon
to show the user selection dropdown in the booking page.
- Disable the eye icon
to hide the user selection dropdown in the booking page.
- Click Save.
4.1.1 Include auto-assign option
Including an auto-assign option for user selection can be helpful when customers are unsure about choosing a staff member. It will automatically assign the available user, which happens on a round-robin basis depending upon their workload.
- Click the checkbox Include 'auto-assign' users in the users list.
- Click Save. This will add an 'auto-assign' option to the users' list.
4.2 Set timezone selection
In the booking page, the slots are shown based on the timezone selected. You can change the timezone and also list only the selected time zone to suit your requirement with one of the below options.
- Business time zone: Selects the business time zone on the booking page.
- Customer's local time zone: Automatically detects and selects the customer's local time zone on the booking page.
- Any other timezone: Any other custom time zone.

Note: By default, the customer's timezone will be selected and all available time zones will be displayed on the booking page.
To configure this, select the required option in the Time Zone dropdown as shown below, then click Save.
Note: Time Zone chosen here will be preselected in the booking page. However customers will still be able to change it.
4.2.1 Time Zone display options
You have three display options for timezone:
- Show timezone: By default, the eye icon
will be enabled. This means it will show the time zone on the booking page.
- Hide timezone: You can hide the time zone option on the booking page by disabling the eye icon
.
- Show but lock timezone: You can show the time zone but restrict customers from changing it by selecting the lock icon
. Ensure the eye icon
is also enabled.
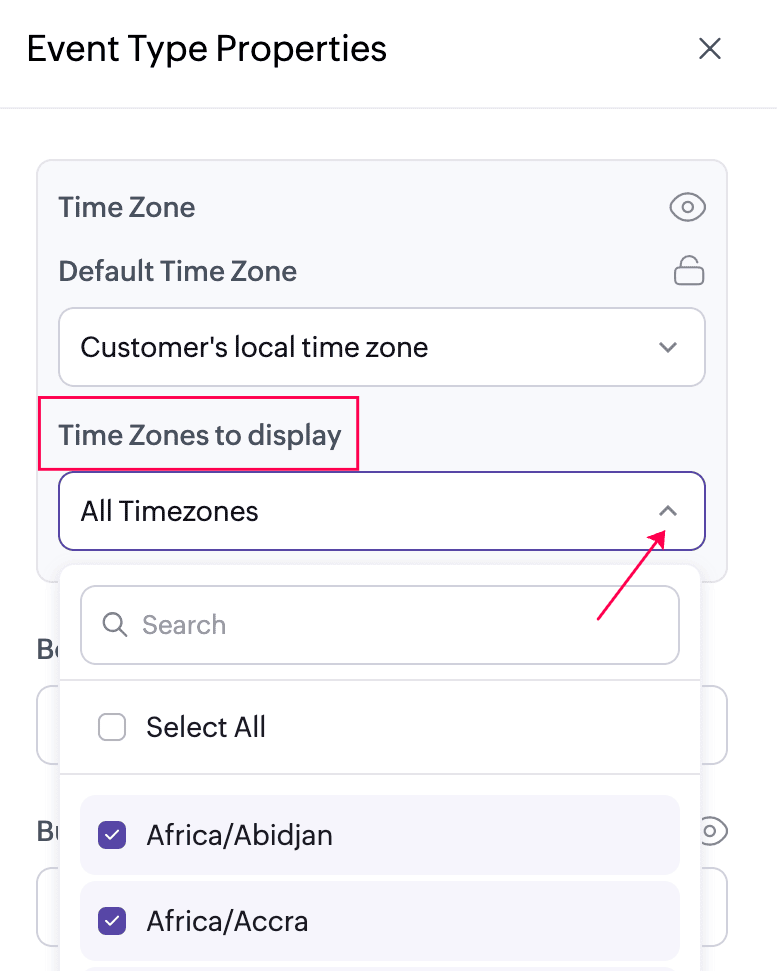
4.2.2 Time Zones to display
4.2.2 Time Zones to display
You can choose the required time zones that must be listed in the booking page. By default, all time zones are displayed for customers to choose from. To restrict this, select only the required time zones so that customers can view and book appointments in those selected zones.
4.3 Set confirmation page
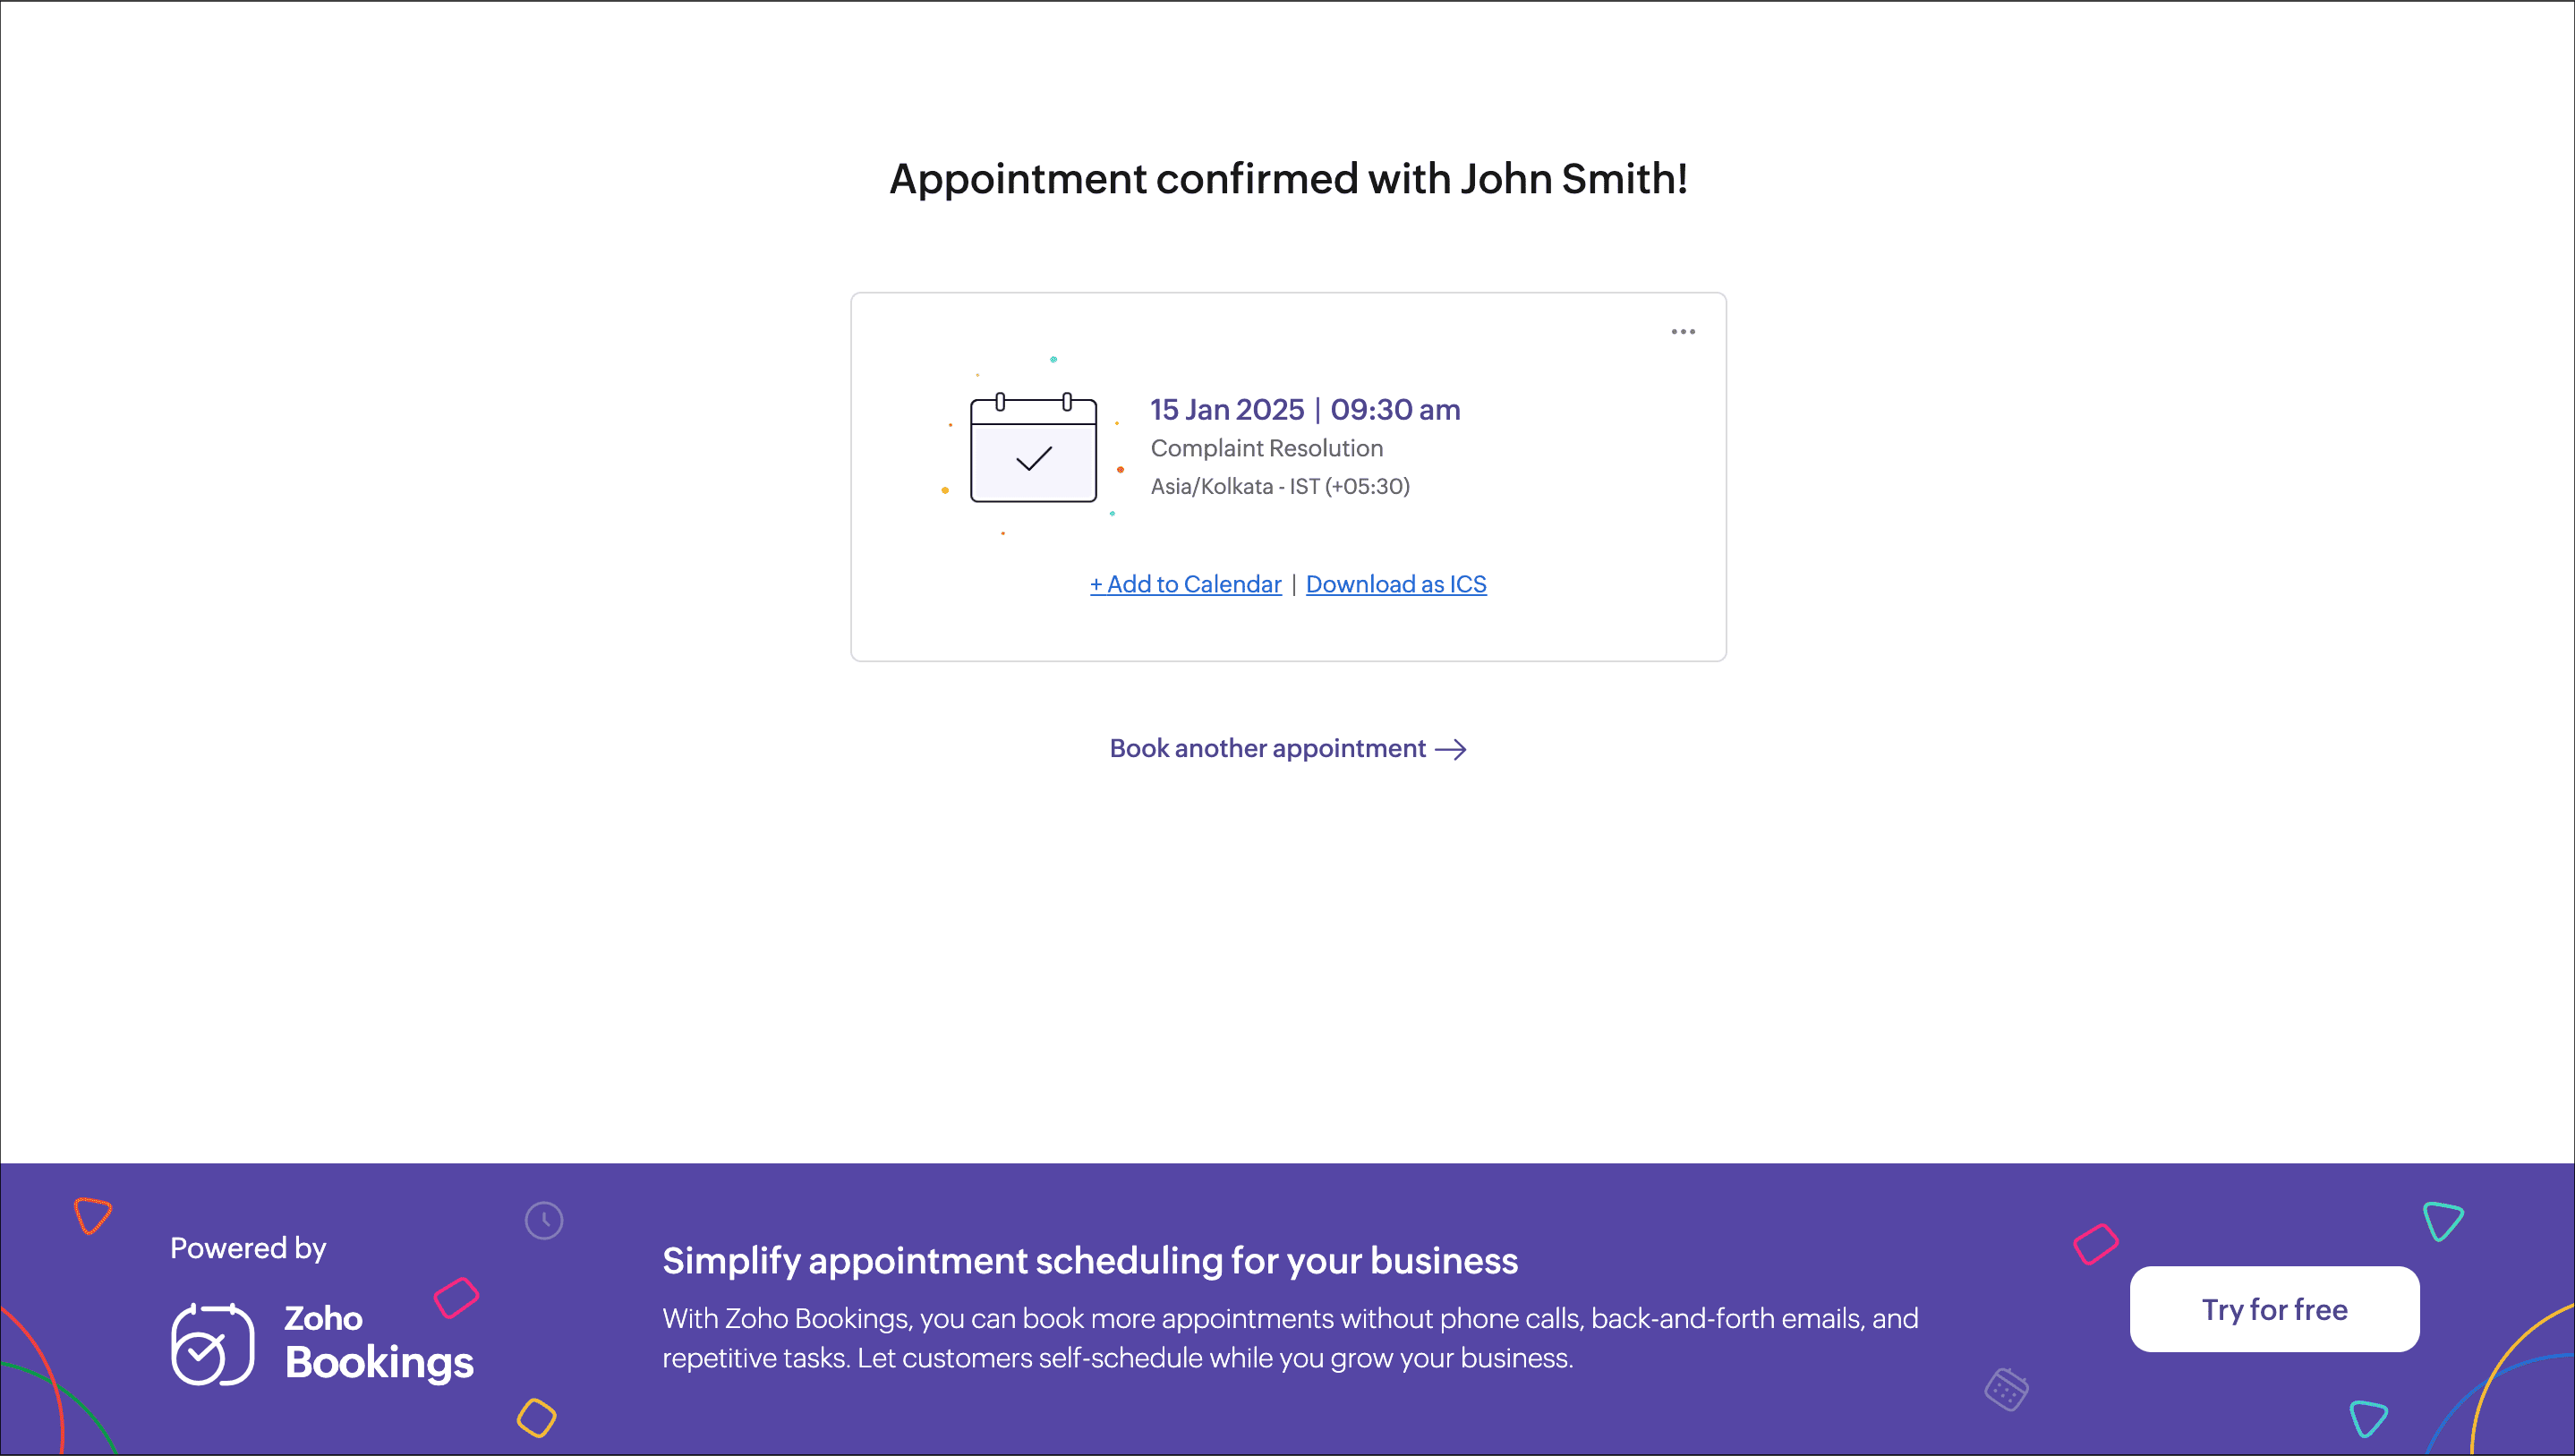
Once the customer books an appointment, the below confirmation page will be shown confirming all the appointment information. You can keep using this as your confirmation page or use any of your webpages as a confirmation page.
- Under the Booking Confirmation Page, select any one of the following
- To use our default confirmation page
- Select Show Zoho Bookings confirmation page in the dropdown.
- Enter the button text to show in the confirmation page to book another appointment.
- To use any other page as a confirmation page
- Select Show your own confirmation page in the dropdown.
- Enter the URL of the confirmation page that you want to set under Page URL.
You can select the checkbox Pass booking details to confirmation page to pass booking details and UTM parameters to your page. - Click Save.
Note: Redirecting customers to a custom URL on booking confirmation is available in the paid plans of Zoho Bookings.
4.3.1 Passing parameters to your confirmation page
When you set your own confirmation page, you can pass Booking parameters in the URL. Bookings support the below list of bookings and UTM (Urchin Tracking Module) parameters to be passed to your confirmation page.
List of supported Booking parameters
These parameters can pass booking details along with your custom URL.
https://www.zylker.com/thankyoupage?booking_id =ZO-12345&assigned_to=John%20Doe
Booking details
- booking_id=<value>
- workspace_uuid =<value>
- workspace_name =<value>
- assigned_to =<value> (staff or resource name)
- service_uuid =<value>
- service_name =<value>
- booking_start_time =<value> (represented in ISO 8061 format in customer timezone)
- booking_end_time =<value> (represented in ISO 8061 format in customer timezone)
- booking_cost =<value>
- booking_cost_paid =<value>
- booking_currency =<value>
Customer details
- customer _name =<value>
- customer_first_name =<value> (if applicable)
- customer_last_name =<value> (if applicable)
- customer _contact_no =<value>
- customer_email =<value>
Custom fields
- customer _<custom_field_name> =<value>
List of supported UTM parameters
These parameters can trace aid performance-tracking and analytics.
- utm_source
- utm_medium
- utm_content
- utm_campaign
- utm_term
Assume that you have embedded the booking page on a website (say, Twitter), and you want to track the source for your campaign (say, 'user-adoption'). You can append UTM parameters to your page (say https://www.zylker.com/thankyoupage) like the following.
https://www.zylker.com.thankyoupage?utm_source=twitter&utm_campaign=user-adoption