Contacts List View
The list view page of contacts displays basic details about your contacts in a list form. This page is useful to view quick details of your contacts, creating or importing contacts, filtering and performing bulk actions on them.
How to access: From the Navigation Toolbar to the left, click Audience and select Contacts. The page that appears is the list view page of contacts.
First, let's check what's available at the top and bottom of the list view page.
● At the top-left of the page, you'll find various views of contacts such as All Active Contacts, Reachable Contacts, Non-Marketing Contacts, and so on.
● To the top-right, you have the option to filter contacts based on their fields and specific criteria.
● Beside it, you have the Import Contacts button to import contacts into Zoho Campaigns and the Add New Contact(s) button to create contacts manually.
● Finally, the More Actions button contains options like Import Summary and Manage Tags.
● At the bottom-left, click the View button to view the total contacts in a view.
● At the bottom-right, you can configure the number of contacts to be listed in a page. You can display 10, 50, 100, 150, 200 contacts per page. Beside it, you can navigate from one page to another.
Contact Views
In Zoho Campaigns, you can filter contacts using predefined views so you're able to work on a particular set of contacts. These filters not only provide easy access to basic views but also save time creating segments for these views.
Accessing the views
To access these views:
- From the Navigation Toolbar on the left, click Audience and select Contacts.
- At the top-left, you should see a view name called All Active Contacts. Besides it, you can see a few more views, namely Marketing, Non-Marketing, and Unsubscribed. Click the More Actions button to view a few more views.
- Click a different view to go to that view.
Below are the views that you can access:
● All Contacts
● Reachable Contacts
● Non-Marketing
● Active Contacts
● Suppressed Contacts
● Excluded Contacts
● Invalid Contacts
● Bounced
● Unsubscribed
● Manually Suppressed
● No emails opened last month
● No emails opened in last 3 months
● No emails opened in last 6 months
All Contacts
This view displays the list of all the contacts in your organization including contacts from reachable, non-marketing, suppressed, excluded, and invalid views.
Reachable Contacts
As the name states, this view displays all the contacts whose subscription type is Marketing. You'll mainly engage with these contacts for your marketing needs.
Non-Marketing Contacts
This view lists all the contacts whose subscription type is Non-Marketing. These contacts haven't provided you with permission to engage with them.
Active Contacts
This view displays the list of all the active contacts in your account. Active contacts includes contacts from reachable and non-marketing views. These are the contacts whom you engage with on a regular basis by sending them marketing campaigns like email campaigns. Contacts that are unsubscribed, bounced, and invalid aren't considered active contacts.
Suppressed Contacts
This view displays contacts who are prevented from receiving communications due to unsubscribe requests, bounces, or custom suppression settings.
Excluded Contacts
This view shows the contacts who have been excluded from marketing communications due to custom classification or specific organization business rules.
Invalid Contacts
Whenever you create a contact in Zoho Campaigns, the system will do a real-time validation of the email address to see if it is valid or not. If it's an invalid email address, the system will flag it so you can't save the contact unless a valid email address is provided.
Basically, records with unparseable, malformed, or unusable contact information that cannot safely be sent an email.
However, there are instances where the validity check gets bypassed and the contacts get added. It can be via a sync from a different Zoho application such as Zoho CRM, via import, or — very rarely — when you manually add a contact. In such cases, the system will do a check after the addition of these contacts and move them to the Invalid view automatically.
Bounced Contacts
This views lists the contacts whose email addresses have suffered bounces. An email address can be bounced for a variety of reasons, such as:
● Recipient email address does not exist.
● Domain name does not exist.
● Typos render the email address invalid. (For example, gnail.com instead of gmail.com)
● Recipient email server has blocked delivery.
● The email address is inactive.
● The email account has been closed.
Only the contacts whose email addresses have suffered hard bounces will be listed in this view. If an email address has soft bounced, there are chances for the email to get delivered to that address in the subsequent retries. Hence, soft bounced email addresses won't be listed. Learn more about hard and soft bounces.
Unsubscribed Contacts
This view shows the contacts who have both unsubscribed of their own accord from your marketing emails, campaigns, and SMSs via the unsubscribe link provided and the contacts who've been unsubscribed by you or other users of your Zoho Campaigns account. They could've been marked as unsubscribed while creating a new contact, via import, bulk update, or via journeys. Their subscription type is Unsubscribed.
In this view, you can find the Unsubscribed Time and Unsubscribed By columns. Unsubscribed Time shows the date and time at which a contact got unsubscribed.
Unsubscribed By displays your Zoho Campaigns organization's user's name who marked the contact as unsubscribed or Recipient indicating the contact unsubscribed themselves.
Manually Suppressed
This view displays contacts who were added to the suppression list by an administrator (ie) contacts who have been marked as unsubscribed either under the Contacts module or via import.
No emails opened last month
This filter displays the contacts who haven't viewed or opened your email campaigns for the past month.
No emails opened in last 3 months
This filter lists the contacts who haven't viewed or opened your email campaigns for the past three months or the past quarter.
No emails opened in last 6 months
This filter shows the contacts who haven't viewed or opened your email campaigns for the past six months or the past half year.
View-based actions and permissions
This table shows the view name and a list of actions that can be performed in each view.
CONTACT VIEWS | DEFINITION | EXPORT | DELETE | CHANGE SUBSCRIPTION TYPE | MASS UPDATE ACTIONS |
All Contacts | Reachable, non-marketing, suppressed, excluded, and invalid contacts | ✓ | |||
Reachable Contacts | Subscription type is marketing | ✓ | ✓ | ✓ | ✓ |
Non-Marketing | Subscription type is non-marketing | ✓ | ✓ | ✓ | ✓ |
Active Contacts | Reachable and non-marketing contacts | ✓ | ✓ | ✓ | ✓ |
Suppressed Contacts | Cannot communicate with them | ✓ | |||
Excluded Contacts | Excluded from comms due to org business rules. | ✓ | |||
Invalid Contacts | Invalid email address | ✓ | |||
Bounced Contacts | Hard bounced email addresses | ✓ | |||
Unsubscribed Contacts | Unsubscribed by the contact or by you/your users | ✓ | |||
Manually Suppressed | Added to suppression list by admin or voluntary unsubscription | ✓ | ✓ |
The last column labeled Mass Update Actions can be done when you select the contacts, and it includes the following bulk actions:
● Assign Tags
● Remove Tags
● Add to Lists
● Remove from Lists
● Assign Topics
● Remove Topics
● Export Contacts
● Mass Update
Filtering your contacts
The filter button at the top-right of the contacts list view page can be used to filter quickly or find contacts based on contact fields (including custom fields) and other attributes. There are lots of attributes you can use to pin point a certain contact.
Below are the list of categories with which you can filter contacts. Each category contains a set of fields – some are related to contacts and some related to campaigns, integrations, and analytics:
● Contact Attributes - comprises contact fields and custom fields
● Account Attributes - fields related to the company the contact may belong to
● Associations - list, segment, topic, and workflow associations
● Email Engagements - email campaign related metrics
● SMS Engagements - SMS campaign related metrics
● Deal Attributes - used when you integrate Zoho CRM and want to filter contacts based on deal-related fields
● Form Attributes - form related fields
● Topics - to find if contacts are subscribed or unsubscribed to topics
● Event Attributes - if you integrate event management apps like Zoho Backstage, you can use the fields under this category to filter contacts
● Webinar Attributes - if you integrate webinar apps like Zoho Webinar and GoToWebinar, you can use the fields of this category
● E-Commerce Attributes - used when you integrate e-commerce solutions like Shopify, Zoho Commerce
How to filter contacts based on certain criteria?
For example, you want to find contacts whose email address contains 'hotmail.com', their Company Name is 'Zylker Inc.', and if they're associated to a list named 'Newsletter List'. You can use this filter button and set the filter criteria.
Here are the steps:
- From the Navigation Toolbar to the left, click Audience and select Contacts.
- Click the Filter button at the top-right.
- In the slide-in window that appears, select the Contact Email field under Contact Attributes category, select the condition as contains any of, and enter value in the box as hotmail.com.
- Next, select the Company Name field under the same category, select the condition as is equal to any of, and enter value in the box as Zylker Inc..
- Finally, scroll down to the Associations category. Select the List Membership field, choose the condition as is equal to any of, and select the Newsletter List.
- Click Apply once finished. The contacts will be listed based on the criteria you set.
Creating contacts from the list view page
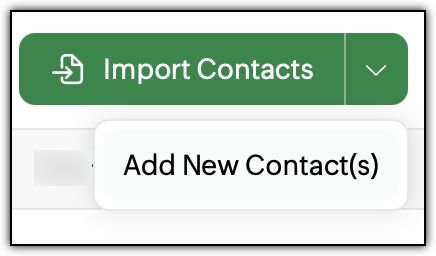
To create contacts in the list view page, you can either use the Import Contacts button or the Add New Contact(s) drop-down option present under this button.
● Import Contacts - if you want to bring in contacts that you have in a spreadsheet file you can use this option.
● Add New Contact(s) - if you want to manually add 20 or less contacts, you can use this option.
More Actions
The More Actions (three-dotted) button is present at the top-right, beside the Import Contacts button. Under this button, you can:
● view the Import Summary of your imports
Bulk actions on contacts in the list view page
On the list view page, you can do various bulk actions on your contacts such as adding them to list, adding tags to them, and so on.
How to select contacts to do bulk actions
Before you can do bulk actions, you need to select these contacts. There are multiple ways to select contacts depending on your requirement. Let's look at each way.
Select specific contacts
This can be used for selecting a very limited number of contacts such as 5-10 contacts. In the contacts list view page, click the checkbox to the left of each contact's email address to select those contacts only.
Select all contacts in a page
This can be used for selecting all the contacts in a page. Click the checkbox next to the Contact Email column to select all the contacts in a page. Maximum 200 contacts can be selected.
Select all contacts
This can be used to select all the contacts you have in your Zoho Campaigns organization. Click the checkbox next to the Contact Email column, and click the Select All option that appears at the top to select more than 200 contacts in the page.
What are the bulk actions you can do on contacts?
After you select the contacts, at the top you'll see the Actions
button. Clicking this button will reveal many actions which are as follows:
● Change Subscription Type - to change the subscription type of the selected contacts
● Assign Tags - to assign tags to the contacts
● Remove Tags - to remove the assigned tags from the contacts
● Add to Lists - to add the contacts to lists
● Remove from Lists - to remove contacts from lists
● Assign Topics - to assign topics to the contacts
● Remove Topics - to remove the assigned topics
● Export Contacts - to export the selected contacts
● Mass Update - to bulk or mass update a particular field of the selected contacts
Inside each list, segment, or a form, you can view the Contacts tab. Bulk actions can also be performed on contacts specific to a list, segment, or form.
Let us look at each action in detail.
 Note: Bulk actions are specific to the view in which you're doing the action.
For example, say you're in the Non-Marketing view in which there are 2,000 contacts, and you want to update the subscription type of all contacts of this view. So, you use the Select All option to select these contacts to update the subscription type. By doing this, only the contacts in the Non-Marketing view will undergo an update. Contacts present in other views like Marketing, Unsubscribed will remain untouched.

Important:
● The list of bulk actions you can perform will vary depending on the view you are in. Not all bulk actions described below will be applicable to all the views.
● Depending on the number of contacts you select, the time taken for a bulk action to be completed can vary.
Change Subscription Type
To change the subscription type in bulk for contacts, you can follow the below steps:
- From the Navigation Toolbar to the left, click Audience and select Contacts.
- Select the contacts using any of the three ways to select a contact.
- Click the Actions button at the top.
- Click Change Subscription Type.
- Choose the subscription type and click Proceed in the pop-up that appears.
Assign Tags
To assign tags in bulk for contacts, you can follow the below steps:
- From the Navigation Toolbar to the left, click Audience and select Contacts.
- Select the contacts using any of the three ways to select a contact.
- Click the Actions button at the top.
- Click Assign Tags.
- Select the tags by clicking them and click Save.
- You can also create a tag by typing its name in the text box, click the Create button, choose the color in the pop-up, click Save. Then click Save again to assign the newly created tag to the selected contacts.
Remove Tags
To remove tags in bulk for contacts, you can follow the below steps:
- From the Navigation Toolbar to the left, click Audience and select Contacts.
- Select the contacts using any of the three ways to select a contact.
- Click the Actions button at the top.
- Click Remove Tags.
- Select the tags by clicking them and click Save.
Add to Lists
To add contacts to lists in bulk, you can follow the below steps:
- From the Navigation Toolbar to the left, click Audience and select Contacts.
- Select the contacts using any of the three ways to select a contact.
- Click the Actions button at the top.
- Click Add to Lists.
- Select the lists by clicking them and click Save.
- You can also create a list by typing its name in the text box, and click the Create button. Then click Save to add the selected contacts to the newly created list.
Remove from Lists
To remove contacts from lists in bulk, you can follow the below steps:
- From the Navigation Toolbar to the left, click Audience and select Contacts.
- Select the contacts using any of the three ways to select a contact.
- Click the Actions button at the top.
- Click Remove from Lists.
- Select the lists by clicking them and click Save.
Assign Topics
To assign topics to contacts bulk, you can follow the below steps:
- From the Navigation Toolbar to the left, click Audience and select Contacts.
- Select the contacts using any of the three ways to select a contact.
- Click the Actions button at the top.
- Click Assign Topics.
- Select the topics by clicking them.
- Select the lawful basis for these topics and click Save.
Note: Lawful basis drop-down will appear if you've enabled GDPR Compliance under Settings -> Compliances.Remove Topics
To remove topics from contacts bulk, you can follow the below steps:
- From the Navigation Toolbar to the left, click Audience and select Contacts.
- Select the contacts using any of the three ways to select a contact.
- Click the Actions button at the top.
- Click Remove Topics.
- Select the topics by clicking them and click Save.
Export Contacts
To export the selected contacts from the list view page, you can follow the below steps:
- From the Navigation Toolbar to the left, click Audience and select Contacts.
- Select the contacts using any of the three ways to select a contact.
- Click the Actions button at the top.
- Click Export Contacts.
- In the slide-in window that appears, enter the File Name, choose the extension (.csv, .tsv, .xlsx, .json), select the fields to be exported, and password protect the file (if needed).
- Click Export. The file will be downloaded to your computer.
Mass Update
To mass update the contacts from the list view page, you can follow the below steps:
- From the Navigation Toolbar to the left, click Audience and select Contacts.
- Select the contacts using any of the three ways to select a contact.
- Click the Actions button at the top.
- Click Mass Update.
- In the pop-up that appears, choose a field under Select Field.
- You can choose to:
- Click Proceed to complete the mass update.
○ Clear Field Value - to remove the existing value of this field
○ Update (for text, number fields) - to replace existing value with new value in this field
○ Append (for text fields) - to add the new value while keeping the existing value in this field
○ Add (for number fields) - to add a specific value to the existing value of the field, and display the final value
○ Subtract (for number fields) - to subtract a specific value from the existing value of the field, and display the final value
○ For mass updating date, checkbox, picklist, multi-select picklist type contact fields, you'll mostly choose a value.
Delete Contacts
To delete the contacts from the list view page, you can follow the below steps:
- From the Navigation Toolbar to the left, click Audience and select Contacts.
- Select the contacts using any of the three ways to select a contact.
- Click the Delete button at the top.
- Click the Delete Contacts button in the pop-up that appears.
Notes:
● Once the contacts are deleted, they cannot be retrieved. You have to re-add them.
● You cannot delete Unsubscribed, Invalid, Bounced, and Blocked contacts.
Customize Columns
After creating contacts, when you access the list view page of contacts, you'll see their details like email, first name, mobile, country, and so on.
But you can display additional contact fields as columns, remove unneeded fields, and also re-arrange the columns in this page using the Customize Columns
option.
To display additional contact fields as columns
If you want to display additional information about your contacts as columns so you can glance at them quickly:
- From the Navigation Toolbar to the left, click Audience and select Contacts.
- Click the Customize Columns option at the far-right, just below the More Actions button.
- Select the fields you want to display as columns by clicking them. Search for a particular field using the search box, and select it.
- Click Save.
To remove contact fields from columns
If you want to remove unneeded information about your contacts from the columns, you can do so by:
- From the Navigation Toolbar to the left, click Audience and select Contacts.
- Click the Customize Columns option at the far-right, just below the More Actions button.
- Select the fields you want to remove from the display by clicking them. Search for a particular field using the search box, and select it.
- Click Save.
To sort the contact fields columns
If you need to have the contact fields to be displayed in a specific order, you can do so by:
- From the Navigation Toolbar to the left, click Audience and select Contacts.
- Click the Customize Columns option at the far-right, just below the More Actions button.
- First, ensure that the fields you want to sort are displayed. If not select them to display in the view. Then, drag the fields (one-by-one) using the 6-dotted icon and place them in the desired position.
- Click Save.
Notes:
● The Contact Email and Mobile fields cannot be removed.
● The Contact Email and Mobile fields cannot be re-arranged.
● You can sort the contacts in ascending or descending order of any field. For example, if you want to sort your contacts in the descending order of First Name, simply click the First Name column in the Contacts page.
Custom Views for Contacts
You can create your own customized views in addition to the existing default views. Custom views are especially useful when you want to view a list of contacts under a specific view excluding the default views. You'll be able to set custom criteria based on which the view will be created. Let's look in detail how a custom view can be created and what operations you can perform on it.
What is a custom view and how do you create it?
Custom views can be used to have particular contacts in a separate view so you can access them easily. You can provide specific criteria while creating a custom view to make it more granular and customized.
How do you create a custom view?
To create a custom view:
- Navigate to Audience -> Contacts.
- Click the More Actions (3-dotted) button at the top left, next to the All Contacts view.
- Click the Create Custom Viewoption.
Click More Actions -> Create Custom View.
- Specify the View Name.
- Select a criteria from the numerous available ones.
- Specify the value or condition based on the criteria you choose and click Create View.
The contacts will be populated into this view based on your criteria and the custom view should also appear at the top next to the All Contacts view.
What criteria are available during contact custom view creation?
When you create a custom view, you'll have numerous criteria at your disposal to select from. The criteria are grouped into different attributes. Below are the attributes that you'll see:
- Contact Attributes
- Account Attributes
- Associations
- Email Engagements
- SMS Engagements
- Deal Attributes
- Form Attributes
- Topics
- Event Attributes
- Webinar Attributes
- E-Commerce Attributes
- Workflow Attributes
- WhatsApp Engagements
Notes:
● The custom view name can be a maximum of 70 characters.
● You can create any number of custom views.
What actions can be performed on a custom view?
To perform actions in a custom view:
- Navigate to Audience -> Contacts.
- Click the More Actions button beside the All Contacts or the custom view.
- You'll see the custom views you've created here. Hover over a custom view and click the More Actions button.
- The actions you can perform include:
- Pin View - Pin a view at the top so you can access it easily.
- Edit - Modify the view name and criteria. Once changes are made, click the Update View button.
- Clone - Clone an existing view.
Example: If you have a view with a complex criteria and want to create a similar view but change only a single criteria, you can simply clone the existing view, edit the cloned view, and change the criteria. Ensure that you change the cloned view's name. - Delete - Delete a custom view. Click the Delete button in the pop-up that appears. Once deleted, the view cannot be retrieved.
- Unpin View - Appears only for a pinned view. To unpin a view from the top bar.
Related Articles: