Data Alerts
1. What are data alerts?
To make informed business decisions, you need to track key changes in your business data. Manually monitoring all the important changes in business data is next to impossible. Data alert in Zoho Analytics helps you combat this problem. With data alerts you can:
- Set up varying levels of conditions to be met for an alert.
- Be notified in-app, or via email.
- Create a webhook request to post alert messages in various messaging services, and even trigger workflows across integrated applications like ServiceDesk Plus, Desktop Central, etc.
Data alerts give you an edge over regular analytics by letting you seize opportunities at the right time.
2. Who can use data alerts?
Any user of Zoho Analytics can configure data alerts.
3. What are the various visualization types that support data alerts?
You can create data alerts over the following views.
- Charts
- Pivot View
- Summary View
4. What are the steps to create data alerts?
Follow the steps below to create a data alert:
Open the report that you wish to monitor.
Click the Alert icon on the top right corner and select Create Alert.
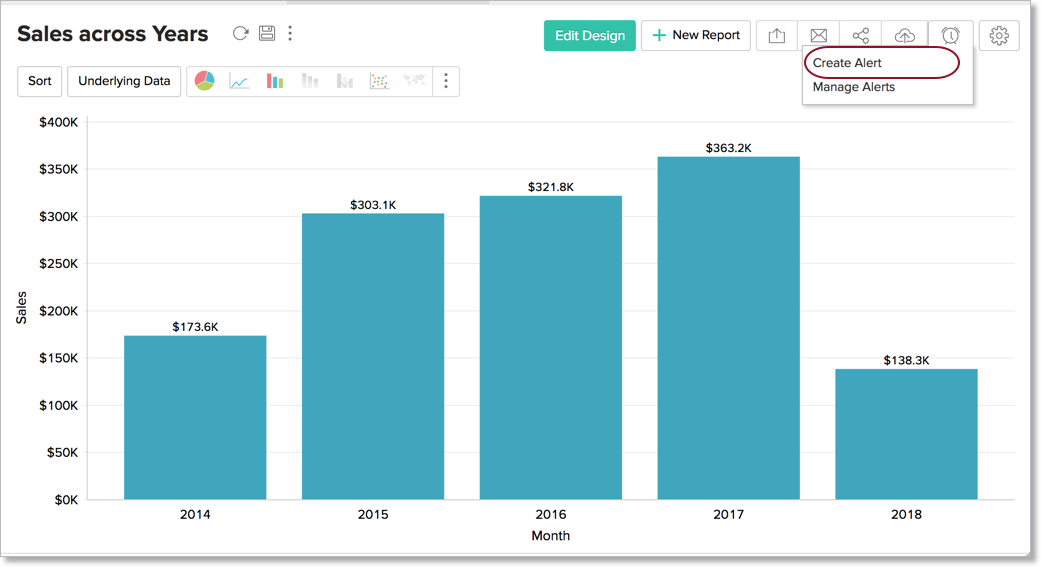
In the Create Alert popup that appears, provide a name for the data alert.
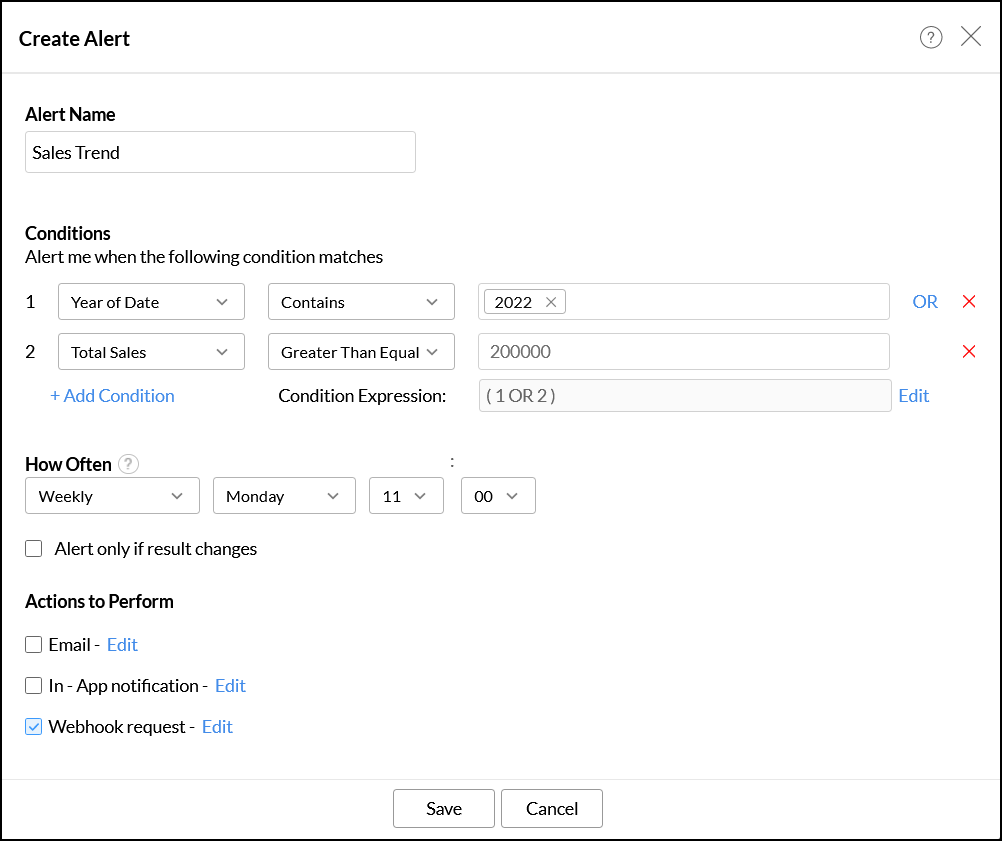
Create the condition based on which the data alert must be triggered.
In a chart, conditions can be created based on columns that are used in the axes of the chart. In a pivot table, conditions can be created based on the columns in the data section, on row/column sub-totals or on the grand summary value (Click here to learn more about pivots views here). In a summary table, conditions can be created based on columns in the summarize section.
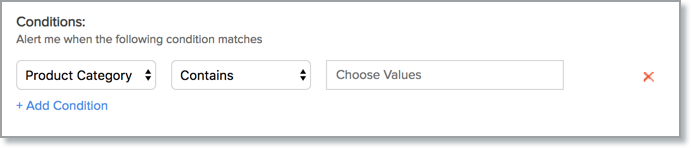
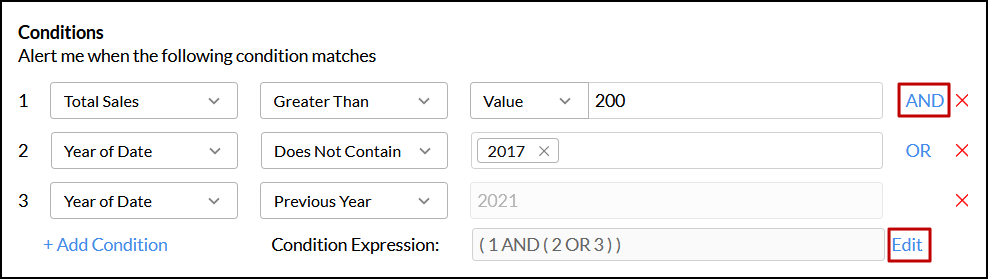
To create the condition,
Select the column over which the condition has to be applied.
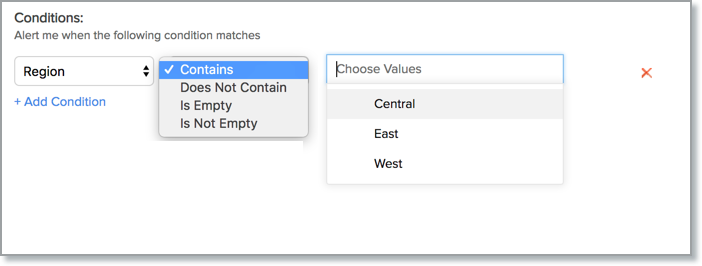
Select the appropriate operator from the drop-down.
Enter the value that the column has to be compared with.
Zoho Analytics allows you to create conditions with both AND and OR conditions. When you add multiple conditions, Zoho Analytics uses the AND condition by default. To switch between AND and OR, click on the corresponding condition. You can also edit the conditions by clicking the Edit link corresponding to the Condition Expression textbox.
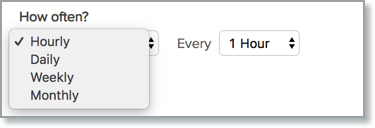
Specify how often you want the application to perform the comparison with your data using the How often? section.
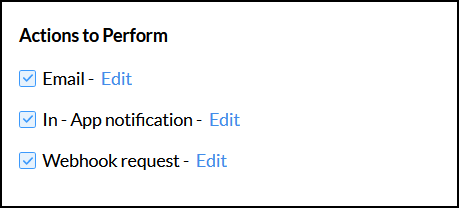
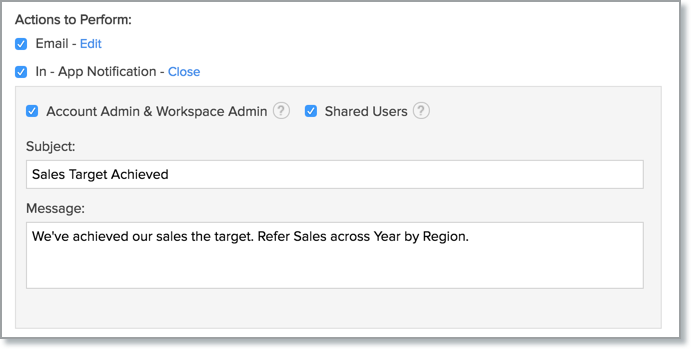
The Actions to Perform section allows you to choose how you wish to be notified when the data alert conditions are met. You can choose to be notified by email, through in-app notifications or configure a webhook request.
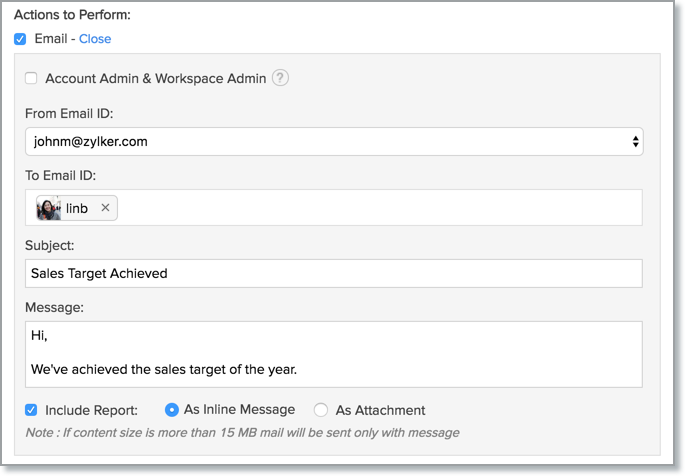
If you select Email, you can choose to send the data alert to the administrators and the workspace admin, and add the required email addresses in the To Email ID section. Modify the email's subject and message as required, and use the Include Report checkbox to add the report to the email.
If you select In - App Notification option, you can choose to send the data alert to the administrators and the workspace admin, and also the shared users of the report. You can also modify the notification's subject and message as required.
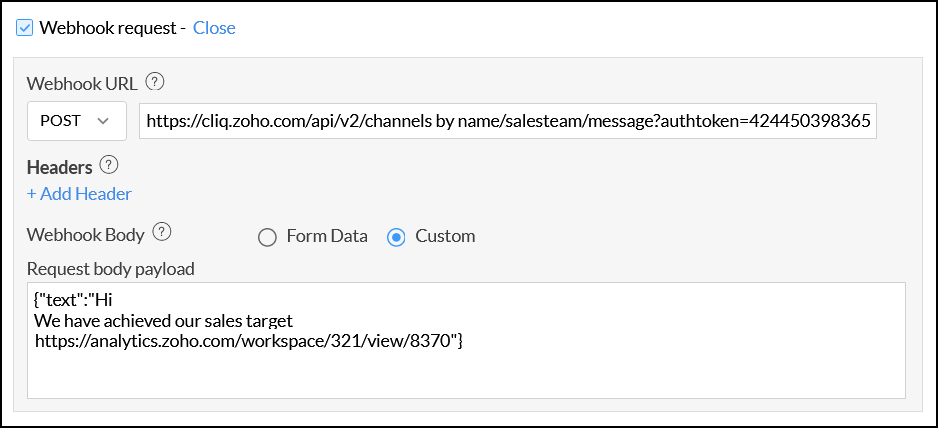
If you select Webhook request, you can post the alert messages in various messaging services or trigger workflows in target applications when the data alert conditions are met. (Click here to learn more about Webhooks). You can modify the following parameters as required.
Webhook URL: Select the URL type as Post, Put or Patch from the dropdown, and specify the corresponding application's webhook URL. In this example, we are delivering the webhook request to a Zoho Cliq [A popular chat application from Zoho] channel. So we have added the corresponding webhook URL.
Headers: Specify the HTTP header which needs to be included in your webhook request.
Webhook Body: Choose any one of the following options to add your webhook message.
Form Data: Specify the Name and Value in the Parameters section.
Custom: Enter the required message in the Request body payload section in the following format: {"text":"<your message>"}
Click Save to create your data alert.
5. Is it possible to create multiple alerts over a report?
Yes, you can create any number of alerts over a report.
6. How do I edit data alerts?
Follow the steps below to edit data alerts:
Open the report over which the alert was created.
Click the Alert icon and select Manage Alert.
In the Manage Alerts page, navigate to the alert that you wish to edit, click the More Actions icon and select the Edit option.
In the popup that appears, make necessary changes and click Save.
7. How do I configure the data alert notification?
Zoho Analytics allows you to set up email notifications, in-app notifications, and webhook requests as alert notification channels for data alerts.
You can send emails to notify the administrators and the workspace administrator using the corresponding checkboxes. You can also send notifications to specific users by entering their email address in the To Email ID section. You can choose to add the report in the notification mail, as an inline message or an attachment, using the Include Report checkbox.
When the alert conditions are met, a notification email will be sent to the specified email addresses.
This option allows you to display an alert within the Zoho Analytics application. You can send emails to notify the administrators, the workspace administrator and the shared users of the report using the corresponding checkboxes.
When the alert conditions are met, the notification will be sent to specified users. You can view the alert message by clicking the notification icon.
This option allows you to post alert messages in various messaging services that support webhook requests. Webhook requests can also be configured to trigger workflows that execute certain actions in other applications. Click here to learn more about Webhooks.
8. Who will be notified when alert conditions are met?
You can notify the administrators and the workspace administrators, and any other user you wish to notify, using the email option. However, while using the In-app notification option, you can only notify the administrators, workspace admin, and the shared users of the respective report.
9. Is it possible to include the report in the notification email?
Yes, you can choose to add the report by selecting the Include Report option. The report can be added either as an inline message or as an attachment using the corresponding options.
Note: The size of the attached report varies depending on the data in your current view. If the size exceeds 15MB, the notification mail will be sent to users without the report.
10. How often will the data alerts conditions be verified?
You can choose to verify data alerts in the following intervals, using the How often section while creating the data alert.
- Hourly
- Daily
- Weekly
- Monthly
11. How do I view the alert's history?
Follow the steps below to view when the data alert has been triggered in the past.
Open the required report over which the alert was created.
Click the Alert icon and select the Manage Alert option.
In the Manage Alert page, hover over the alert whose history you wish to access.
Click the Alert History icon. A calendar view appears, highlighting the days when the alert was triggered. Clicking on these highlighted days will display the alert runtime, triggered time, and the copy of the report when the alert was triggered.
12. Is it possible to execute data alerts instantly?
Yes. Follow the below steps to do this.
Open the required report over which the alert was created.
Click the Alert icon and select the Manage Alert option.
In the Manage Alert page, click the Run icon that appears on mouse over the required alert.
13. How do I delete a data alert?
Follow the steps below to delete a data alert:
Open the required report over which the alert was created.
Click the Alert icon and select the Manage Alert option.
In the Manage Alert page, click the Delete icon that appears on mouse over the required alert. Confirm your action in the popup that appears.
14. How do I manage all the alerts in the workspace?
To manage the data alerts in a workspace:
Click the Settings icon on the side panel, and navigate to the Alerts section.
Every alert created in the workspace will be listed on this page.
On mouse over a required alert, the following options will be available:
Status: This toggle button allows you to pause the data alert, and activate it when required. When the status is inactive, the conditions specified in the data alert will not be checked.
Run Now: This option allows you to run the data alert.
View Alert History: This option allows displays the various times the specific alert was triggered.
Info: This option displays the alert's created and modified times.
Edit: Select this option to modify the existing data alert.
Delete: Use this option to delete the required data alert.
You can also manage the various alerts created over a specific report by clicking the Alert icon on the top right corner of the report, and clicking the Manage Alerts icon.