Record Approvals
Upon receiving form entries from your respondents, you can create reports to sort and consolidate the entries that need to be approved by applying filters. You can set approvers to review the records and approve or deny them. This will streamline the approval process by allowing multiple records to be reviewed at one place rather than on each form entry.
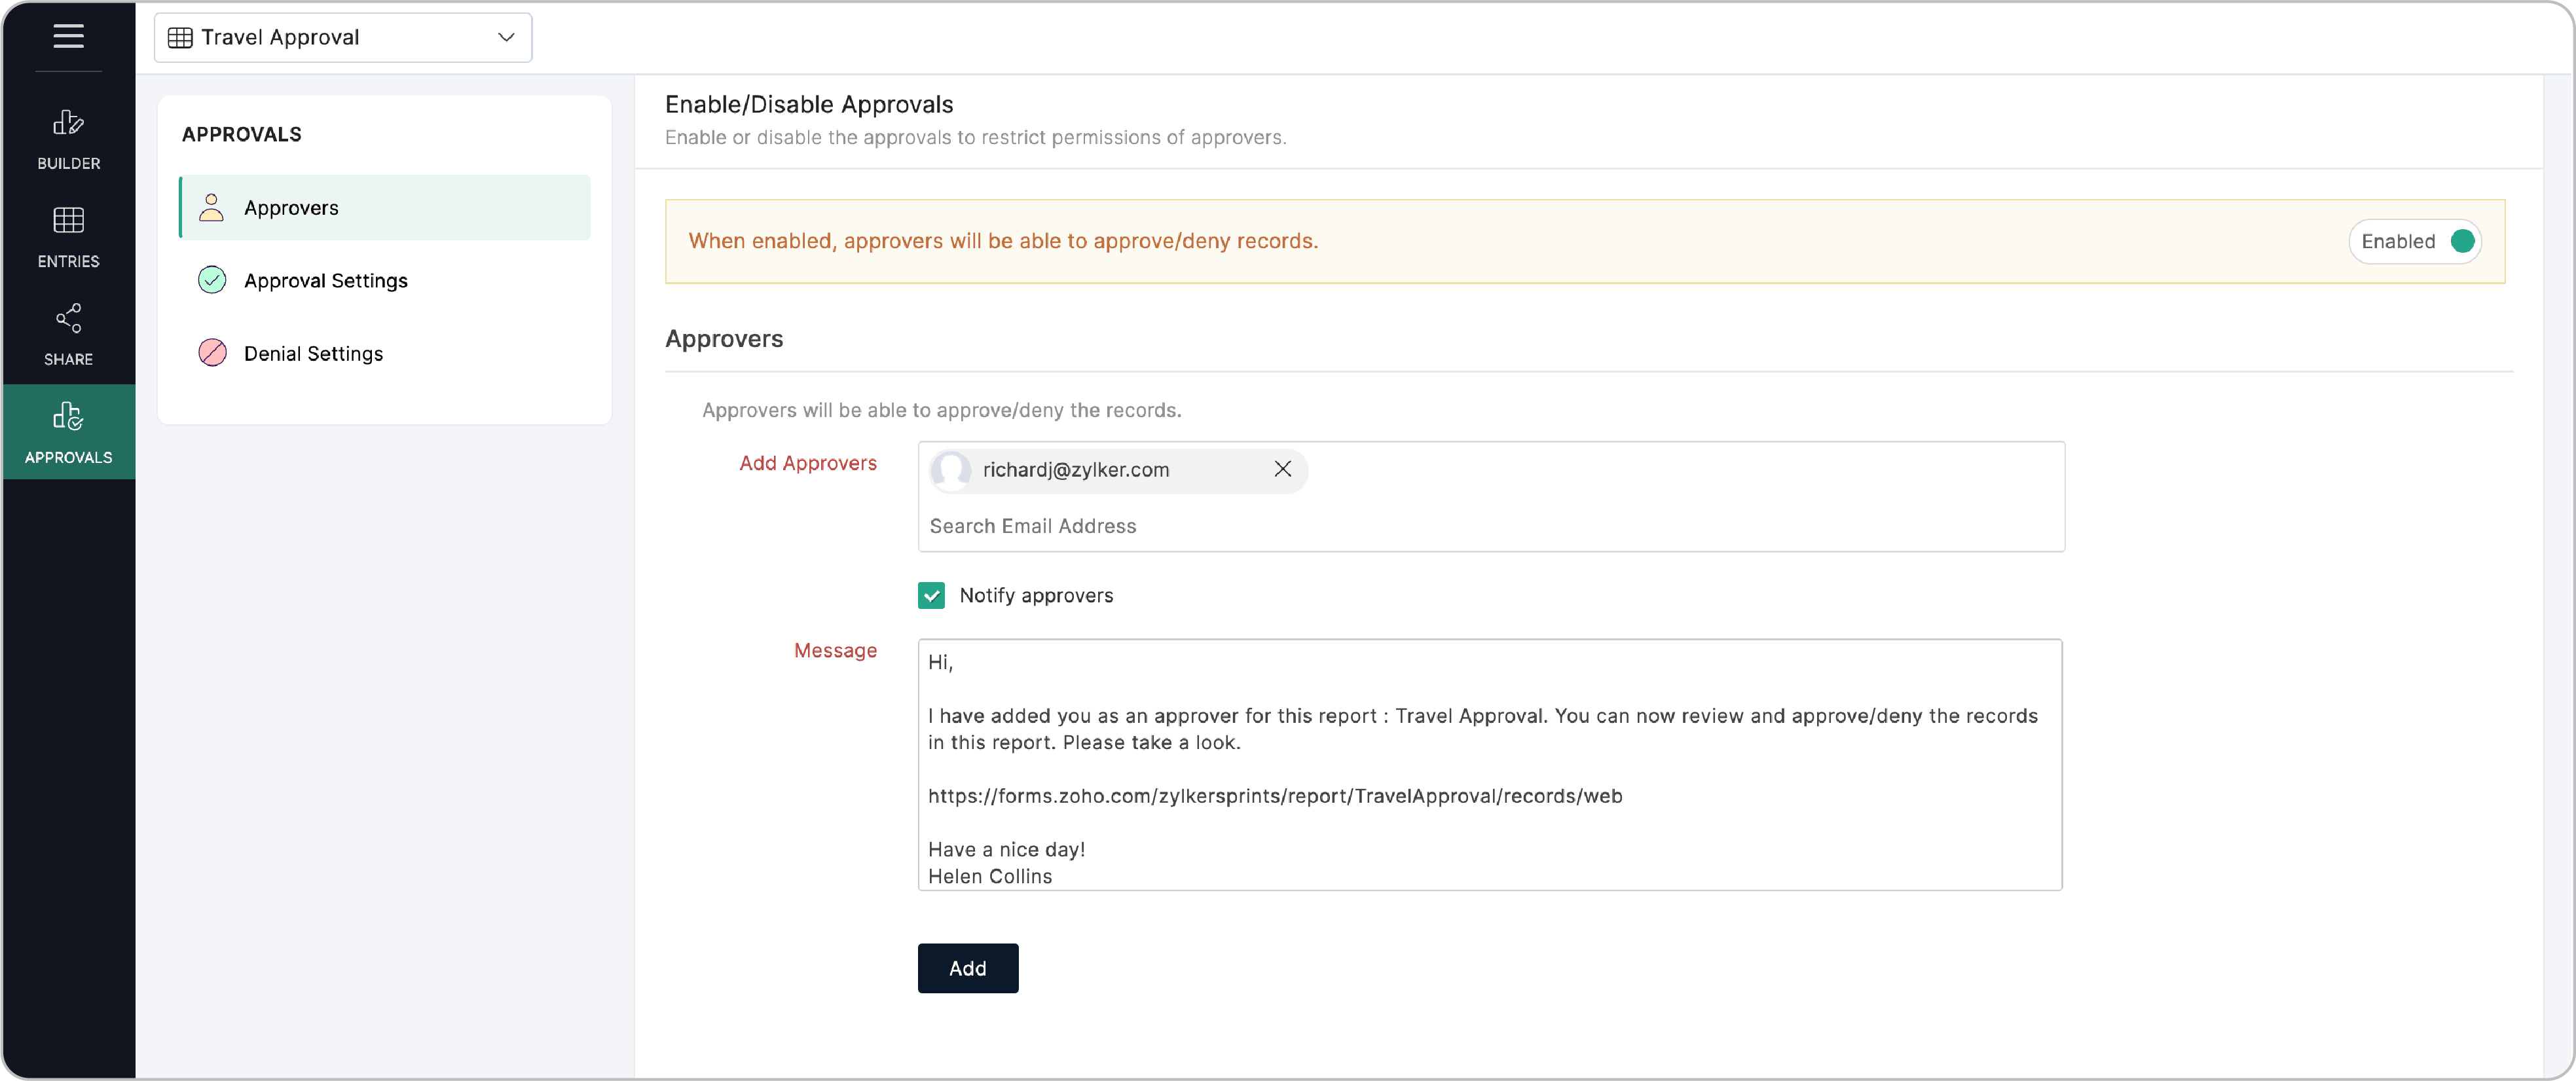
Adding Approvers
Approvers can review the entries in a report, and approve or deny them. They can engage in discussions over each entry and include their reason for approval/denial.
To add an approver for a report,
- Go to the report that you want to set approvers for.
- Navigate to Approvals tab > Approvers and enable approvals.
- In Add Approvers, enter the email addresses of the users within your organization to add them as approvers for the report.
- To trigger an email to the added users notifying that they have been set as approvers for a report, select Notify approvers. You can change the default message of the email and click Add & Notify.
To view all the approvers added for a report, click Approvers under Add approvers.
Once you have added approvers for a report, you can configure the Approval Settings and Denial Settings.
Approval Settings
Under Approval Settings, you can change the default label for the Approve option that appears to the approvers and choose to notify users via an email on record approval.
To do this,
- Under the Approvals tab, click Approval Settings and change the default label (Approve) as required.
- To trigger an email to the users within your organization and the respondents when a record is approved, select Enable email notification on approval.
- Enter the email addresses of the users you wish to notify. You can change the default Subject and Message of the email and personalize them by including values from form responses using the merge icon.
- Click Save.
Denial Settings
Under Denial Settings, you can change the default label for the Deny option and choose to notify users via an email on the denial of a record.
To do this,
- Under the Approvals tab, click Denial Settings and change the default label (Deny) as required.
- To trigger an email to the users within your organization and the respondents when a record is denied, select email notification on denial.
- Enter the email addresses of the users you wish to notify. You can change the default Subject and Message of the email and personalize them by including values from form responses using the merge tag.
- Click Save.

Note: You can send Record Approval related emails to specific addresses mapped with assign value on choice-based fields like Checkbox, Dropdown, Radio, Multiple Choice, and Image Choice.
How can an approver approve/deny records?
To approve/deny the entries of a report,
- Navigate to the Entries tab of the report.
- Hover over an entry and click the ellipsis icon as shown.
- Click Review. A summary of the entry with the options to Approve or Deny will be displayed.
- Approvers can additionally:
- Leave comments for each entry in the Comments section and engage in discussions with the other approvers.
- Include a reason to specify why a report has been approved/denied in the Include reason section.