Manage Settings
Mail Configuration
Mail servers are configured to send emails to desired destinations. For instance, when you send scheduled emails of your reports, you need to the configure mail server through which mails are to be sent.
Specify the following details in the Mail Configuration tab.
Specify the SMTP Server name and the Port number in respective fields.
Provide the email address. It will be used as the sender address.
If the SMTP server requires authentication details, select the Requires authentication checkbox, and provide the username and password.
For TLS Support in the mail server configuration, click the TLS Enabled checkbox.
To enable Secure Connection(SSL), check the SSL Enabled checkbox.
If the chosen mail server is down for some reasons, you have an option to configure a Standby Mail Server that functions as a back up mail server. Check the Configure a standby mail server checkbox.
To test if the configured settings are functioning properly, click the Test Primary Server Settings button.
Click Save to save the configuration.
Proxy Configuration
To monitor any URL that is available on the Internet, the requests have to be routed through a HTTP proxy server. This can be done by setting up the proxy configuration.
Follow the steps given below to configure a proxy server:
Navigate to the Proxy configuration tab in the Settings page.
To detect the proxy server automatically, select the Automatically detect settings radio button and click Save .
To specify the proxy settings manually, select the Use a proxy server radio button, and specify the following details:
Host and port number of the proxy server.
Username and password of the user to access the Internet.
Specify the Internet addresses you want to connect to without using a proxy server. Use comma (,) to specify multiple IP's.
Click Save . Every request to the Internet will now be routed through the proxy server.
To disable the proxy server, select the Disable Proxy radio button and click Save .
SSL Configuration
-
Head to the SSL Configuration tab from the Settings page.
-
Choose the format of your SSL certificate from the Select your certificate file format drop-down. The following are the supported file formats: .cer, .crt, .pfx, .p7b, .keystore, and .jks.
-
Browse and upload the SSL certificate.
-
Upload the private key generated together with the certificate to verify a secure connection to Zoho Analytics. This option applies only to the .cer, .crt, and .p7b file formats.
-
In the Keystore Password field, enter the password of the Keystore where the private key is saved. If your private key is in .key format, then Keystore Password is not required.
-
You can either choose to upload the intermediate certificate manually or allow Zoho Analytics to detect it automatically by selecting the Manual or Automatic radio button. You can upload a maximum of four intermediate certificates. It is recommended to choose Manual in case of any proxy is used.
-
On uploading all the necessary certificates, click Save .
-
Restart the Zoho Analytics application to reflect the changes.

Rebranding
Logo rebranding allows you to customize the Zoho Analytics product logo that is displayed within the Zoho Analytics product. This support is available only in the Professional edition of Zoho Analytics.
Instructions for rebranding:
Drag and drop the desired image into the logo image section of the rebranding window. You can also click inside the logo image section of the rebranding window which will open up a window, allowing you to browse through your local files and select the preferred image as your logo (supported image types: gif, jpg, jpeg, bmp and png).
Enter the required login description or tagline in the Login Description field.
Click Save.
Note:
Recommended optimum image dimension: 185 x 30 pixels.
Changes in login description require a server restart to take effect.
Rebranding is available only for the Professional edition of Zoho Analytics.
User Management
The administrator can add, delete, activate or deactivate users, from the User Management page. The SAML configuration tab can be used to configure single sign-on with third party applications. The Active Directory Import and the Active Directory SSO tabs enable you to import your Active Directory users and configure single sign-on for Active Directory users. To learn more about User Management in Zoho Analytics, click here .
Concurrent Guests
A concurrent guest is anyone who can simply view published reports and dashboards across your organization without having to log in to Zoho Analytics.
The Concurrent Guests setting page displays details about the concurrent sessions, such as the Session information, the Last Accessed Time, the IP address and the Session ID.
License Management
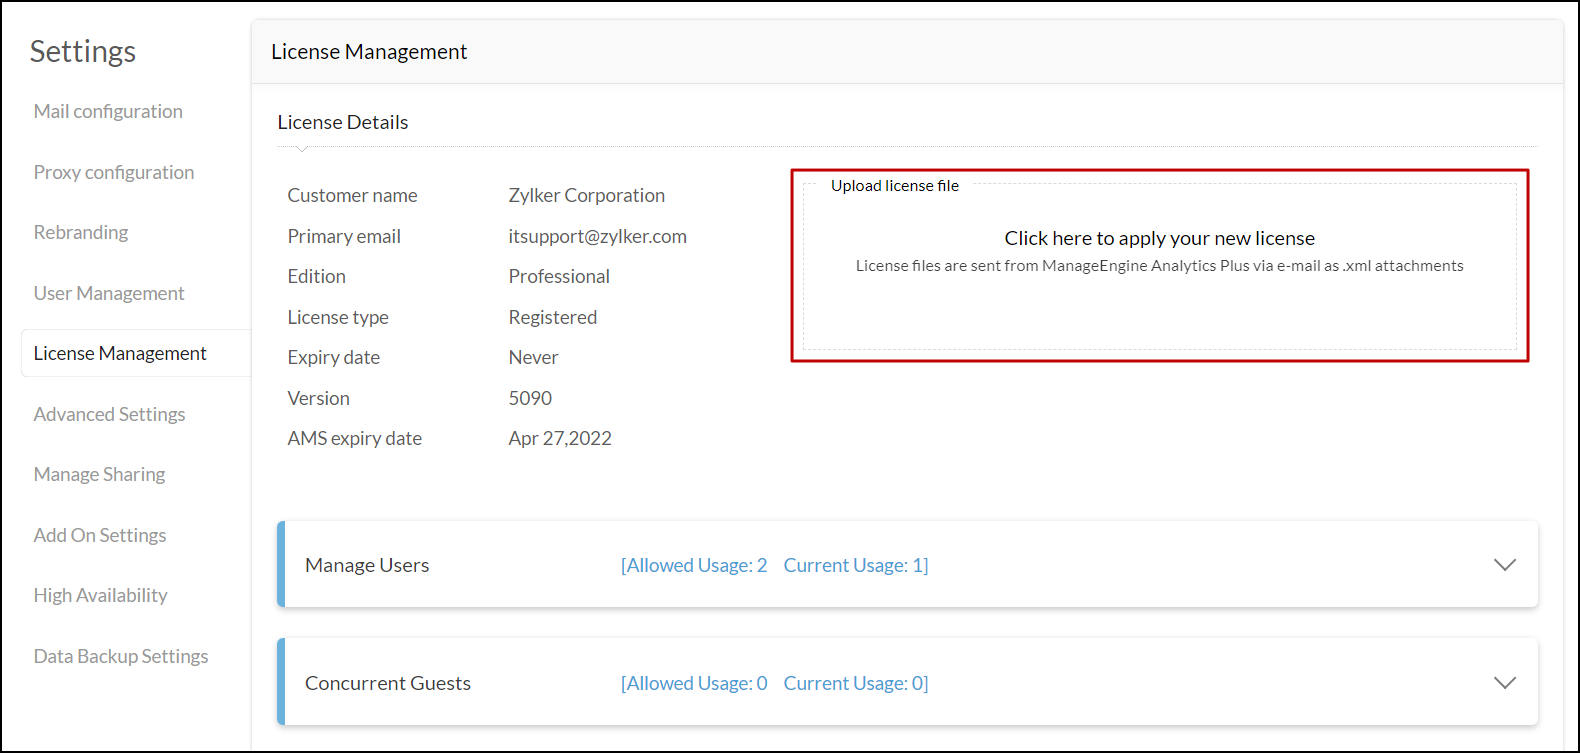
The License Management page allows you to manage the various licensing components or apply a new license. You can also view details of the current license, along with the allowed usage and current usage of users, viewers and concurrent guests.
On purchasing Zoho Analytics , you will receive a license file in an email. To apply the new license, click the Click here to apply your new license section, and upload the required license file.
To view details of your users, viewers and concurrent guests, navigate to the Manage Users, Manage Viewers and Concurrent Guests sections respectively.
In addition to the license file, users are also required to upload the Annual Maintenance and Support (AMS) license file in the License Management page. (To learn more about the various pricing models, click here .) Upon AMS renewal, you will receive the AMS license file from licensing@zohoanalytics.com (please write to sales@zohocorp.com if you haven't received one). Click the Click here to apply your new license section, and upload the file.

Advanced Settings
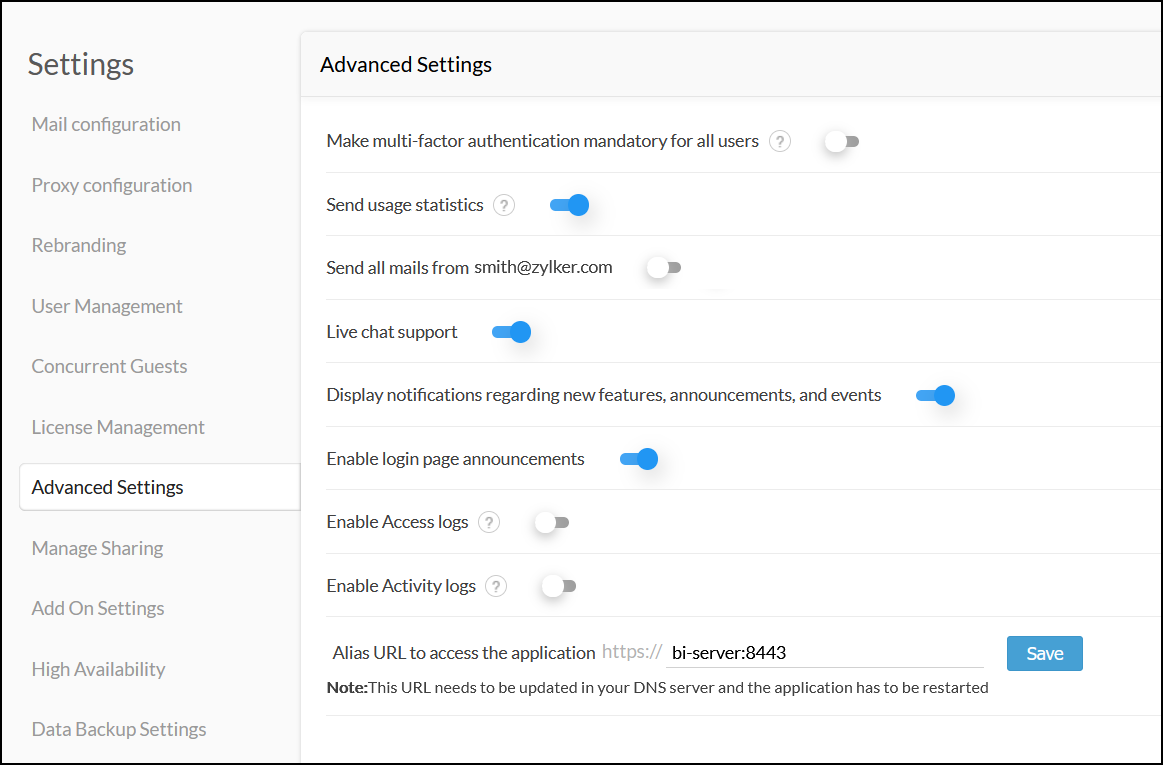
The Advanced Settings section allows you to configure the following changes in your Zoho Analytics application.
- Make multi-factor authentication mandatory for all your users: This option allows administrators to mandate multi-factor authentication for every Zoho Analytics user. Click here to learn more about setting up multi-factor authentication in Zoho Analytics.
Send usage statistics: To enhance product quality, Zoho Analytics collects statistical data pertaining to quality, stability, and usability of the product from every installation. This collected data does not include any personally identifiable information, and will only be used for analysis. This feature is enabled by default, and can be disabled using the Send usage statistics toggle button.
Send all mails from user email address: This option lets you change the behavior of the product to send emails from a common email address taken from the email server settings page, instead of using the respective user's email address.
Live chat support: This option allows you to enable a live chat box to contact Zoho Analytics' support staff directly from the application.
Display notifications regarding new features, announcements, and events: This option lets you receive notifications about comments, new features, announcements, and events from Zoho Analytics through the application.
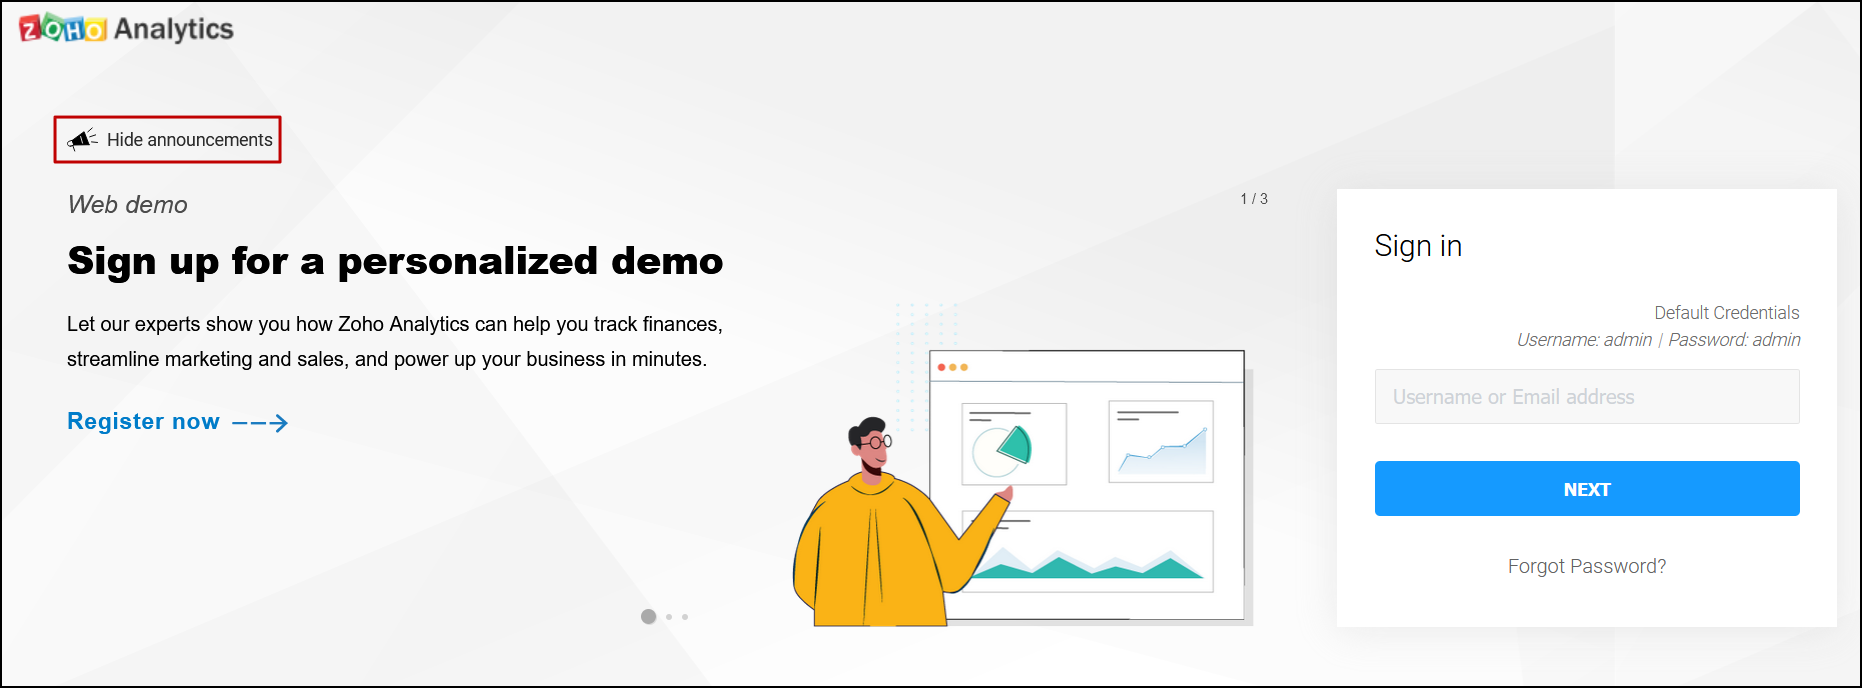
Enable login page announcements : Administrators can enable this option to display various product-related announcements on upcoming webinars, e-books and more across every Zoho Analytics users' login page.
Individual users can also choose to hide these announcements by clicking the Hide announcements option. However, other Zoho Analytics users will continue to view the login page announcements untill the administrator disables this option.

Enable Access logs: This option allows administrators to capture detailed logs on application access activity. On enabling this option, a new Audit logs workspace will be created, with a table containing access logs and several out-of-the-box reports and dashboards built over this data. Click here to learn more about access logs.
Enable Activity logs: This option allows administrators to capture detailed logs on user activity within the Zoho Analytics application. On enabling this option, a new Audit logs workspace will be created, with a table containing activity logs and several out-of-the-box reports and dashboards built over this data. Click here to learn more about activity logs.
Alias URL to access the application: This option lets you configure an alias URL through which you can access your Zoho Analytics application. The URL needs to be updated in your DNS server when an alias is created and the application needs to be restarted for the changes to take effect. Once the alias URL is set up, all email notifications generated will display the newly set up alias URL as the host name of Zoho Analytics.
Note: While configuring the alias URL, ensure the right port number is used, and in cases where reverse proxy is configured, ensure the network configurations are up-to-date.

Manage Sharing
The Manage Sharing options are accessible by clicking the Settings icon that is present on the top right corner of Zoho Analytics. The visibility and accessibility options of all your workspaces to your users can be controlled from this section.
Manage your user permissions in the Manage Sharing section which displays all the Users to which views are shared.
The Access column shows if the user has access to the respective workspace.
The Workspaces column shows all the workspaces that are accessible to that respective user.
To disable sharing for a particular user, click on the Remove Sharing option that appears on clicking the workspaces shared with a user.
Clicking on the By Workspaces tab at the top of the Manage Sharing window will display all the workspaces that are present along with the date they had been created and the users who have access to the respective workspace.
To export the users list as a csv file based on users to whom the workspaces are shared, go to the By Users view, and click on the Export icon present on the top right corner of the Manage Sharing window.
Add-On Settings
The Add-On Settings page lets you enable additional functionality in the form of add-ons. To install an add-on, navigate to the required listing, and click the corresponding Install button. Some add-ons may require an application restart. New updates to the add-ons will also be available on this page.
The following add-ons are available in Zoho Analytics:
Ask Zia is the intelligent analytics assistant that allows users to put forth questions in plain English and generates relevant visualizations. To learn more about Ask Zia, click here .
The Spatial Data Analysis add-on allows users to create customized geo visualizations by importing spatial data. To learn more about importing Spatial data files into Zoho Analytics, click here .
The Zip Code support for Geo maps add-on allows users to easily generate geo visualizations based on zip code data, without having to manually configure the zip code's corresponding geolocation. To learn more about creating map charts, click here .
High availability
The High Availability section allows you to view details of your primary and standby servers, such as the overall status of high availability configuration, and the status of file and data replication. (To learn more about high availability configuration, click here .)
High Availability Status: An online status signifies that the standby server is ready to takeover from the primary server, should it experience downtime. When the high availability status goes offline, verify if the standby server can access the primary server by launching the primary server's application URL from the standby server. Additionally, check the file sharing status.
Data Replication Status: This section tells you if data replication is being carried out between the primary and standby servers. If this status is offline, check the file sharing configuration and ensure data replication goes online immediately. Failure to do so will cause your high availability cluster to stop functioning over a period of time.
File Replication Status: This section tells you if the configuration files are in sync between the primary and the standby servers. When this status is offline, re-check your configuration and ensure any credential changes are updated across both servers accurately.
Apart from tracking the status of your high availability configuration, you can also edit the servers' details, and delete the high availability configuration from this page. To edit your primary and standby server's details, click the Edit icon that appears on mouse over the required server listing. Modify the username and password as required, and click Save .
To change the port number of the primary server, refer this documentation .
To delete the high availability configuration, click the Edit icon that appears on mouse over the standby server details. Click the Remove icon and confirm your action in the popups that appear. The Zoho Analytics application on the standby server can be uninstalled once the delete operation is complete.
Data Backup Settings
-
Click the Schedule data backup toggle button.
-
Specify the folder (on the Zoho Analytics server) where the backup has to be saved using the Data backup location section.
-
In the Backup every section, specify the frequency of backup generation. You can generate a backup once every 1, 3, 5, 7, 14, or 30 days, or provide a custom number of days as required.
-
Choose the number of days to hold on to the backup in your server using the Retain backups for drop-down. Zoho Analytics allows you to retain your backup for up to 3, 7, 10, 14, or 30 days or specify a custom number. You can also choose to keep the backup saved in your server forever by selecting the Forever option from the drop-down.
-
Click Save to finish.

Note:
A backup taken from a Linux server cannot be restored in a Windows server, and vice versa. The backup can only be restored on the server of the same OS.
Backup files are password protected. The default password for the backup file is "Analytics".
Zoho CRM Training Programs
Learn how to use the best tools for sales force automation and better customer engagement from Zoho's implementation specialists.
Zoho DataPrep Personalized Demo
If you'd like a personalized walk-through of our data preparation tool, please request a demo and we'll be happy to show you how to get the best out of Zoho DataPrep.
All-in-one knowledge management and training platform for your employees and customers.
You are currently viewing the help pages of Qntrl’s earlier version. Click here to view our latest version—Qntrl 3.0's help articles.
Zoho Sheet Resources
Zoho Forms Resources
Zoho Sign Resources
Zoho TeamInbox Resources
Related Articles
Workspace Settings
Zoho Analytics provides several options to customize your workspaces, such as setting the beginning of your fiscal year, setting chart color or grid theme across reports and managing users, data alerts and slideshows. 1. What are the various ...Account Setting
Accessing Zoho Analytics On-Premise My Account Settings Manage Setting Application MaintenanceManaging data sources
Zoho Analytics enables users to view and manage all data sources within the same workspace from a single location. To access this page, click the Data Sources button at the bottom of the side panel. The Data Sources page lists all the sources from ...Using Ask Zia
Setting up Ask Zia To enable Ask Zia, follow the steps below: Step 1: Open the Manage Settings page and click Add On Settings. Step 2: In the screen that appears, head to the Ask Zia listing and click Install Zia. Step 3: Once the installation is ...User Management
The administrator can import, delete, activate or deactivate users, from the User Management section of the Settings page. You can import Active Directory users and enable single sign-on functionality for them using the Active Directory tabs. To ...


