Compose, Organize and Configure Emails
- When you compose your email, SalesInbox suggests contacts and leads from your CRM.
- Once you have sent an email, you can Add a ResponseWatch.
That is, when you configure ResponseWatch , SalesInbox will notify you if there is no response from a customer for a said number of days for an email that you have sent. This will help you easily follow up a second time with customers.
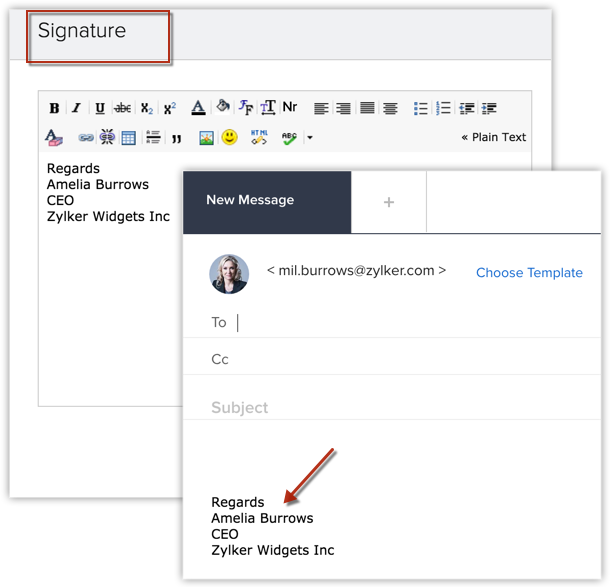
- You can add signature and attach documents to your email.
Compose an email
- Click the Compose button on the left pane.
-
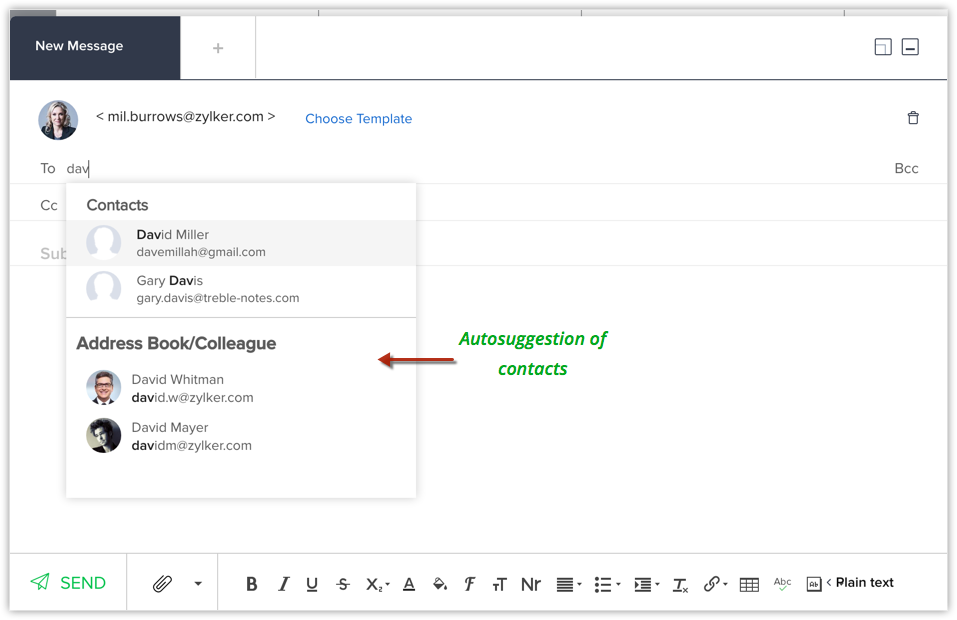
In the New Message popup window, compose your email content. As you type the email in the To field, SalesInbox will autosuggest email addresses from Zoho CRM. You can either choose from the suggested emails or type a new one.
- You could Send the email immediately to the desired recipient or Save draft to be sent later.
Click Add Template if you wish to send an existing email template from Zoho CRM.
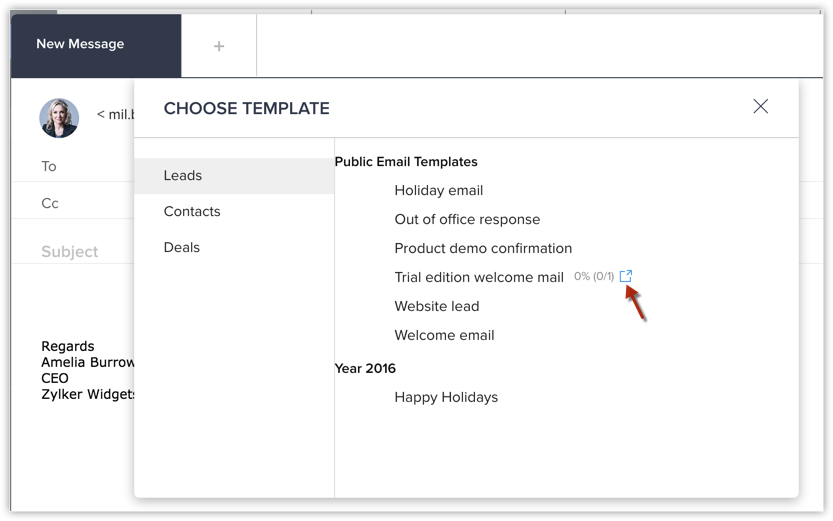
When you choose templates while composing an email, you will also be able to see template statistics for each template. You can check statistics to see which template has performed well in terms of number of opens and clicks and then make an informed choice.

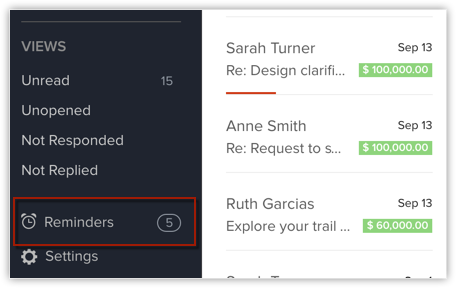
Add ResponseWatch
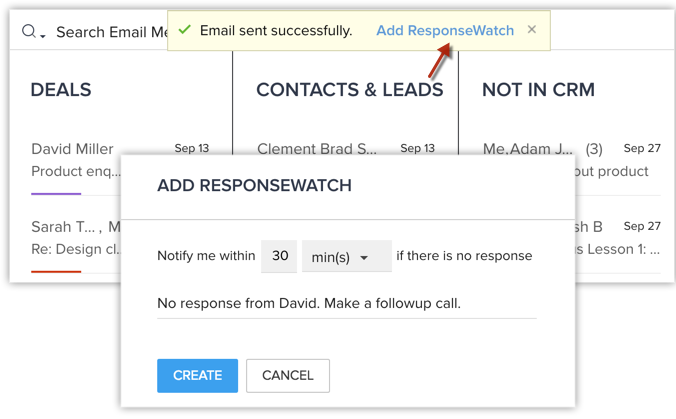
- Compose and send your email to the required contact.
- On the band that says "Email sent successfully" click Add ResponseWatch.
- Enter the time period and reminder message as required and click Create .
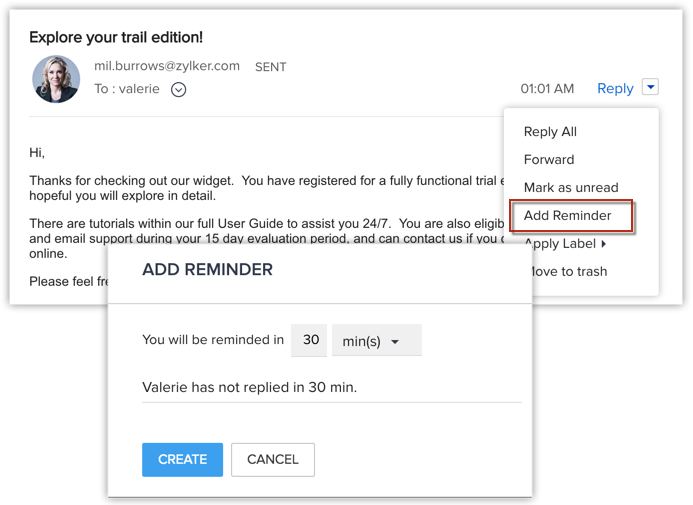
- Go to the Sent folder.
- Click the desired email.
- In the Email details page, click the drop-down arrow next to Reply .
- Click Add Reminder .
- In the popup that appears, enter the time and reminder message and click Create .
- The Notified column shows you a list of reminders the you received, but not yet closed - which means you have not done the action the reminder was meant for. You can come back to this section to see items that you were reminded about.
- The Completed column displays a list of reminders for which you have completed the said action.
Add signature
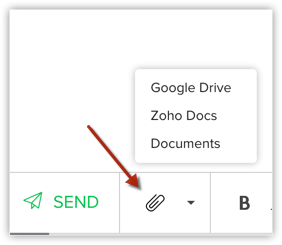
Attach Documents
- Click the Attachment icon in the Compose window .
- You can attach from your computer, Zoho Docs, Google Drive or the Documents tab in Zoho CRM.
Archive Email
- Begin Archiving
- Archive Emails
- Unarchive Emails
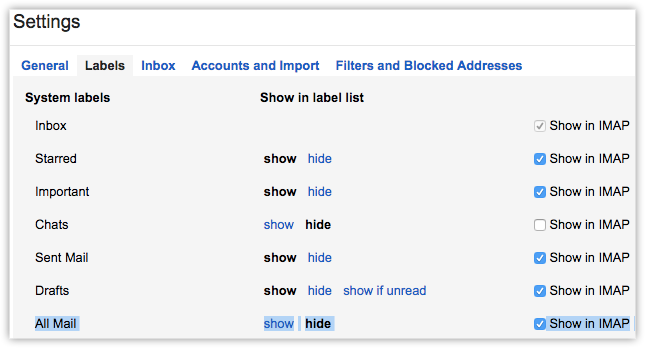
- Go to Settings (
 )at the right corner > Click Settings .
 - Click Labels > All Mail > Check Show in IMAP.
- Go to any email > click the drop-down list > click Archive .
- Or Select the email > right click on the email icon > click Archive from the drop-down.
To mass select emails, click Select-all icon > select Archive from Actions drop-down list.
- Select an email.
- Click Archive from the top panel.
- Go to the archive folder.
- Select an Email > click drop-down list > select Unarchive and Move.
To mass select emails, click Select-all icon, select Unarchiveand Move from Actions drop-down list.
- Go to All mail folder.
- Click on any email.
- Right click and select Unarchive .
Schedule Emails
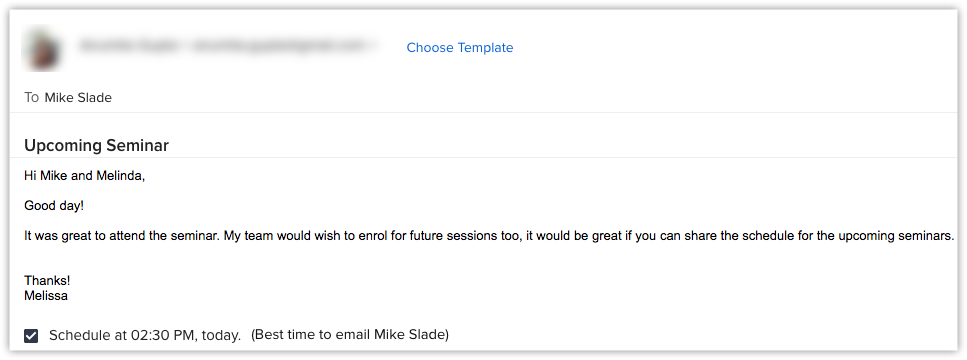
- In SalesInbox, click Compose .
- Enter the recepients email address.
- In the notification, click the checkbox for Best time to Contact.
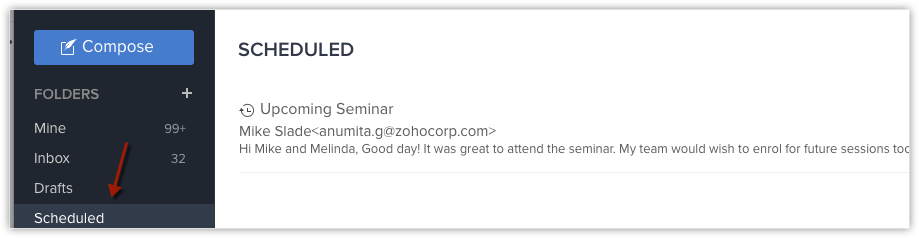
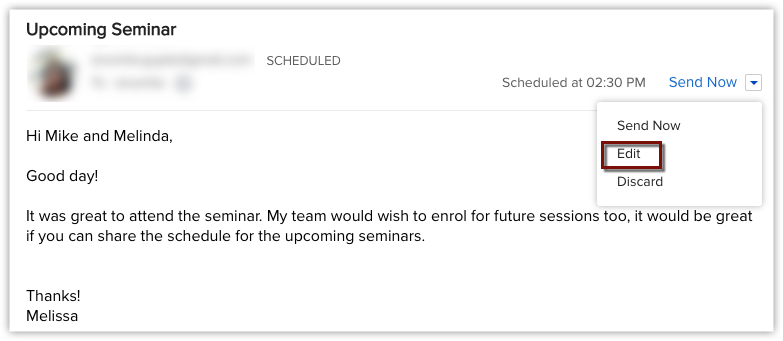
- Go to Scheduled folder > select an email .
- Choose Edit from the drop-down list.
- Click Save .
- If your email has more than one recepient, the best time to contact will be displayed only for the first recepient.
- If you edit an email in the Scheduled folder and do not Save it, the email will not be sent. You will recieve a failure notice.

SalesInbox Shortcuts
- Select emails in bulk: When you hover over the email categories in the CRM view, you will notice the Select icon. When clicked, this icon enables you to mass select emails, and either delete them or mark as unread.

- Mark mail as read/unread or delete mail: A shortcut to mark individual emails as read/unread is to hover over the particular email and choose the Mail icon. To delete the mail, click the Trash .
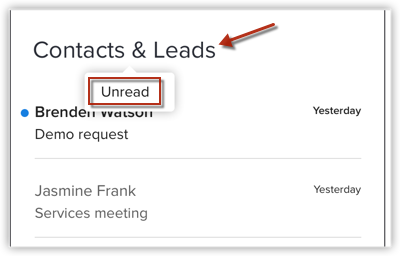
- Find unread emails quickly: To access unread mail quickly, simply click on top of the category you wish to view the email from. From the drop-down, click Unread to view only the unread emails in that particular category.
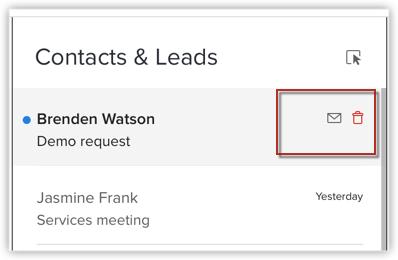
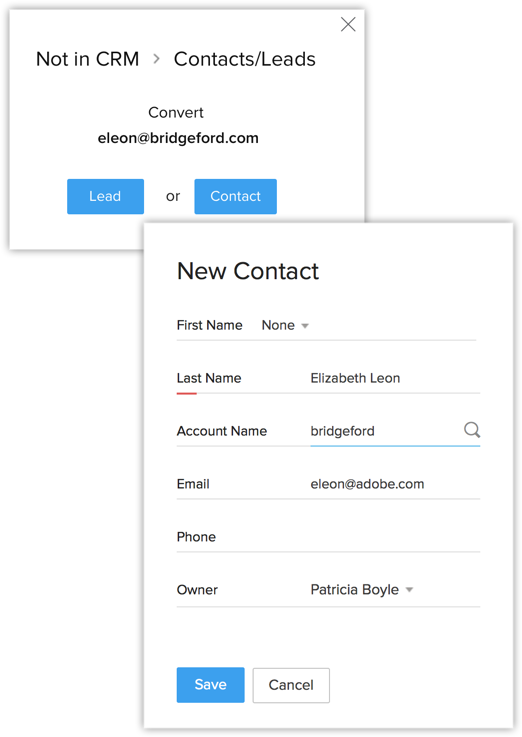
- Move emails quickly to a new category - To convert an Not in CRM as a lead or a contact or a colleague, drag that email from Not in CRM and drop it in the Contacts & Leads or Colleagues column. A pop-up will appear, from which you can take the necessary actions.
Email Settings
While Zoho SalesInbox comes with an array of useful features, it is important that you set them up in a way that will ensure effective email management.
This guide on Email Settings will help you with configuring filters, associating folders and tasks to the filters, configuring email workflow rules among many other functions. Read through this guide to learn how to make the most out of Zoho SalesInbox.
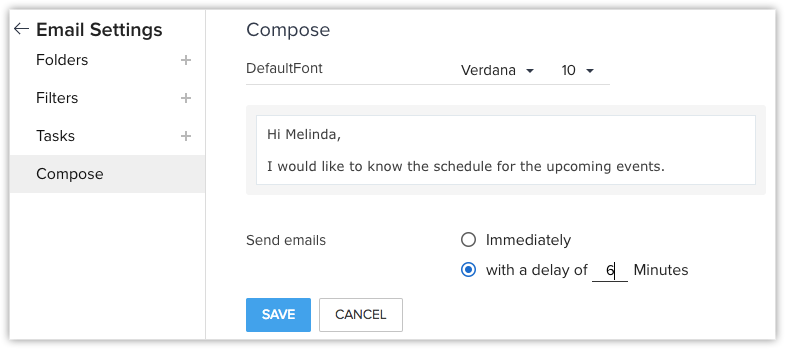
Compose Settings
In the compose settings, you can choose to customize the font size and font type of an email. Also, you can choose to either send an email immediately to a recipient or delay it for a pre-defined period of time. When delay settings is enabled, emails are stored in the Scheduled folder until the specified time, during this time you can choose to edit the email.
- In SalesInbox, go to Settings > Email Settings > Compose .
- Type the subject of the email.
- Under Send Emails > enter a value in With a Delay of "n" Minutes .
- Click Save .

Access your files securely from anywhere
Zoho CRM Training Programs
Learn how to use the best tools for sales force automation and better customer engagement from Zoho's implementation specialists.
Zoho DataPrep Personalized Demo
If you'd like a personalized walk-through of our data preparation tool, please request a demo and we'll be happy to show you how to get the best out of Zoho DataPrep.
- Zoho Workerly Home
- Forums
- Connect With Us:


- Zoho Recruit Home
- Forums
- Connect With Us:
All-in-one knowledge management and training platform for your employees and customers.
![]()
Create. Review. Publish.
You are currently viewing the help pages of Qntrl’s earlier version. Click here to view our latest version—Qntrl 3.0's help articles.


Zoho Sheet Resources
Zoho Forms Resources
Zoho Sign Resources
Sign, Paperless!
Zoho TeamInbox Resources
Design. Discuss. Deliver.
Related Articles
Frequently asked questions on Emails in Zoho CRM
How can I view the status of emails sent or received in my CRM account? A CRM user can view the status of emails sent or received to the customers on the record detail page under the Emails related list. What are the different email delivery status ...Configuring Email Compose Setting
Email communication is a cornerstone of effective business operations, serving varied purposes, from scheduling meetings to engaging potential clients. While many organizations use a standard email template for consistency, there are instances where ...POP/POP3 Emails Tab
Users have the capability to seamlessly send emails to their customers directly from their CRM platform. In this guide, we'll walk you through the steps to accomplish this using the POP/POP3 protocols. This feature is available for POP users in old ...Managing Emails
Manage filters in Zoho SalesInbox When your Inbox is flooded with emails from various people - customers, advertisers, colleagues - finding a specific email is like looking for a needle in a haystack.You may be looking for an email from an important ...FAQs: Mass Emails
1. How do I send mass emails from CRM using my SMTP server? Mass emails can be sent via your SMTP servers using email relay. To set up email relays, you will have to connect your SMTP server with the Zoho CRM server. To configure email relay settings ...