Organization Policy Settings
What are Organization Policy Settings in Zoho People?
This space contains crucial settings that impact your entire organization's accounts. These include settings on alerts, chats, employee information preferences, search preferences, profile picture preferences, and finally locale and display format preferences.
Navigating to Organization Policy Settings
- Navigate to Settings (gear icon on the top-right corner) and select Manage Accounts.
- Switch to the Organization Setup tab and select the Organization Policy sub tab.
Configuring Alert and Chat Settings
Navigate to Settings > Manage Accounts > Organization Policy. Adjust the required settings in the Alert & Chat settings card.
Notifications switch: If you wish to disable all email alerts and notifications sent from Zoho People, disable the Notifications switch. This includes system emails configured from services such as LMS, Leave, etc., and even once created by the users through workflows, etc.
Chat switch: Zoho People has an in-built chat bar, which can be used to send messages, attachments, calls, etc. to other employees. This can be enabled or disabled here using the Chat switch.
Bot switch: Zoho People has an in-built Zia bot, this can be enabled or disabled using the Bot switch.

Zoho People's Zia is an intelligent AI assistant that simplifies HR operations, shifting focus from routine processes to people. Acting as a smart HR companion, Zia provides contextual help with everyday tasks—answering policy questions, generating insights, and creating reports. Featuring multilingual support and voice interaction, Zia delivers clarity and efficiency to HR teams and employees alike. Learn more about Zia Chat bot.
Employee Personal Information Preferences
Navigate to Settings > Manage Accounts > Organization Policy. Adjust the required settings in the employee personal information settings card.
Using these options, the administrator can choose to give employees the choice to display or hide sensitive information such as their birthdays, work anniversary dates, wedding anniversary dates, and mobile number. Based on the preferences configured here, employees will have access to permissions on the Personal Preferences page. Learn more about personal preferences.
Profile Picture Update Preferences
Navigate to Settings > Manage Accounts > Organization Policy > Profile picture update card. Specify who can update the profile picture in Zoho People by using the provided drop-down.
Setup an Approval Process for Profile Picture Updates
To set up an approval process for employee profile picture updates, navigate to Settings > Manage Accounts > Organization Setup > Organization Policy and scroll down to the Profile picture update section.
Here, select the "Employee" option. Once selected, you will see additional options to select the associated approver.
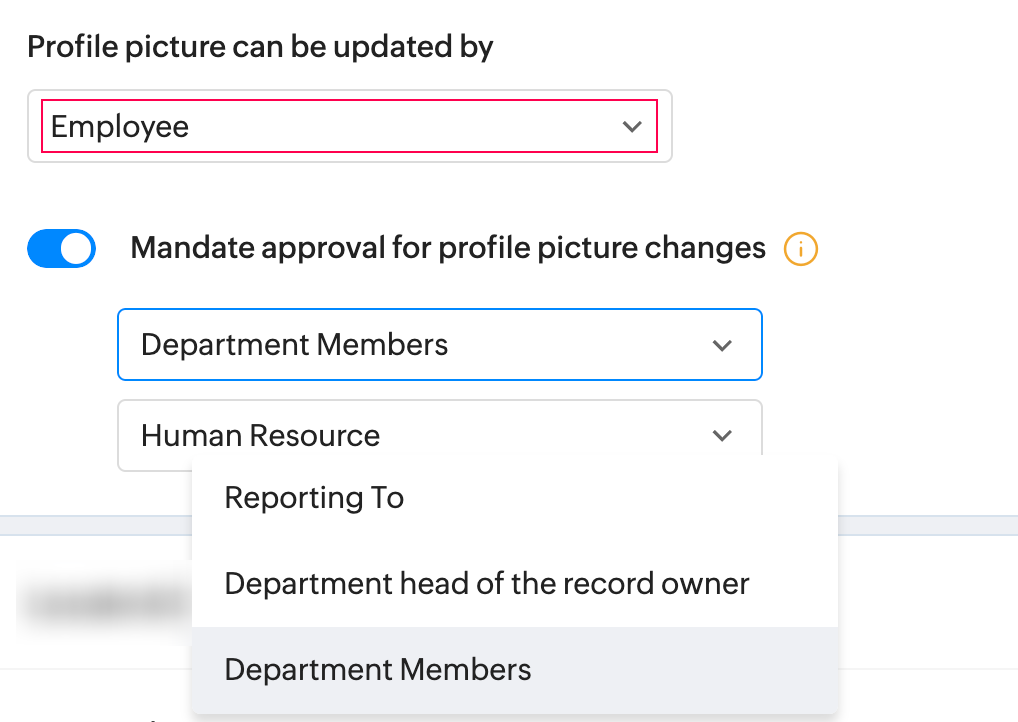
You can authorize the reporting manager, department head, or all employees in a specific department as approvers. Once configured, all employee profile picture update requests will trigger an automated email and approval notification. After approval, the updated picture will be displayed in Zoho People.

NOTE
If an approver is not selected, the Zoho People administrator will automatically act as the approver.
If an approver is not selected, the Zoho People administrator will automatically act as the approver.
Cover Image Preferences
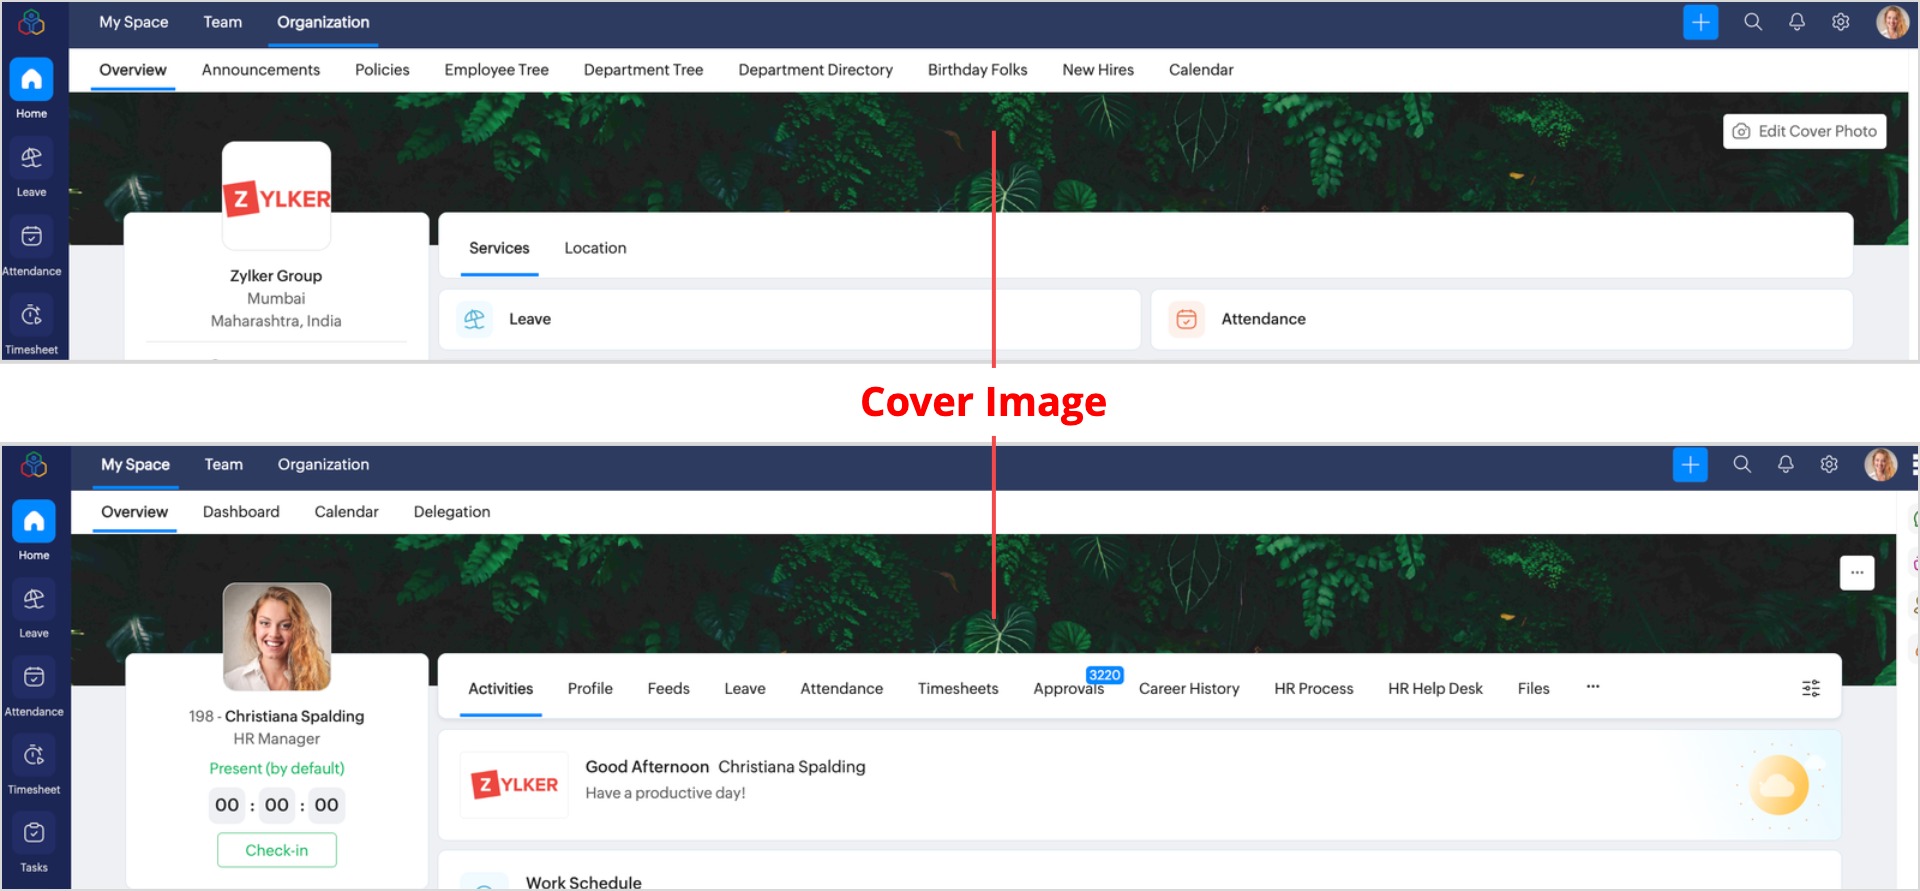
Cover image refers to the image displayed in Home > My Space > Organization > Overview and Home > Organization > Overview. Zoho People allows customizing preferences associated to these images.
To adjust cover image preferences, navigate to Settings > Manage Accounts > Organization Setup > Organization Policy and scroll down to Cover Image Preferences.
Default behaviour:
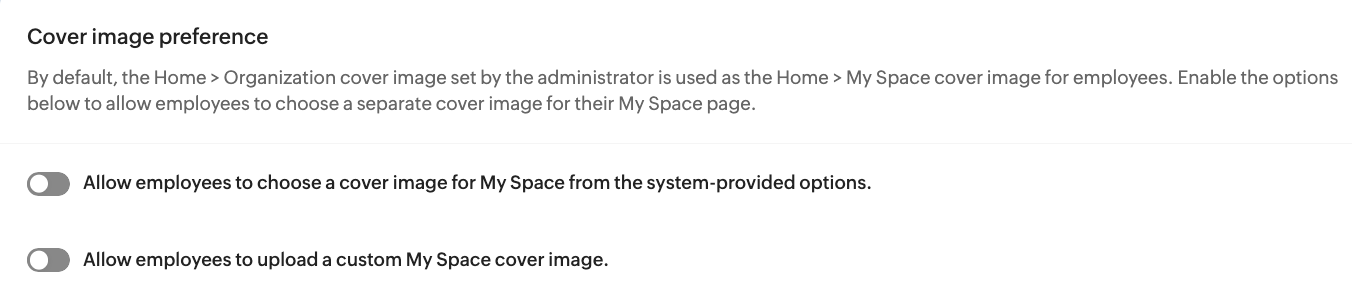
Both options are disabled by default, that means the image set by the administrator in Home > Organizaton > Overview page will be the cover image used across the entire organization in both the Organization tab and the My Space tab for all employees, with no customization option for employees.
To allow employees to customize their cover image, choose from one of these options available:
- "Allow employees to choose a cover image for My Space from system-provided options.":
When enabled, employees can head over to Home > My Space > Top-right Ellipses icon > Personal Preferences and use the Change Cover Image option to choose from one of the pre-set cover images. - "Allow employees to upload a custom My Space cover image":
When enabled, employees can head over to Home > My Space > Top-right Ellipses icon > Personal Preferences and use the Change Cover Image option to upload their own cover image.
Locale & Display format
Navigate to Settings > Manage Accounts > Organization Policy > Locale & display format card. Adjust the settings here as per your organization's preferences.
Specify the organization's primary country/region and time zone here.
You can also add multiple locations and specify their time zones from the Locations page. (Settings > Manage Accounts > Locations). Each employee can be associated with a region and this nformation can be edited through the Employee Information page in Operations (Operations > Employee Information > Employees page), or through the HR Process feature.
Time: Specify if the organization uses a 12-hour or 24-hour time format. This setting impacts all users.
Name: Specify the name display format; for example, if you would like to display the first name following the last name or vice versa across the organization, that can be adjusted here. This setting impacts all users.
Date: Specify the preferred date format choice using the provided drop-down. This setting impacts all users.
Recycle Bin Preference
The Recycle Bin Preference allows administrators to define how long deleted records remain in the Recycle Bin before they are permanently removed from the organization. During the retention period, deleted records can be restored. Once the retention period expires, the records are permanently deleted and cannot be recovered.
Changing the display language in Zoho People
First, let us look at the supported languages of Zoho People 5.0:
- Arabic
- Bulgarian
- Chinese
- Croatian
- Danish
- Dutch
- English (UK)
- English (US)
- French
- Georgian
- German
- Hebrew
- Hindi
- Italian
- Japanese
- Korean
- Polish
- Portuguese
- Russian
- Serbian
- Spanish
- Swedish
- Turkish
- Vietnamese
- Indonesian (Bahasa)
- Thai
- Malay
- Traditional Chinese

Only the Tabs / Sub-tabs / Fields / In-app descriptions and labels that are non-editable by the user will be changed to the respective language. The fields that are editable (user-defined) will remain the same.
How to change the display language in Zoho People?
- In your browser, navigate to accounts.zoho.com
- Enter your password to re-identify yourself.
- Click Edit in your profile card. (Profile > Personal Information > Edit).
- Select the desired language and select the corresponding country/region using the provided drop-downs.
- Click Save.

Remember to select a language supported in Zoho People (refer the list above) when selecting language in accounts.zoho.com.
Selecting the correct country/region along with langugage will ensure accurate translations of Zoho People system content.