Import data from Panoply
Zoho DataPrep allows you to import data from Panoply, a fully-integrated data management platform that syncs, stores, organizes and analyzes data from many sources.
Prerequisites for Panoply
Please ensure the following conditions are met before proceeding with connecting to your Panoply.
1. Provide database read permissions to the Zoho DataPrep server.
2. Ensure you have the correct login credentials for your database. As a best practice, try connecting to your target database from the Zoho DataPrep server, using the native database management software available for the respective database.
To import data from Panoply
1. Create a pipeline or open an existing pipeline from the Home Page, Pipelines tab or Workspaces tab and click the Add data option. You can also click the Import data option under the Workspaces tab to import data.
 Info: You can also click the Import data
 2. Choose the Cloud databases category from the left pane and click Panoply. You can also search Panoply in the search box.

Note: If you had already added a Panoply connection, choose the required connection under the Saved connections category and proceed to import. To learn more about Saved connections, click here.
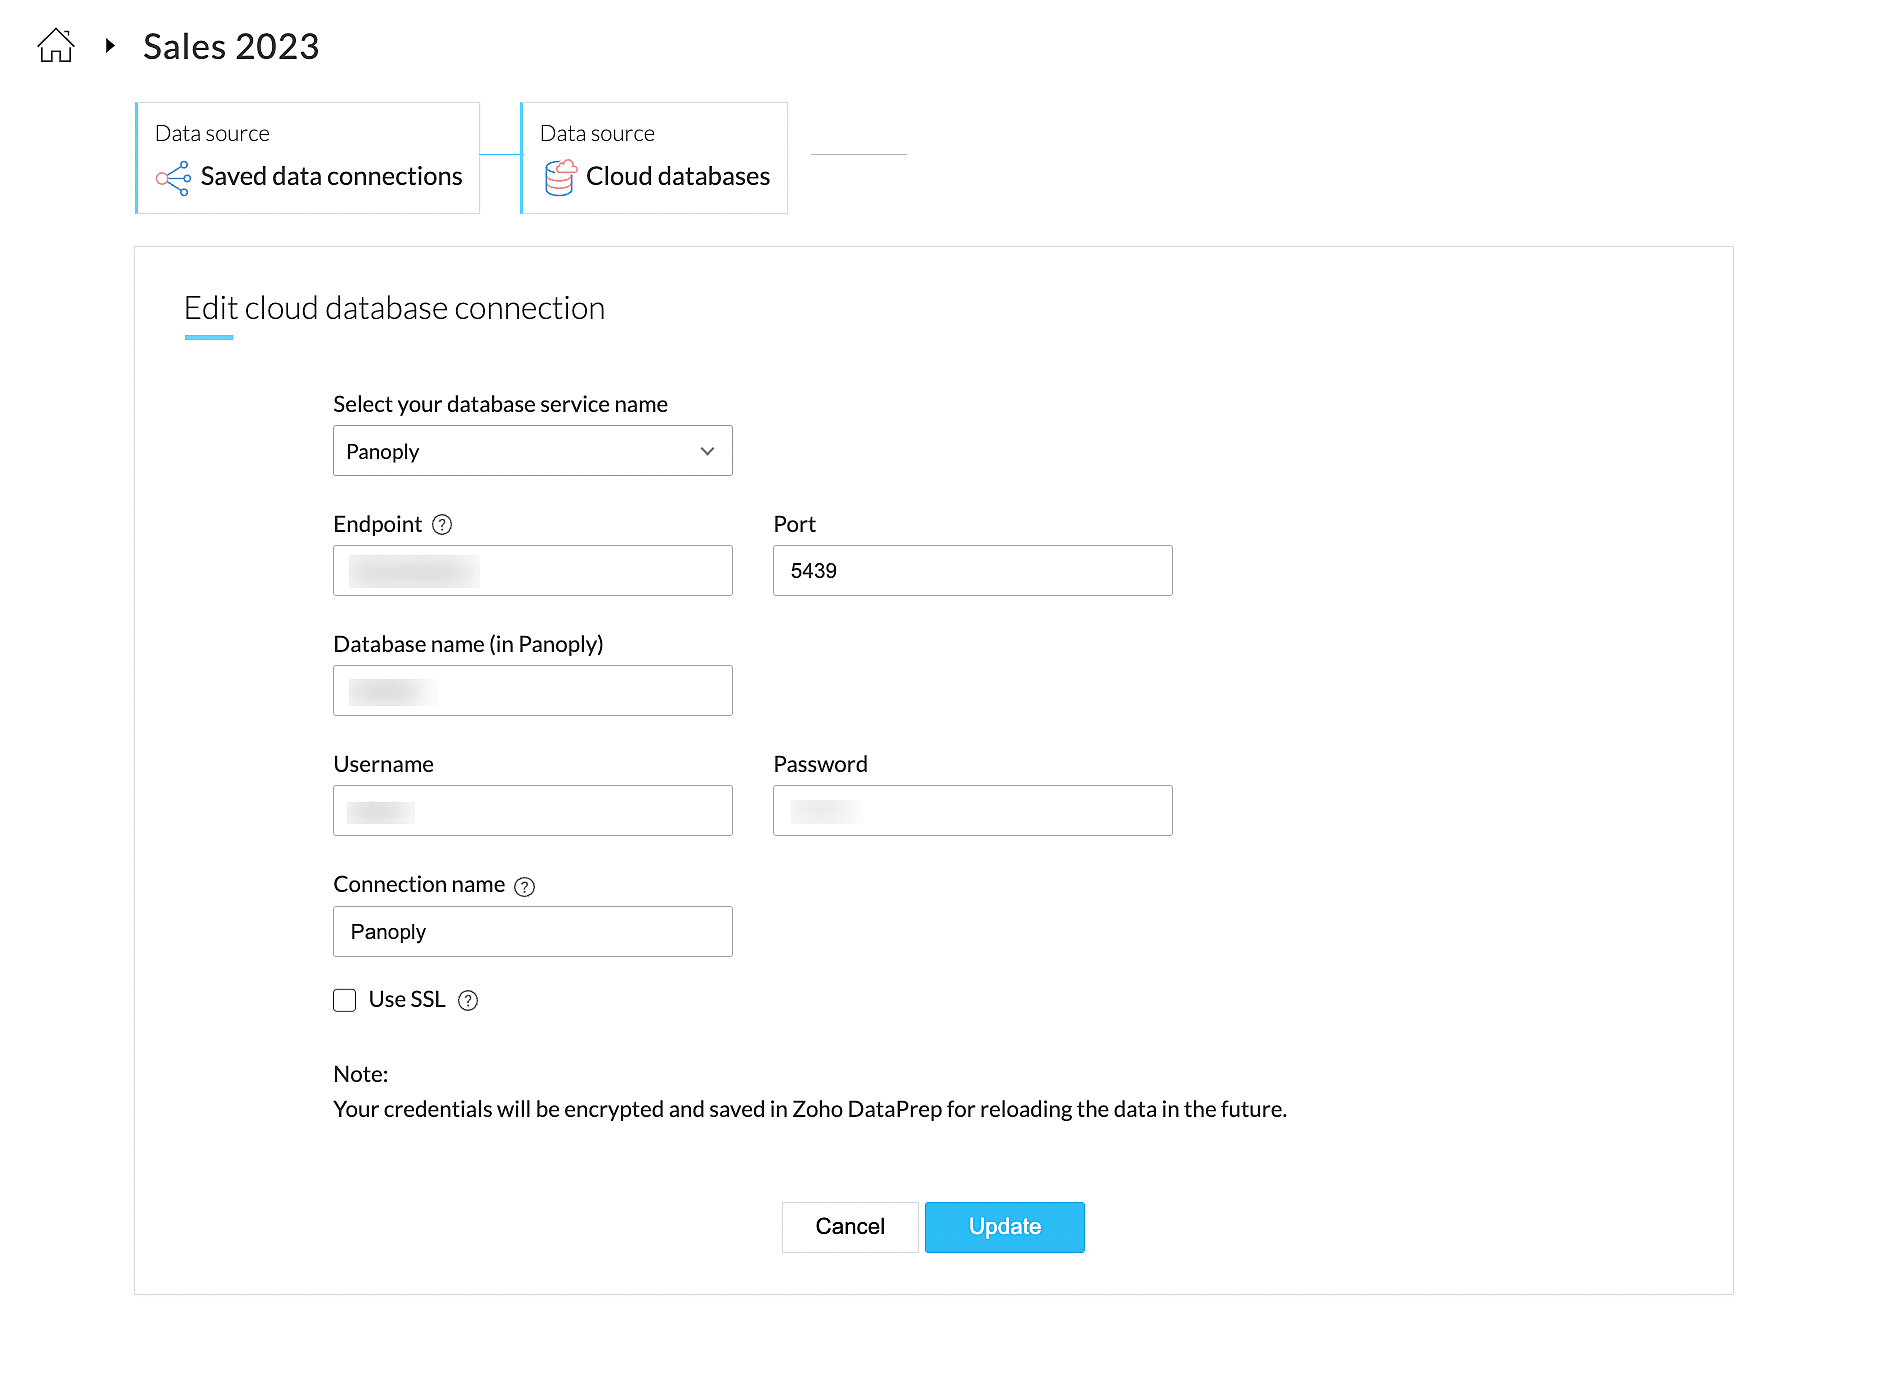
3. Select Panoply in the Database service name dropdown.
4. Enter the Endpoint, Port, Database name, Username, and Password to authenticate the database connection.
5. Enter a unique name for your connection under Connection name.
6. You can also select the Use SSL checkbox if your database server has been setup to serve encrypted data through SSL.
7. Click the Connect button.
Note: The connection configuration will be saved for importing data in the future. Credentials are securely encrypted and stored.
8. Select the tables that need to be imported.
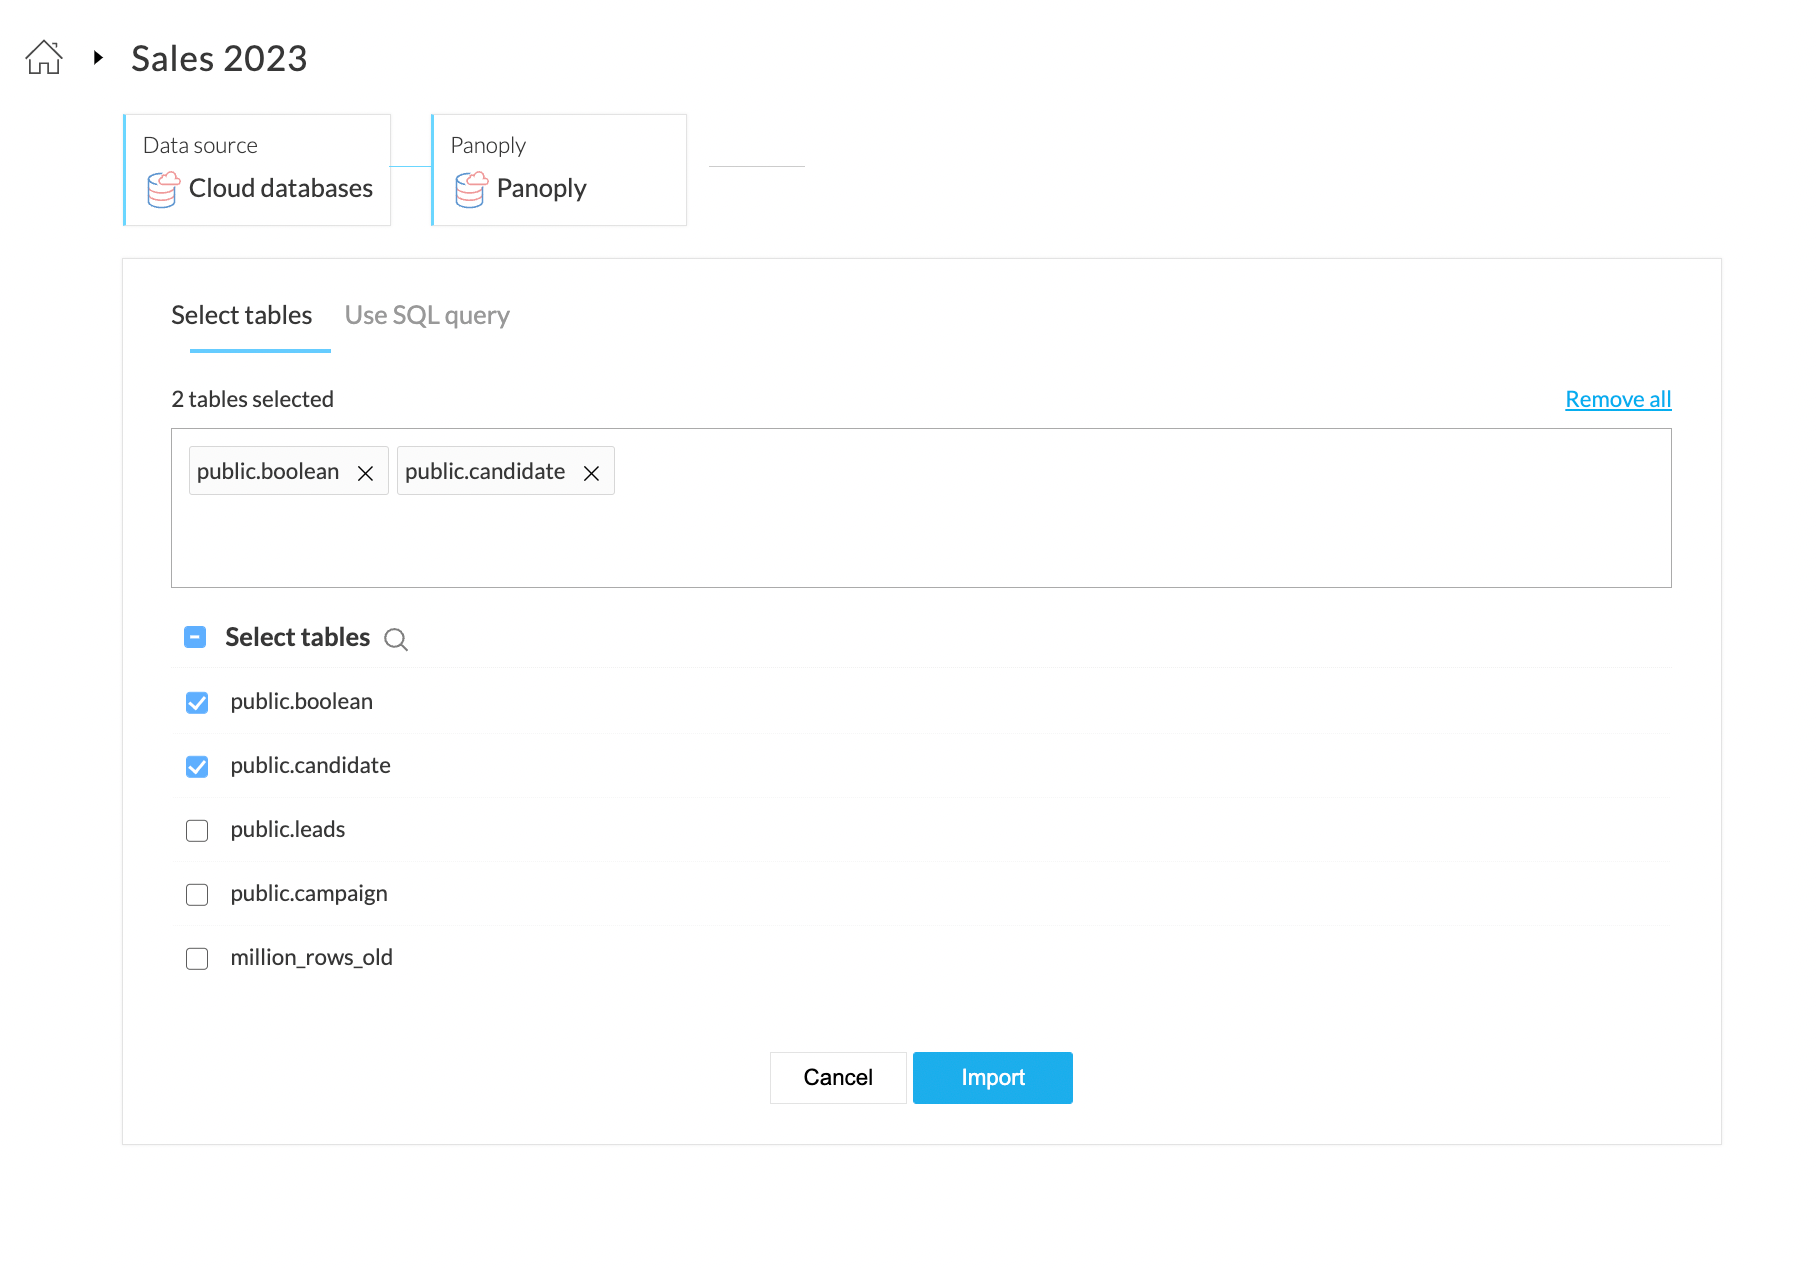
9. You can also the Use SQL query option to select and import data.
 The incremental fetch option is not available when the data is imported using a query from databases. Click here to know more about incremental fetch from cloud database.
 10. Click Import to begin importing data from your account.
11. Once you complete importing data, the Pipeline builder page opens and you can start applying transforms. You can also right-click the stage and choose the Prepare data option to prepare your data using various transforms in the DataPrep Studio page. Click here to know more about the transforms.
12. Once you are done creating your data flow and applying necessary transforms in your stages, you can right-click a stage and add a destination to complete your data flow.

While configuring the Schedule, Backfill, Manual reload, Webhooks, or Zoho Flow, the import configuration needs to be mandatorily setup for all the sources. Without setting up the import configuration, the run cannot be saved. Click here to know more about how to set up import configuration.
13. After configuring a run, a pipeline job will be created at the run time. You can view the status of a job with the granular details in the Job summary. Click here to know more about the job summary.
To edit the Panoply connection
DataPrep saves your data connections to avoid the hassle of keying in the credentials every time you need to connect to a data source or destination. You can always edit the saved data connection and update them with new parameters or credentials using the Edit connection option.
1. Choose Saved connections from the left pane from the Choose your data source box while creating a new dataset.
2. You can manage your saved connections right from the data import screen. Click the (ellipses) icon to share, edit, view the connection overview, or remove the connection.
3. Click the Edit connection option. You can update all the parameters and credentials in the saved connection and click Update .
SEE ALSO
Learn about importing data using saved data connections.
Import data from cloud storage services.