📘 Zoho CRM – Kiosk and Query Implementation to Display Zoho Books & Desk Contact Information
Business Use-case:
A business wants to quickly view consolidated information about a contact from multiple Zoho applications—such as Zoho Books and Zoho Desk—directly from the contact’s record in Zoho CRM.
This includes:
- Checking if the contact is a portal user in Zoho Books
- Verifying if the contact is an end user of the Zoho Desk Help Center
- Identifying whether the contact is marked as spam in Zoho Desk
Solution Overview:
You can achieve this using the Kiosk and Query setup within Zoho CRM. The solution involves executing REST API calls to Zoho Books and Zoho Desk using key contact identifiers (such as email address or phone number) and presenting the fetched details in a structured format (like a table) within the CRM Contact record.
Steps to implement the above solution:
Step 1: Create two sources—one for Zoho Books and one for Zoho Desk—as shown below.
Set up separate data sources for Zoho Books and Zoho Desk. This requires creating two distinct sources—one specifically for Zoho Books and another for Zoho Desk—to ensure proper data integration and management. The configuration process for both sources is illustrated below:
Zoho Books:
Zoho Desk:
We have authenticated both the sources using the connection created within Zoho CRM.
Step 2: Create two queries—one for Zoho Books and one for Zoho Desk—as shown below.
After setting up the sources, create queries for each one to retrieve the necessary data. You will need to create two separate queries—one for Zoho Books and another for Zoho Desk—to ensure accurate data extraction. The process for creating these queries is demonstrated below:
Zoho Books:
As shown above, we have passed the "Email" field as a dynamic variable to be passed for the parameters in the above REST API Query.
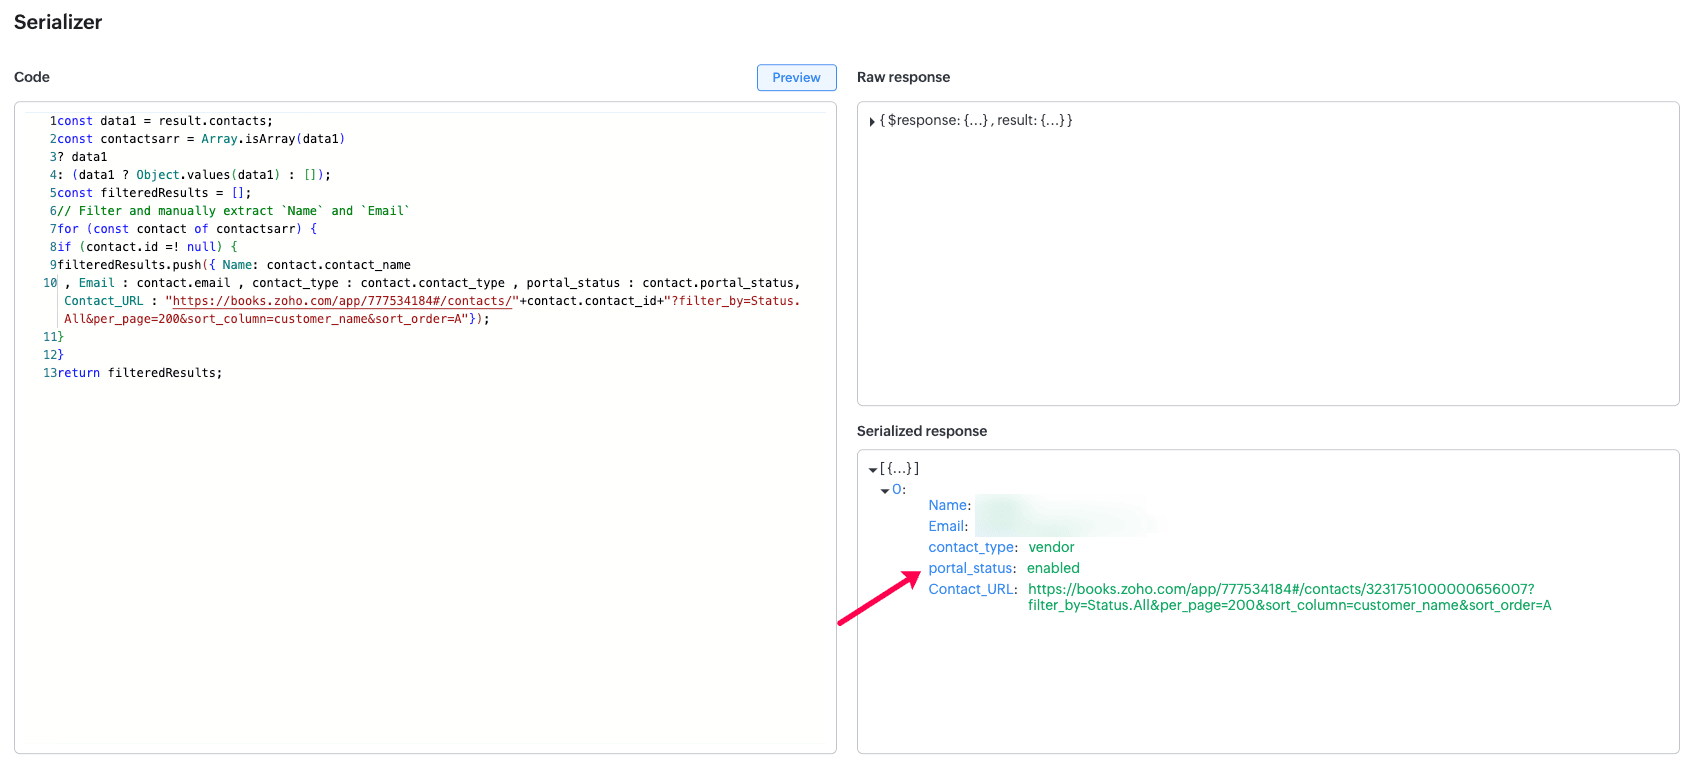
Serializer:
The purpose of the serializer is to convert the raw response from the query to a formatted response with the only needed keys from the raw response arrays.
- const data1 = result.contacts;
- const contactsarr = Array.isArray(data1)
- ? data1
- : (data1 ? Object.values(data1) : []);
- const filteredResults = [];
- // Filter and manually extract `Name` and `Email`
- for (const contact of contactsarr) {
- if (contact.id =! null) {
- filteredResults.push({ Name: contact.contact_name
- , Email : contact.email , contact_type : contact.contact_type , portal_status : contact.portal_status, Contact_URL : "https://books.zoho.com/app/777534184#/contacts/"+contact.contact_id+"?filter_by=Status.All&per_page=200&sort_column=customer_name&sort_order=A"});
- }
- }
- return filteredResults;
After adding the serializer we now have the response as shown below with contact details from Zoho Books.
Schema:
To define the name for the received keys in the above serialized response and store them as a table.
Zoho Desk:
As shown above, we have passed the "Email" field as a dynamic variable to be passed for the parameters in the above REST API Query.
Serializer:
The purpose of the serializer is to convert the raw response from the query to a formatted response with the only needed keys from the raw response arrays.
- const data1 = result.data;
- const contactsarr = Array.isArray(data1)
- ? data1
- : (data1 ? Object.values(data1) : []);
- const filteredResults = [];
- // Filter and manually extract `Name` and `Email`
- for (const contact of contactsarr) {
- if (contact.id =! null) {
- filteredResults.push({ Name: contact.lastName , Email : contact.email , Spam_Contact : contact.isSpam , help_center_user : contact.isEndUser , Link : contact.webUrl });
- }
- }
- return filteredResults;
After adding the serializer we now have the response as shown below with contact details from Zoho Books:
Schema:
To define the name for the received keys in the above serialized response and store them as a table:
Step 3: Associate the Query in Kiosk and added the below steps:
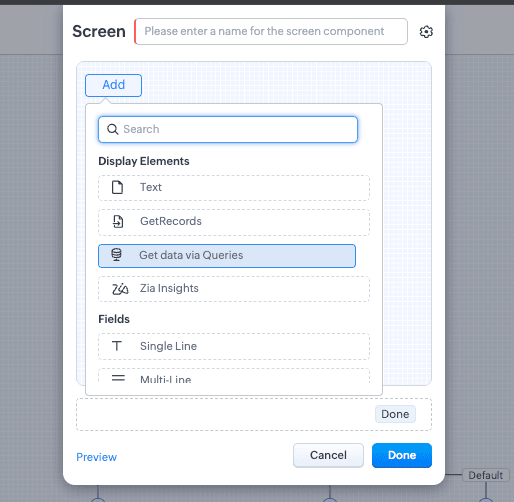
1. Create a screen in the Kiosk for Contact module as shown below and choose "Get data via Queries"
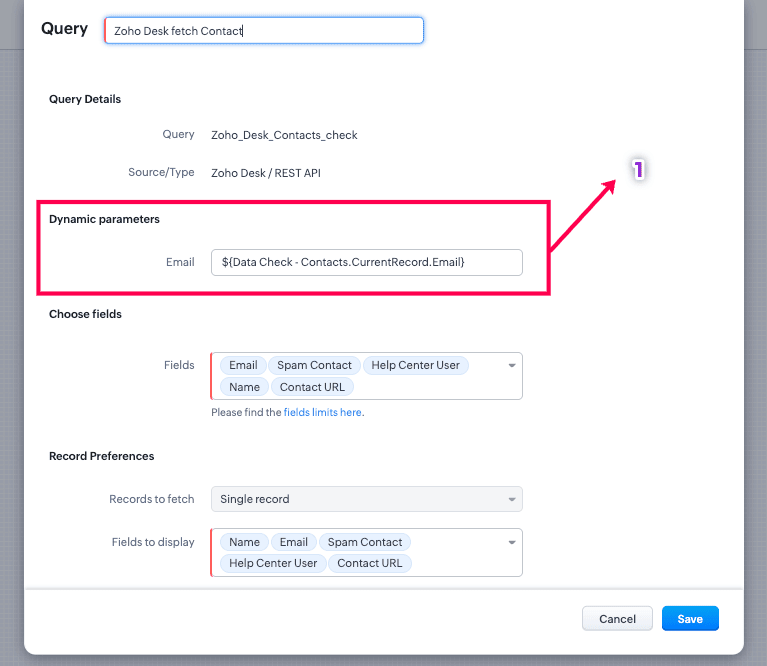
2) Now, you can now associate the created queries from step 2 here as shown below,
2) Now, you can now associate the created queries from step 2 here as shown below,
As shown above, you need to enter '#' for the dynamic variable "Email" we declared when creating the query in Step 2 and choose the field of the Contact which needs to be used for searching in the query.
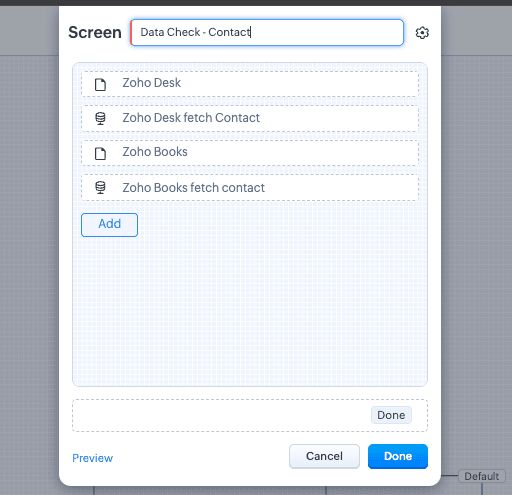
3) In the same way, you can the other query for Zoho Books as well and the Kiosk screen will look like above,
4) You can now implement the Kiosk in detail view page of the Contact as shown below,
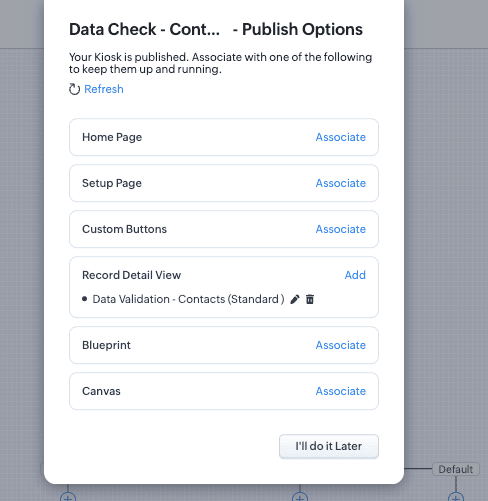
4) You can now implement the Kiosk in detail view page of the Contact as shown below,
5) Now, the use-case is successfully implemented, and the details of the contact can now be seen from the detail view page of the Contact in Zoho CRM as shown below,
Custom Solution Created by Nickelson J | Zoho Partner Support
If you need any further clarifications, please don’t hesitate to contact partner-support@zohocorp.com.
Additionally, we kindly ask all "Europe and UK Partners" to reach out to partner-support@eu.zohocorp.com.