Sending a Document for e-Signing
E-Sign Documents
To send a document for e-signature:
1. From your home page go to Operations > Files > E-Sign Documents.
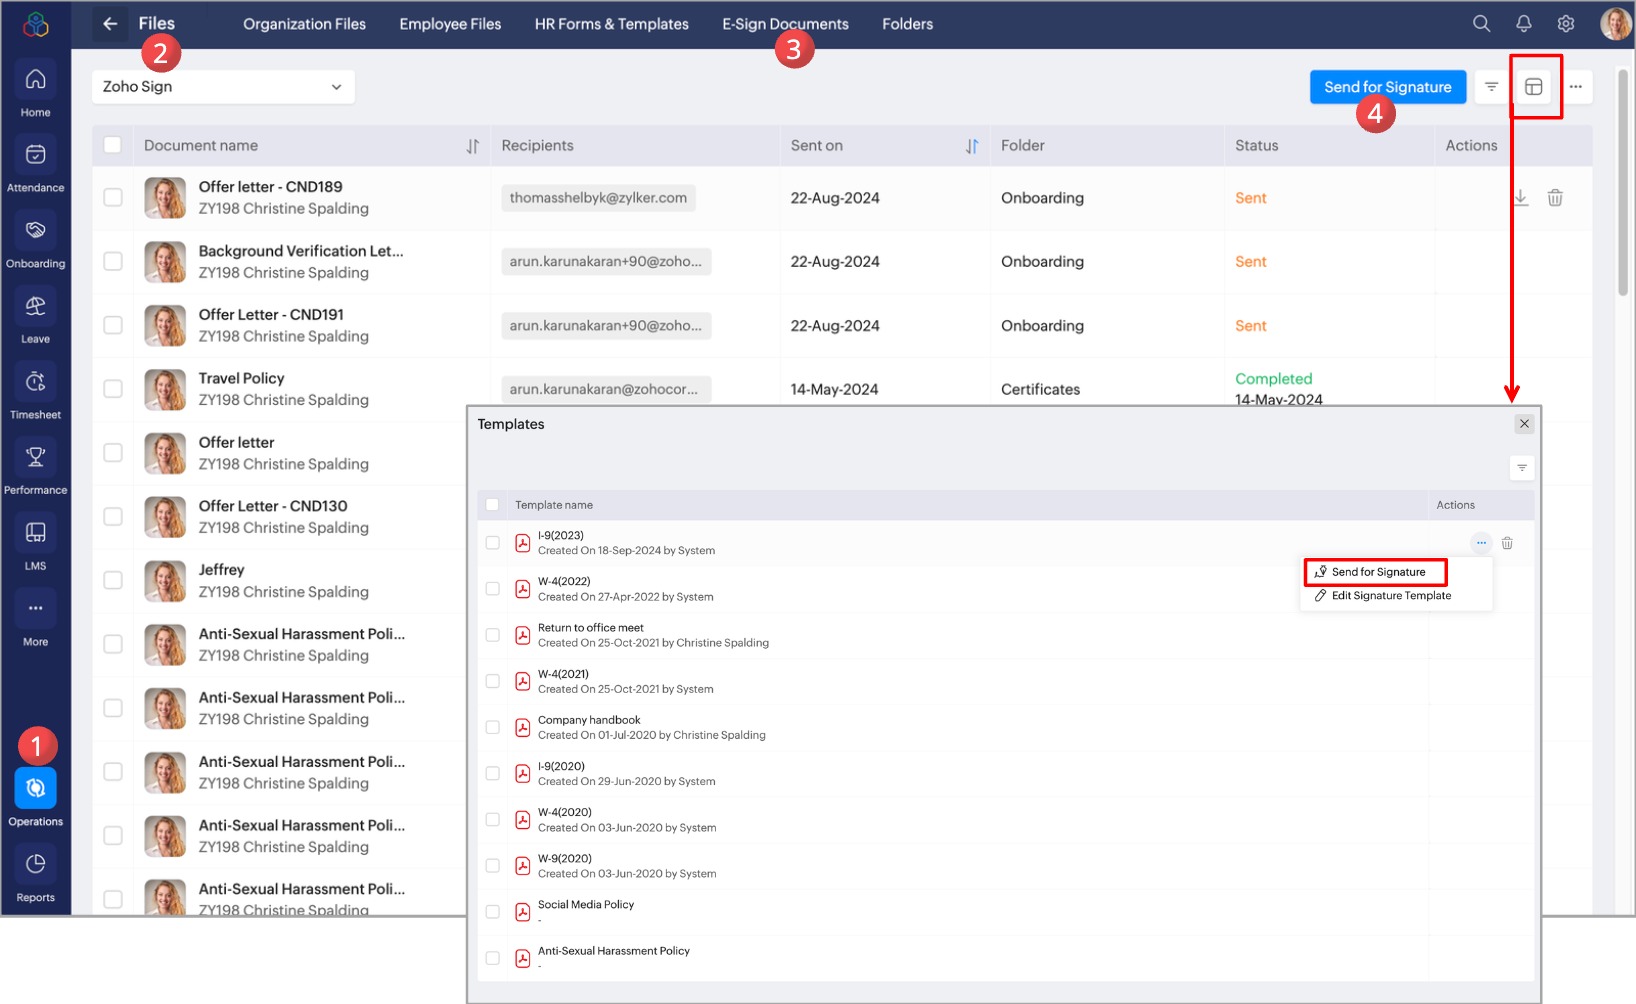
2. Click on Send for signature.

You can also send any e-signature templates created in the organization files by clicking the template icon, as shown in the image above.
3. Upload the respective file to be sent for e-signature.
4. Select a folder name to which the signed documents should be linked.
5. In document details, enter the document name and a descriptive message which will be displayed to all the specified recipients.
4. Click Add Recipients and do the following action:

Select Send in order check box to send the document singed in order. For example, if manager and employee are recipients in the order, manager needs to sign the document first to move the document to employee for signature.
a. Use the dropdown and select the Manager if you want the employee's direct reporting manager to be included.
b. Use the dropdown and select the Specific User, search and add the specific employee to be included.
c. Use the drop-down to choose any of the acknowledgement type for the e-sign document:
Sign: User can e-sign the document.
View: User can view the document once.
Approve: User can approve the document.
d. Use the drop-down to select the language in which the document should be in.
e. Click on the Private Message icon to enter the private message for the recipient.
f. Click on the Authentication icon and enable Email OTP Verification and click Save to open the document after Email OTP verification.
Steps d, e, and f are only available for Zoho Sign integration. DocuSign and Adobe Sign do not support these options.
5. In the Additional options section, set deadlines and reminders for e-signing the document if required.
6. In the Automatic Website Redirection section, enter the webpage URL that you want to redirect your recipients based on the given scenarios.
7. Click Send.
8. Based on e-sign platform integration, the Zoho Sign or DocuSign or Adobe Sign panel will open where you can drag and drop the corresponding signature fields into the documents.
9. Add additional fields as required and click Send.
You have successfully sent the document for e-signature using Zoho Sign, the recipient will receive the document via email where they can e-sign the document.You can also download the signed document from this tab.
Supported File Formats for e-Signature
Zoho Sign supports following file formats:
- jpg
- jpeg
- doc
- docx
- png
- off
- rtf
- dots
- txt
- tex
- saw
Please ensure that the document you upload is in any one of these file formats
Learn More: