HR Help Desk - Agents
Agents tab in HR Help Desk service is an administrators and agents space where they can manage and resolve the case requests raised by the employees in the organization. The following sections detail the views and actions that can be performed on the agent tab.

Agent tab is only visible to Administrators and to employees who are Agents to an HR Help Desk Category.
Watch our help video on managing agents tab:
General flow of activities in HR Help Desk requests
- A case or query is raised with respect to a category by employees in your organization.
- An individual user/group/department under the category picks up the case and works on it as 'Agents'.
- The Agent starts work on the case if it is assigned to an individual user. If it's assigned to a group/department, the group/department head can assign the case to a user who belongs to the group/department or the user can pick up a case assigned to their group or department.
- The Agent can add comments to discuss the case.
- Agents can add and assign tasks to themselves or their reportees. Admin can assign tasks to any user in the organization.
- Once the case is completed, the status is changed.
HR Help Desk Agents tab
All HR Help Desk requests that are submitted are listed under the Agents tab. Agents can view and select a ticket to review the details and take action to resolve the issue.
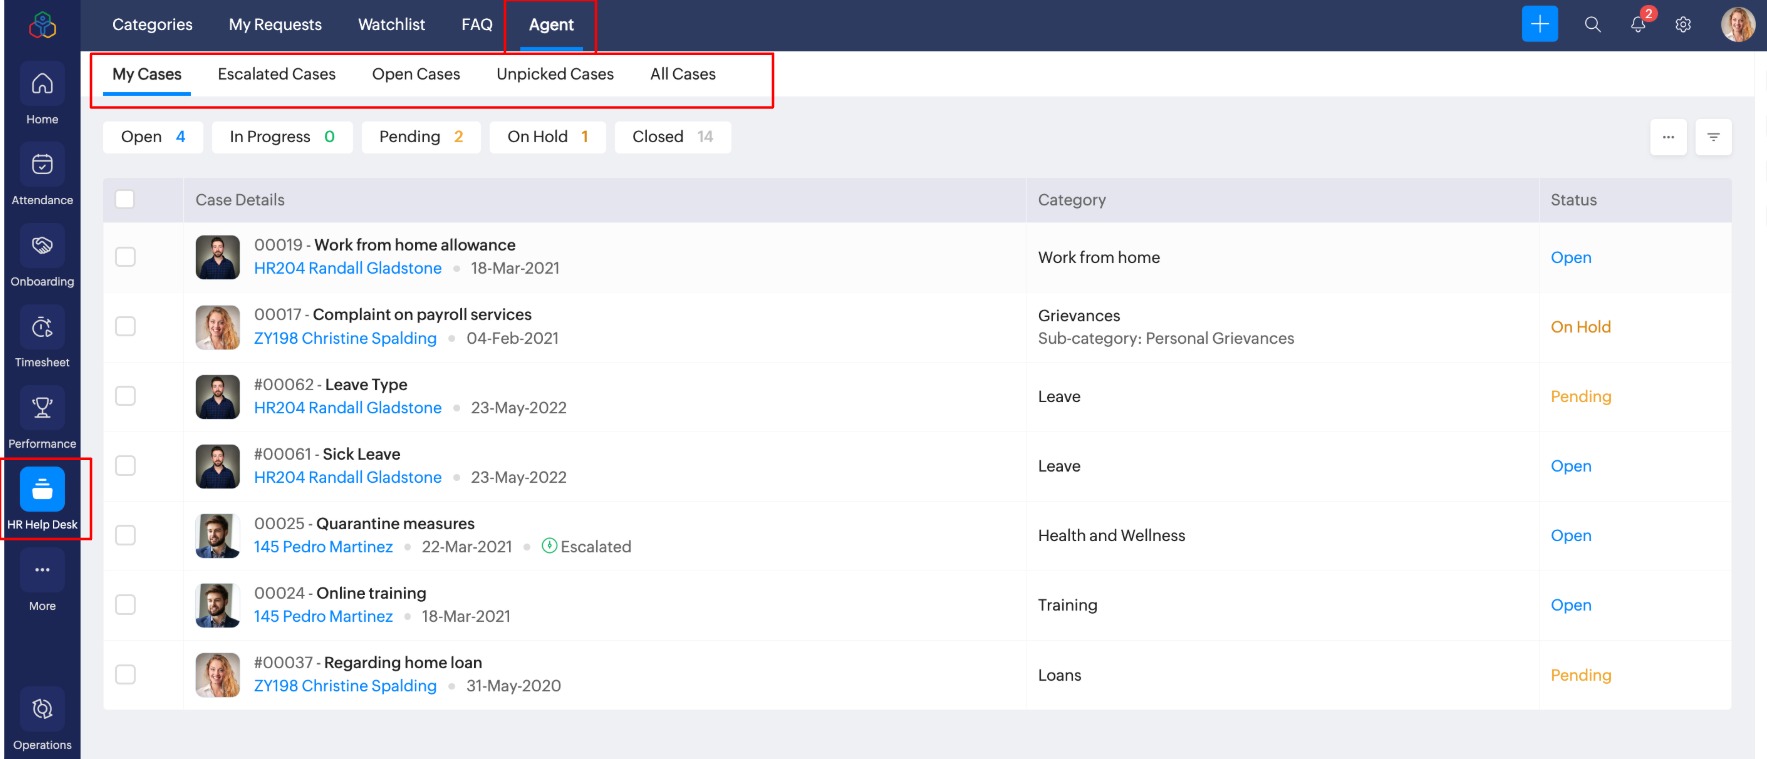
- My cases: All the cases for which the user is assigned as the agent will be shown.
- Escalated cases: Cases that are escalated based on the defined SLA will be shown here.
- Open cases: All cases with an Open or In-Progress status will be shown.
- Unmanaged: All cases that are yet to be assigned to an agent by the category admin will be shown.
Unmanaged tab is only visible if you are assigned as Category Administrator and Case management is mandated. For more information, refer to Setup section of Case - Categories.
- All cases: The admin will be able to view all the cases listed.
All cases in which the user has been @mentioned will be shown in the watchlist, for more information, refer to Cases - Watchlist.
Case Assignment By Category Admin
A category admin can assign or unassign an agent to any case raised within the category to which they are assigned as administrator.

To mandate case assignments for cases submitted in specific category, enable Mandate category administrators to manage case assignments, for more information, refer to the Setup section of Case - Categories. Agents in the category cannot pick cases unless a category administrator assigns the case to them.
To assign an agent to a case:
- From the home page, go to Cases > Agent > Unmanaged.
- Click on the case you want to assign an agent to.
- Click on the agent drop-down and tag the agent you want to assign.
To unassign an agent from a case:
- From the home page, go to HR Help Desk > Agent > All Cases.
- Click on the case you want to unassign the agent from.
- Click on the ellipsis icon in the top-right corner.
- Select Unassign. The agent will no longer be associated with the case.
Unassigning yourself from a case
If you (Agents or Admins) are mistakenly assigned to a case or need to leave for whatever reason, you can unassign yourself from it.
- From your home page, go to HR Help Desk > Agent > All Cases.
- Click on the respective case.
- Click on the ellipsis icon in the top-right corner
- Select Unassign. You will no longer be associated with the case.
Resolving a Case
Once the agent has been assigned to a case they can resolve it by providing their feedback on the case.
To resolve a case request:
- From home page, click HR Help Desk > Agents tab.
- Navigate to My Cases or Escalated Cases tab to locate the case that is assigned to you.
- To filter a case based on status click on:
- Open: Displays the cases with open status.
- In-Progress: Displays the case that is in In-progress status.
- Pending: Displays the case which is in pending status.
- On hold: Displays the case which is on hold.
- Click on the case to view details and resolve.
- Write a comment in the comment section to answer the query.
- In comment section you can do the following actions:
- Add comment about the query and format it.
- Add link and attach files as reference to resolve the query.
- Add FAQ and Attach FAQ. - The right side section allows you to change case status, set priority, and change agent.
 For more details on adding and attaching FAQ, refer to adding and attaching FAQ.
- Once you have provided the necessary information about the query, click Submit.
The requestor will receive the notification about your comment. - You can submit the case request with a change in status by clicking the drop-down as shown in the below image.
Adding and Attaching FAQ
When responding to a question, the Agent or the Admin can use existing FAQs, or create new ones to supplement their response.
To attach an existing FAQ to your response:
- Go to HR Help Desk > Agent.
- Select the case that you are handling under All Requests, My Requests, or Unassigned.
- In the comments space, click Attach FAQ.
- Click Attach on the relevant FAQ.
The FAQ will be added to your comment section. - Click Submit.
- The requestor can click on the FAQ to learn about the FAQ.
To add a new FAQ
- Go to HR Help Desk > Agents tab.
- Select the case that you are handling under All Requests, My Requests, or Unassigned.
- In the comments space, click Add FAQ.
- Enter the FAQ question and answer.
- Add tags relevant to the FAQ.
- Attach references to the FAQ.
- Click Save: This option adds the FAQ to the FAQ section of the Case Category.
- Click Save and Attach: This option adds the FAQ to the FAQ section of the Case Category and attaches it to this case request.