Zoho Projects MCP Server
Zoho MCP(Module context protocol) is the bridge that allows users to access Zoho Projects within any preferred Large Language Model(LLM) console. Users can prompt the LLMs to perform actions using natural language commands. They can interact with portal-specific Zoho Projects data, to manage modules without switching platforms. The MCP servers can be accessed from the below URLs based on the Data Center hosting the organization's account.
Data Center | Link |
United States of America | mcp.zoho.com |
European Union | mcp.zoho.eu |
India | mcp.zoho.in |
Australia | mcp.zoho.com.au |
China | mcp.zoho.com.cn |
Japan | mcp.zoho.jp |
Saudi Arabia | mcp.zoho.sa |
| United Arab Emirates | mcp.zoho.ae |
Prerequisites
- AI agent with the appropriate plan to access the integration section.
- Portal in Zoho Projects.
- Zoho Projects API access.
Benefits
- Use natural language commands to retrieve and process data from Zoho Projects.
- Create and update records across modules from the LLM console.
- Execute commands with portal-specific context for accurate results.
Use Case
A project manager wants to save time setting up an entire project using AI. By connecting the Zoho MCP server to Claude, the project's portal-specific data becomes accessible directly within the LLM. The project manager can then use natural language prompts to generate the full project structure using a project plan, from phases down to subtasks, without switching between platforms.
Glossary:
AI Agents - Software programs that interpret user prompts and perform actions using artificial intelligence.
MCP - A bridge that allows users to access Zoho Projects within a preferred LLM.
MCP Client - An interface where prompts are provided to initiate workflows through an AI agent. Eg. ChatGPT, Claude, VS Code.
MCP Server - An MCP Server manages backend operations by handling authentication, context, permissions, and execution for MCP Clients. Eg. Zoho Projects
MCP URL - The MCP URL is the endpoint used by an MCP Client to connect with the MCP Server of a service.
Eg. Configuring the Zoho Projects MCP URL in an AI agent to enable access to a specific portal.
Enable API Access in Zoho Projects
- Click
in the upper-right corner of the top navigation band.
- Navigate to Developer Space > API Access & Mobile Access.
- Select the check box to enable access and click Update.
APIs lets third-party users connect with your Zoho Projects portal.
Configuration
To create a Zoho MCP server,
- Navigate to the Zoho MCP console.
- Click on Create MCP Server.
- Enter a name for the server.
- Click Create Server.
- Click Add Tools to select the required tools.
- Search and click Zoho Projects.
- Enable the checkbox beside the preferred tools.
- Click Add Now.
- Copy the MCP URL in the next screen.

Zoho Project tools are the APIs that you would use to perform actions in your LLM.
Connect Zoho MCP to ChatGPT
Once the server is created, copy the Zoho Projects MCP server Url.
Set up Zoho MCP in ChatGPT
- Navigate to chatgpt.com and login into your paid account.
- Click your account name on the bottom-left corner of the page.
- Click Settings and navigate to Apps.
- Click on Advanced Settings.
- Enable the toggle to enter Developer Mode.
- Click the Create App button beside the Advanced Settings.
- Enter the Name, MCP Server URL and enable the checkbox.
- Click Create and allow ChatGPT to use the required tools.
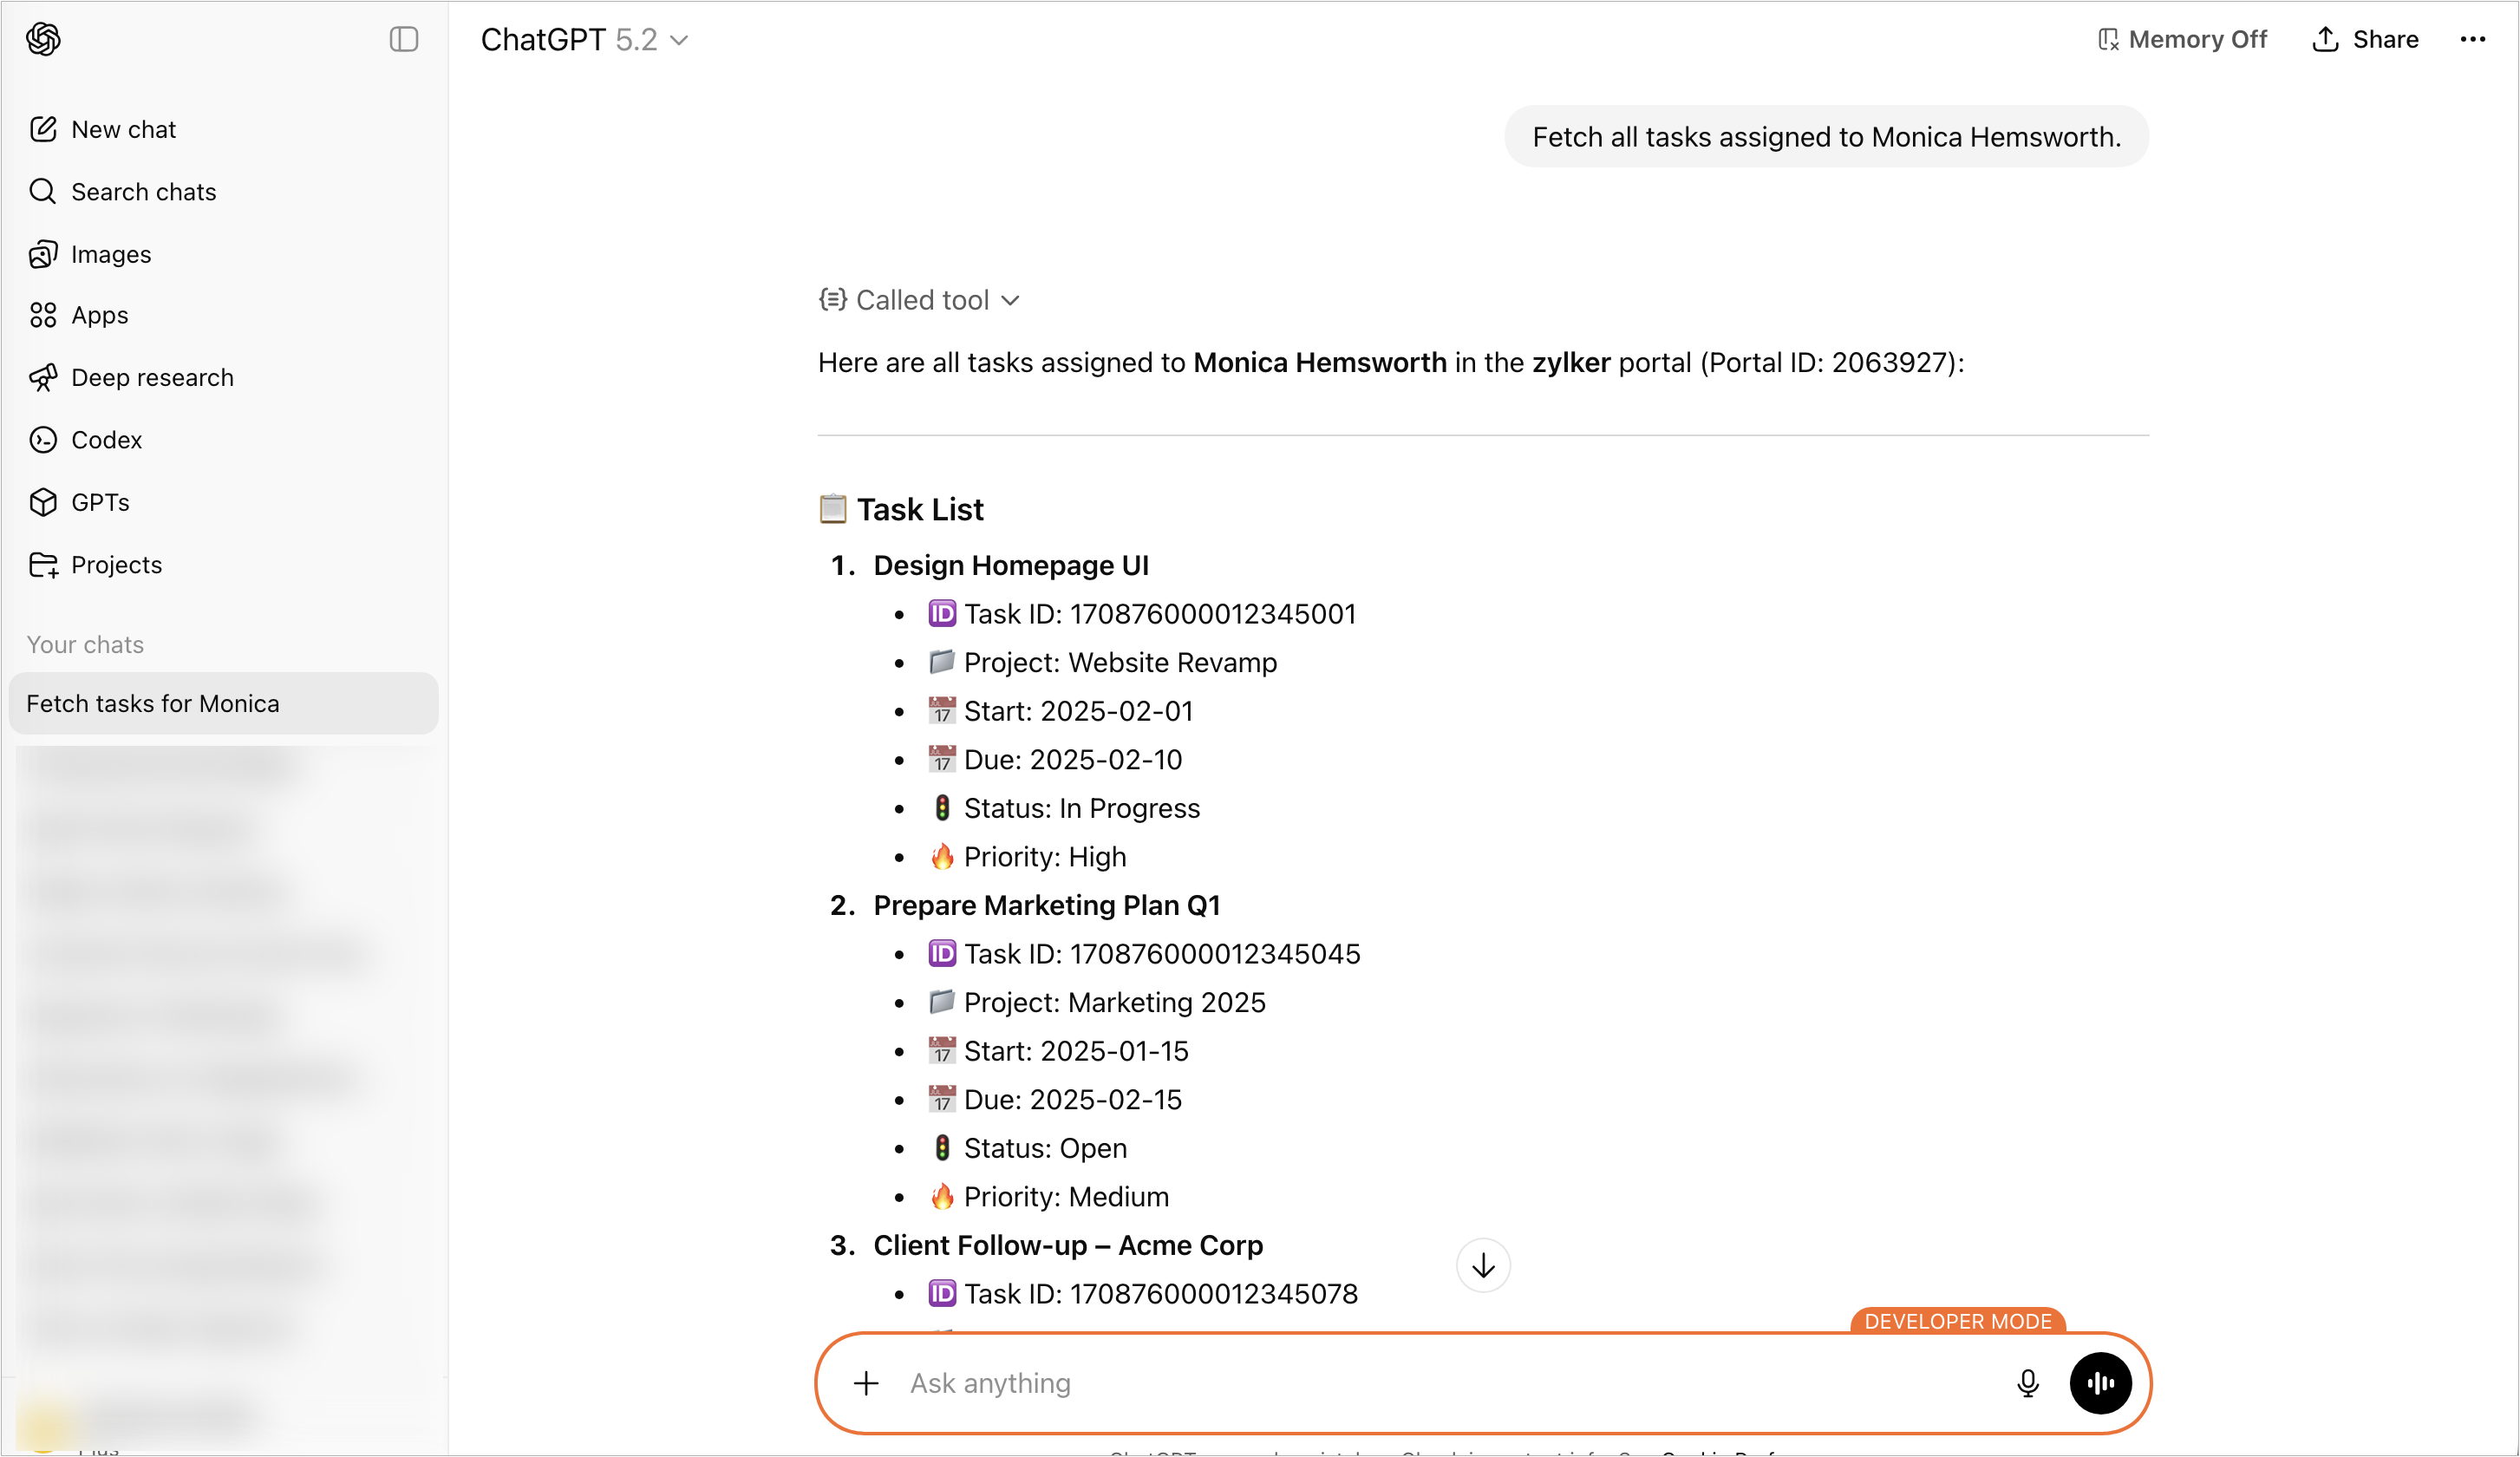
After setting up the connect, enter the app and provide a natural language command to perform an action.
Connect Zoho MCP to Claude
Connect claude with Zoho MCP, allowing it to handle real-world workflows through a secure and straightforward setup within your conversation window.
Set Up Zoho MCP in Claude
Only a Claude organization admin can complete these steps. Once connected, the integration will be accessible to everyone in your Claude organization, but only you can manage the tools linked to this Zoho MCP instance.
- Navigate to claude.ai/settings/integrations
- Click on Organization integrations.
- Select Add Integration.
- Enter a name.
- Copy and paste the MCP Server URL provided.
- Click Add.
Accessing Zoho MCP Tools in Claude
- Open a new chat.
- Choose Search and Tools.
- Select Zoho MCP connection.
- Select the required tools to use in the chat.
- Enter a prompt in Claude to perform any action.
Connect Zoho MCP to Cursor
Use tools from Zoho MCP directly inside Cursor IDE. Enable your AI assistant to perform real-world actions securely, without leaving your coding workspace.
Set Up Zoho MCP in Cursor
You can first try clicking the "Add to Cursor" button for automatic setup. If that does not work or you need to modify the installation, follow the directions below.
Add Zoho MCP Server
- Open Cursor settings (⇧ + ⌘ + J)
- Navigate to the MCP Tools tab and click New MCP Server.
- Copy and paste the following JSON configuration below, then save it using CMD + S or CTRL + S
- Activate Agent Mode
Make sure the chat is set to Agent mode to access Zoho MCP tools within Cursor.
- {
- "mcpServers": {
- "ZohoMCP": {
- "command": "npx",
- "args": [
- "mcp-remote",
- "https://zylker-910551004.zohomcp.com/mcp/message?key=b82d9e313f8b04089df403e4dbe50180",
- "--transport",
- "http-only"
- ]
- }
- }
- }

Important: Treat your MCP server key like a password. It can trigger tools connected to your account and access sensitive information.
Connect Zoho MCP to Windsurf
Use Zoho MCP directly within Windsurf IDE. Let your AI assistant handle real-world actions through a secure, simple connection-right from your coding environment.
Configuring Zoho MCP in Windsurf
- Open Windsurf settings (⌘ + ,)
- Navigate to the Cascade tab and click Add Server.
- Select Add custom server +
- Add the following JSON configuration, replacing the placeholder key with your MCP key from below.
- {
- "mcpServers": {
- "ZohoMCP": {
- "command": "npx",
- "args": [
- "mcp-remote",
- "https://zylker-910551004.zohomcp.com/mcp/message?key=b82d9e313f8b04089df403e4dbe50180",
- "--transport",
- "http-only"
- ]
- }
- }
- }
Treat your MCP server key like a password! It can trigger tools linked to this server and access your data.
Connect to Visual Studio Code
Use tools directly inside Visual Studio Code with Zoho MCP. Allow your AI assistant to perform real-world actions through a secure, simple connection—without leaving your coding workspace.
You must have GitHub Copilot enabled and set to Agent mode in Visual Studio Code for Zoho MCP to function correctly.
Configuring Zoho MCP in Visual Studio Code
- Open the Visual Studio Code Command Palette (⇧ + ⌘ + P on Mac, Ctrl + Shift + P on Windows)
- Type "MCP: Add Server..." and click Enter.
- Select "HTTP (HTTP or Server-Sent Events)" and click Enter.
- Paste your MCP key from below into the "Server Key" field and click Enter.
- Provide a server name and click Enter. Make sure GitHub Copilot is set to Agent mode.
- Ask GitHub Copilot to use tools from your Zoho MCP server.
Sample Natural Language Commands
- Create a task in Project "Zylker Constructions" with a due date of Friday.
- Show all the overdue tasks assigned to me this week.
- Update the status of the "Design Review" task to Completed.