Orchestrating customer journeys using Journey Builder
Give your customers a friction-free experience all along their buyers' journey
From receiving a lead in your business to converting them as a contact and closing a deal with them, your prospect is interacting with one business entity—your brand. And, to offer great CX, businesses often rely on a series of automations to follow-up prospects or to provide contextual actions. While the intention centers around providing CX, businesses needs a more dynamic and scalable facility to deliver consistent and coherent customer experience to match the direction and pace of customers’ journeys.

Consistent CX requires orchestration over automation
Journey Builder is a tool that helps you orchestrate your customer journeys and provide contextual actions at different touchpoints—with consistency and coherence.
All you need is a design plan of your process, foresight on your customers’ supposed behaviors, and empathy to come up with useful solutions—Journey builder will help lay the road.
Illustration: (Expand to read)
The below image is an example of a process flow flowing through different tools; the incoming signals signifies customer behavior, and the actions signifies the business’s response. Customer records are accommodated at different stages and moved when the Signals are triggered. And, that is how customer experience can be coherently delivered through the process.
This article will help you understand its structure, its purpose, capabilities, and steps on how to configure a complete journey.
Understanding Journey Builder and its components
Built based on the mathematical model called the Finite State Machine (FSM), the Journey Builder tool is made up of structural elements called the Stages, Transitions, and Actions to process inputs and execute timely outputs.

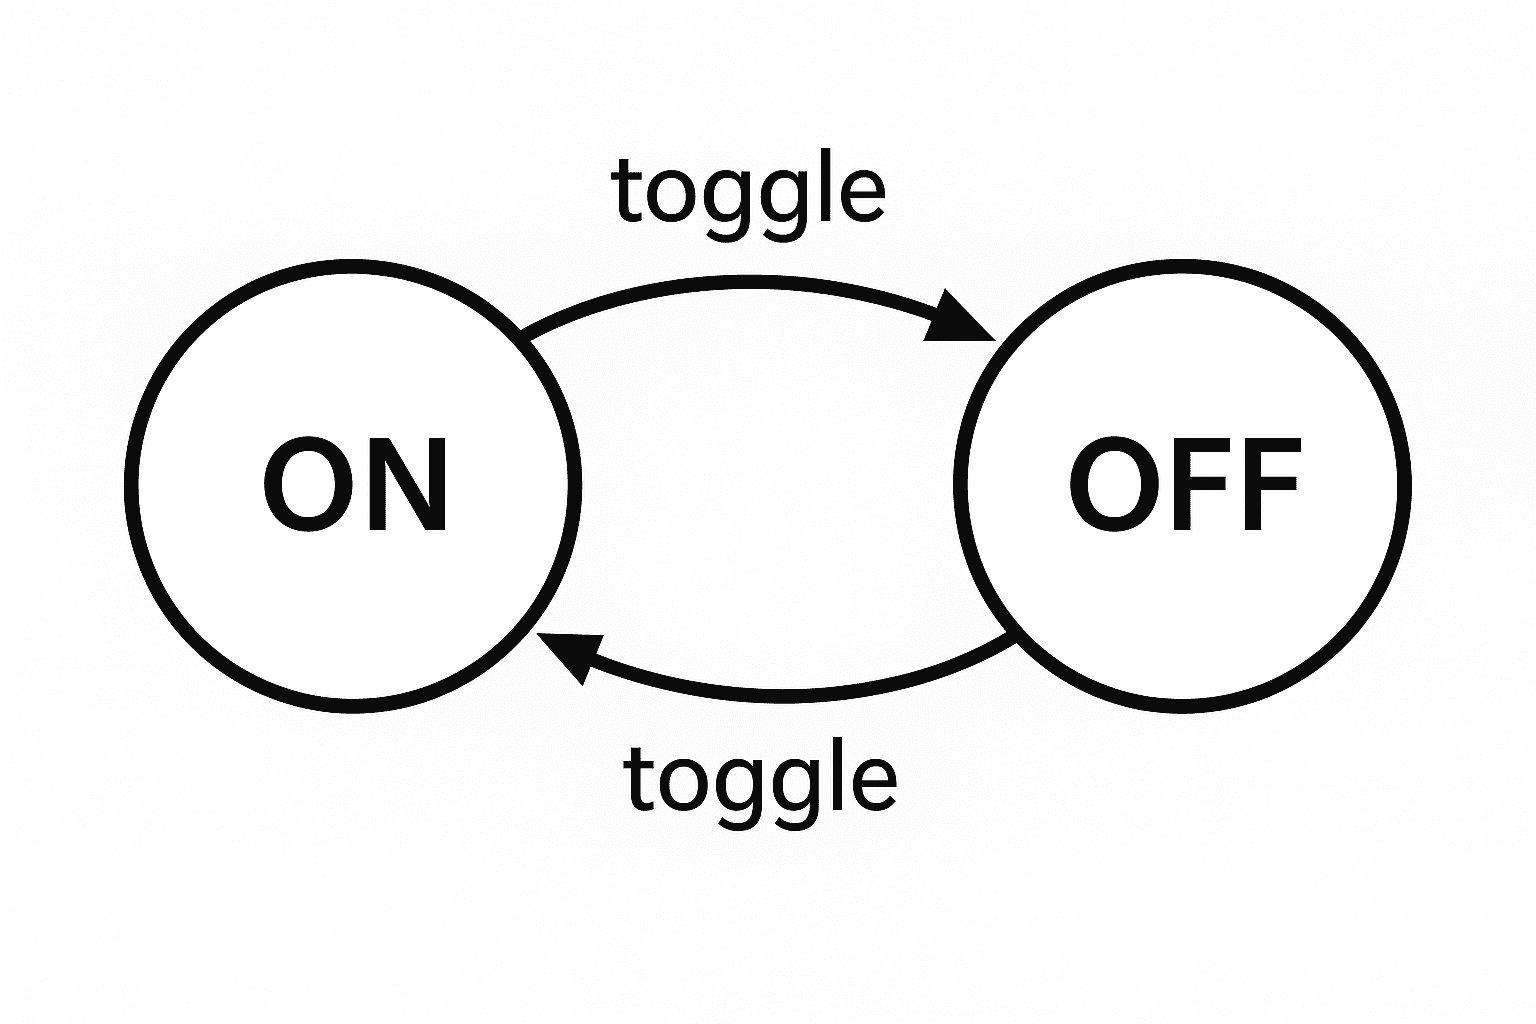
About FSM: Finite State Machine is a tool that is made up of a finite number of states (as in states of being) . When there is an external influence on a resting state, the tool will move the physical entity from that state. This is called the transition. Consider a power switch where there are two states: On and Off. When you toggle the switch ON, your toggling action acts as a transition that moves the switch from the state off to on. And what the switch renders after this transition is its designated action—like a fan running as a result.
Using Stages, Transitions, and Actions, you can build complete micro- and macro- journeys for various processes like lead management, bid-desk management, order management, supply chain management, customer onboarding, customer success, and more. If you are already nurturing your prospects and customers using activity-based actions in Cadences, with Journey Builder, you can go beyond and deliver extensive experiences using an array of standard and custom actions after you have nurtured them.
STAGES
Stages are steps in a journey/process. They house customer records as they move ahead in their journey and execute actions as orchestrated.
Lead Contacted, Lead Qualified, Opportunity Created, Product Shipped, and Product Delivered are among different steps in a process that can be configured as stages. In addition to these standard stages, you can also capture behavior-based stages like interest-observed, contact established, product exploration stage, and more as stages, based on your business agenda.
You can:
- Create goals for your journey at the starting stage
- Mark multiple stages as the end stage along with their sentiments
- Set up instant, schedule, and recurring actions for every other stage.
In the larger network called the customer journey, stages act as milestones to guide the customer records in the journey while executing responses as configured.
Add success and failure stages
The objective of a journey is met when it ends, and as a customer progresses through your business process, the experience they gather will influence their direction and decision, which can end up being positive or negative for the business.
That is why we have given two ways to add end stages and further determine the sentiment behind these end stages. In the larger web of Stages and Transitions, earmarking the end stages with their sentiment help identify the end stages instantly.
- To any stage, if they are the last step in the process, you can mark them as the end stage in the stage info. You can also mark the sentiment of the stage as Success, Failure, or Neutral, which indicates the success or failure of the journey taken.
- You can also create success and failure stages right from within the floating Elements tray and associate them to the journey created.
Both methods will end the journey, and the records that have reached the end stage will exit the journey.
Note:
Marking as end stages will indicate the customer's journey for that process is ended. They can, however, enter or continue to be in another journey based on their qualification for that journey’s criteria.
Tracking customers journey in realtime using Journey Builder
To configure stages in Journey Builder
- Log in to your CRM organization as an admin.
- Navigate to Setup> Experience Center > CommandCenter > Journey Builder. Alternatively, you can also search for Journey Builder in the Setup search.
- In the Journey Builder page, click on the Create Journey button from the top-right of the list view.
- To add stage to an existing journey, open the journey from the list view.
- In the ensuing Create Journey form, provide Journey name and Description. Click Proceed.
- The builder will welcome you. Click on the Create Stage button to get started. The first stage will be named Stage 1 by the system, and it is connected to the zeroth moment called the Start stage.
- Goals are the journey's objective, and they are not mandatory. If you’d like to add goals, click on the Start stage to configure Goals for this journey.
- You can select from these options: Reaching a particular stage, Take a predefined path, or the time taken to reach a stage.
- Based on your selection, select associated attributes to define the selected goals.
- Click Save once you're done.
- Up next, rename the Stage 1 as desired. You can also add a description to serve as a reference.
- Likewise, create as many stages as you’d like to have in your journey.
- You can add a stage from the floating Elements tray, or simply click on the existing stage. This will display visual cues to create new stages in the rest of its sides as branches. Click on the desired branch to add a new stage.
- After creating a stage, add Actions to each stage to orchestrate personalized responses for the customers' choices on their journey.
Learn more about setting up actions.
UX Shortcuts to create Stages
- Hover on a stage to view nodes along the mouse path.
- Click on a current stage and click on the proximity handles to create a Stage adjacent to the existing one.
- Click the +New button on the stages options from the elements tray to create empty stages.
- Convert a success/ failure end stage into a stage
TRANSITIONS
Transitions are qualifiers that move your customer records from one stage to another. They stay between two stages, and you have to configure Signals for them to become functional. To narrow down further, you can also specify record conditions.
- Configuring Signals means determining which events trigger the record in the previous stage to go into the next stage.
- Conditions let you narrow down your record selection using the characteristics of a record or the configured Signal.
Signals
Each transition is made up of a sophisticated event bus service called the Signals that communicates customer actions, behaviors, consents, and responses to the system. The transitions listening to these Signals will receive the event, validate them, and move the records in one stage to another.
Read me: Signals in Journey Builder
Signals can capture events of the following types with their examples:
- Record actions: CRUD (Create, Read, Update, Delete)
Example: Create of a record, Update to the Last modified time, Edit to the record, Delete of the record. - User actions: Email, Call, Webform submissions
Example: Submission of a webform, Receiving an incoming email, Attempting an outgoing call. - Integration Signals: Events from Zoho’s applications integrated with Zoho CRM.
Example: Visiting a Survey, Registration received for a Webinar, Receiving a Desk ticket. - Custom Signals: Any custom capability that can trigger the record’s movement in the journey.
Example: Prospect wish-listing a product, Abandoning a cart, Drop in demand observed in the MRP tool and so on.
Filters and conditions
Thus far, you looked at what Transitions and Signals are.
- Transition sits between two stages and it contains Signals, filters and conditions as part of it. Transitions help qualify the records to move from one stage to another.
- Signals are hotspots that captures the desired events happening in your business landscape. An event that occurs will activate the Signal within a transition, thereby moving the record from the resting stage to the next stage.
From this, you’d understand the role of Transitions and Signals in traversing the record through their journeys. But, in order to provide personalized experiences for your customers, you need to be very precise in your targeting. That said, it is important to use Record filters and Signal conditions as part of your configuration, to achieve this precision.
What are Record filters and Signal conditions and what is the difference between them both?
By definition, filters and conditions are essentially criteria to determine which record to trigger and when. However, they both differ in terms of purpose and execution.
Record filters
Record filters are criteria passed on the records in the resting stage. When an event is observed, the chosen Signal will activate the transition. At this juncture, the system checks for the record filter: If a record meets the criteria, only then it will be moved from stage A to stage B.
In short, record filters are criteria applied to the records using their field attributes.
Imagine a journey orchestration plan to optimize pipeline experience. Typically, it involves the following modules: Leads, Contacts, and Deals and might involve stages like
Lead creation > Lead qualification > Lead Conversion > Contact creation > Deal creation > Closure
Say for leads submitted by partners, you don’t want to qualify them again. That is your business preference and you can translate this exception into process by defining record filters.
As configuration, this is how it will look:
As you can see, when a record enters the journey (signified by record creation event configured as Signals), if their lead source field is marked as Partner, then those records are directly moved to the stage called Qualified, taking an entirely new path because of the record filter.

Facts:
- Record filters apply for transitions
- The criteria is always about the field and field values
- It help validate and qualify the entry of the record in resting stage into the subsequent stage.
Signal conditions
Signal conditions are criteria passed onto the signals itself. As you might know, Signals captures the events and moves the record ahead in the journey. Passing a criteria onto a Signal means, choosing which Signal can be allowed to move a record.
Say, you only want to move the records to the next stage when you receive an email from the prospect with the subject Request Demonstration.
Here, receiving an email is a futuristic event and writing a condition about this means you are applying the criteria on the Signal itself. Only those incoming emails that has Request Demonstration as the subject have the power to set the records in motion to the next stage.
This is an example of signal conditions applied to response-based events. It also includes events like emails, calls, tasks, meetings, and chats.
There is also another type of signal condition called the CRU-based signal conditions.
CRU stands for Create, Read, and Update of a record and building criteria on events like create of a record, read of a record, or update of a record can also decide if the Signal can be triggered or not.
Let us take the same example of pipeline optimization.
Modules involved: Leads, Contacts, and Deals
Stages involved: Lead creation > Lead qualification > Lead Conversion > Contact creation > Deal creation > Closure
Imagine as a business, you’d like to adapt different negotiation terms based on the customer type: For existing customers you may want to offer freemium subscription of another product and for new customers you allow higher discounts to acquire.
These are strategic decisions made to provide valuable experiences for your customers based on their type. Here also, the field “Business type” comes only as part of the deals module from the futuristic stage.
The system will not validate any records in the resting stage C: Contact creation, but will move these records’ entity into the deal creation stage, only if the deal is created with the business type as Existing.
Imagine you have one journey with multiple paths for each business type. Then, there will be two stages the customer entity can go to: Deal created for existing business and Deal created for New business. It is by means of Signal conditions, can you determine which records can go to which of these stages.
Take a look at the above screenshot: The records are now stationed at the stage Contact created. The two departing Signals are the same: Record creation in deals module. However, the system sends the record to the new business deal stage only when the new deal is created with the business type field chosen as New Business. Upon reaching this stage, the business can configure personalized actions that offer higher discounts only for those new businesses.
Here’s the comparison for you to understand between the record filters and signal conditions:
Facts:
- Signal conditions qualify the Signal event itself. If the event doesn’t qualify the system won’t recognize the event and will not let it drive the journey.
- The criteria can be about record fields and values or about the response-based events.
- It help validate if the Signal is the right one to influence / drive the journey.
 Note: Signal conditions act the same as Record Filter if the records in the source and destination stages are going to be from the same module. Signal conditions for CRU actions will act beneficial for cases where you want to achieve cross-module routing between different source and destination stages.
Types of transitions in Journey Builder
There are three types of transitions in Journey Builder: standard transition, common transition, and wait transition.
Standard Transition
- A standard transition is a one-to-one transition. For each destination stage, there will be only one source stage and one transition connecting them. When this transition is triggered, a record resting in the source stage will be moved into the destination stage. In other words, standard transitions are unique because of those specific source and destination stages, and they can accommodate only one preceding stage.
For example, records in the Order Placed stage will rest in that stage until an event qualifies them to move to the Payment completed stage. Here, the event is completion of payment. Until the payment is initiated and completed, the record will be in the Order Placed stage, and the act of completing the payment can move the records in the Order Placed stage only.
Common Transition
- A common transition is a single transition that is shared by multiple source stages. All of these source stages will converge into one destination through a single, common transition.
Info: You can also have a standard one-to-one transition connecting the same source and destination stages. Read more: Setting Precedence between two branching transitions
A common transition enables a many-to-one flow of records.
Imagine there are multiple stages that are similar in purpose but vary based on process. These stages might require only one qualifying event (Signal) so that they can move the records to their destination stage.The below image depicts a common transition. There are three stages to represent three categories: New home buyers, Investors, and Entrepreneur. However, for all the three personas, your business will have to collect requirements and instead of having three different standard transitions, when the need being the same for all the above stages, you can use a common transition, there by making the process flow logical and continuous.
Wait as a transition
- Wait as a fallback option: While transitions qualify events through Signals, Journey Builder also considers a lack of response an event, thereby enabling you to use the Wait component to transfer records from one stage to another.
It's a fallback option to manage no-shows.
A cold prospect is unlikely to respond to any of your emails. Instead of holding their records in the Email Sent stage, by using the Wait component, you can park their records in a dedicated stage, so that those unresponsive records are not stagnated, while others pass through the same stage.
This will cleanse the stages from cold records, prevent unintentional engagements, and help produce accurate overall customer journeys.
Transition in a nutshell
Whenever there's an event (input) ;whether it's customer-driven or business-driven; if it meets the Signal criteria and the record condition, the record in the source stage (the preceding stage) will be transitioned to the corresponding next stage (the destination stage) while executing business actions simultaneously (output).
For each transition, you can:
- Add standard and/ or custom Signals to capture a wide range of events
- Provide conditions for Signals for accurate transmission
- Narrow things down further using record conditions for precision
- Add Identifiers to identify and track customers in the web of other customer journeys
- Add logs for effective journey administration
A transition can be standard, common, or even a Wait component.
Ways to create a standard transition
Transitions can be created in three ways:
- Connecting two stages by dragging the node from one stage to another will create a plus icon. Clicking + will create a transition.
- Add a transition from the Elements tray. Clicking on the Transition options in the Transition tray will let you set the source and destination stage. This action will create a transition bridge. You can either establish the bridge and create Signals later or create a transition with Signals.
- Or, you can click on the transition option in the elements tray and drag them onto the desired stage. This will invoke a new destination stage, you can then rename.
Ways to create a common transition
- Click on the + icon and determine the Signal. After you have renamed the transition, beneath the transition name, you can see which stage this transition bridges. Click on the Set as common button and select the source stages from the list.
- Click on the common transition option from the Element tray and select the source and destination stages. Like a standard transition, you can create one as-is or create it with Signals.
- Convert a standard transition to common transition by selecting the transition, clicking Set as common beneath the Transition name, and selecting the source stages.
- Or, select the common transition option from the elements tray, drag and drop onto the destination stage to choose the desired source stages that corresponds to this common transition.
Converting a common transition into standard transition
If you want to convert a common transition to a standard transition, go to the common transition strip, click on the transition badge, and click the cancel (x) icon.
UX shortcuts for transitions
To create Transition:
- Drag the Stage node and drop it to the neighbouring Stage to enable transitions between them. It helps when connecting stages that are distant from one another.
- Creating a stage will allow you to configure transition right next to it.
- Create a transition from the elements tray by determining the stages
Note:
- Canceling a common transition and converting it to a standard transition will result in the connection node changing. The stage it was created in will become the source stage; to change it, you have to manually reposition the connection node.
- A common transition will come bearing the linked icon (
), and the stages it connects will be visible only when you hover your mouse over them.
- Two stages can be connected using all kinds of transitions: Common, Standard, and Wait. If by choice, the Signals between common transition and standard signals happen to be the same, and you can choose to set precedence for execution.
To configure transitions
- Click the plus ➕ icon between two stages to create a transition.
- Select the desired Signals. It can be the system-standard CRM Signals, integration-based application Signals, or custom Signals.
- Further select the Signal attributes.
For example: If you have selected Record Create as a Signal, then the Signal attributes are the modules, layouts, and other Signal conditions. Attributes like these are available distinctively for each Signal. - If you’d like to filter Signals (to determine the event criteria), provide the filter criteria in the conditions you see right within the added Signal.
- Click Add Record Filters to filter the records in journey based on the record-based parameters. Click Manage Record Filters if you’d like to make a change to the Signal or the criteria.
- Click the Identifier tab to add identifiers for each Signal. Learn more about creating identifiers.
- Click the Logs tab to record events occurred during the transition for future reference. Press the Add Log button to invoke the field. You can also use #Merge fields to refer to a few particular records that passed a transition.
ACTIONS
Actions are suitable responses you can append to your stages. This is where orchestration comes into the picture. Every stage comes with an action group in which you can configure multiple actions like making field updates, invoking functions and webhooks, creating tasks, adding and/or remove tags, converting leads or quotes, and sending notifications via email and Cliq as instant, scheduled, and/or recurring actions. These automations provide timely updates to the customers while simultaneously keeping the business process in-line with their journeys.
In general, these actions will be executed for all stages in the journey. However, if you like to send out personalized responses, you can only run them for those journeys that come via a specific transition.
An action group is a collection of actions you can append to a Stage. It includes instant, scheduled, and recurring actions. These actions based on desired timing, duration, and gap after a trigger will help orchestrate timely responses and they help create relevant, smooth, and flawless customer experience.
- Instant actions are executed the next moment the record reaches the respective stage.
Example: If a prospect submitted a gated form, then an email with the requested exclusive content can be shared via instant actions. - Scheduled actions are scheduled a certain period after the record has reached the stage.
Example: A task can be created for the sales representative two days after the record creation to remind the sales reps to take further actions. - Recurring actions are actions that are set to keep executing every day, hour, or minutes until the record is moved to the next stage or if the Wait transition lapses its timer.
Example: You can send reminder emails to your customers requesting that they complete the balance payment using recurring actions. If the payment is made, the emails will stop moving the record to the next stage; if they exceed a certain amount of time (and if the Wait deadline is crossed), then the record can be moved to the next stage called Violated with legal steps as actions.
Here’s a list of actions available under each action group:
Action Groups and respective actions | ||
Instant action | Scheduled action | Recurring action |
Field update | Field update | Field update |
Function | Function | Function |
Webhook | Webhook | Webhook |
Task | Task | Task |
Create Record | ||
Convert | ||
Add Tags | ||
Remove Tags | ||
Email notifications | Email notifications | Email notifications |
Notes: Actions are listed based on the modules and transitions selected for the stage.
To add actions
- Go to the desired stage, then click the Actions tab from the sliding panel.
- Click the New Action Group button.
- Choose the desired module on which actions will be executed.
- Select the Run for specific transition checkbox to execute this action group only for the records that come via a certain transition. Select all the desired transitions.
- Append actions from the action group: Instant, scheduled, and/or recurring.
- Select the action and furnish their properties from within each action accordingly.
Notes:
- If you have chosen an action group to run for records coming via specific transitions, then they get the precedence in terms of execution.
- If action groups are configured for both specific transitions and 'All Transitions,' the specific transition action group will run first, followed by the 'All Transitions' action group.
- If you have selected to run for specific records, then it applies for all action groups created for that stage.
- You cannot uncheck the run for specific records once selected. You have to delete the action group and redo the configuration.
- Action limits:
Thus far, we have seen that Stages, Signals, Transitions, and Actions are the structural components needed to build the customer journey.
Illustrating Customer Journey in CommandCenter
- The desired path or the journey is built with multiple stages in sequence
- From the Zero moment, the behavior or action of a prospect or a customer can be observed and received using Standard and Custom Signals.
- Signals trigger the transition, thereby moving the corresponding records to the appropriate stage.
- Contextual actions get established as a result.
- These structural components help in building journeys. Journey builder also comes with a few other components to identify, manage, and measure customer journeys: Goals, Identifiers, Logs, Deadline, and Variables.
Administrative components of Journey Builder
GOALS
Goals are objectives you desire for each journey.
Customer journey is a culmination of customers’ choices and experiences they gather. To work towards making them favorable for your business and create positive experiences, you can ascribe one of the following goals to your journey and assess the trajectory:
- Reaching a particular stage
- Take a predefined path
- Time taken to reach stage
Ascribing goals to your journeys will help streamline your intent and assess how many of the customers are meeting your expectations, see what aspect made them complete according to your goal, and how you can improvise those types of journeys that did not fulfill your objectives.
SETTING PRECEDENCE
Viewing a completed journey builder will sure look like a cob web. The chance of two stages corresponding to one stage via two transitions are completely possible and when you happen to have these transitions to carry the same Signal, then on such stages, you can create Precedence.
This happens especially when you have common and standard transitions between two stages.
All you have to do is to
- Select the stage that has branching transitions
- Click Precedence tab.
- Look at the current order of execution.
- If you'd like to change the order, select the double vertical ellipses (⋮⋮) and drag the selected stage up or down to set the precedence.
Note: Precedence can be set only with two or more transition nodes and it will not be displayed on stages otherwise, including the end stages.IDENTIFIERS
Identifiers are unique field values that help identify customers and their journeys in the web of interlocking paths. It follows the process of identity resolution to accurately associate data with individuals who interact with a business across different platforms and channels
Thus, when a customer commences their journey, identifiers help attribute their movements, their choices, and their behaviors to their records in real-time in the CommandCenter module.
Even when customers engage with your business after a break, their journey resumes seamlessly without creating duplicates. It is therefore an important component that helps create an accurate path and personalized executions.
For example, email address, lead name, ticker symbol, street name, ID number, quote number, mobile number are among unique values that represent a customer’s record in Zoho CRM, and whenever the customer actions are observed across transitions, the system ascribes these chain of movements back to their records as journeys.
Note:
You can choose up to ten identifiers per transition
How does it work?
As no two consecutive transitions could have the same Signal or belong to the same module, the identifier values in one transition may not be available in the next one, and that’s why we have built what's called value mapping logic.
First, the system will look for a 5*5 match where the identifying fields between two transitions are the same and will have the same value. This is a direct match.
If a 5*5 match is not available, then it will look if the two transitions match with any of the five fields’ values. It can be in 4 * 4, 3 * 3, 2 * 2, or 1 * 1 combinations; this is called a partial match. If the unique values between the two transitions match, then the system understands that the action was performed by the same record.
Even if there are no fields with matching values between the two transitions, Identifiers are equipped to store and accumulate identifying values from the previous transitions and compare the presenting values with them. If there is a match, then the journey will be attributed to that customer without any hassle.
Just for clarity:
While identifiers are applicable for the CommandCenter suite as a whole, their role in Journey Builder is limited to attributing journeys with the respective customers’ journeys. In Path Finder, identifier helps in recording new paths and building their journey as they are discovered.
You can choose identifiers from the builder in two ways:
- Signal fields lists all single-line fields available in the modules chosen in the Signal selection.
- Reference fields in a transition will list all the previous transitions as breadcrumbs. By referring to one of the previous transitions, you are instructing the system to attribute the current transition to those customers that crossed that particular transition. You can use reference fields when there is no match between the two transitions, or if you want to narrow down to customers based on their historical engagement.
To add identifiers
- Go to the transition, select the Identifier tab from the sliding panel.
- Based on the number of Signals, you would have as many fields to add Identifiers in.
- Choose up to five unique identifying values from all of the fields. You can also use the system suggested fields for quick selection.
Manage Identifiers:
Identifiers are mandatory to publish a journey, as they are what make up the customer navigation. However, instead of visiting every transition to add or update them, identifiers can be managed globally using the Manage Identifier option.
This option lists all the stages and their transitions—you only have to choose the identifiers. You can choose between Signal fields and Reference fields. In Manage Identifier, you can also choose standard identifiers using related record fields for each module.
To manage Identifiers globally
- Go to the journey and click Manage Identifier from the top-right corner, next to the Publish button.
- Review the stages and transitions listed for your reference and start populating identifiers for each transition configured.
LOGS
Logs are records of events worth noting. Say, one of your customers escalated for poor experience—the fact it was reported during this transition is worth noting as logs. This log will subsequently be a part of the record’s timeline for future reference.
DEADLINE
Deadlines are a waiting threshold you append to the journey. You can determine the whole journey to close within a time or transitions from certain stages.If the journey or a stage touched the deadline, you can choose to escalate or move to a stage.
VARIABLES
Variables are data placeholders to collect customer data as they move about in their journey. It is represented in the format Journey> Transition> Signal > Field, and instructs the system to use those records that satisfy this breadcrumb trail for further analyses—in the web of customer interactions, variables can be used to point out to the record that followed a particular path and use that in further analyses like reports, dashboards, and more.
Imagine you’d like to study a campaign’s success: The journey will be common for all leads created. However, to identify and subject those prospects that were created and converted via the campaign, variables will be helpful.
To add Variables
- Go to the journey, click on the Manage Variables icon from the top-right corner, near the Delete button.
- You can capture records with desired attributes using user-defined variables.
- Provide a name for the variable and the value. You can use the #merge fields to refer to the route.
- Click Save.
- You can also look at the system-defined Variables built based on transitions created.
Tools to enhance journey building experience
Auto-align helps in aligning the stages and transitions so that the journeys are clearly understood.
Export as PNG lets you export the journey as PNG. You can export the full view of the chart or only the visible area.
Navigation lets you pan the journey building area, such that it is convenient to add the extensive stages and transitions without having to refer to them every time you configure them.
Get into the state of flow: Shortcuts summary
To create Stage:
- Hover on a stage to view nodes along the mouse path.
- Click on a current stage and click on the proximity handles to create a Stage adjacent to the existing one.
- Click the +New button on the stages options from the elements tray to create empty stages.
To create Transition:
- Drag the Stage node and drop it to the neighboring Stage to enable transitions between them. It helps when connecting stages that are distant from one another.
- If you are creating a common transition, dropping the selecting the common transition from the elements tray and dropping them on the "desitination" stage enables creation of common transition nodes.
- Creating a stage will allow you to configure transition right next to it.
- Create a transition from the elements tray by determining the stages
To rectify configuration errors:
- Pick the transition node from one stage and place them over another to rectify the configuration
To edit/ delete Stage or Transition:
- Right click on the Stage or Transition to edit or delete.
To rename Stage, Transition, and Journey: Double-click on the entity.
To zoom in and out of the journeys:
- Use your mouse’s scroll wheel or laptop’s trackpad.
- Double-click on the zoom level to render optimal magnification.
- Click on the navigation preview and pinch to magnify or shrink the entire journey.
To navigate the journey around the builder space:
- Use your mouse’s trackpad
- Click on the navigation preview and move the view-port indicator