Add and manage users
Administrators and any user with the Manage Users permission in their settings can add, import, modify, re-invite, activate and deactivate users to the account.
To add a new user:
1. Click  on the top right.
2. Navigate to Setup > General > Users.
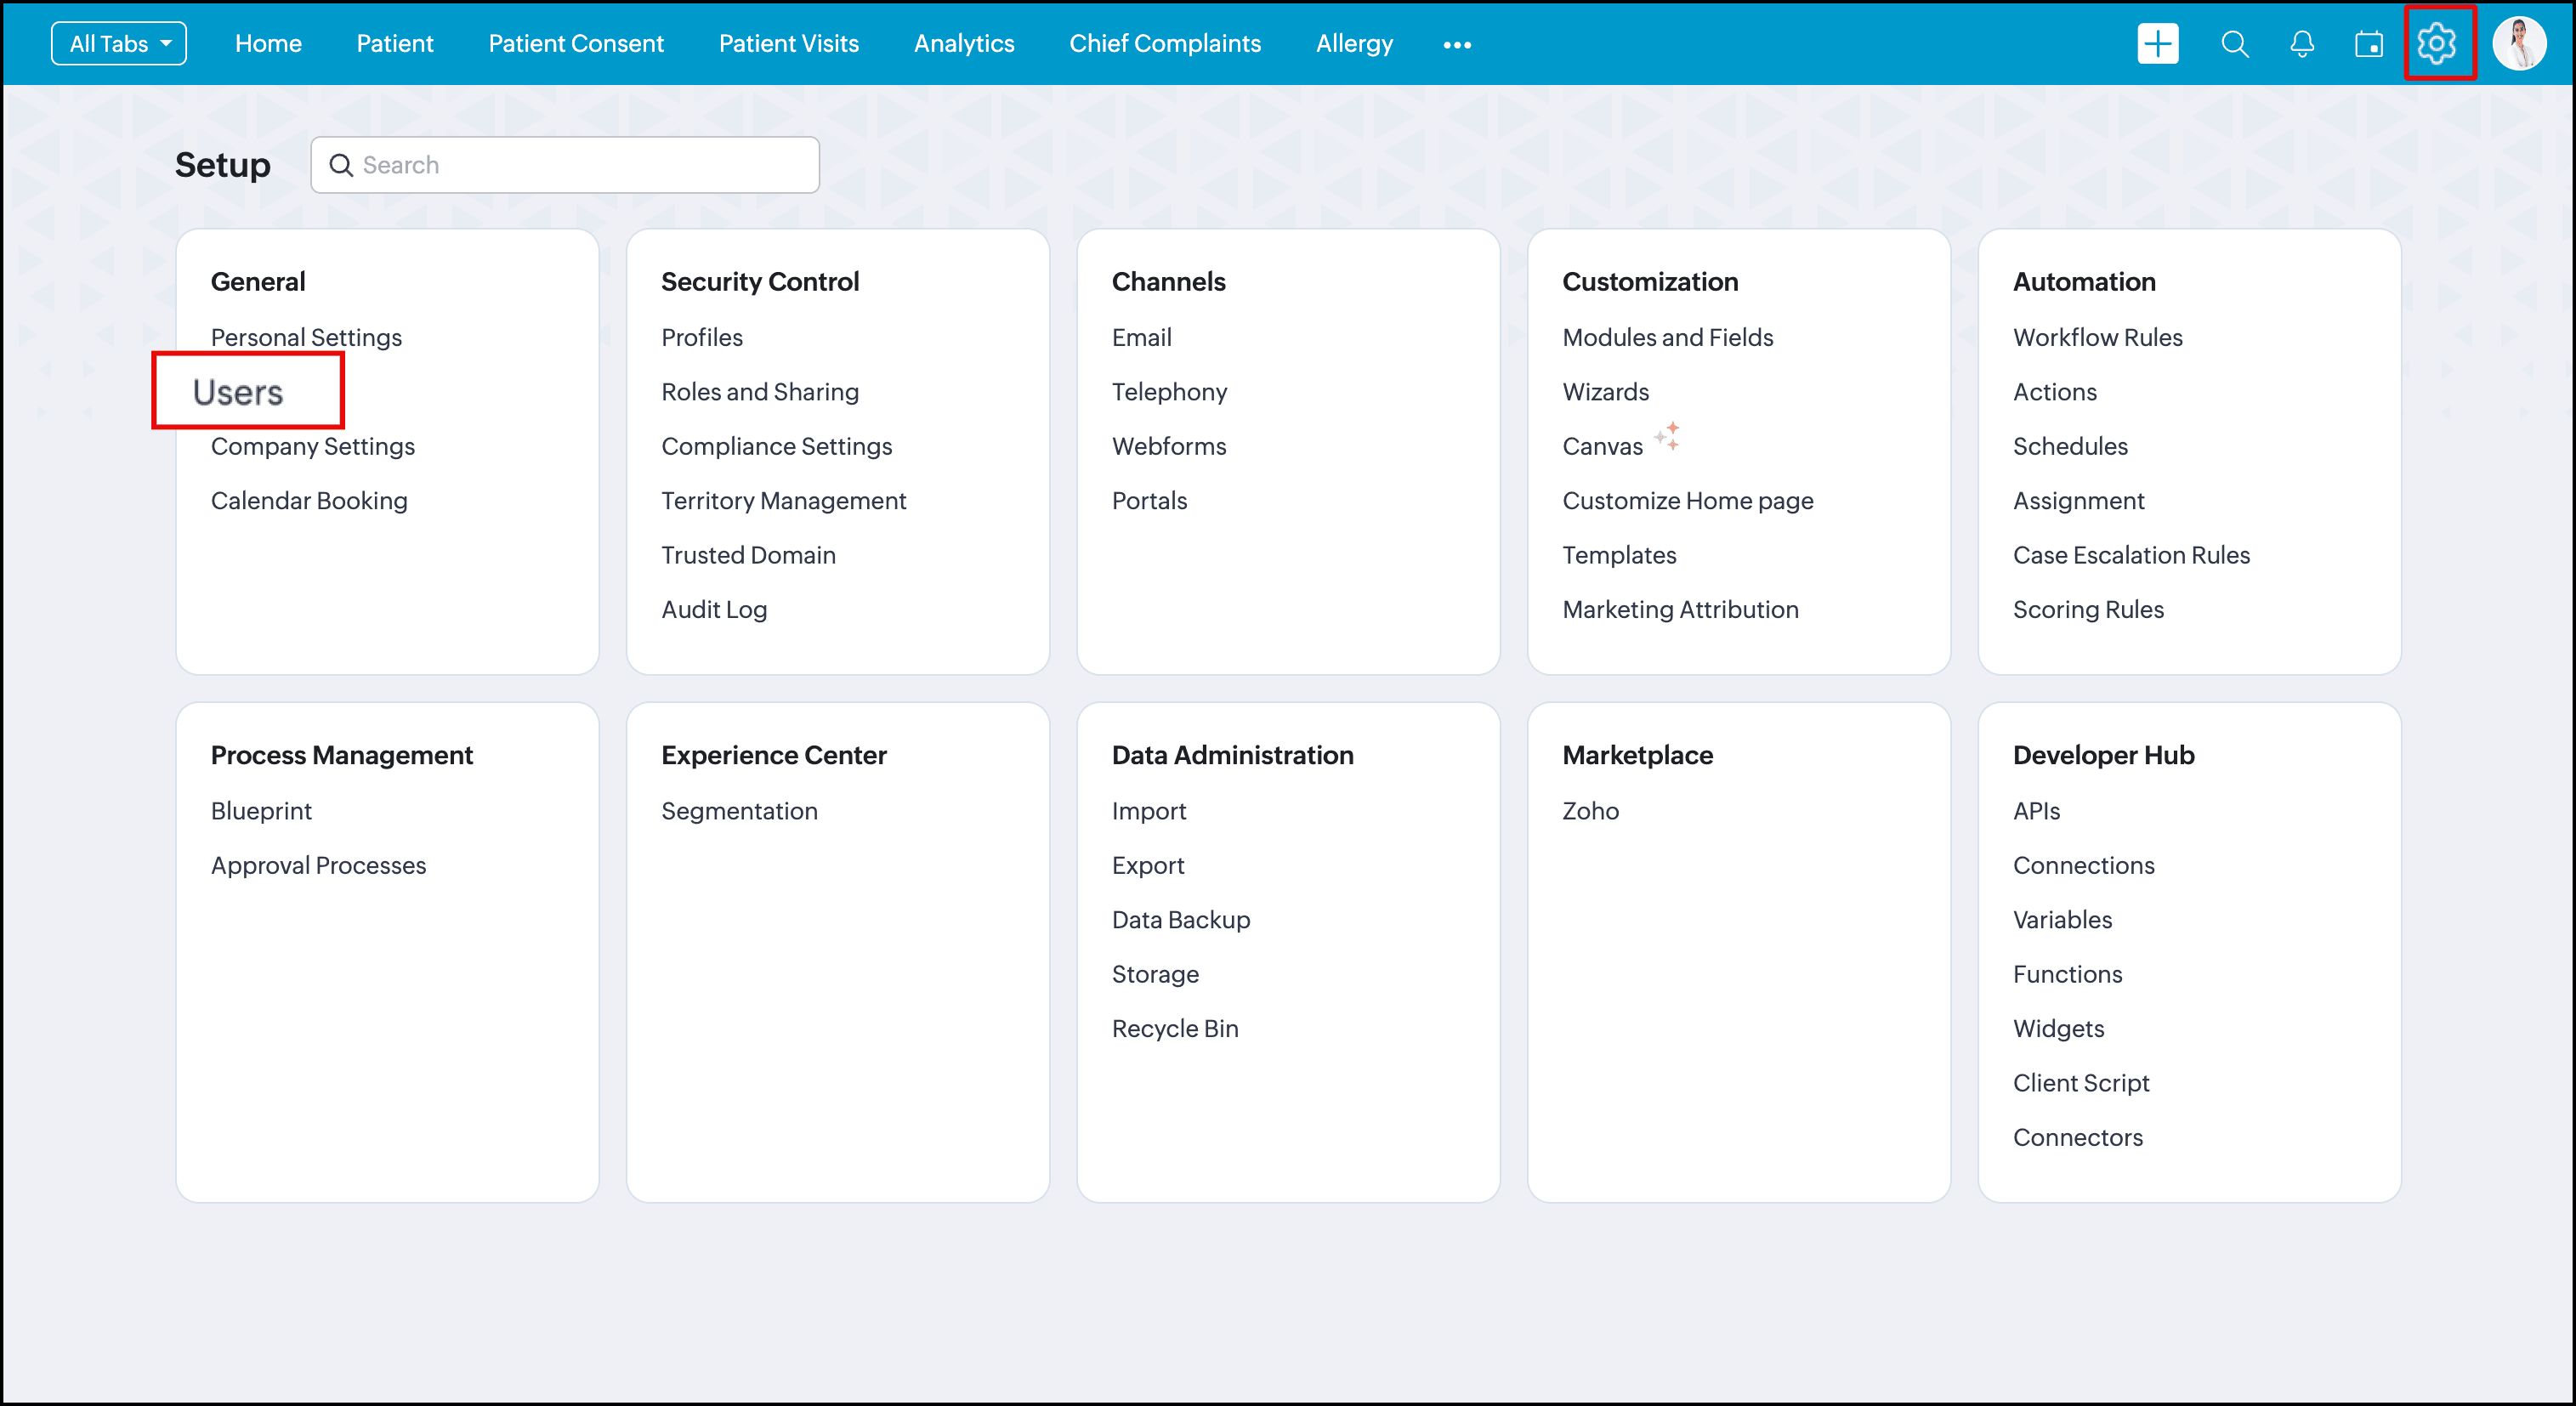
3. Click the +New User button.
4. A pop-up menu will appear to add a new user. Enter the information for the following fields:
- First Name
- Last Name
- Role
- Profile
- Department
5. Click Save.
To import existing users:
1. Click  on the top right.
2. Go to Setup > General > Users.
3. Click  next to the +New User button.
4. Choose Import Users. A new window will appear to browse and add users
5. Click the Browse button and add the file from your desktop.
6. Click Next
7. In What do you want to do with the records in the file?, choose Add as new user or Update existing users only or Both.
8. If you choose Update existing users only or both, do the following:
➤ In Find existing users based in, choose User ID or Email.
➤ Check Don't update empty values for existing users to avoid overwriting of empty values for the existing users
➤ Check Don't update empty values for existing users to avoid overwriting of empty values for the existing users
9. Click Next
10. Map the imported fields with the appropriate CRM fields.
11. Click Next to finish the import.
To modify a user:
1. Click on the top right.
2. Navigate to Setup > General > Users.
3. Select the user and click on the  next to the profile name.
4. A new pop-up menu will appear to modify the details. Modify details for the necessary fields:
User information
- First name
- Last name
- Role
- Profile
- Alias
- Phone
- Mobile
- Website
- Fax
- Date of birth
- Department
- Doctor register number
- Medical degrees
Address information
- Street
- City
- State
- Zip code
- Country
6. Click Save.
To re-invite a user:
1. Click on the top right.
2. Navigate to Setup > General > Users.
3. Select the user and click on the Reinvite button in the user window.
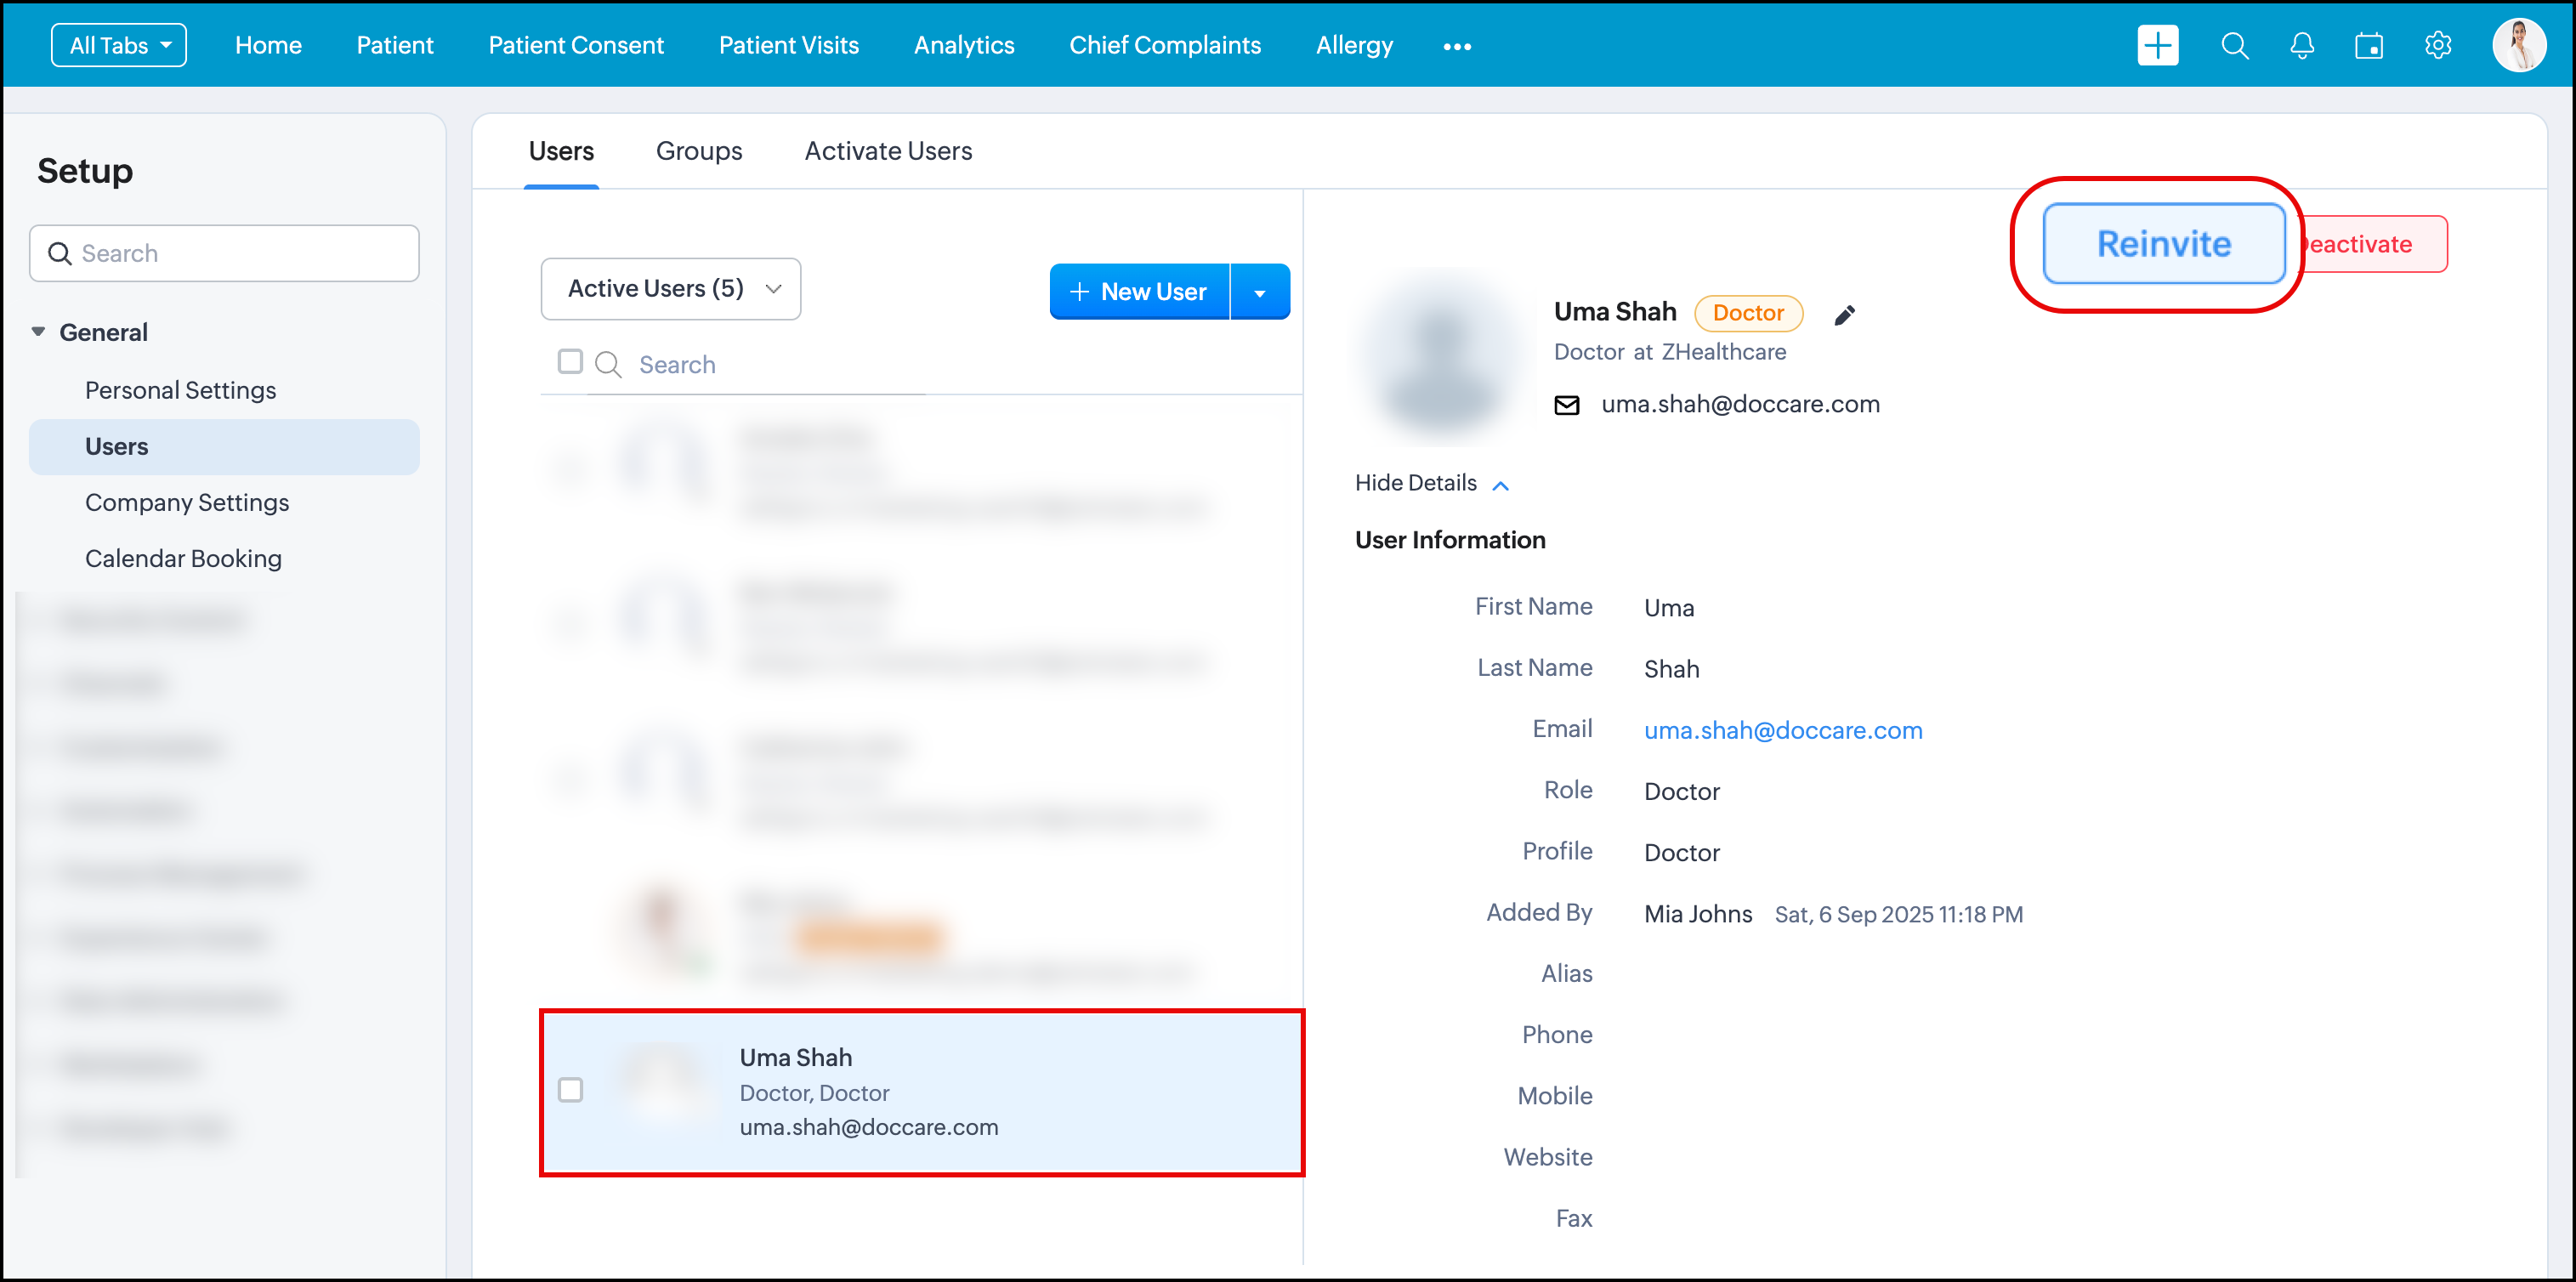
4. A pop-up box will appear confirming the invite has been sent.
5. Click Close.
To deactivate user(s):
1. Click on the top right.
2. Navigate to Setup > General > Users.
3. Select the active user(s).
4. Click Deactivate.
5. A pop-up to confirm the action will appear. Click I understand. Deactivate Now.

The user profile is now deactivated.
To activate user(s):
1. Click on the top right.
2. Go to Setup > General > Users.
3. Click the next to Active Users.
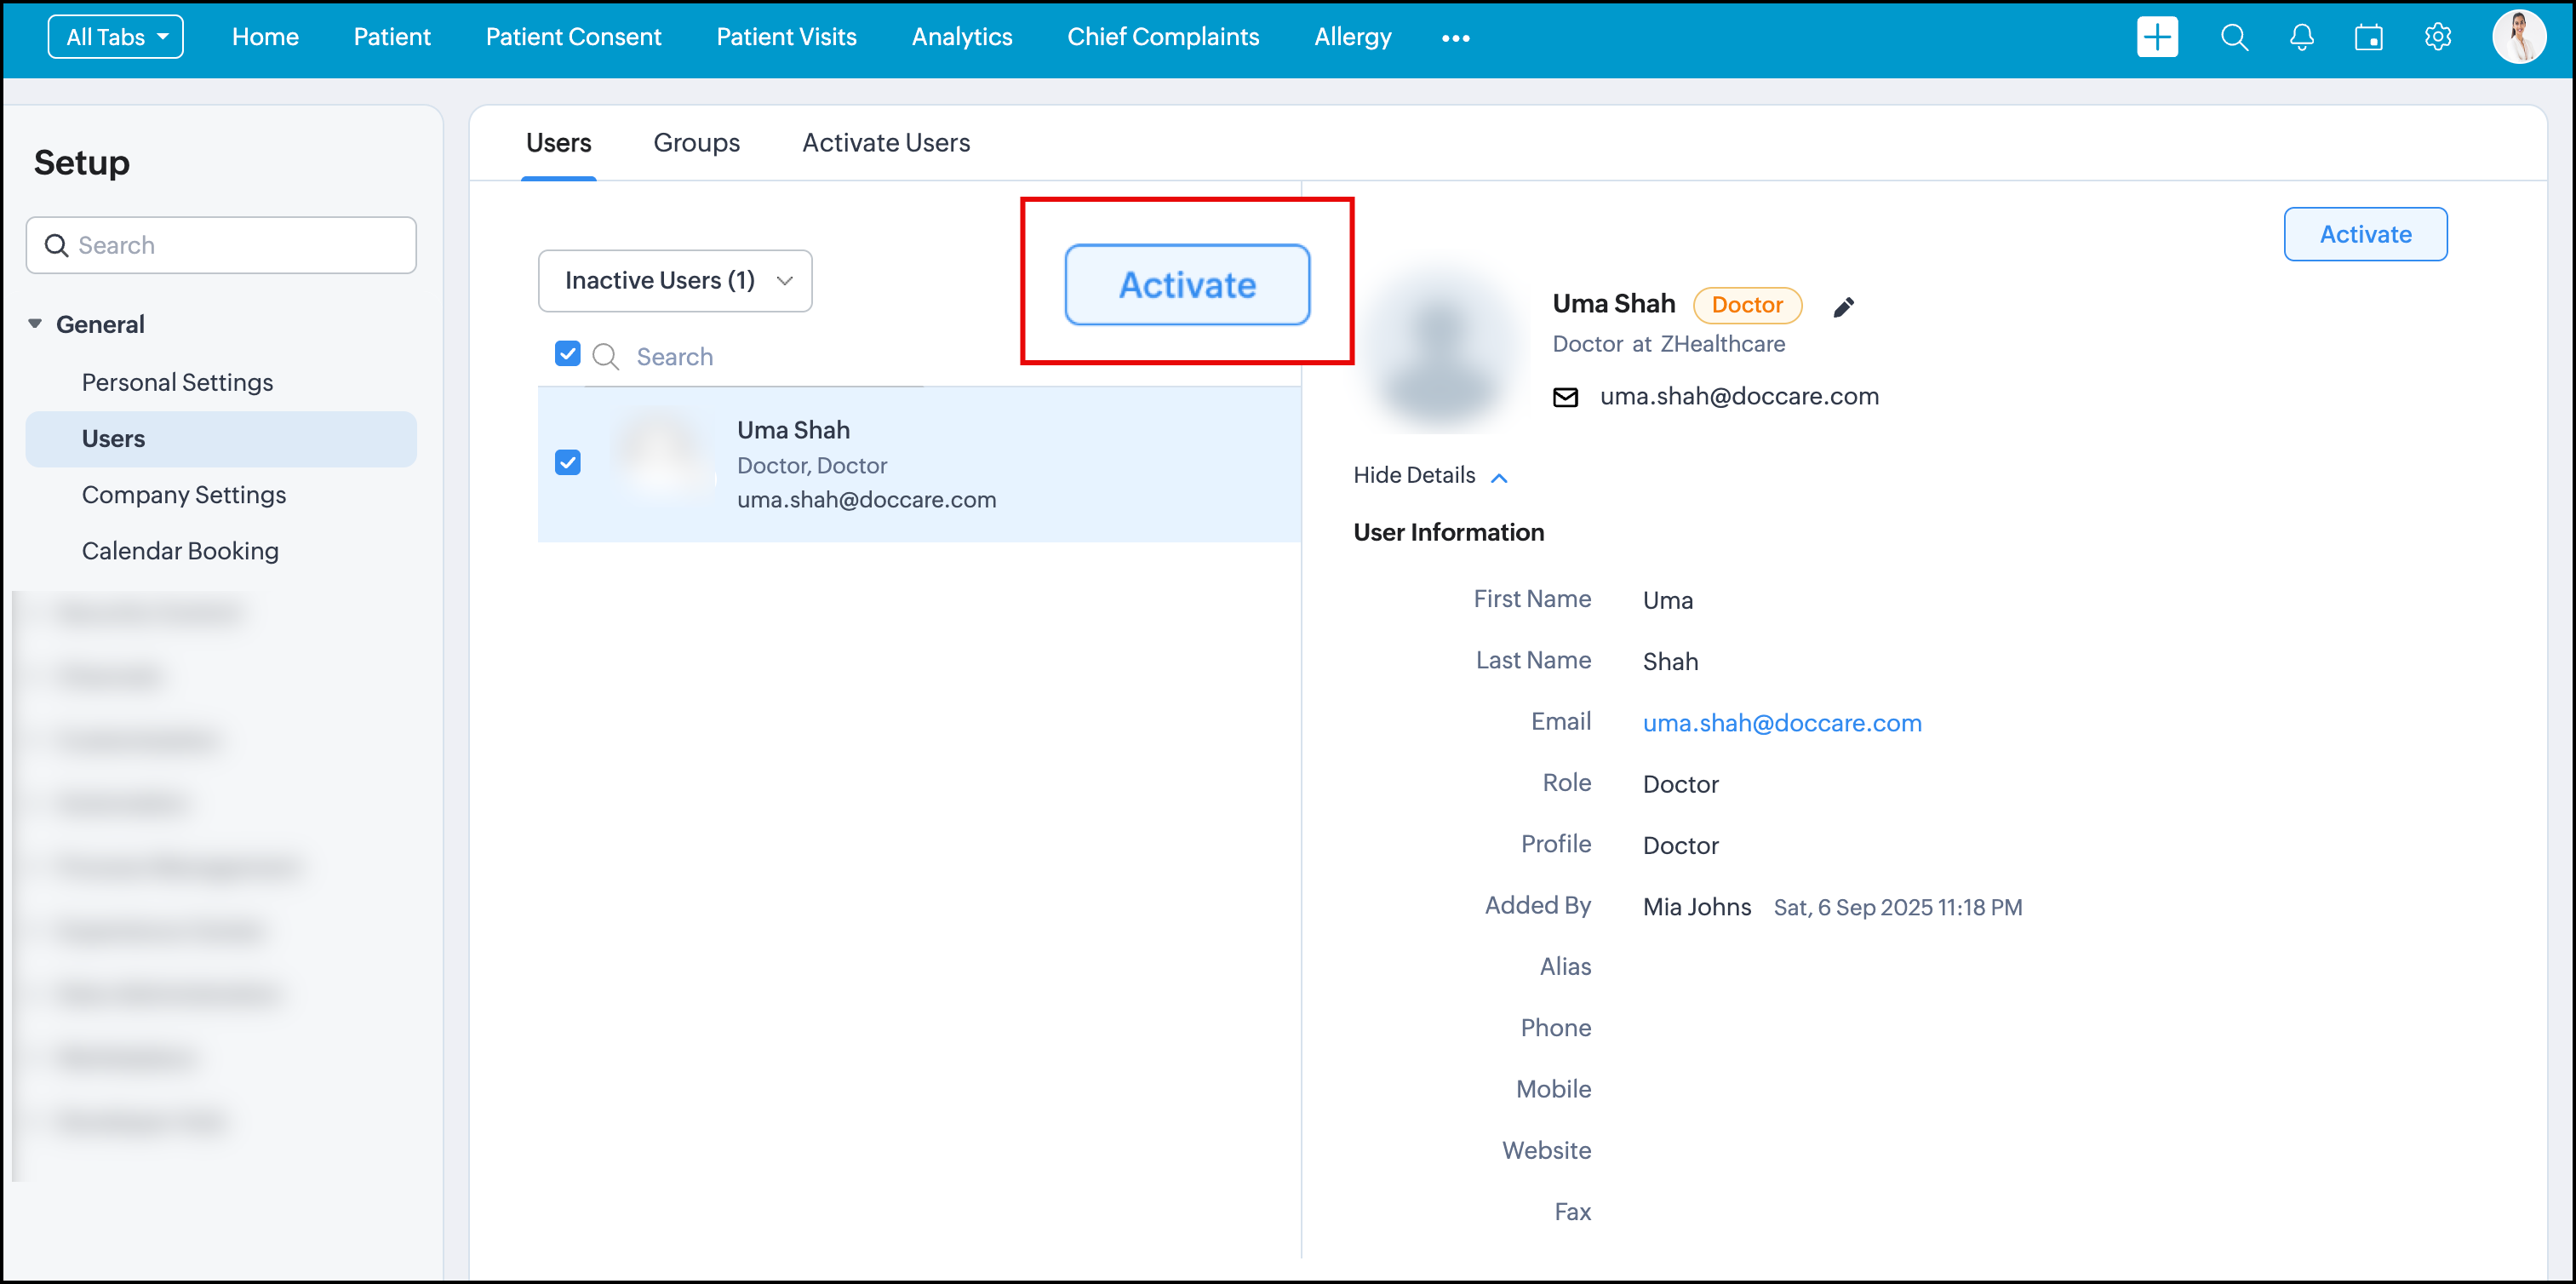
4. Click Inactive users. The list of inactive users will appear.
5. Select the inactive user(s).
6. Click Activate.
7. A pop-up to confirm the action will appear. Click Activate Now.
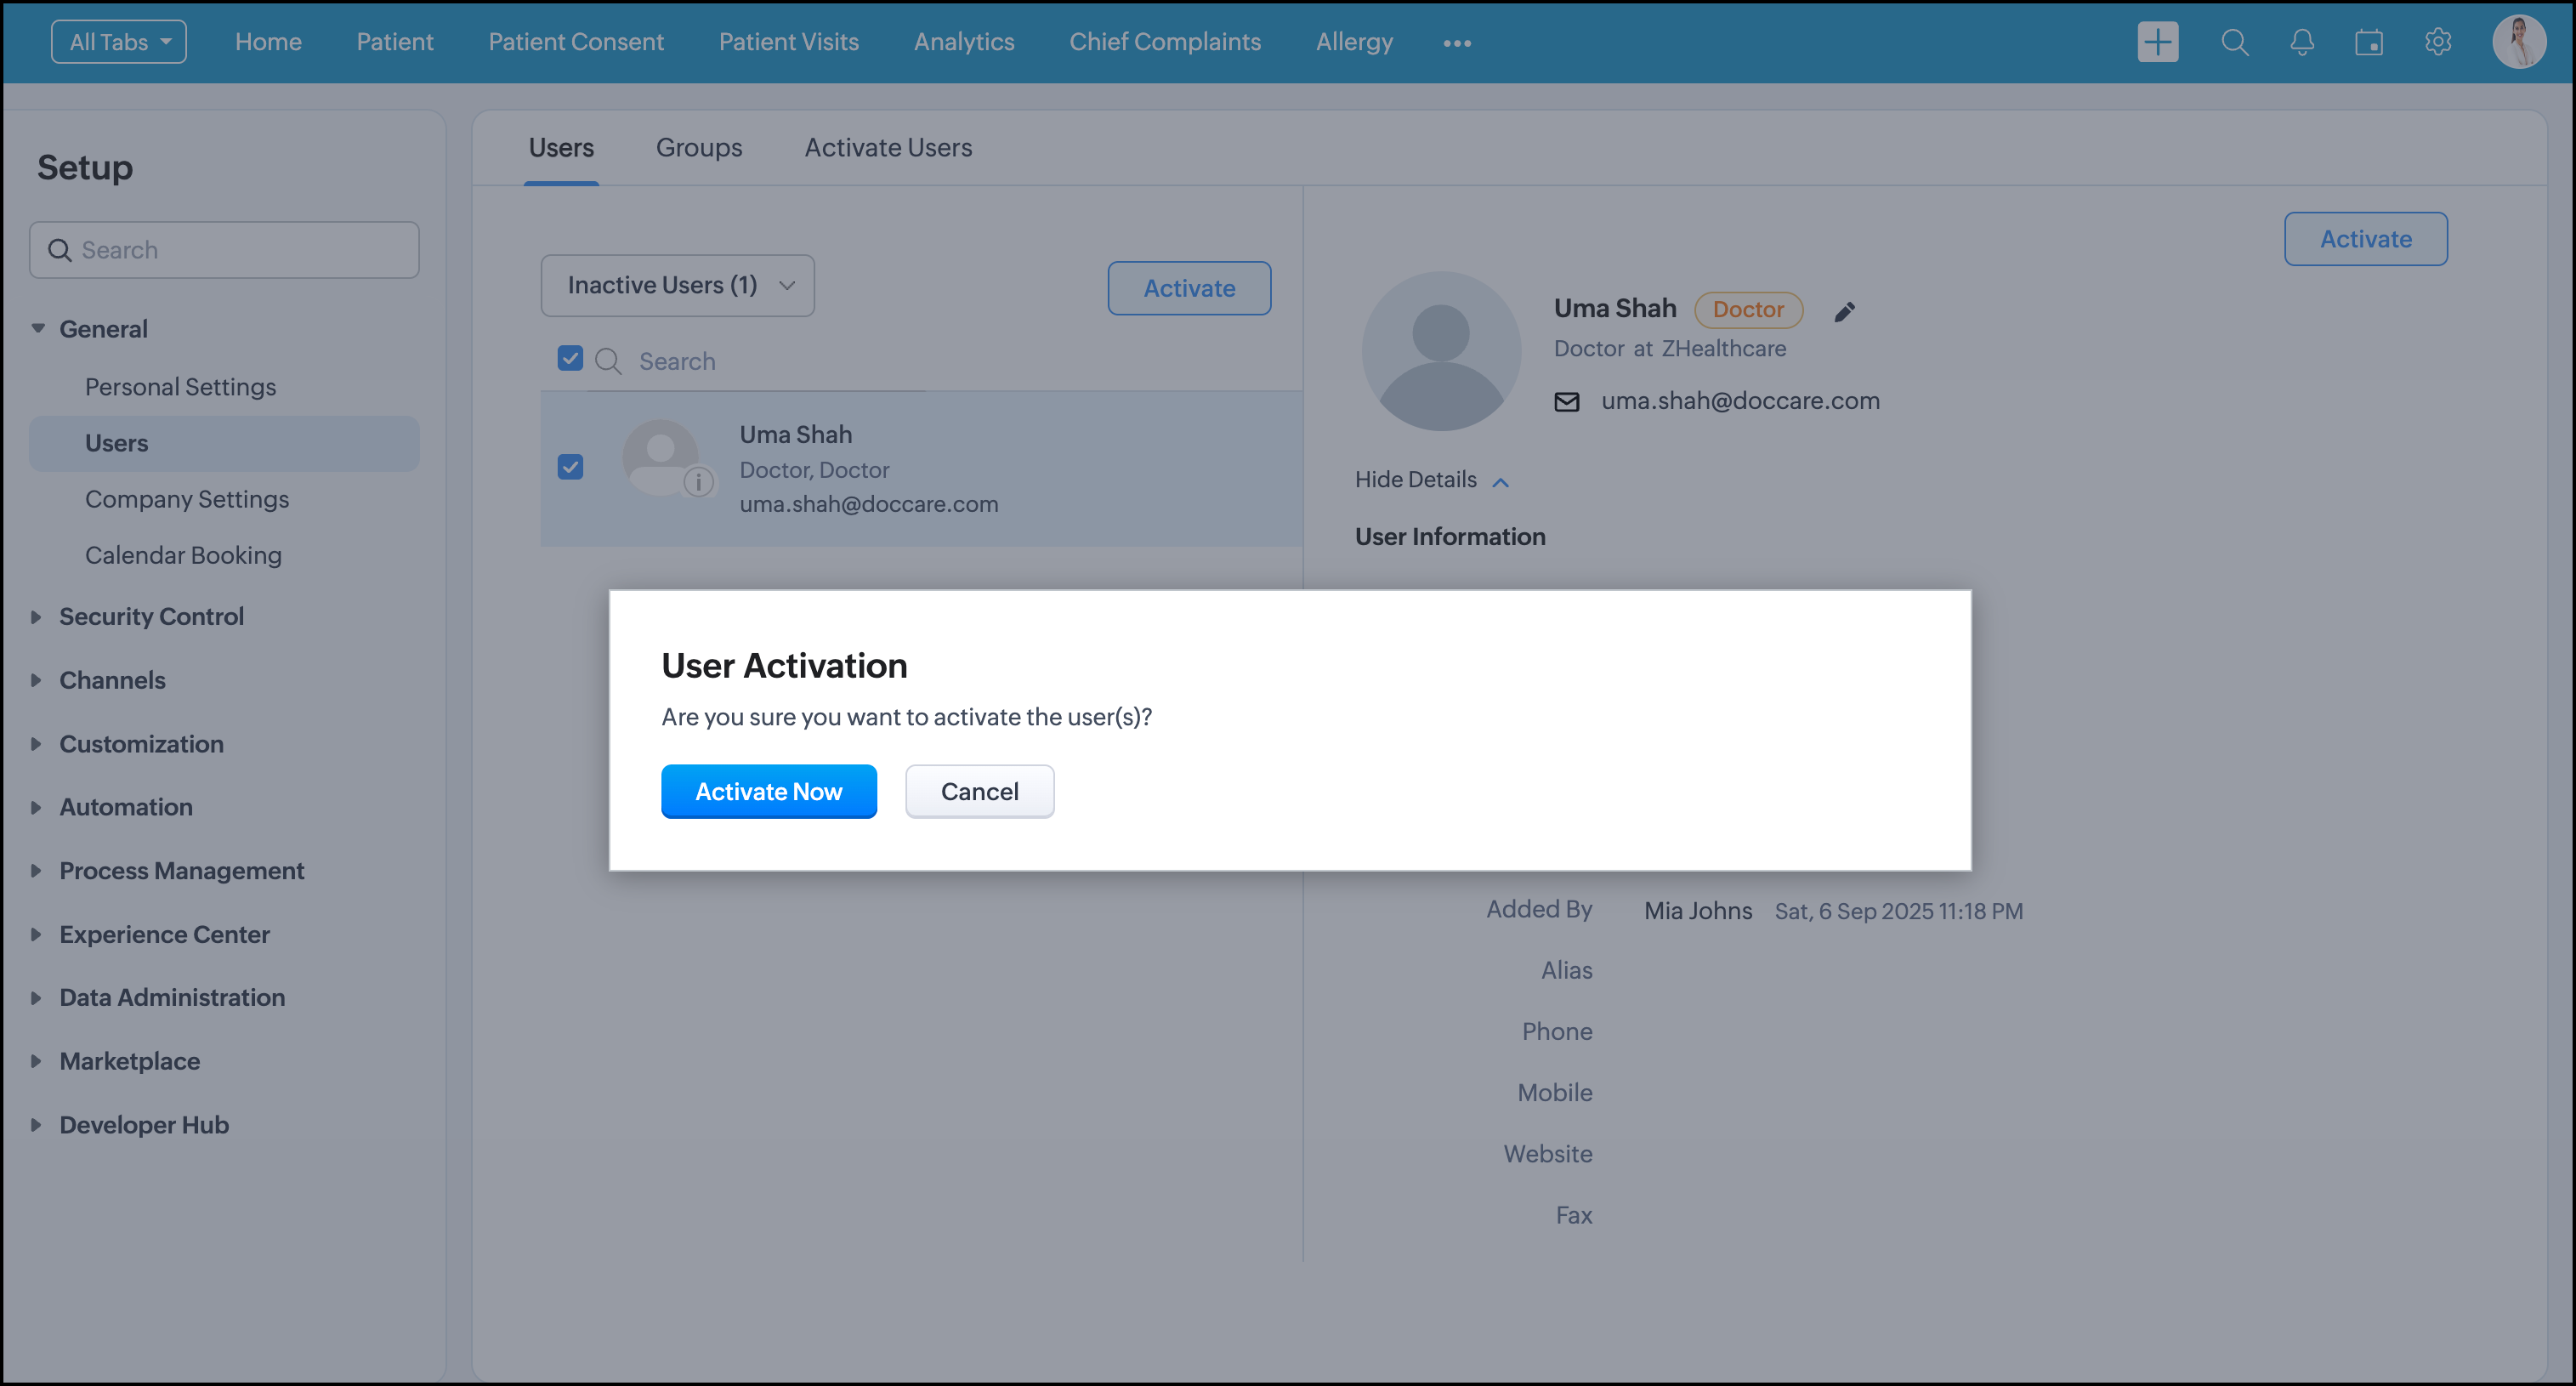
8. An email will be sent to the user notifying user activation.
To delete a user:
1. Click on the top right.
2. Go to Setup > General > Users.
3. Select the user profile, and you will see the user details on the right.
4. Scroll down to the end of the details
5. Click Delete this user.
6. A pop-up to select a deletion option will appear.
➤ Delete without transfer: The user profile will be deleted without transferring the data
➤ Transfer now: Select the user to whom you want the data to be transferred.
7. Click Delete.