Customizing the Information Tabs
In the Zoho IoT application, tab menus are used to display different information of a managed entity. Tab menus are configured at the model level, and reflected to all managed entities of the model. Each model includes a default tab menu that is displayed by default on accessing the information screen of the entity.
Image: Tabs for a managed entity of model Gateway.
To customize the tabs of the above managed entity, the tabs menu of the model Gateway must be modified.
The standard default tab menu contains the following tabs:
- Overview
- Details
- Messages
- Alarms
- Data Explorer
- Timeline
- Relations
- Attachments
Key Customization Options
- Users can customize the default tabs by removing existing ones or adding new tabs.
- Users can add multiple menus, and map different menus for different profiles.
- Users can create dashboards and related lists as separate tabs.

Note: Tab customizations made for a model in the Developer Application are reflected in the model instance (Managed Entity) information screen in the End Application. After any tab menu modification, refresh the screen when prompted to view the updated changes.
Default Tab Menu
To view the default tab menu associated to a model,
- Access the Developer Application.
- Go to the model's list view screen.
- Click on the name of the model for which you want to view the tab menu. The information page of the model is displayed.
- Click on the option Tab Customization in the left pane. The available tab menus are displayed in the right.
- Initially, only the Default tab menu is available.
- Click on Default to view the tabs available in the menu.
Modifying Default Tabs
To modify the default tab menu associated to a model,
- Access the Developer Application.
- Go to the model's list view screen.
- Click on the name of the model for which you want to view the tab menu. The information page of the model is displayed.
- Click on the option Tab Customization in the left pane. The available tab menus are displayed in the right.
- Click on the Customize Tabs button. The toggle buttons to include/exclude tabs are displayed.
- Modify the toggle to ON/OFF to include/exclude a tab option.
Tab customization made for a model in the Developer Application will be reflected in the managed entity's information screen in the End Application. After any tab menu modification, refresh the screen when prompted to view the updated changes.
Image: Default tab menu of model Gateway with tabs including Timeline
Image: Removing tab Timeline from the Default tab menu of model Gateway by setting the toggle to OFF.
Image: Default tab menu of model Gateway without tab Timeline
Creating Tab Menus
To create a custom tab menu for a model,
- Access the Developer Application.
- Go to the model's list view screen.
- Click on the name of the model for which you want to view the tab menu. The information page of the model is displayed.
- Click on the option Tab Customization in the left pane. The available tab menus are displayed in the right. Initially, only the Default tab menu is available.
- Click on the Add Tab Menu button in the right of the screen.
- Provide the title in the New Tab Menu screen.
- Select the Clone menu for the available menus list. The new menu will be created with the tabs present in the Clone menu.
- Enter the description, and select the profiles that have access to the menu.
- Click Create.
Image: Supervisors Tab menu is created and displayed under Available menus.
You can use the options available in the Actions drop down menu to edit, rearrange, or delete tab from the menu.
Adding Menu Items
New tabs can be included to the existing tabs by using the Add Tab Menu button.
To add a new tab,
- Click on the Add New Tab button.
- Select the required tab from the list of tabs.
The tabs are grouped under the following categories.
Name | Components |
Data Visualization | Overview*
Details Messages Data Explorer *The options listed under Overview can be configured as a separate tab. |
Monitoring | Alarms |
Associations | Relations
*The options listed under Relations can be configured as a separate tab. |
Others | Attachments Timelines |
Note: All sub options present under Relations tab (Associated Certificates, Deployment History, Command History, Connected Assets, Connected Locations, Connected Peripheral Devices) can be created as a separate tab.
Mapping Tab Menu to Profiles
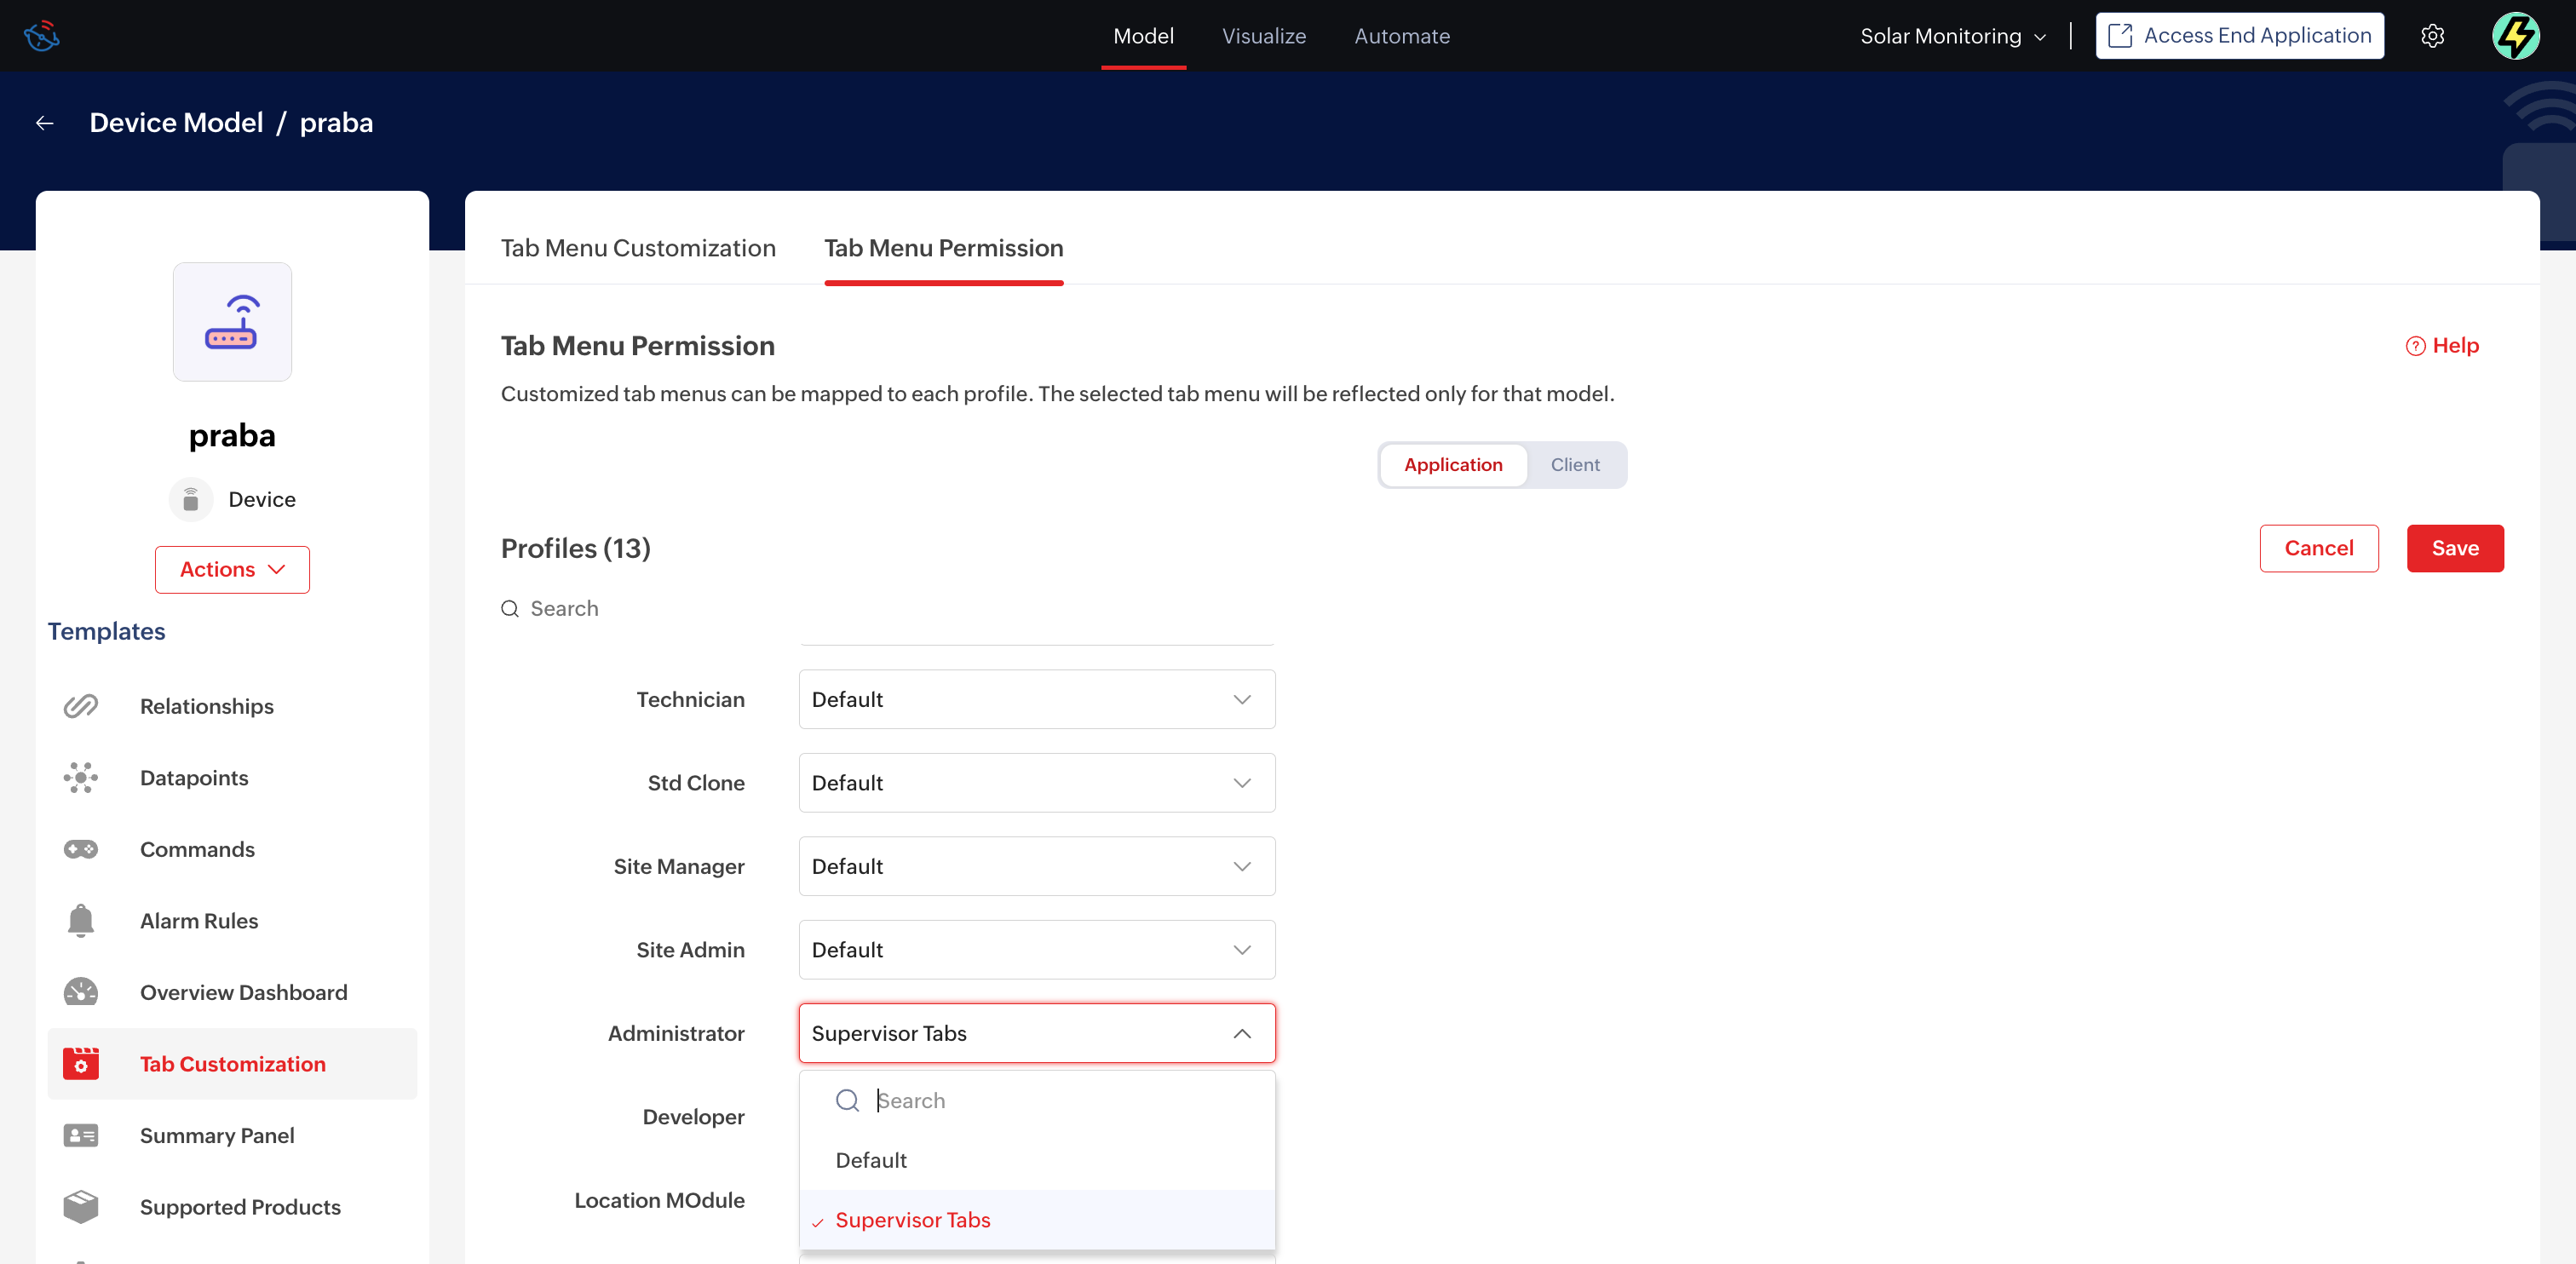
Existing and newly created tab menus can be mapped to profiles using the Tab Menu Permissions option. During tab menu creation, the profiles selected under Menu Permissions will have the corresponding tab menus available for selection in the dropdown.
For example, if the Supervisor Tab was created with the Menu Permission provided to Administrator, the Administrator profile in Tab Permission will have the Supervisor Tab listed in the menu as given below.
To map tab menus,
- Access the Developer Application.
- Go to the model's list view screen.
- Click on the name of the model for which you want to view the tab menu. The information page of the model is displayed.
- Click on the option Tab Customization in the left pane. The available tab menus are displayed in the right.
- Click on the Tab Menu Permission tab. The profiles and the tabs mapping is displayed.
Note: The Application and Client toggle will appear at the top when the Client Management module is enabled. - Click on the Edit button.
- Select the tab to be set for the profile.
Note: The profiles that were selected for the option Menu Permission will have the particular menus listed in the drop down for selection. - Click Save.